


1、日期对象
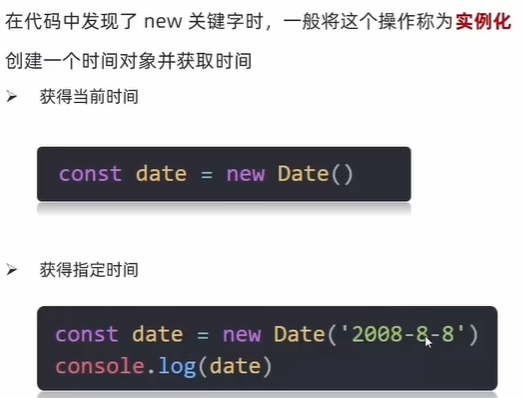
1)实例化
2)日期对象方法

  <script>
    //获得日期对象
    const date = new Date()
    //使用方法
    console.log(date.getFullYear());
    console.log(date.getMonth() + 1); // getMonth() : 0~11
    console.log(date.getDate());
    console.log(date.getDay()); // getDay() : 0~6
    console.log(date.getHours());
    console.log(date.getMinutes());
    console.log(date.getSeconds());
  </script>
格式化日期:xxxx年x月x日 xx:xx:xx
  <script>
    //获得日期对象
    const div = document.querySelector('div')
    // function getMyDate() {
    //   const date = new Date()
    //   let h = date.getHours()
    //   let m = date.getMinutes()
    //   let s = date.getSeconds()
    //   h = h < 10 ? '0' + h : h
    //   m = m < 10 ? '0' + m : m
    //   s = s < 10 ? '0' + s : s
    //   return `今天是: ${date.getFullYear()}年${date.getMonth() + 1}月${date.getDate()}号 ${h}:${m}:${s}`
    // }

    // div.innerHTML = getMyDate()
    // setInterval(function () {
    //   div.innerHTML = getMyDate()
    // }, 1000)

    // 第二种写法
    // 得到日期对象
    const date = new Date()
    div.innerHTML = date.toLocaleString() // 显示年月日 时分秒
    // div.innerHTML = date.toLocaleDateString()  // 显示年月日
    // div.innerHTML = date.toLocaleTimeString()  //显示时分秒
    setInterval(function () {
      const date = new Date()
      div.innerHTML = date.toLocaleString()
    }, 1000)
  </script>
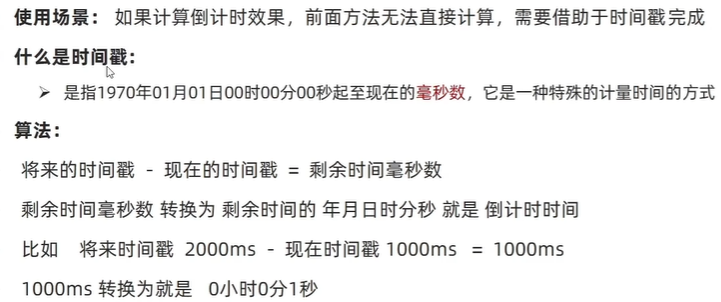
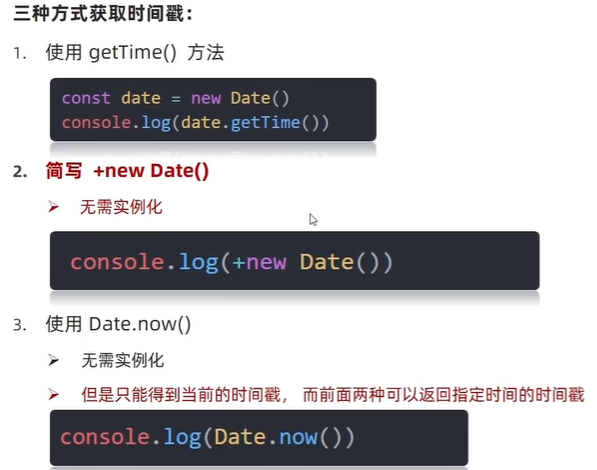
3)时间戳
  <script>
    // 1. getTime()
    // 实例化 new Date()返回对象 字符串
    const date = new Date()
    console.log(date.getTime());

    //2. +new Date() 数字型
    console.log(+new Date());

    //3. Date.now()
    console.log(Date.now());
  </script>
4)案例:倒计时

<!DOCTYPE html>
<html lang="en">

<head>
  <meta charset="UTF-8">
  <meta name="viewport" content="width=device-width, initial-scale=1.0">
  <title>Document</title>
  <style>
    .countdown {
      width: 240px;
      height: 305px;
      text-align: center;
      line-height: 1;
      color: #fff;
      background-color: brown;
      /* background-size: 240px; */
      /* float: left; */
      overflow: hidden;
    }

    .countdown .next {
      font-size: 16px;
      margin: 25px 0 14px;
    }

    .countdown .title {
      font-size: 33px;
    }

    .countdown .tips {
      margin-top: 80px;
      font-size: 23px;
    }

    .countdown small {
      font-size: 17px;
    }

    .countdown .clock {
      width: 200px;
      margin: 18px auto 0;
      padding-top: 18px;
      overflow: hidden;
    }

    .countdown .clock span,
    .countdown .clock i {
      display: block;
      text-align: center;
      line-height: 34px;
      font-size: 23px;
      float: left;
    }

    .countdown .clock span {
      width: 34px;
      height: 34px;
      border-radius: 2px;
      background-color: #303430;
    }

    .countdown .clock i {
      width: 20px;
      font-style: normal;
    }
  </style>
</head>

<body>
  <div class="countdown">
    <p class="next">今天是2225年9月28日</p>
    <p class="title">十一倒计时</p>
    <p class="clock">
      <span id="day">00</span>
      <i>:</i>
      <span id="hour">00</span>
      <i>:</i>
      <span id="minutes">25</span>
      <i>:</i>
      <span id="second">20</span>
    </p>
    <p class="tips">25/10/1 00:00:00</p>
  </div>
  <script>

    // 函数封装
    function getResTime() {
      const now = +new Date()
      const last = +new Date('2025-10-1 00:00:00')
      const res = (last - now) / 1000 //秒
      let s = parseInt(res % 60)
      s = s < 10 ? '0' + s : s
      let m = parseInt(res / 60 % 60)
      m = m < 10 ? '0' + m : m
      let h = parseInt(res / 60 / 60 % 24)
      h = h < 10 ? '0' + h : h
      let d = parseInt(res / 60 / 60 / 24)
      d = d < 10 ? '0' + d : d
      document.querySelector('#day').innerHTML = d
      document.querySelector('#hour').innerHTML = h
      document.querySelector('#minutes').innerHTML = m
      document.querySelector('#second').innerHTML = s
    }
    function getToday() {
      const today = new Date()
      return `今天是${today.getFullYear()}年${today.getMonth() + 1}月${today.getDate()}日`

    }
    const next = document.querySelector('.next')
    next.innerHTML = getToday()
    setInterval(function () {
      next.innerHTML = getToday()
    }, 1000)
    getResTime()
    setInterval(getResTime, 1000)
  </script>
</body>

</html>
2、节点操作
1)DOM节点
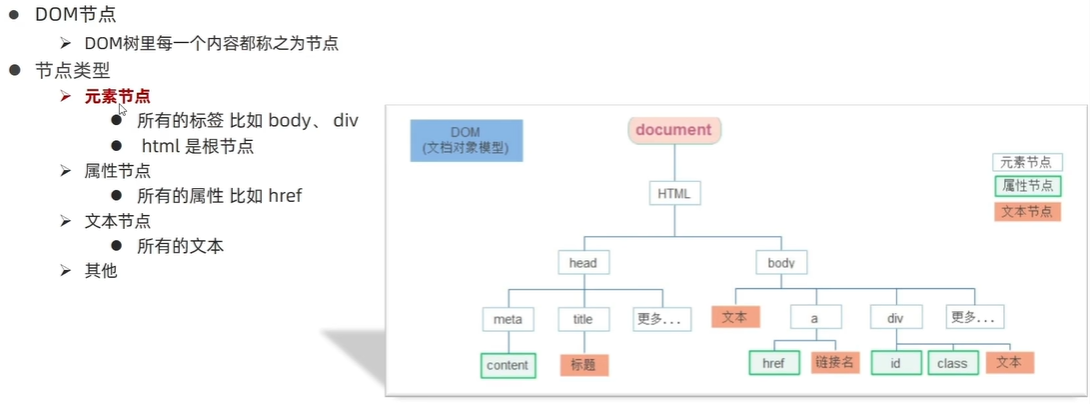
主要操作标签(元素节点)
2)查找结点
(1)父节点查找
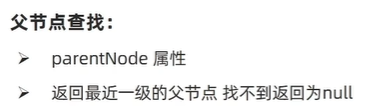
子元素.parentNode
<body>
  <div class="grandpa">
    <div class="dad">
      <div class="bady"></div>
    </div>
  </div>
  <script>
    const baby = document.querySelector('.baby')
    console.log(baby) // 返回dom对象
    console.log(baby.parentNode) // 返回 bady 父节点 是对象
    console.log(baby.parentNode.parentNode) // 返回 bady 父节点 的父节点 是对象
  </script>
</body>
(2) 案例:关闭广告
多个相同类名的盒子关闭思路:使用document.querySelectorAll获得伪数组
<!DOCTYPE html>
<html lang="en">

<head>
  <meta charset="UTF-8">
  <meta name="viewport" content="width=device-width, initial-scale=1.0">
  <title>Document</title>
  <style>
    .box {
      position: relative;
      width: 300px;
      height: 100px;
      background-color: skyblue;
      margin: 50px auto;
    }

    .boxx {
      position: absolute;
      top: 0;
      right: 5px;
      font-size: 20px;
      color: #fff
    }

    .boxx:hover {
      cursor: pointer
    }
  </style>
</head>

<body>
  <div class="box">
    <div class="boxx">x</div>
  </div>
  <div class="box">
    <div class="boxx">x</div>
  </div>
  <div class="box">
    <div class="boxx">x</div>
  </div>
  <script>
    const boxx = document.querySelectorAll('.boxx') //伪数组
    console.log(boxx);

    for (let i = 0; i < boxx.length; i++) {
      boxx[i].addEventListener('click', function () {
        this.parentNode.style.display = 'none'
      })
    }
  </script>
</body>

</html>
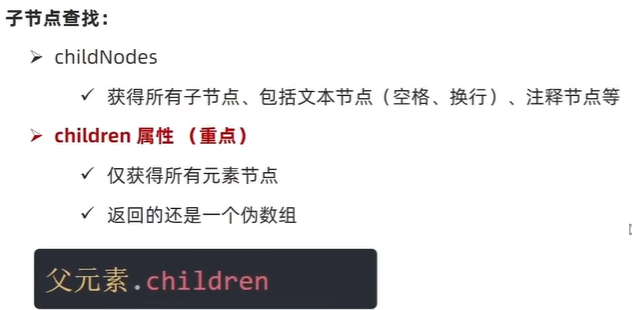
(3)查找子节点
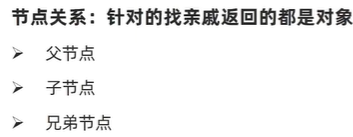
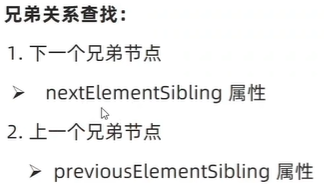
(4)查找兄弟节点
好处:之前是无脑的想要谁就获取谁,现在可以省一次获取
3)增加节点(重点)
eg:发布评论
(1)创建节点

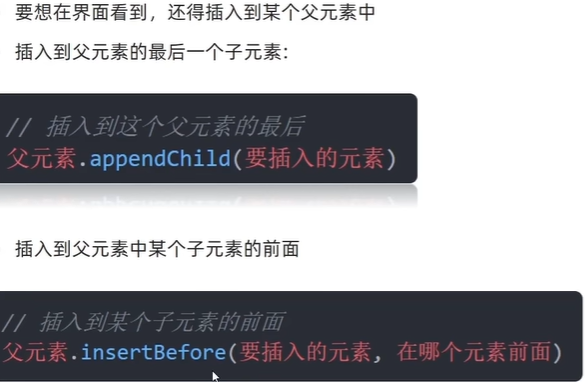
(2)追加节点
<!DOCTYPE html>
<html lang="en">

<head>
  <meta charset="UTF-8">
  <meta name="viewport" content="width=device-width, initial-scale=1.0">
  <title>Document</title>
</head>

<body>
  <ul>
  <ul>
    <li>我在你前面</li>
    <li>我在你后面</li>
  </ul>
  <script>
    // // 创建节点
    // const div = document.createElement('div')
    // // 追加节点 作为父元素的最后一个子元素
    // document.body.appendChild(div)
    const ul = document.querySelector('ul')
    const li = document.createElement('li')
    li.innerHTML = 'Hello World!'
    // ul.children 是ul里面所有li的伪数组
    ul.insertBefore(li, ul.children[0])
  </script>
</body>

</html>
(3)案例:学成在线
<!DOCTYPE html>
<html lang="en">

<head>
  <meta charset="UTF-8">
  <meta name="viewport" content="width=device-width, initial-scale=1.0">
  <title>Document</title>
  <style>
    * {
      margin: 0;
      padding: 0;
    }

    .w {
      width: 1200px;
      margin: auto;
    }

    body {
      background-color: #f3f5f7;
    }

    li {
      list-style: none;
    }

    a {
      text-decoration: none;
    }

    .clearfix:before,
    .clearfix:after {
      content: "";
      display: table;
    }

    .clearfix:after {
      clear: both;
    }


    .box {
      margin-top: 30px;
    }

    .box-hd {
      height: 45px;
    }

    .box-hd h3 {
      float: left;
      font-size: 20px;
      color: #494949;
    }

    .box-hd a {
      float: right;
      font-size: 12px;
      color: #a5a5a5;
      margin-top: 10px;
      margin-right: 30px;
    }

    /* 把li 的父亲ul 修改的足够宽一行能装开5个盒子就不会换行了 */
    .box-bd ul {
      width: 1225px;
    }

    .box-bd ul li {
      position: relative;
      top: 0;
      float: left;
      width: 228px;
      height: 270px;
      background-color: #fff;
      margin-right: 15px;
      margin-bottom: 15px;
      transition: all .3s;

    }

    .box-bd ul li a {
      display: block;
    }

    .box-bd ul li:hover {
      top: -8px;
      box-shadow: 0 15px 30px rgb(0 0 0 / 10%);
    }

    .box-bd ul li img {
      width: 100%;
    }

    .box-bd ul li h4 {
      margin: 20px 20px 20px 25px;
      font-size: 14px;
      color: #050505;
      font-weight: 400;
    }

    .box-bd .info {
      margin: 0 20px 0 25px;
      font-size: 12px;
      color: #999;
    }

    .box-bd .info span {
      color: #ff7c2d;
    }
  </style>
</head>

<body>
  <div class="box w">
    <div class="box-hd">
      <h3>精品推荐</h3>
      <a href="#">查看全部</a>
    </div>
    <div class="box-bd">
      <ul class="clearfix">

      </ul>
    </div>
  </div>
  <script>
    let data = [
      {
        src: '/images/course01.png',
        title: 'Think PHP 5.0 博客系统实战项目演练',
        num: 1125
      },
      {
        src: '/images/course02.png',
        title: 'Android 网络动态图片加载实战',
        num: 357
      },
      {
        src: '/images/course03.png',
        title: 'Angular2 大前端商城实战项目演练',
        num: 22250
      },
      {
        src: '/images/course04.png',
        title: 'Android APP 实战项目演练',
        num: 389
      },
      {
        src: '/images/course05.png',
        title: 'UGUI 源码深度分析案例',
        num: 124
      },
      {
        src: '/images/course06.png',
        title: 'Kami2首页界面切换效果实战演练',
        num: 432
      },
      {
        src: '/images/course07.png',
        title: 'UNITY 从入门到精通实战案例',
        num: 888
      },
      {
        src: '/images/course08.png',
        title: 'Cocos 深度学习你不会错过的实战',
        num: 590
      },
    ]
    const ul = document.querySelector('.box-bd ul')
    // 根据数据个数,创建对应的 li
    for (let i = 0; i < data.length; i++) {
      const li = document.createElement('li')
      // 追加
      li.innerHTML = `
          <a href="#">
              <img src=${data[i].src} alt="">
              <h4>
                  ${data[i].title}
              </h4>
              <div class="info">
                  <span>高级</span> • <span>${data[i].num}</span>人在学习
              </div>
          </a>
      `
      ul.appendChild(li)
    }
  </script>
</body>

</html>
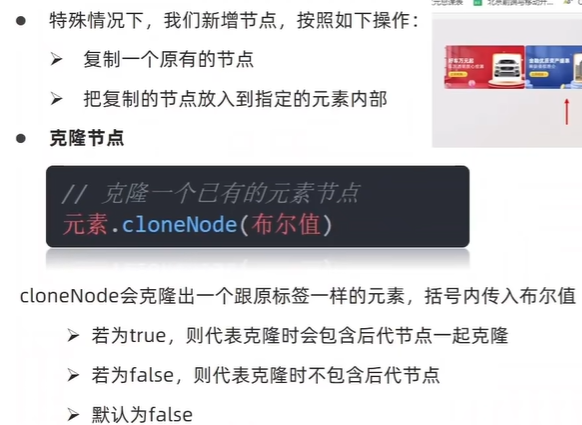
(4)克隆节点
<!DOCTYPE html>
<html lang="en">

<head>
  <meta charset="UTF-8">
  <meta name="viewport" content="width=device-width, initial-scale=1.0">
  <title>Document</title>
</head>

<body>
  <ul>
    <li>1</li>
    <li>2</li>
    <li>3</li>
  </ul>
  <script>

    const ul = document.querySelector('ul')
    //克隆节点 元素.cloneNode()
    // const li1 = ul.children[0].cloneNode(true)
    // 追加
    // ul.appendChild(li1) cloneNode(false) 只克隆标签 默认false
    ul.appendChild(ul.children[0].cloneNode(true))
  </script>
</body>

</html>
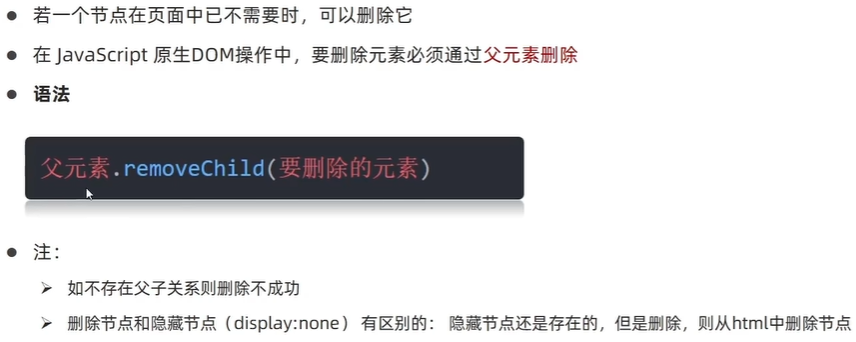
4)删除节点
<body>
  <ul>
    <li>1</li>
  </ul>
  <script>

    const ul = document.querySelector('ul')
    // 删除节点 父元素.removeChild(子元素)
    ul.removeChild(ul.children[0])
  </script>
</body>
3、M端事件
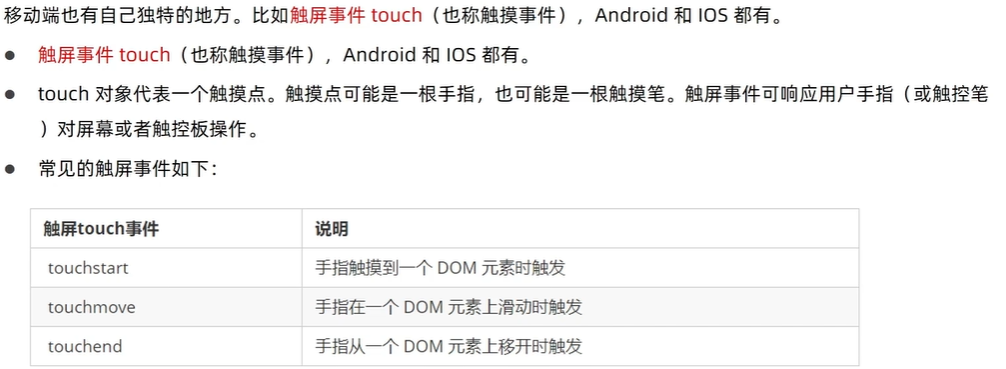
  <script>

    const div = document.querySelector('div')
    // 触摸
    div.addEventListener('touchstart', function () {
      console.log(1);

    })
    // 离开
    div.addEventListener('touchend', function () {
      console.log(2);
    })
    //移动
    div.addEventListener('touchmove', function () {
      console.log(3);
    })
  </script>
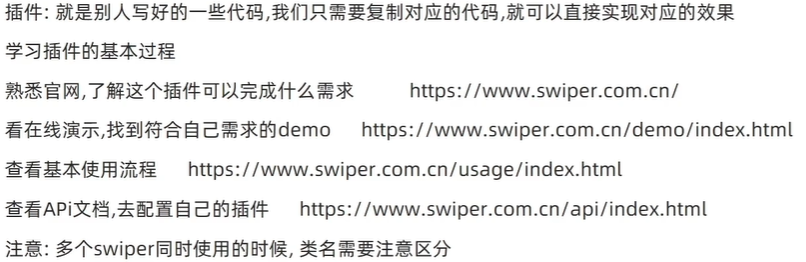
4、js 插件推荐
5、案例:学生信息表
分析:业务模块:点击录入,录入数据、点击删除,删除数据
本次案例尽量减少dom操作,采取操作数据的形式;增加和删除都是针对于数组的操作,然后再将数组数据渲染到页面中。
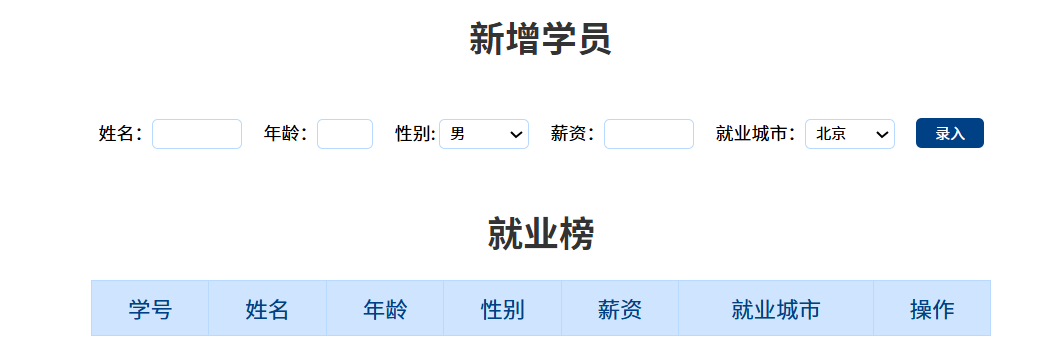
思路:拆两个模块:新增和删除;我们先声明一个空的数组;点击录入,根据数据,生成对象,追加到数组中;再将数组数据渲染到页面表格的行;点击删除,删除的是对应数组里的数据;再将数组数据渲染到页面。
什么都不输时,点击录入,我们会发现表单会跳转,我们要阻止这种行为。
    info.addEventListener('submit',function(e){
      // 什么都不输,点录入,表单会跳转,阻止这种行为
      // 阻止默认行为 表单不跳转
      e.preventDefault()
    })
同时,什么都不输时,点击录入,我们也会发现,表单中会出现空白数据,此时,我们发现这些存储数据的表单都有name属性,那么,我们可以获取带有name属性的表单,然后我们遍历他们,只要有一个为空,就中断程序return。注意:书写的位置要放在新增数据的前面(不满足条件,就不需要录入),阻止默认行为的后面。
      const items = document.querySelectorAll('[name]')
      for (let i = 0; i < items.length; i++) {
        if (items[i].value === '') {
          alert('输入内容不能为空')
        }
      }
总代码:
<!DOCTYPE html>
<html lang="en">

<head>
  <meta charset="UTF-8">
  <meta name="viewport" content="width=device-width, initial-scale=1.0">
  <title>学生信息</title>
  <style>
    * {
      margin: 0;
      padding: 0;
    }

    a {
      text-decoration: none;
      color: #721c24;
    }

    h1 {
      text-align: center;
      color: #333;
      margin: 20px 0;

    }

    table {
      margin: 0 auto;
      width: 800px;
      border-collapse: collapse;
      color: #004085;
    }

    th {
      padding: 10px;
      background: #cfe5ff;

      font-size: 20px;
      font-weight: 400;
    }

    td,
    th {
      border: 1px solid #b8daff;
    }

    td {
      padding: 10px;
      color: #666;
      text-align: center;
      font-size: 16px;
    }

    tbody tr {
      background: #fff;
    }

    tbody tr:hover {
      background: #e1ecf8;
    }

    .info {
      width: 900px;
      margin: 50px auto;
      text-align: center;
    }

    .info input,
    .info select {
      width: 80px;
      height: 27px;
      outline: none;
      border-radius: 5px;
      border: 1px solid #b8daff;
      padding-left: 5px;
      box-sizing: border-box;
      margin-right: 15px;
    }

    .info button {
      width: 60px;
      height: 27px;
      background-color: #004085;
      outline: none;
      border: 0;
      color: #fff;
      cursor: pointer;
      border-radius: 5px;
    }

    .info .age {
      width: 50px;
    }
  </style>
</head>

<body>
  <h1>新增学员</h1>
  <form class="info" autocomplete="off">
    姓名:<input type="text" class="uname" name="uname" />
    年龄:<input type="text" class="age" name="age" />
    性别:
    <select name="gender" class="gender">
      <option value="男">男</option>
      <option value="女">女</option>
    </select>
    薪资:<input type="text" class="salary" name="salary" />
    就业城市:<select name="city" class="city">
      <option value="北京">北京</option>
      <option value="上海">上海</option>
      <option value="广州">广州</option>
      <option value="深圳">深圳</option>
      <option value="杭州">杭州</option>
    </select>
    <button class="add">录入</button>
  </form>

  <h1>就业榜</h1>
  <table>
    <thead>
      <tr>
        <th>学号</th>
        <th>姓名</th>
        <th>年龄</th>
        <th>性别</th>
        <th>薪资</th>
        <th>就业城市</th>
        <th>操作</th>
      </tr>
    </thead>
    <tbody>
      <!--
          <tr>
            <td>1001</td>
            <td>欧阳霸天</td>
            <td>19</td>
            <td>男</td>
            <td>15000</td>
            <td>上海</td>
            <td>
              <a href="javascript:">删除</a>
            </td>
          </tr>
          -->
    </tbody>
  </table>
  <script>
    // 获取表单中的元素
    const uname = document.querySelector('.uname')
    const age = document.querySelector('.age')
    const gender = document.querySelector('.gender')
    const salary = document.querySelector('.salary')
    const city = document.querySelector('.city')
    const tbody = document.querySelector('tbody')
    const items = document.querySelectorAll('[name]')
    // 声明空数组,增删对这个数组操作
    const arr = []
    // 录入数据
    // 表单提交
    const info = document.querySelector('.info')
    info.addEventListener('submit', function (e) {
      // 什么都不输,点录入,表单会跳转,阻止这种行为
      // 阻止默认行为 表单不跳转
      e.preventDefault()

      // 表单验证
      // 遍历
      for (let i = 0; i < items.length; i++) {
        if (items[i].value === '') {
          alert('输入内容不能为空')
        }
      }

      // 创建新的对象,存储录入的数据
      const obj = {
        stuId: arr.length + 1,
        uname: uname.value,
        age: age.value,
        gender: gender.value,
        salary: salary.value,
        city: city.value
      }
      // 将对象放在数组中
      arr.push(obj)
      // 录入数据后,重置表单,恢复默认表单
      this.reset()
      // 调用渲染函数
      render()
    })
    // 由于录入,删除数据都需要渲染函数,因此封装函数
    function render() {
      // 为了解决录入数据时,会把录入之前数组中的数据打印一次,录入之后,再次打印数组中的所有数据
      // 因此,渲染数据时,先清空 tbody
      tbody.innerHTML = ''
      // 遍历数组
      for (let i = 0; i < arr.length; i++) {
        const tr = document.createElement('tr')
        tr.innerHTML = `
          <td>${arr[i].stuId}</td>
          <td>${arr[i].uname}</td>
          <td>${arr[i].age}</td>
          <td>${arr[i].gender}</td>
          <td>${arr[i].salary}</td>
          <td>${arr[i].city}</td>
          <td>
            <a href="javascript:" data-id=${i}>删除</a>
          </td>
        `
        // 追加元素 父元素.appendChild(子元素)
        tbody.appendChild(tr)
      }
    }

    // 删除操作
    //事件委托
    tbody.addEventListener('click', function (e) {
      // 点击删除
      if (e.target.tagName === 'A') {
        // 删除数组中对应的数据
        arr.splice(e.target.dataset.id, 1)
      }
      // 重新渲染
      render()
    })
  </script>
</body>

</html>


 被折叠的 条评论
为什么被折叠?
被折叠的 条评论
为什么被折叠?
 到【灌水乐园】发言


