


(Windows中使用Xshell 7连接虚拟机,同时通过IntelliJ IDEA将文件上传至虚拟机中的HDFS上,然后将一个文件内容追加到另一个文件中,以及实现对虚拟机中HDFS上文件的读取。)
环境准备
1.VMware虚拟机(Linux操作系统)
2.Windows10~11
3.JDK
4.IntelliJ IDEA
5.HadoopHadoop安装及集群环境配置-优快云博客 https://blog.youkuaiyun.com/2301_81921110/article/details/139362063?spm=1001.2014.3001.55016.Xshell 7(用于连接虚拟机与Windows)
7.Xftp 7(用于虚拟机与Windows之间传输文件)
实践前提
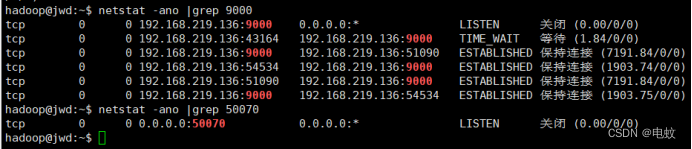
①首先要配置网络通信
netstat -ano |grep 9000
netstat -ano |grep 50070
sudo vim /etc/hosts
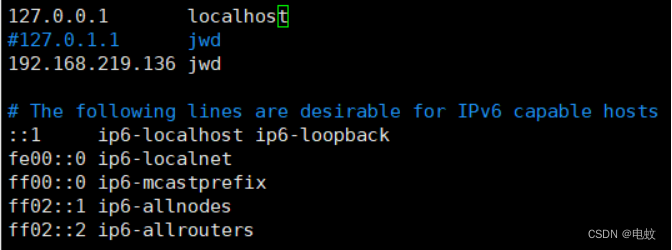
(注:此处jwd需修改为用户个人虚拟机计算机名,192.168.219.136为用户个人虚拟机IP)
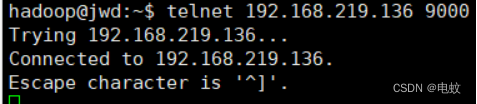
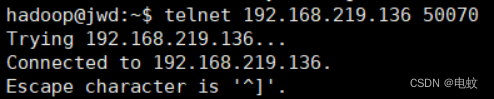
②查看是否成功实现通信。(下图即为成功实现通信)
telnet 192.168.219.136 9000
telnet 192.168.219.136 50070
注:若无法实现通信,请检查hadoop配置是否正确。
正确配置core-site.xml,mapred-site.xml ,yarn-site.xml
将其中的jwd修改为个人虚拟机主机名称或者IP地址,不能使用localhost或者127.0.0.1。
一、在Ubuntu环境本地新建两个文件,分别命名为:2024-1、2024-2,2024-1的内容为:2024-1;2024-2的内容为:2024-2。
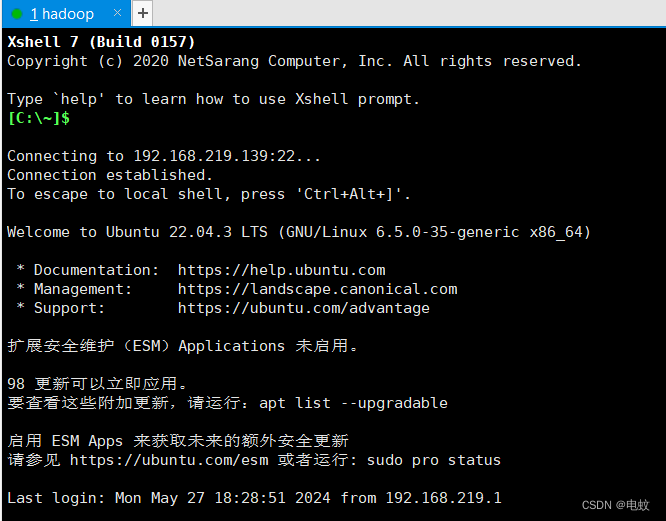
1、在Windows中使用Xshell 7连接虚拟机
2、启动Hadoop
start-all.sh
jps

3、新建两个文件,分别命名为:2024-1、2024-2,2024-1的内容为:2024-1;2024-2的内容为:2024-2。
mkdir 2024
cd 2024
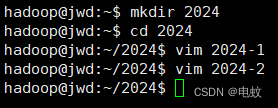
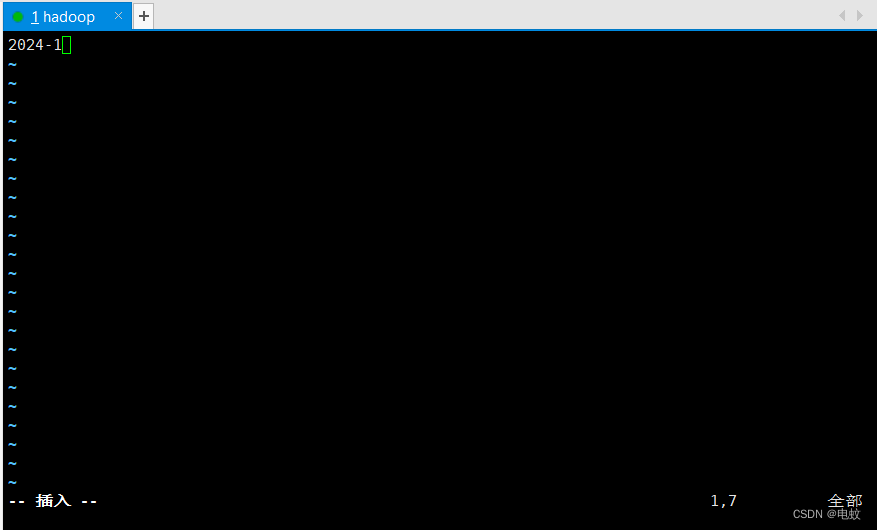
①vim 2024-1
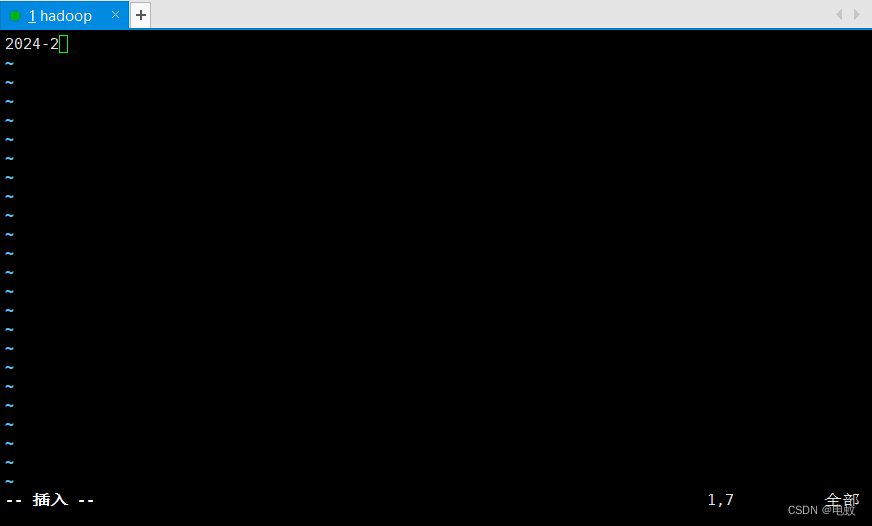
②vim 2024-2
二、通过命令和代码两种方式,实现将文件:2024-1上传到HDFS上,然后将文件:2024-2内容追加到文件:2024-1后边。
(1)通过命令将文件:2024-1上传到HDFS上,然后将文件:2024-2内容追加到文件:2024-1后边。
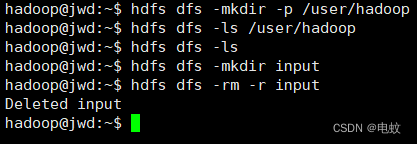
①需要注意的是,Hadoop系统安装好以后,第一次使用HDFS时,需要首先在HDFS中为hadoop用户创建一个用户目录。命令如下:
hdfs dfs -mkdir -p /user/hadoop
hdfs dfs -ls /user/hadoop #显示HDFS中与当前用户hadoop对应的用户目录下的内容
hdfs dfs -ls #列出HDFS上的所有目录
hdfs dfs -mkdir input #创建一个input目录
hdfs dfs -rm -r input #删除input目录
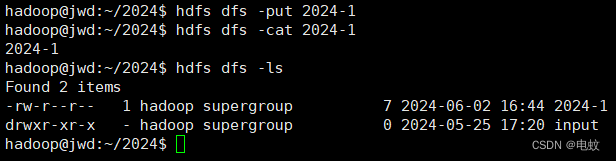
②将文件:2024-1上传到HDFS上;
hdfs dfs -put 2024-1
hdfs dfs -ls
hdfs dfs -cat 2024-1 #查看HDFS中的2024-1这个文件的内容
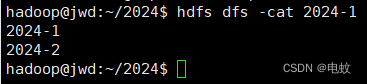
③将文件:2024-2内容追加到文件:2024-1后边。
hdfs dfs -appendToFile 2024-2 2024-1
![]()
hdfs dfs -rm -r 2024-1 #删除2024-1这个文件
(2)通过代码将文件:2024-1上传到HDFS上,然后将文件:2024-2内容追加到文件:2024-1后边。
hadoop fs -chmod 777 /user/hadoop #为HDFS中的hadoop目录增加用户读写执行权限
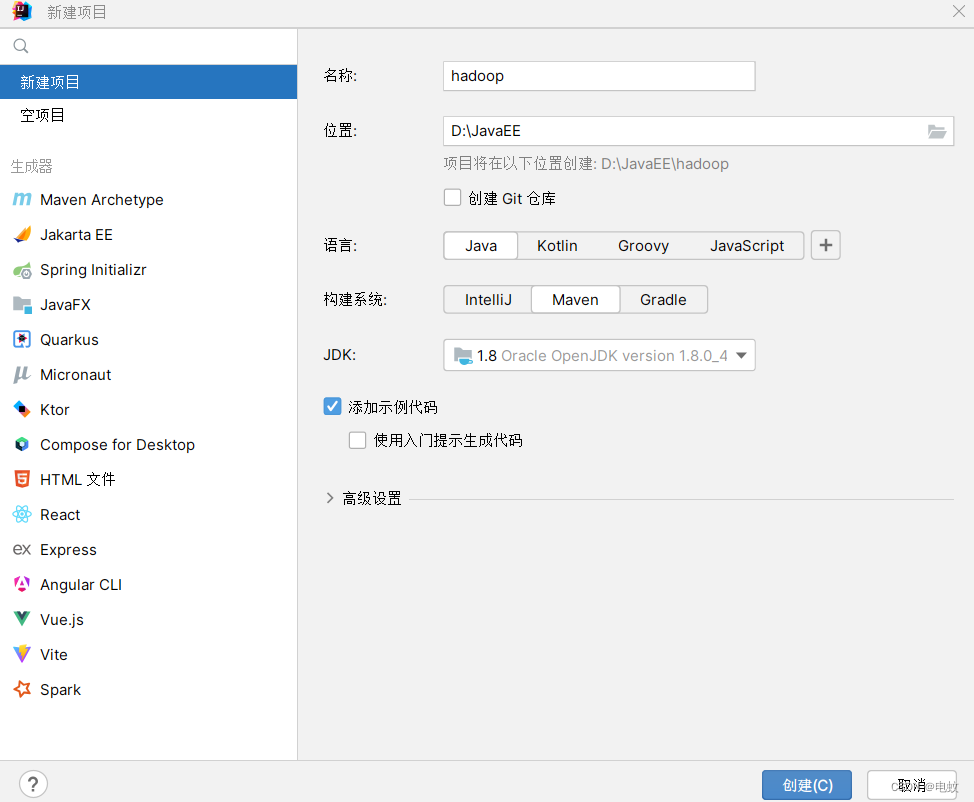
(注:idea创建maven项目)
构建如图所示目录
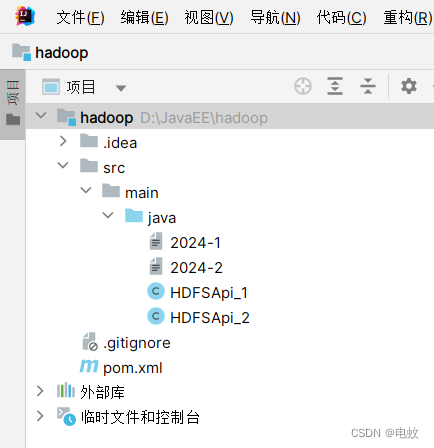
导入hadoop所需jar包
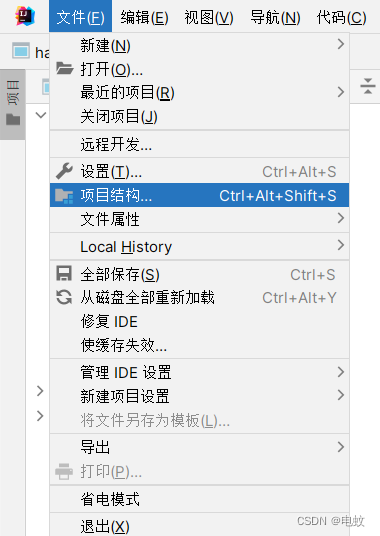
单击“文件——项目结构”命令。
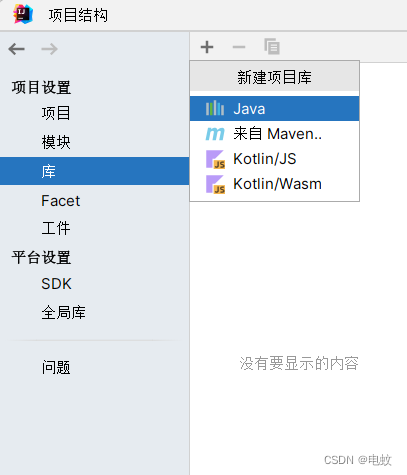
在“项目结构”窗口中单击“库”,单击“+”,单击“Java”。
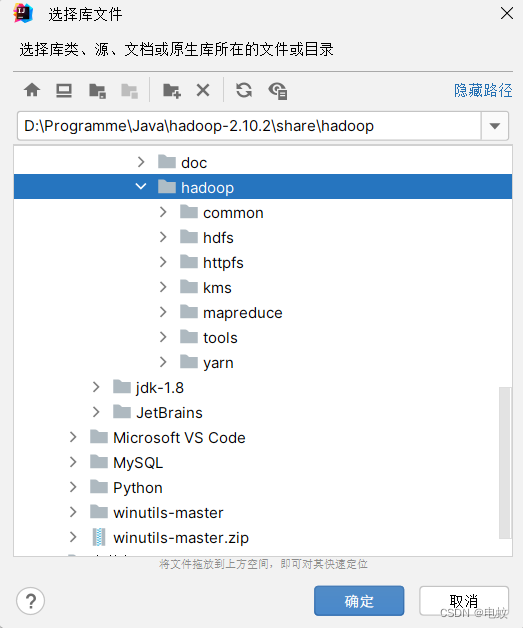
在“选择库文件”窗口中找到安装的hadoop,选择hadoop-2.10.2——share——hadoop文件夹,将其中的“common,hdfs,mapreduce,yarn文件夹”以及“四个文件夹中的lib文件夹”所包含的所有jar包导入。
idea所用插件(Big Data Tools)
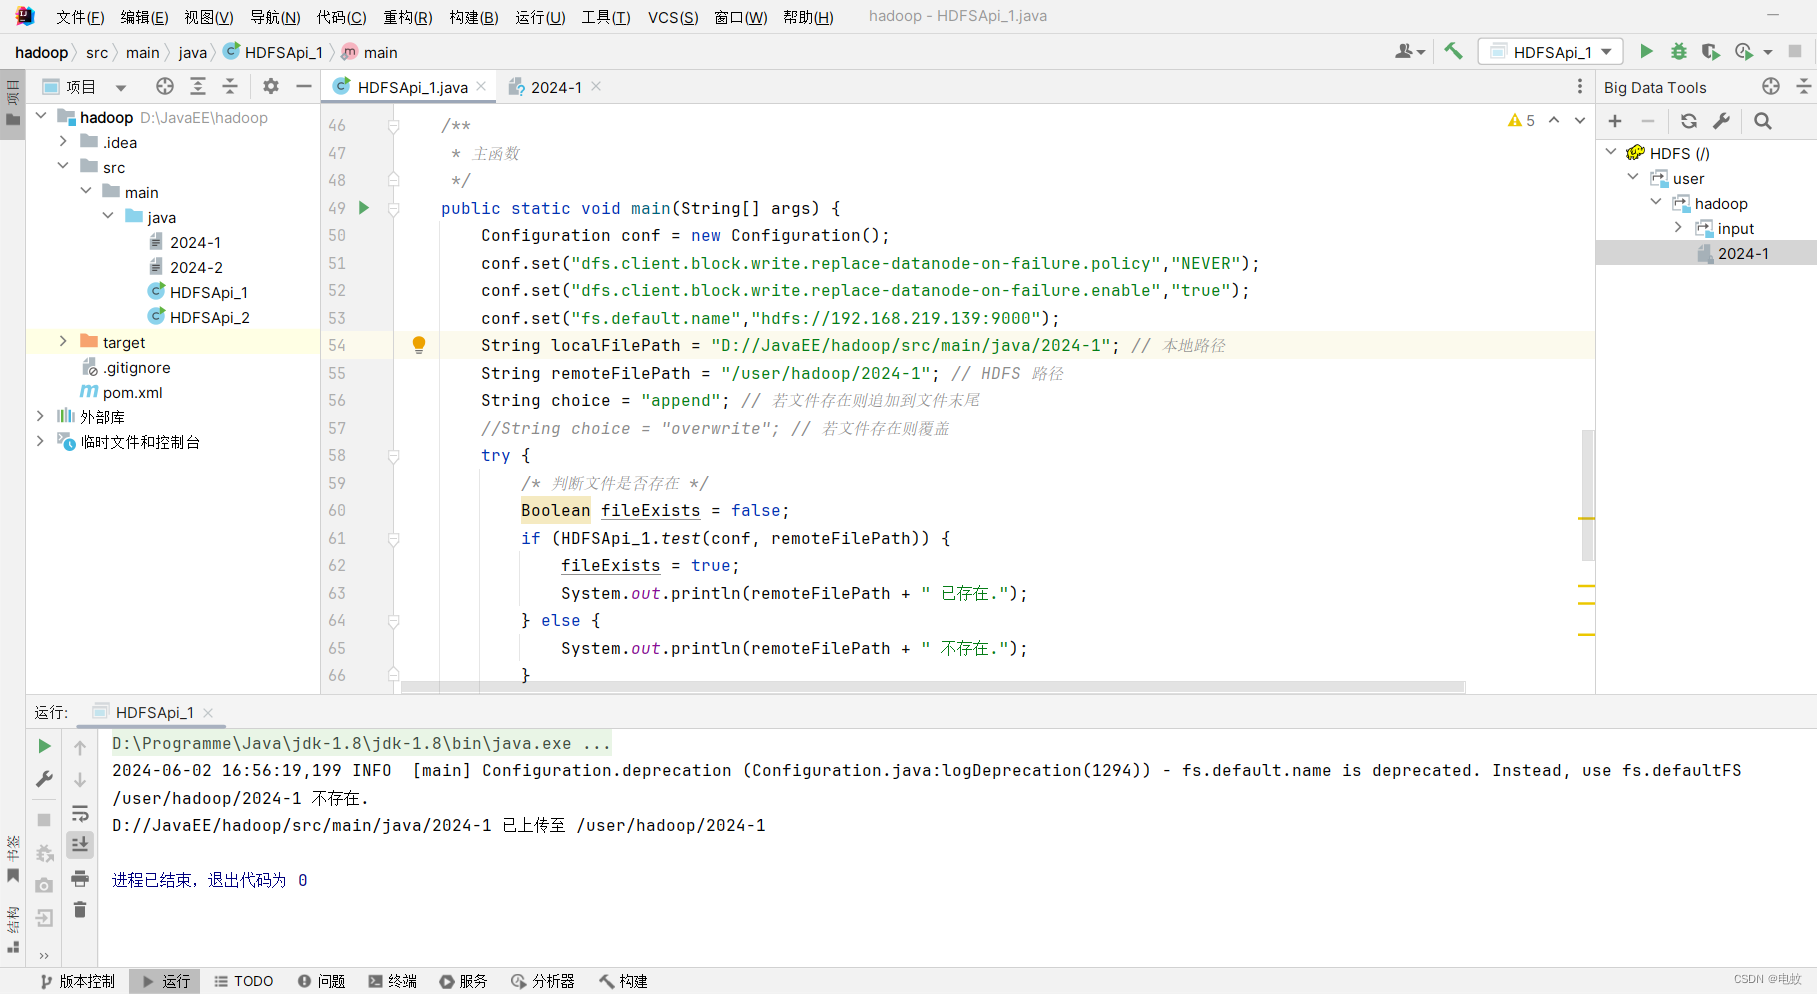
①将文件:2024-1上传到HDFS上;
代码:
import org.apache.hadoop.conf.Configuration;

import org.apache.hadoop.fs.*;

import java.io.*;


public class HDFSApi_1 {

    /**

     * 判断路径是否存在

     */

    public static boolean test(Configuration conf, String path) throws IOException {

       FileSystem fs = FileSystem.get(conf);

       return fs.exists(new Path(path));

    }

    /**

     * 复制文件到指定路径

     * 若路径已存在,则进行覆盖

     */

  public static void copyFromLocalFile(Configuration conf, String localFilePath, String remoteFilePath) throws IOException {

       FileSystem fs = FileSystem.get(conf);

       Path localPath = new Path(localFilePath);

       Path remotePath = new Path(remoteFilePath);

        /* fs.copyFromLocalFile 第一个参数表示是否删除源文件,第二个参数表示是否覆盖 */

       fs.copyFromLocalFile(false, true, localPath, remotePath);

       fs.close();

    }

    /**

     * 追加文件内容

     */

    public static void appendToFile(Configuration conf, String localFilePath, String remoteFilePath) throws IOException {

       FileSystem fs = FileSystem.get(conf);

       Path remotePath = new Path(remoteFilePath);

       /* 创建一个文件读入流 */

       FileInputStream in = new FileInputStream(localFilePath);

       /* 创建一个文件输出流,输出的内容将追加到文件末尾 */

       FSDataOutputStream out = fs.append(remotePath);

       /* 读写文件内容 */

       byte[] data = new byte[1024];

       int read = -1;

       while ( (read = in.read(data)) > 0 ) {

          out.write(data, 0, read);

       }

       out.close();

       in.close();

       fs.close();

}


    /**

     * 主函数

     */

    public static void main(String[] args) {

       Configuration conf = new Configuration();

       conf.set("dfs.client.block.write.replace-datanode-on-failure.policy","NEVER");

       conf.set("dfs.client.block.write.replace-datanode-on-failure.enable","true");

       conf.set("fs.default.name","hdfs://192.168.219.136:9000");

       String localFilePath = "D://JavaEE/hadoop/src/main/java/2024-1"; // 本地路径

       String remoteFilePath = "/user/hadoop/2024-1"; // HDFS 路径

       String choice = "append"; // 若文件存在则追加到文件末尾

        //String choice = "overwrite"; // 若文件存在则覆盖

       try {

          /* 判断文件是否存在 */

          Boolean fileExists = false;

          if (HDFSApi_1.test(conf, remoteFilePath)) {

             fileExists = true;

             System.out.println(remoteFilePath + " 已存在.");

          } else {

             System.out.println(remoteFilePath + " 不存在.");

          }

          /* 进行处理 */

          if ( !fileExists) { // 文件不存在,则上传

             HDFSApi_1.copyFromLocalFile(conf, localFilePath, remoteFilePath);

             System.out.println(localFilePath + " 已上传至 " + remoteFilePath);

          } else if ( choice.equals("overwrite") ) { // 选择覆盖

             HDFSApi_1.copyFromLocalFile(conf, localFilePath, remoteFilePath);

             System.out.println(localFilePath + " 已覆盖 " + remoteFilePath);

          } else if ( choice.equals("append") ) { // 选择追加

             HDFSApi_1.appendToFile(conf, localFilePath, remoteFilePath);

             System.out.println(localFilePath + " 已追加至 " + remoteFilePath);

          }

       } catch (Exception e) {

          e.printStackTrace();

       }

    }

}
运行结果:
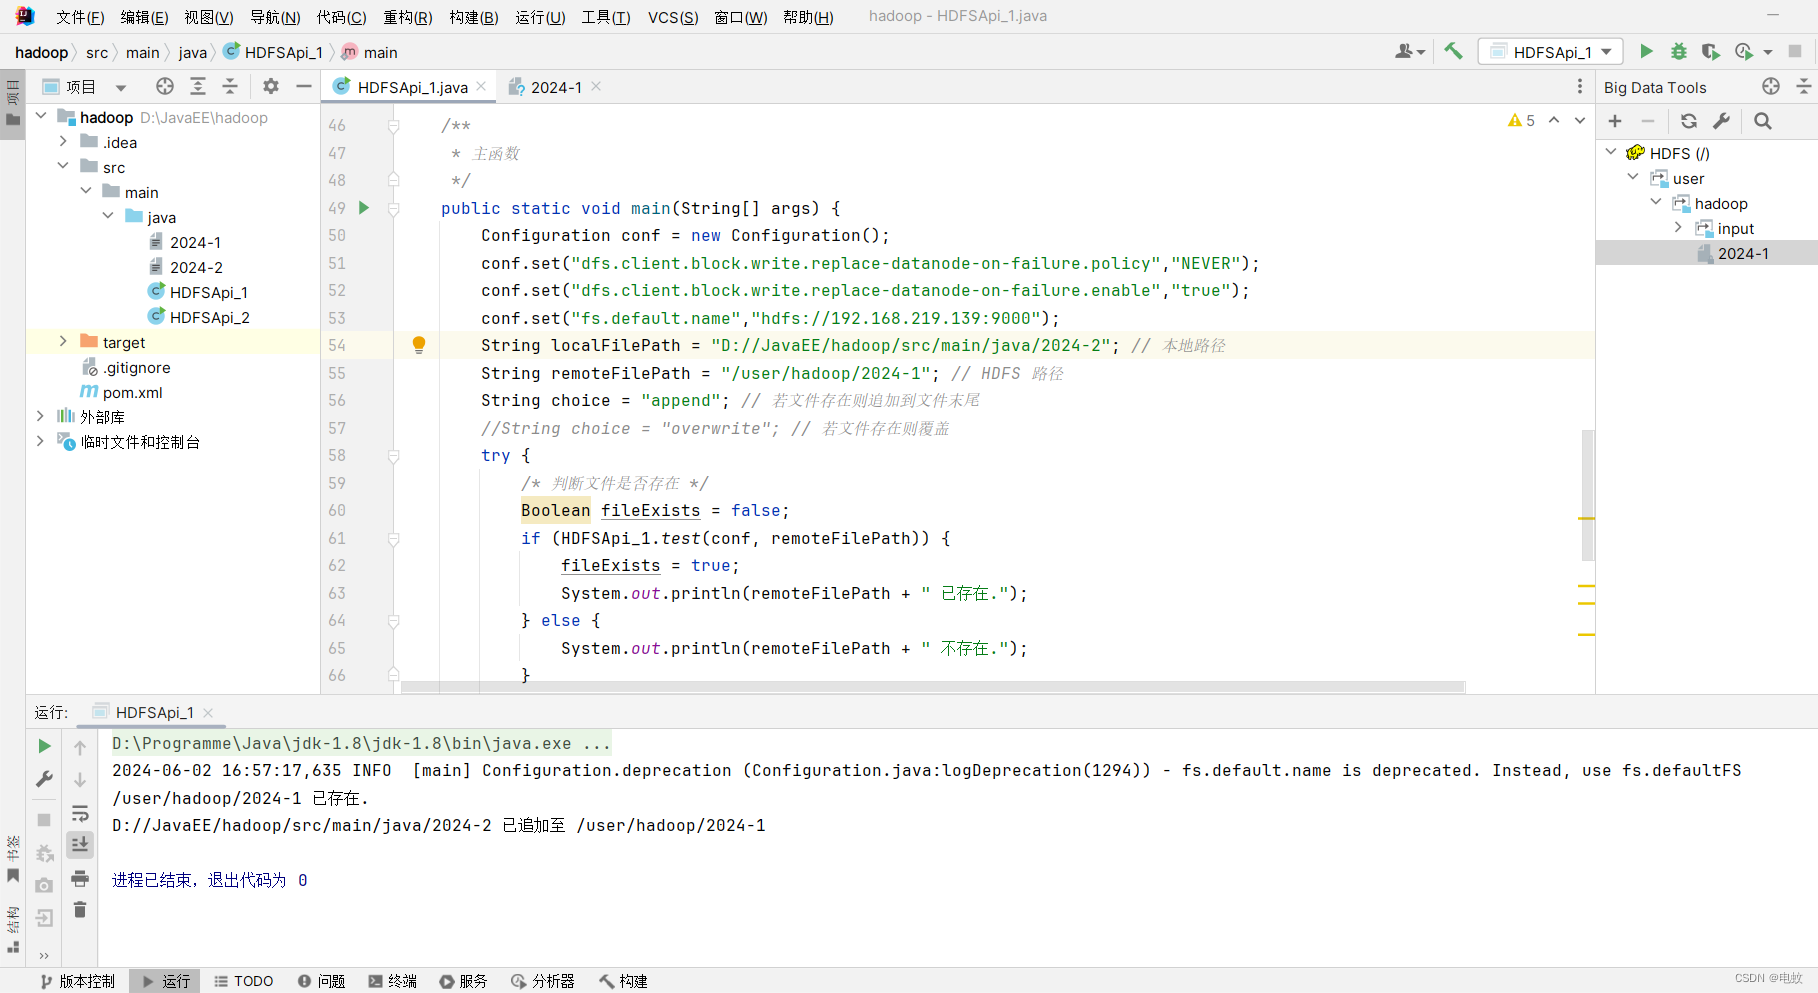
②将文件:2024-2内容追加到文件:2024-1后边。
代码:
将①中代码:

"D://JavaEE/hadoop/src/main/java/2024-1";

改为

"D://JavaEE/hadoop/src/main/java/2024-2";
运行结果:
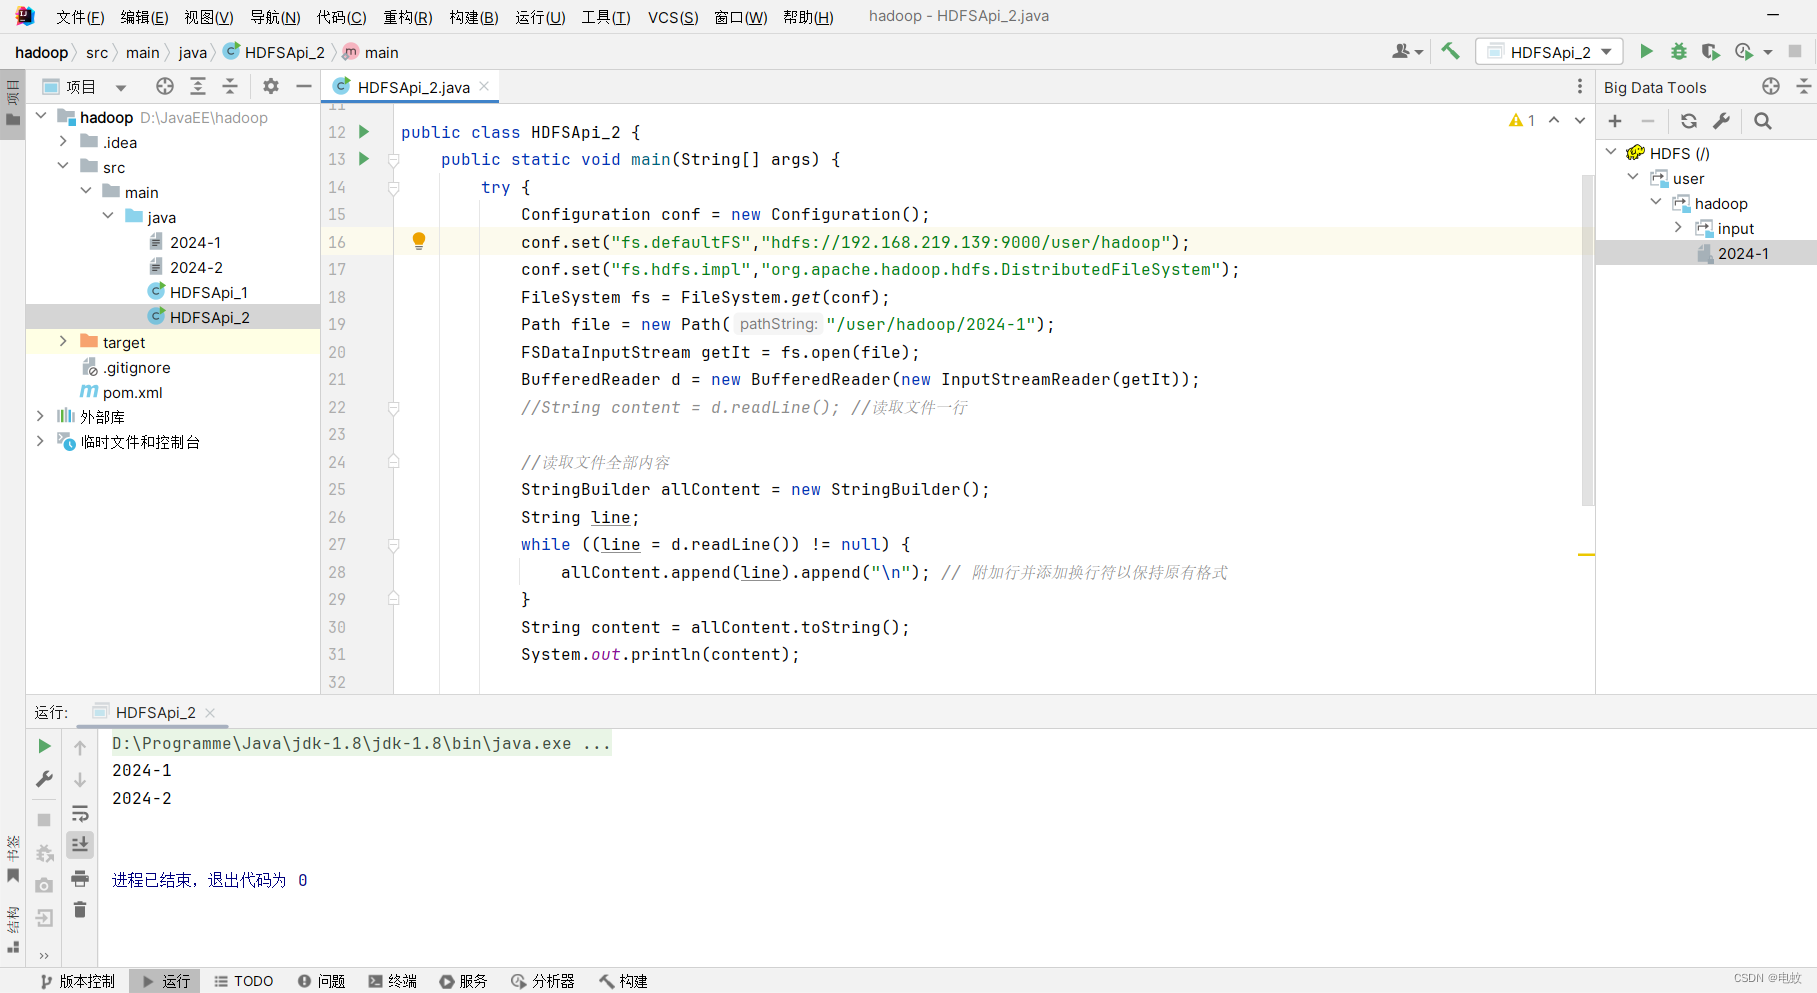
三、通过代码的方式,实现对HDFS上文件:2024-1的读取。
代码:
import java.io.BufferedReader;

import java.io.InputStreamReader;

import org.apache.hadoop.conf.Configuration;

import org.apache.hadoop.fs.FileSystem;

import org.apache.hadoop.fs.Path;

import org.apache.hadoop.fs.FSDataInputStream;


public class HDFSApi_2 {

    public static void main(String[] args) {

        try {

            Configuration conf = new Configuration();

            conf.set("fs.defaultFS","hdfs://192.168.219.136:9000/user/hadoop");

            conf.set("fs.hdfs.impl","org.apache.hadoop.hdfs.DistributedFileSystem");

            FileSystem fs = FileSystem.get(conf);

            Path file = new Path("/user/hadoop/231305335-1");

            FSDataInputStream getIt = fs.open(file);

            BufferedReader d = new BufferedReader(new InputStreamReader(getIt));

            //String content = d.readLine(); //读取文件一行


            //读取文件全部内容

            StringBuilder allContent = new StringBuilder();

            String line;

            while ((line = d.readLine()) != null) {

                allContent.append(line).append("\n");  //附加行并添加换行符以保持原有格式

            }

            String content = allContent.toString();

            System.out.println(content);


            d.close(); //关闭文件

            fs.close(); //关闭hdfs

        } catch (Exception e) {

            e.printStackTrace();

        }

    }

}
运行结果:


 被折叠的 条评论
为什么被折叠?
被折叠的 条评论
为什么被折叠?
 到【灌水乐园】发言


