


 本文详细介绍了如何在macOS环境下进行GoWeb编程,包括Go语言环境安装、dep包管理工具的使用、Postgres数据库的安装、初始化数据脚本的执行以及项目编译与运行。在解决问题部分,提供了针对brew下载缓慢、引用vender包问题和多文件编译问题的解决方案。通过学习,你可以掌握GoWeb开发的基础流程。
GoLang语言web服务开发准备
本文主要思路是根据一个chitchat项目来玩转go语言(项目来源于goweb编程一书) 实现的web基础开发,以及模板文件加载 路由,数据库操作等功能。
运行效果如下


系统环境:macos
使用到的软件:postgres数据库,navicat 数据库客户端工具,Intellij 编译工具,github demo管理
go语言的学习楼主推荐如下学习地址
https://github.com/Unknwon/the-way-to-go_ZH_CN/blob/master/eBook/directory.md
https://github.com/astaxie/build-web-application-with-golang/blob/master/zh/preface.md
Go语言环境安装
安装go的基础编译运行环境 mac brew install go ,或者 也可以直接去官网下载安装包 [官网地址下载] (https://golang.google.cn/dl/) 可根据自己的系统和版本下载对应的安装包
以下这几个环境变量是重点,根据自己下载的go的版本和安装路径进行设置
GOROOT=/usr/local/Cellar/go/1.12.1/libexec
export GOROOT
export GOPATH=/Users/jiangqiaowei/mygo
export GOBIN=$GOPATH/bin
export PATH=$PATH:$GOBIN:$GOROOT/bin
GOROOT: go安装目录
GOPATH:go工作目录
(其中包括src bin pkg三个子目录 需要自己手动创建,src 为工程目录需要把go的项目放在这个目录中进行编译,bin为引用库目录新建放那就好, pkg打包生成目录新建放那就好)
GOBIN:go可执行文件目录
PATH:将go可执行文件加入PATH中,使GO命令与我们编写的GO应用可以全局调用,编辑完之后退出保存文件,然后使用
source ~/.bash_profile 使环境变量生效
设置多个path
mac:
GOPATH="/home/www/gopath1:/home/www/gopath2"
windows:
GOPATH=f:/gopath1;f:/gopath2;
包管理dep安装
MacOS: brew install dep 安装dep包管理工具
Linux: curl https://raw.githubusercontent.com/golang/dep/master/install.sh | sh
Windows: go get -u github.com/golang/dep/cmd/dep
Windows得自己编译,并且确认把 G O P A T H / b i n 添 加 到 环 境 变 量 GOPATH/bin 添加到环境变量 GOPATH/bin添加到环境变量PATH下
dep init 当项目中使用了除了标准库意外的库执行此步骤会默认下载到项目对应的vender包中用于编译使用,如果已存在vender文件则备份当前的vender,并下载项目中的所有依赖包,生成Gopkg.lock和Gopkg.toml
以下是两个文件的作用说明,简单讲Gopkg.toml是清单文件,Gopkg.lock是校验描述文件。尽量不要修改,避免造成两个文件不同步的错误。
A manifest - a file describing the current project’s dependency requirements. In dep, this is the Gopkg.toml file. A lock - a file containing a transitively-complete, reproducible description of the dependency graph. In dep, this is the Gopkg.lock file.
dep status 用来查看项目依赖的详细信息和状态,非常清晰。

dep ensure尝试确保所有的依赖库都已经安装,如果没有即下载,相当于对依赖库做增量更新。
dep ensure add github.com/RoaringBitmap/roaring@^1.0.1
下载添加新的依赖库,并增量更新清单文件和校验描述文件。github.com/RoaringBitmap/roaring 是依赖库的包名,1.0.1是库的版本号。
本地缓存
当然dep不会每次都去下载,其工作原理和Mevan一样,会优先在本地仓库搜索,本地仓库未找到即在网络上下载,并添加到本地仓库。
$GOPATH/pkg/dep/sources
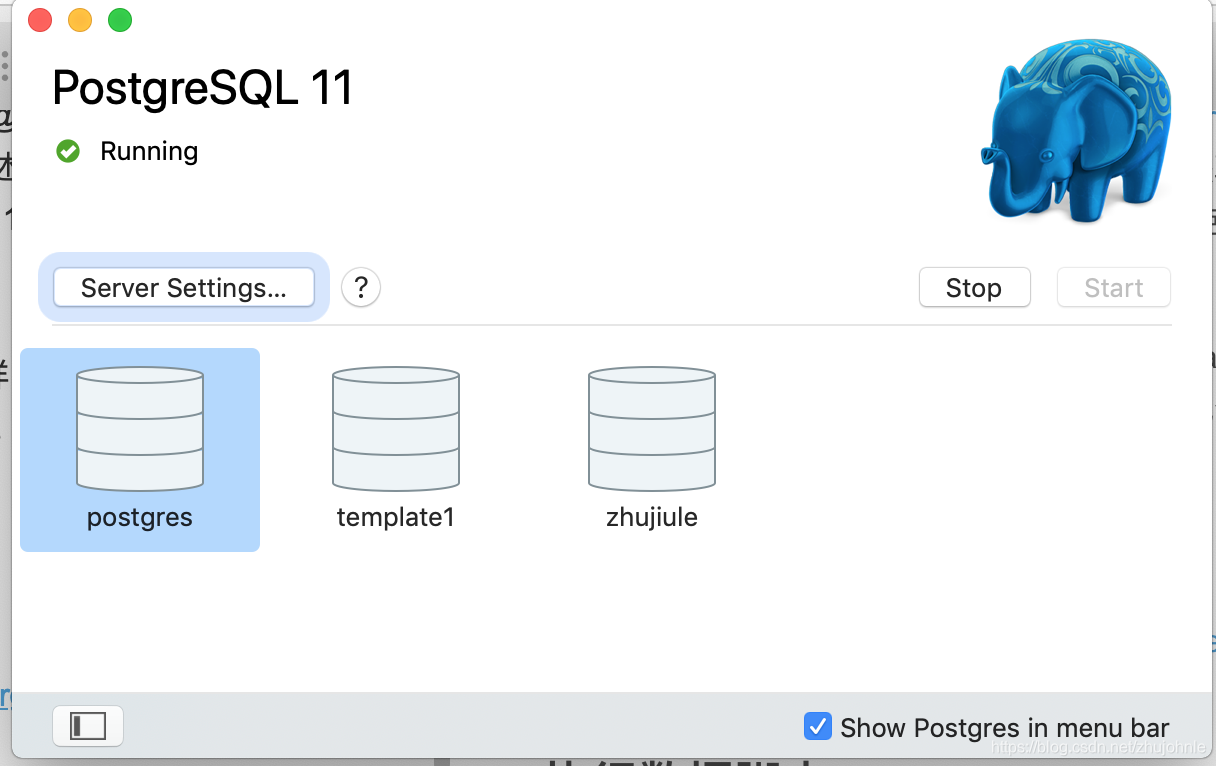
安装Postgres数据库
Postgres 数据库下载地址: https://www.postgresql.org/download/
直接下载对应的操作系统的版本即可,安装完成以后,可以在面板上进行start 或者stop 。本文不对postgres 的操作做过多描述详细可查考官方文档
初始化数据脚本
执行数据库初始化脚本,作者为了更直观 用的是客户端管理工具如下图
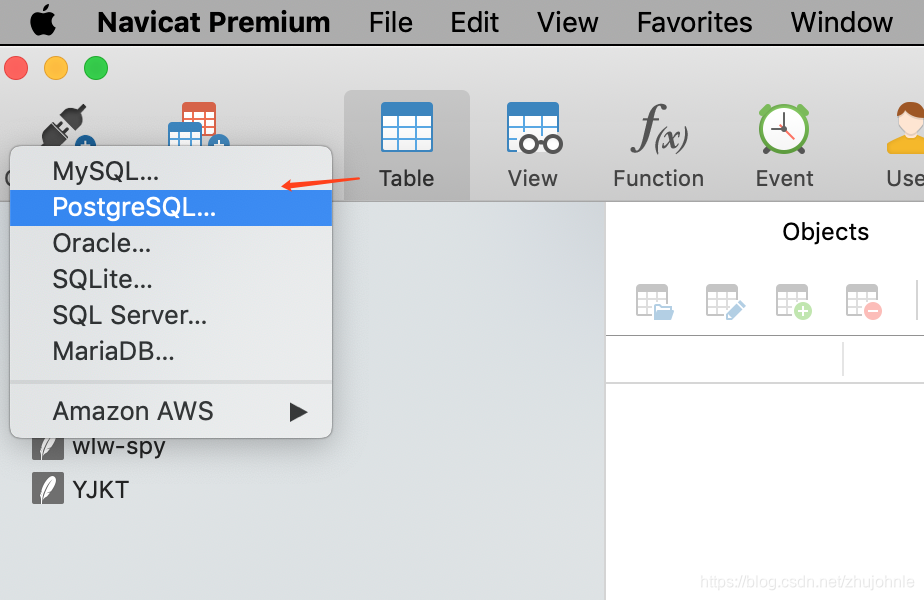
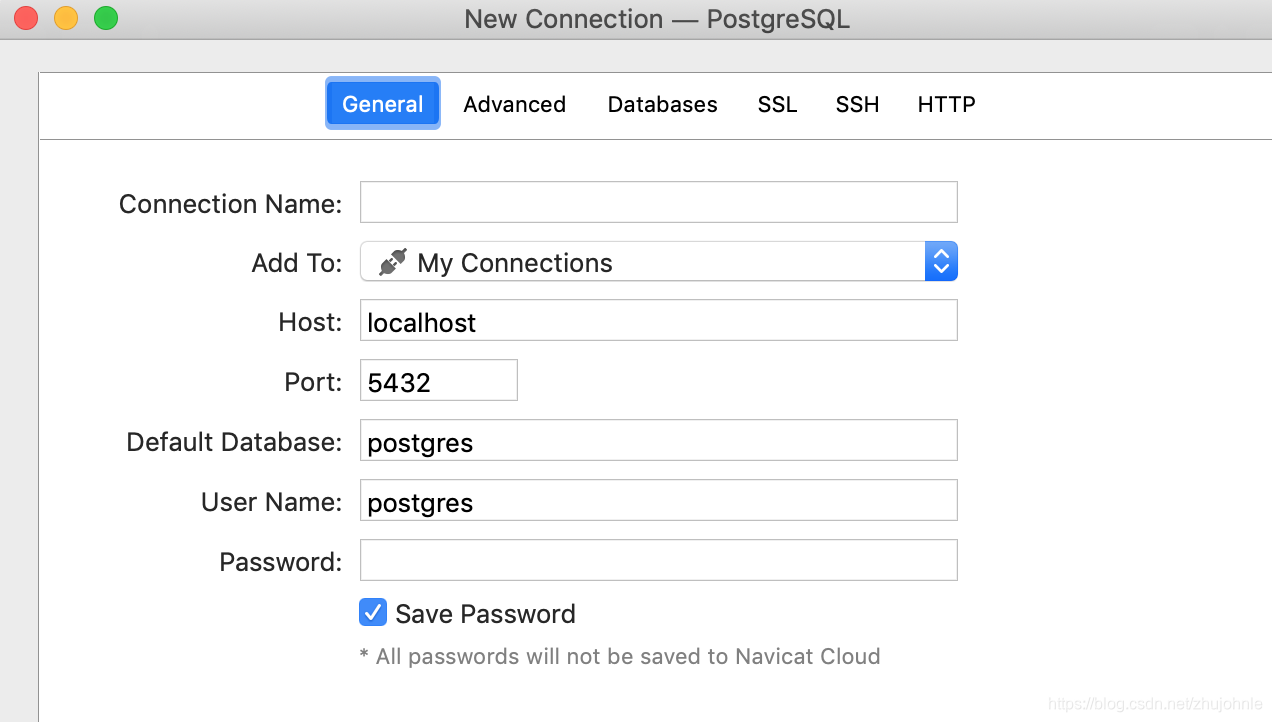
默认安装完postgres数据库后没有设置密码直接连接即可,线上环境一定要设置密码这里我们只是用作测试
下载代码(代码地址在最后的github里 ),跑起来看看代码结构,其中数据库初始脚本在如下位置(注意需要包项目放置在自己设定的$GOPATH 目录的src/github.com/目录下 ,具体为什么自己理解)

默认下载下来会带有vendor目录和dep包管理工具生成的两个文件,这是作者dep init 以后的结果,一般我们项目里需要自己去生成dep init的包管理环境,可以把相关文件删除后重试一下 看看具体dep做了哪些工作。
编译及运行服务
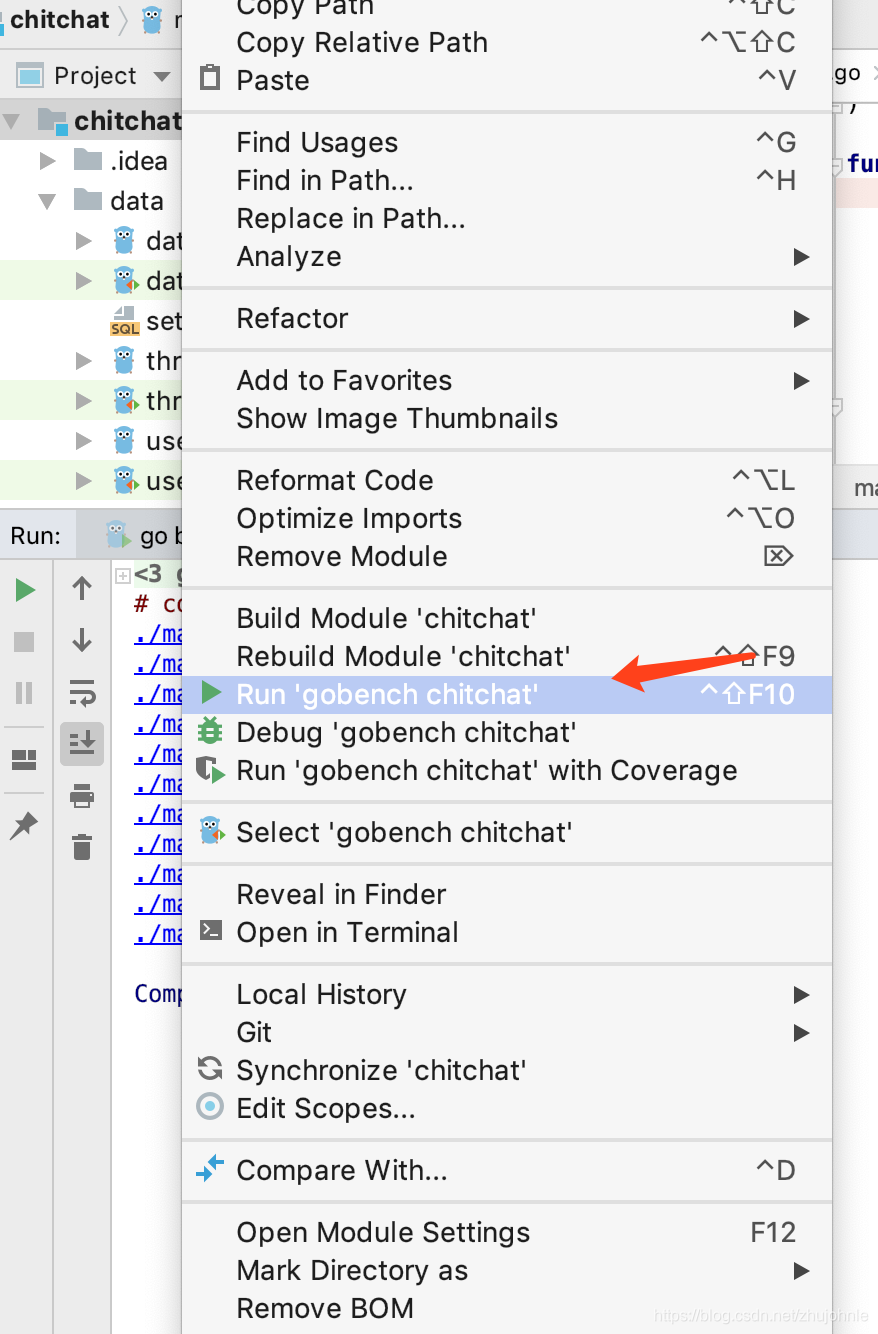
现在我们准备工作做好以后,开始运行项目。那么问题来了 ,熟悉java 开发的同学都知道首先要找main方法入口。当然golang文件对于可执行的文件都提供对应的main方法,但是对于多个文件下的编译缺不能直接执行main方法 否则会有如下错误,会提示一堆undefined 这是因为go的编译环境的问题

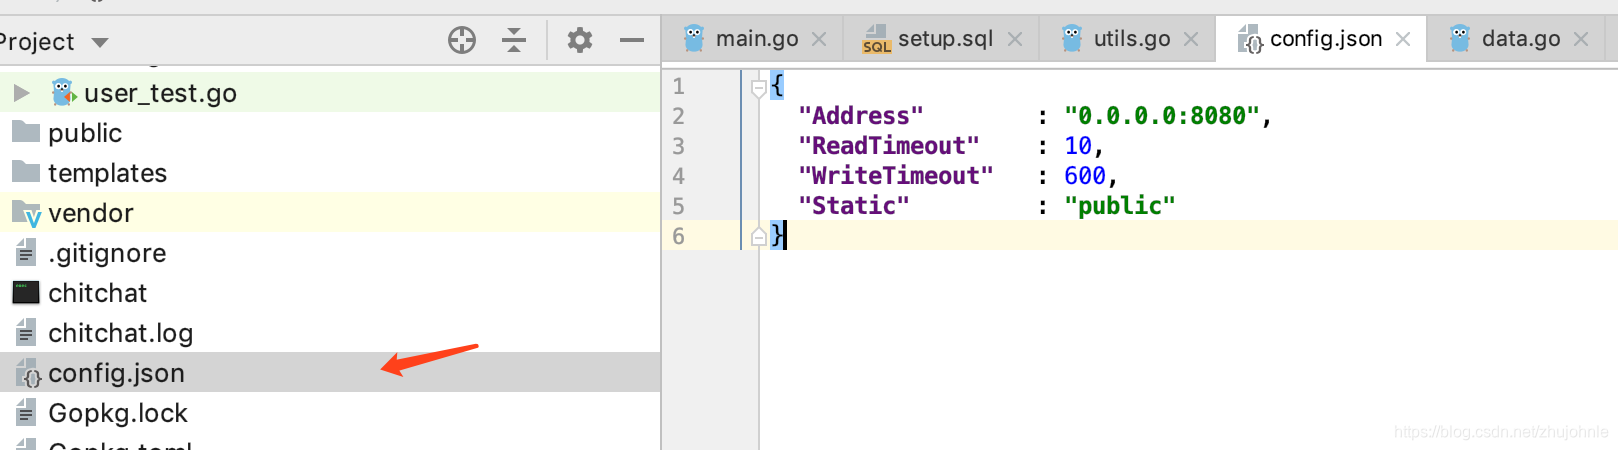
正确的做法是对项目整体右键运行即可,运行起来后直接程序跑在8080端口直接访问localhost:8080 即可访问。
这里做了一个最基础的设置,代码的细节读者可以自己去研究结合电子书去理解
问题及解决方案
brew下载编译的时候缓慢问题的解决
因为访问地址的原因,使用默认地址下载brew的时候 会比较慢,可以采用国内的几个下载资源,参考如下文章
[1] https://blog.youkuaiyun.com/lwplwf/article/details/79097565
[2] https://learnku.com/articles/18908
无法引用已下载到vender下的包的问题
1.需要项目放置到GOPATH目录下,如本工程就放置在作者自己配置的$GOPATH 目录下的src/github.com 目录下
2.检查自己的环境变量是否有问题。
多文件无法build的问题
1.单个文件直接执行main方法入口即可
2.多个文件的要对整个包进行编译 而不能直接对入口文件进行编译,这样会报undefined错误。
后记
本文是作者在学习过程中的总结,为了后来的人能更少坑的进入golangweb编程的行列。如遇到其他问题可以一块探讨。通过对go web编程的基础了解,让我看到了Go 这个语言未来的无限可能行,其语言天生的对高并发,高容错的人性处理相信在以后的互联网发展力会更有一席之地
资源下载
GoWeb 编程电子书下载
链接:https://pan.baidu.com/s/183W5wNwWc2CAaAfQbqJ2RQ 密码:y4xz
本文代码地址
https://github.com/MobiDevOS/GoWebChitchat


 4393
4393

 被折叠的 条评论
为什么被折叠?
被折叠的 条评论
为什么被折叠?
 到【灌水乐园】发言


