


open webui作为大模型的一个大前端,而langgraph又是开发工作流及Agent的利器,open webui提供了与langgraph集成的机制。其具体实现依赖于Pipelines。本文基于前面的一个简单的具有搜索功能的chatbot与open webui集成。
第一步:实现graph服务
1)创建服务目录,比如/home/langgraph/example
2)从https://github.com/open-webui/pipelines/tree/main/examples/pipelines/integrations/langgraph_pipeline 下载代码
3)修改源码
用如下代码替换langgraph_example.py文件中内容:
import os
import json
import getpass
from typing import Annotated, Literal
from typing_extensions import TypedDictfrom fastapi import FastAPI
from fastapi.responses import StreamingResponsefrom langgraph.graph import StateGraph, START, END
from langgraph.graph.message import add_messages
from langchain_openai import ChatOpenAI
from langgraph.config import get_stream_writer
from langchain_tavily import TavilySearch
from langgraph.prebuilt import ToolNode, tools_conditionos.environ["TAVILY_API_KEY"] = "tvly-……"
tool = TavilySearch(max_results=2)
tools = [tool]'''
Define Langgraph
'''
def generate_custom_stream(type: Literal["think","normal"], content: str):
content = "\n"+content+"\n"
custom_stream_writer = get_stream_writer()
return custom_stream_writer({type:content})class State(TypedDict):
messages: Annotated[list, add_messages]llm = ChatOpenAI(
model = 'qwen-plus',
api_key = "sk-3……",
base_url = "https://dashscope.aliyuncs.com/compatible-mode/v1")
llm_with_tools = llm.bind_tools(tools)def chatbot(state: State):
think_response = llm_with_tools.invoke(["Please reasoning:"] + state["messages"])normal_response = llm_with_tools.invoke(state["messages"])
generate_custom_stream("think", think_response.content)
generate_custom_stream("normal", normal_response.content)
return {"messages": [normal_response]}graph_builder = StateGraph(State)
graph_builder.add_node("chatbot", chatbot)#增加chatbot节点到工作流图tool_node = ToolNode(tools=tools) #生成工具节点
graph_builder.add_node("tools", tool_node) #把工具节点增加到工作流图中graph_builder.add_conditional_edges( "chatbot", tools_condition,)#增加条件边
graph_builder.add_edge("tools", "chatbot")#增加从tools—>chatbot的边
graph_builder.add_edge(START, "chatbot")#增加从START—>chatbot的边graph = graph_builder.compile()
'''
Define api processing
'''
app = FastAPI(
title="Langgraph API",
description="Langgraph API",
)@app.get("/test")
async def test():
return {"message": "Hello World"}@app.post("/stream")
async def stream(inputs: State):
async def event_stream():
try:
stream_start_msg = {
'choices':
[
{
'delta': {},
'finish_reason': None
}
]
}# Stream start
yield f"data: {json.dumps(stream_start_msg)}\n\n"# Processing langgraph stream response with <think> block support
async for event in graph.astream(input=inputs, stream_mode="custom"):
print(event)
think_content = event.get("think", None)
normal_content = event.get("normal", None)think_msg = {
'choices':
[
{
'delta':
{
'reasoning_content': think_content,
},
'finish_reason': None
}
]
}normal_msg = {
'choices':
[
{
'delta':
{
'content': normal_content,
},
'finish_reason': None
}
]
}yield f"data: {json.dumps(think_msg)}\n\n"
yield f"data: {json.dumps(normal_msg)}\n\n"# End of the stream
stream_end_msg = {
'choices': [
{
'delta': {},
'finish_reason': 'stop'
}
]
}
yield f"data: {json.dumps(stream_end_msg)}\n\n"except Exception as e:
# Simply print the error information
print(f"An error occurred: {e}")return StreamingResponse(
event_stream(),
media_type="text/event-stream",
headers={
"Cache-Control": "no-cache",
"Connection": "keep-alive",
}
)
4)安装依赖
在应用目录下运行pip命令:
#pip install -r requirements.txt
5)启动服务
#unicorn langgraph_example:app --reload #服务启动后运行端口缺省为8000
第二步:安装流水线
1)在open webui,从【管理员面板】—>【设置】—>【Pipeline】进入流水线安装页面:
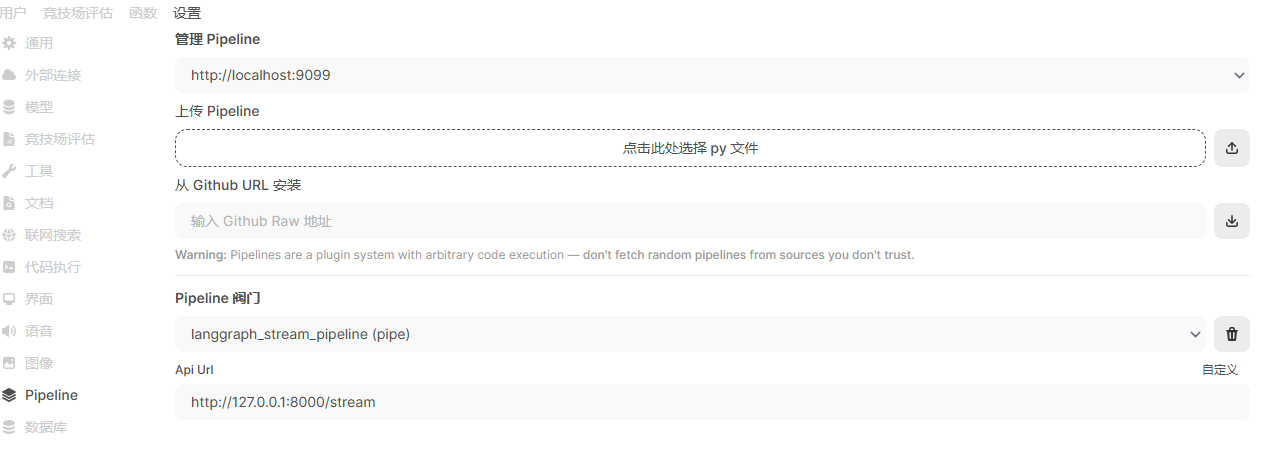
2)选择【点击此处选择 py文件】,从本地找到并选择langgraph_stream_pipeline.py文件,并点击【这里】
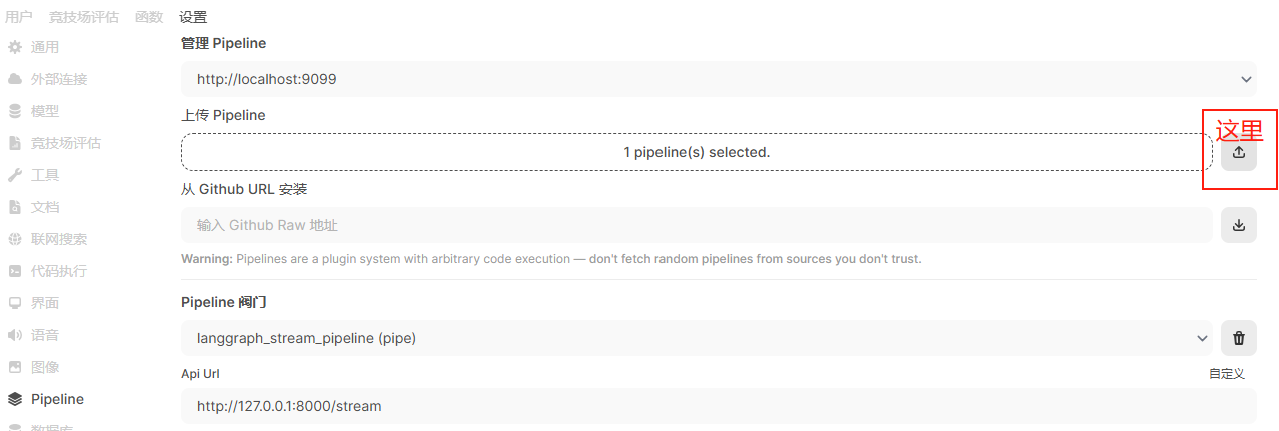
处理成功后,下面会显示Pipeline阀门和Api Url(可以根据实际情况调整Url)。最后点击【保存】。
anggraph_stream_pipeline.py内容如下:
import os
import requests
from pydantic import BaseModel, Field
from typing import List, Union, Generator, Iterator
class Pipeline:
class Valves(BaseModel):
API_URL: str = Field(default="http://127.0.0.1:9000/stream", description="Langgraph API URL")
def __init__(self):
self.id = "LangGraph stream" #模型列表中显示的名字,可自行修改
self.name = "LangGraph stream"
# Initialize valve paramaters
self.valves = self.Valves(
**{k: os.getenv(k, v.default) for k, v in self.Valves.model_fields.items()}
)async def on_startup(self):
# This function is called when the server is started.
print(f"on_startup: {__name__}")
pass
async def on_shutdown(self):
# This function is called when the server is shutdown.
print(f"on_shutdown: {__name__}")
passdef pipe(
self,
user_message: str,
model_id: str,
messages: List[dict],
body: dict
) -> Union[str, Generator, Iterator]:data = {
"messages": [[msg['role'], msg['content']] for msg in messages],
}
headers = {
'accept': 'text/event-stream',
'Content-Type': 'application/json',
}
response = requests.post(self.valves.API_URL, json=data, headers=headers, stream=True)
response.raise_for_status()
return response.iter_lines()
第三步:使用langgraph的chatbot
在启动对话时,模型列表可看到新增的chatbot,名字为LangGraph stream。接下来的使用与普通大模型无异。


 1065
1065

 被折叠的 条评论
为什么被折叠?
被折叠的 条评论
为什么被折叠?
 到【灌水乐园】发言


