


 本文详细解析了Launcher中Widgets的加载流程,从交互图到逻辑思路,深入探讨WidgetsContainerView的初始化过程,以及如何通过RecyclerView和WidgetsListAdapter实现widget的显示。文章还分析了适配器加载各widget的方法,并提供了关键的UI布局代码。
一:交互图
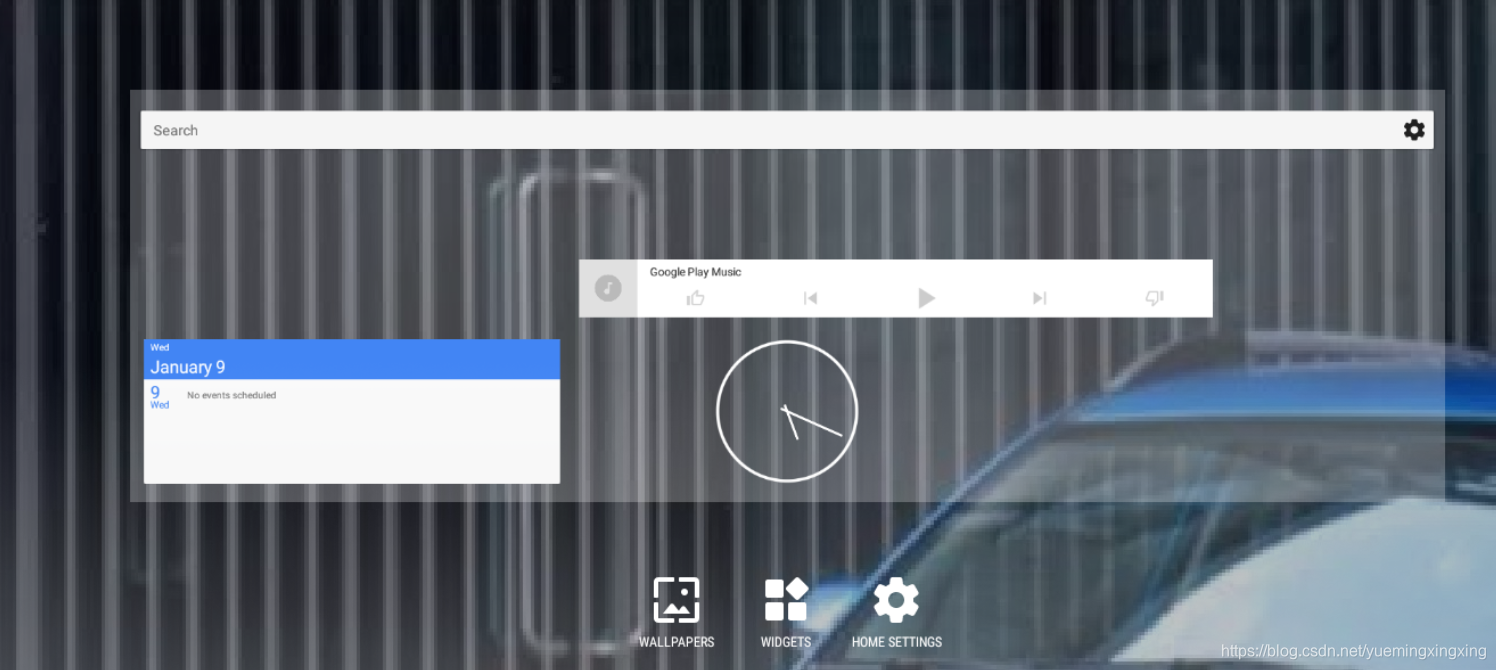
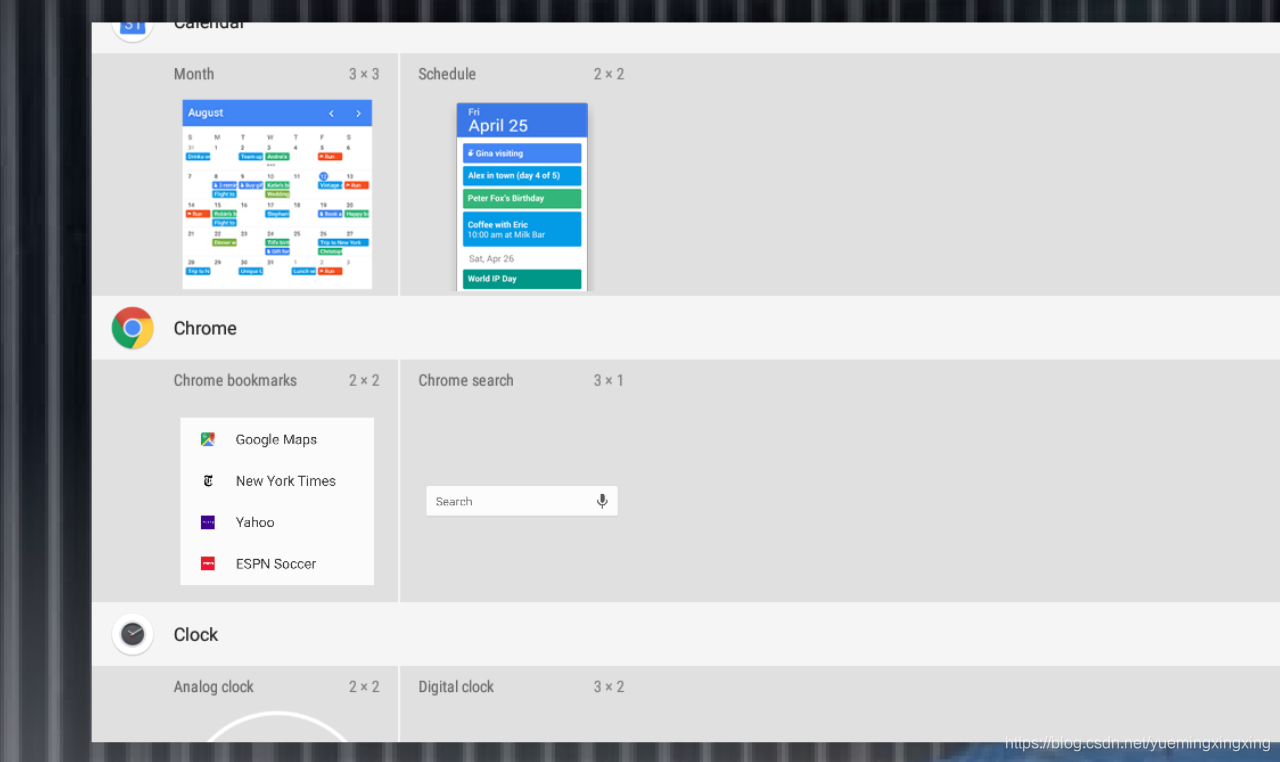
长按Launcher进入OverView Panel界面,点击WIDGETS进入Widgets界面,拖拽widgets到Launcher桌面,显示widget到桌面,完成widget的显示操作
二:逻辑思路
1.WidgetsContainerView为显示所有Widgets的View,初始化在Launcher的onCreate方法中调用setupViews方法初始化
2.绑定all widgets是在Launcher的onCreate方法调用mModel.startLoader(currentScreen) -->loaderResults.bindWidgets() -->callbacks.bindAllWidgets(widgets) --> mWidgetsView.setWidgets(allWidgets)-->mAdapter.setWidgets(model)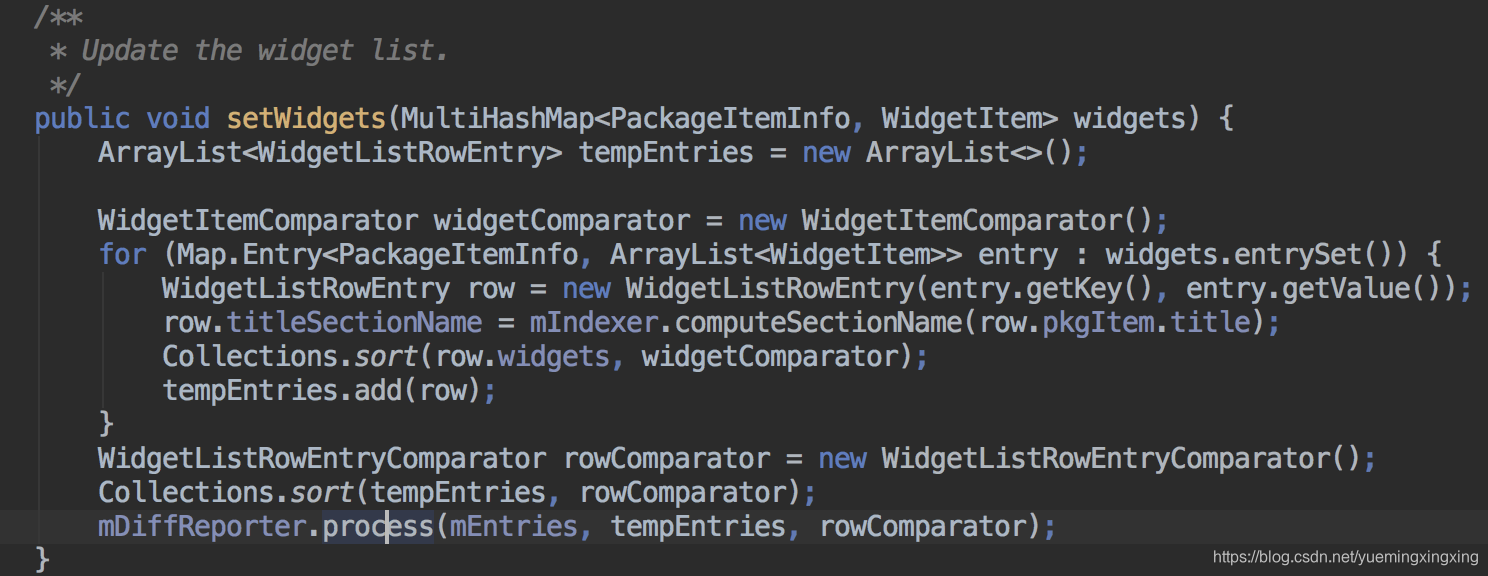
tempEntries把wigets信息传递给了mEntries
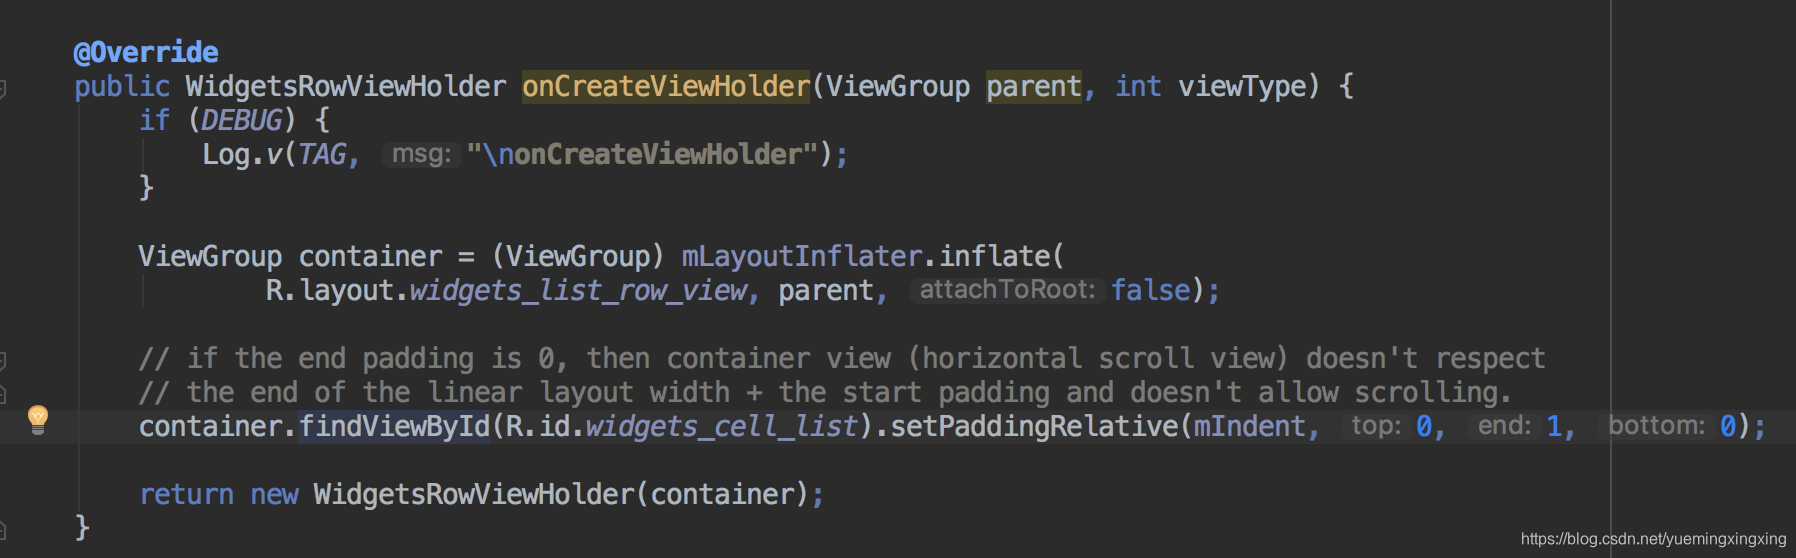
3.Widgets显示是通过Recyclerview实现的,其适配器为WidgetsListAdapter,适配器如何加载各个widget的呢?

@Override
    public void onBindViewHolder(WidgetsRowViewHolder holder, int pos) {
        WidgetListRowEntry entry = mEntries.get(pos);
        List<WidgetItem> infoList = entry.widgets;

        ViewGroup row = holder.cellContainer;
        if (DEBUG) {
            Log.d(TAG, String.format(
                    "onBindViewHolder [pos=%d, widget#=%d, row.getChildCount=%d]",
                    pos, infoList.size(), row.getChildCount()));
        }

        // Add more views.
        // if there are too many, hide them.
        int expectedChildCount = infoList.size() + Math.max(0, infoList.size() - 1);
        int childCount = row.getChildCount();

        if (expectedChildCount > childCount) {
            for (int i = childCount ; i < expectedChildCount; i++) {
                if ((i & 1) == 1) {
                    // Add a divider for odd index
                    mLayoutInflater.inflate(R.layout.widget_list_divider, row);
                } else {
                    // Add cell for even index
                    WidgetCell widget = (WidgetCell) mLayoutInflater.inflate(
                            R.layout.widget_cell, row, false);

                    // set up touch.
                    widget.setOnClickListener(mIconClickListener);
                    widget.setOnLongClickListener(mIconLongClickListener);
                    row.addView(widget);
                }
            }
        } else if (expectedChildCount < childCount) {
            for (int i = expectedChildCount ; i < childCount; i++) {
                row.getChildAt(i).setVisibility(View.GONE);
            }
        }

        // Bind the views in the application info section.
        holder.title.applyFromPackageItemInfo(entry.pkgItem);

        // Bind the view in the widget horizontal tray region.
        for (int i=0; i < infoList.size(); i++) {
            WidgetCell widget = (WidgetCell) row.getChildAt(2*i);
            widget.applyFromCellItem(infoList.get(i), mWidgetPreviewLoader);
            widget.ensurePreview();
            widget.setVisibility(View.VISIBLE);

            if (i > 0) {
                row.getChildAt(2*i - 1).setVisibility(View.VISIBLE);
            }
        }
    }
4.适配item的UI图
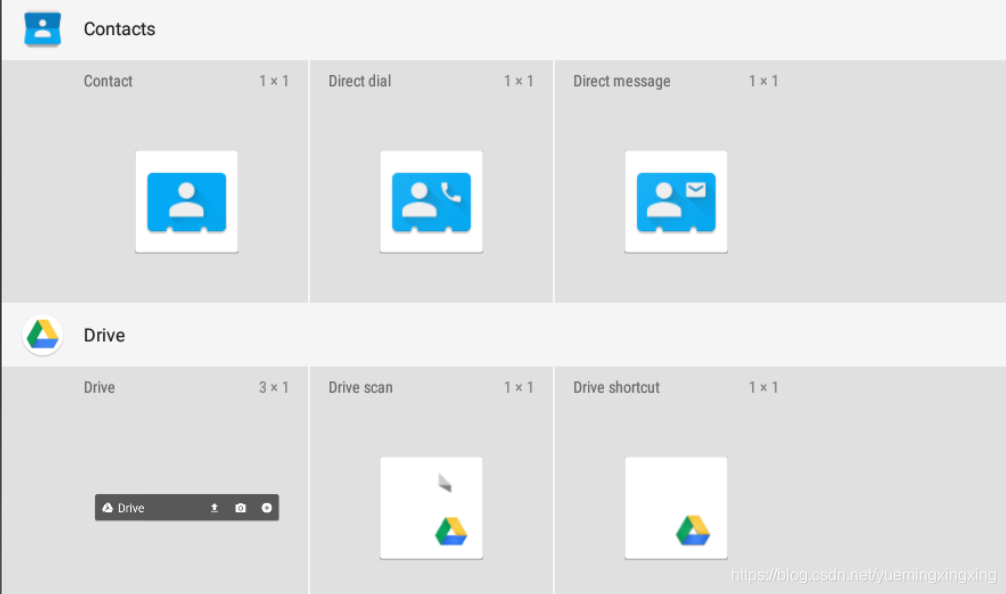
其XML构架为
<LinearLayout
    xmlns:android="http://schemas.android.com/apk/res/android"
    xmlns:launcher="http://schemas.android.com/apk/res-auto"
    android:id="@+id/widgets_cell_list_container"
    android:layout_width="match_parent"
    android:layout_height="wrap_content"
    android:orientation="vertical"
    android:focusable="true"
    android:descendantFocusability="afterDescendants">

    <!-- Section info -->

    <com.android.launcher3.BubbleTextView
        android:id="@+id/section"
        android:layout_width="match_parent"
        android:layout_height="@dimen/widget_section_height"
        android:background="?android:attr/colorPrimary"
        android:drawablePadding="@dimen/widget_section_horizontal_padding"
        android:ellipsize="end"
        android:focusable="true"
        android:gravity="start|center_vertical"
        android:paddingBottom="@dimen/widget_section_vertical_padding"
        android:paddingLeft="@dimen/widget_section_horizontal_padding"
        android:paddingRight="@dimen/widget_section_horizontal_padding"
        android:paddingTop="@dimen/widget_section_vertical_padding"
        android:singleLine="true"
        android:textColor="?android:attr/textColorPrimary"
        android:textSize="16sp"
        android:textAlignment="viewStart"
        launcher:deferShadowGeneration="true"
        launcher:iconDisplay="widget_section"
        launcher:iconSizeOverride="@dimen/widget_section_icon_size"
        launcher:layoutHorizontal="true" />

    <include layout="@layout/widgets_scroll_container" />
</LinearLayout>
widgets_scroll_container的XML为
<HorizontalScrollView
    xmlns:android="http://schemas.android.com/apk/res/android"
    android:id="@+id/widgets_scroll_container"
    android:layout_width="match_parent"
    android:layout_height="wrap_content"
    android:background="?android:attr/colorPrimaryDark"
    android:scrollbars="none">
    <LinearLayout
        android:id="@+id/widgets_cell_list"
        android:layout_width="wrap_content"
        android:layout_height="wrap_content"
        android:paddingStart="0dp"
        android:paddingEnd="0dp"
        android:orientation="horizontal"
        android:showDividers="none"/>
</HorizontalScrollView>
LinearLayout的的子View由WidgetCell构成,WidgetCell加载widget的图像和信息是在onBindViewHolder方法调用:
 for (int i=0; i < infoList.size(); i++) {
            WidgetCell widget = (WidgetCell) row.getChildAt(2*i);
            widget.applyFromCellItem(infoList.get(i), mWidgetPreviewLoader);
            widget.ensurePreview();
            widget.setVisibility(View.VISIBLE);

            if (i > 0) {
                row.getChildAt(2*i - 1).setVisibility(View.VISIBLE);
            }
        }
这样所有的widget都加载出来了!!!!!!!!!


 1568
1568

 被折叠的 条评论
为什么被折叠?
被折叠的 条评论
为什么被折叠?
 到【灌水乐园】发言


