


一、安装步骤
- 从https://github.com/HuguesTHOMAS/KPConv-PyTorch/tree/master/cpp_wrappers 下载cpp_wrappers文件夹
- 然后分别将cpp_neighbors和cpp_subsampling文件夹中的setup.py文件内容替换如下:
由于numpy版本不匹配的问题,原先的setup.py文件会报错
# cpp_neighbors
from setuptools import setup, Extension
import numpy as np

# Adding sources of the project
SOURCES = [
    "../cpp_utils/cloud/cloud.cpp",
    "neighbors/neighbors.cpp",
    "wrapper.cpp"
]

# Define the extension module
module = Extension(
    name="radius_neighbors",
    sources=SOURCES,
    extra_compile_args=['/std:c++11', '-D_GLIBCXX_USE_CXX11_ABI=0'],
    include_dirs=[np.get_include()]
)

# Run setup
setup(ext_modules=[module])
# cpp_subsampling
from setuptools import setup, Extension
import numpy as np
# Adding sources of the project
SOURCES = [
"../cpp_utils/cloud/cloud.cpp",
"grid_subsampling/grid_subsampling.cpp",
"wrapper.cpp"
]
# Define the extension module
module = Extension(
name="grid_subsampling",
sources=SOURCES,
extra_compile_args=['/std:c++11', '-D_GLIBCXX_USE_CXX11_ABI=0'],
include_dirs=[np.get_include()]
)
# Run setup
setup(ext_modules=[module])3.在终端分别运行上述两个文件夹中build.bat文件,观察到文件夹内多了两个.pyd文件即为编译成功。
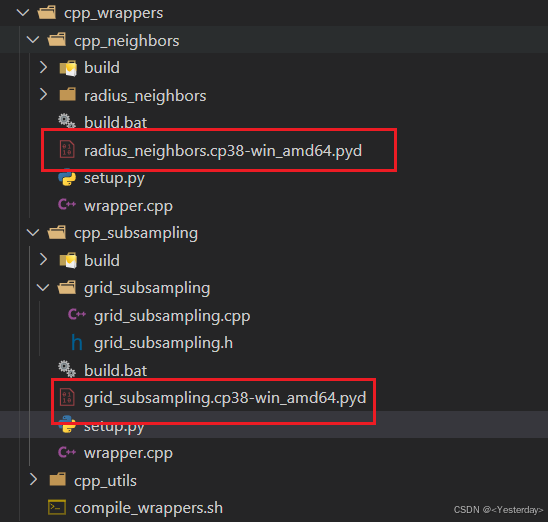
二、问题解决

按照上图方式使用该模块时发现报错“module not found error”,该问题是由第三级目录(cpp_subsampling和cpp_neighbors)路径不匹配导致的。

只需将上图第一个红框中的目录改成radius_neighbors然后按照如下方式引用即可成功。
import cpp_wrappers.cpp_subsampling.grid_subsampling as cpp_subsampling
import cpp_wrappers.cpp_neighbors.radius_neighbors as cpp_neighbors


 7632
7632

 被折叠的 条评论
为什么被折叠?
被折叠的 条评论
为什么被折叠?
 到【灌水乐园】发言


