


C++ 核心编程
本阶段主要针对C++面向对象编程技术做详细讲解,探讨C++中的核心和精髓。
内存分区模型
C++程序在执行时,将内存大方向划分4个区域
- 代码区: 存放函数的二进制代码,由操作系统进行管理
- 全局区: 存放全局变量和静态变量以及常量
- 栈区: 由编译器自动分配内存释放,存放函数的参数值,局部变量等
- 堆区:由程序 员分配和释放,若程序员不释放,程序结束时由操作系统回收
内存四区意义:
不同区域存放的数据,赋予不用的生命周期,给我们更大的灵活编程。
程序运行前
在程序编译后,生成了exe可执行程序,未执行程序前分为两个区域
代码区:
- 存放CPU执行的机器指令
- 代码区是共享的,共享的目的是对于频繁别执行的程序,只需要在内存中有一份代码即可
- 代码区是只读的,便其只读的原因是防止程序意外的修改了它的指令
全局区:
- 全局变量和静态变量存放在此
- 全局区还包含常量区、字符串常量区和其他常量区也存放在此
该区域的数据在程序结束后由操作系统释放
#include <iostream>
using namespace std;
// 定义全局变量
int g_a = 10;
int g_b = 10;
// const 修改的全局变量
const int c_g_a = 10;
const int c_g_b = 10;
int main() {
// 局部变量
int a = 10;
int b = 10;
// 打印地址
cout << "局部变量a的地址为:" << (int)&a << endl;
cout << "局部变量b的地址为:" << (int)&b << endl;
cout << "全局变量g_a的地址为:" << (int)&g_a << endl;
cout << "全局变量g_b的地址为:" << (int)&g_b << endl;
// 静态变量
static int s_a = 10;
static int s_b = 10;
cout << "静态变量s_a的地址为:" << (int)&s_a << endl;
cout << "静态变量s_b的地址为:" << (int)&s_b << endl;
// 常量
// 字符串常量
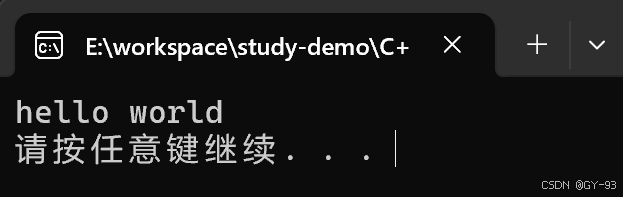
cout << "字符串常量的地址为:" << (int)&"hello world" << endl;
//const修改的变量
// const修改的全局变量
cout << "全局常量c_g_a的地址为:" << (int)&c_g_a << endl;
cout << "全局常量c_g_b的地址为:" << (int)&c_g_b << endl;
// const 修饰的局部变量
const int c_l_a = 10;
const int c_l_b = 10;
cout << "局部常量c_g_a的地址为:" << (int)&c_l_a << endl;
cout << "局部常量c_g_b的地址为:" << (int)&c_l_b << endl;
return 0;
}
结果:
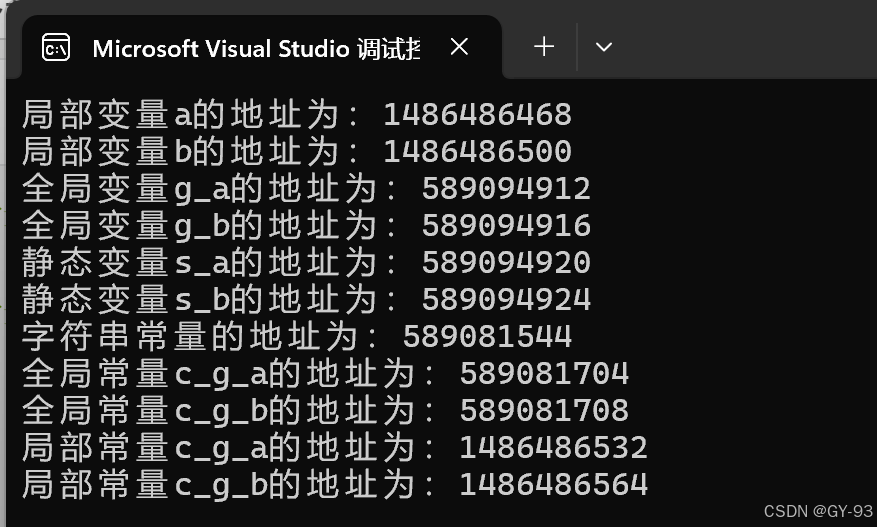

总结:
- C++中在程序运行前分为全局区和代码区
- 代码区特点是共享和只读
- 全局中存放全局变量、静态变量、常量
- 常量区中存放const修饰的全局常量 和 字符创常量
程序运行后
栈区
由编译自动分配内存,存放函数的参数值,局部变量等
注意事项:不要返回局部变量的地址,栈区开辟的数据由编译器自动释放
#include <iostream>
using namespace std;
int* func() {
// 局部变量, 存放在栈区, 栈区的数据在函数执行完后自动释放
int a = 10;
// 返回局部变量的地址
return &a;
}
int main() {
// 接受func函数的返回值
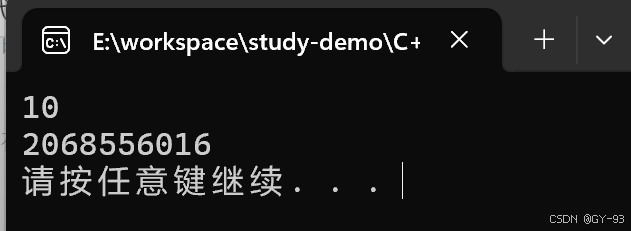
int* p = func();
cout << *p << endl; // 第一次可以打印正确的数字,是因为编译器做了保留
cout << *p << endl; // 第二次这个数据就不在保留了
system("pause");
return 0;
}
在windwos32未上运行结果:
但是我发现一个问题, 在windows64位上运行结果如下, 打印了很多次,但是结果还是正常的:
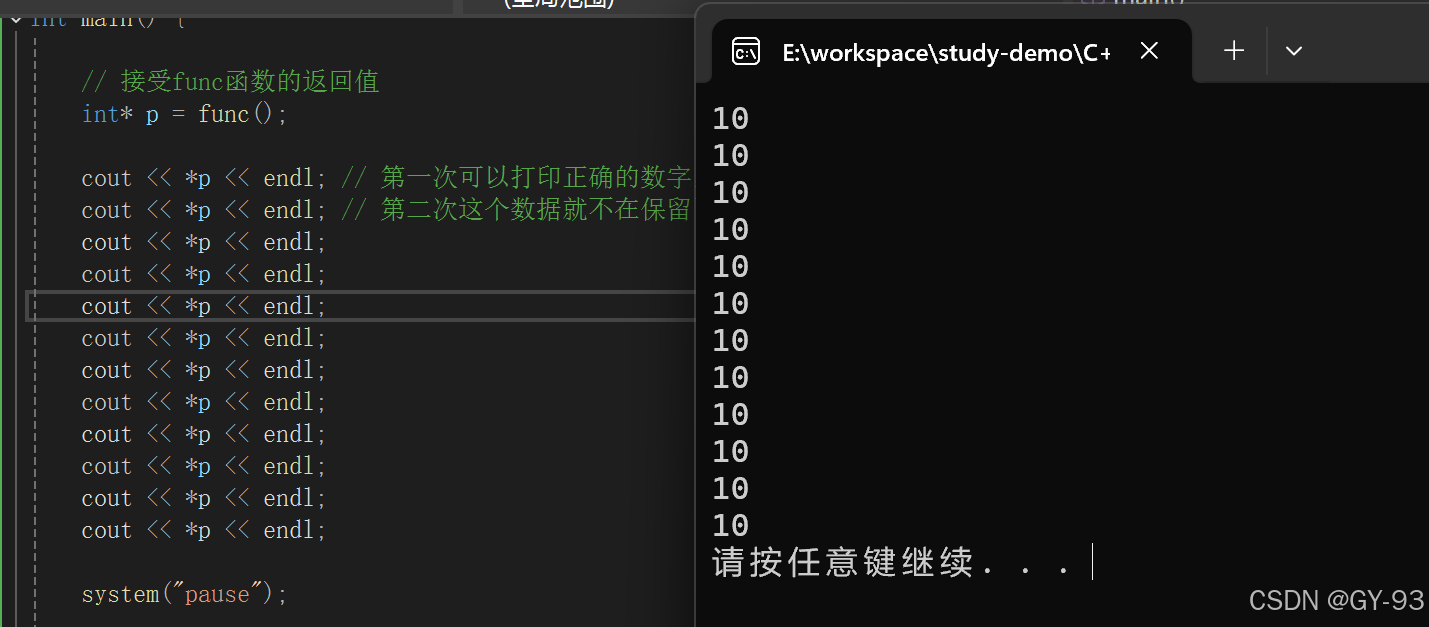
**这个可能是由于系统的一些差异造成的,总之不推荐大家返回局部变量的地址 **
注意: 函数中形参数据也会放在栈区
堆区
由程序员分配释放,若程序员不释放,程序结束时由操作系统回收
在C++中主要利用new 在堆区开辟内存
#include <iostream>
using namespace std;

int* func1() {
	// 利用new关键字, 可以将数据开辟到堆区
	// 指针 本质也是局部变量, 放到栈上, 指针保留的数据就是放在堆区
	int* a = new int(10);

	return a;
}

int main() {
	int* p = func1();

	cout << *p << endl;
	cout << *p << endl;

	system("pause");


	return 0;
}
new操作符
C++ 中利用new操作符在堆区开辟数据
堆区开辟的数据, 由程序员手动开辟, 手动释放, 释放利用操作符delete
语法: new 数据类型
利用new创建的数据, 会返回该数据对应的指针类型
#include <iostream>
using namespace std;

int * func2() {

	int* a = new int(10);

	return a;
}

void test() {
	// 创建10整形数据的数组, 在堆区
	int* arr = new int[10]; // 10代表数组有10个元素

	for (int i = 0; i < 10; i++)
	{
		arr[i] = i + 100;
	}

	for (int i = 0; i < 10; i++)
	{
		cout << arr[i] << endl;
	}

	// 释放堆区数组
	// 释放数组的时候, 要加[]才可以, 加[] 才知道要释放的是数组
	delete[] arr;
}

int main() {

	int* p = func2();

	cout << *p << endl;
	cout << *p << endl;
	cout << *p << endl;

	// 堆区的数据, 由程序员管理开辟, 程序员管理释放
	// 如果想释放堆区的数据, 利用关键字 delete

	// 释放 p的内存
	delete p;

	// 在释放内存后, 你在访问p的话就是访问坏内存, 会报错
	//cout << *p << endl;


	test();

	system("pause");
	return 0;
}
引用
引用的基本使用
作用: 给变量起别名
语法: 数据类型 &别名 = 原名
#include <iostream>
using namespace std;
int main() {
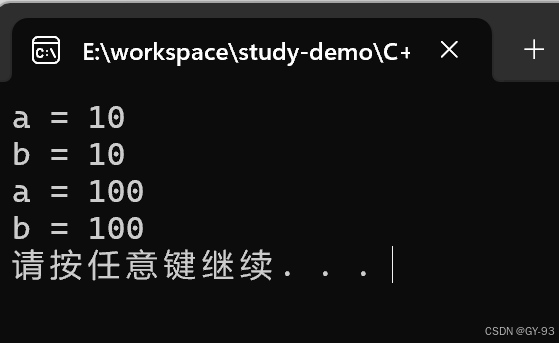
int a = 10;
int& b = a;
cout << "a = " << a << endl;
cout << "b = " << b << endl;
b = 100;
cout << "a = " << a << endl;
cout << "b = " << b << endl;
system("pause");
return 0;
}
结果:
引用注意事项
- 引用必须初始化
- 引用在初始化后, 不可以改变
#include <iostream>
using namespace std;

int main() {

	int a = 10;
	int b = 20;

	//int& c;// 引用必须初始化
	int& c = a; // 一旦初始化后, 就不可修改

	// 这个是赋值操作, 不是修改引用
	c = 20;

	cout << "a = " << a << endl;
	cout << "b = " << b << endl;
	cout << "c = " << c << endl;

	system("pause");

	return 0;
}
输出结果:
引用做函数参数
作用: 函数传参时, 可以利用引用的技术形参修饰实参
优点: 可以简化指针修改实参
#include <iostream>
using namespace std;
// 值传递
void swap(int a, int b) {
int temp = a;
a = b;
b = temp;
}
// 指针传递
void swap2(int* a, int* b) {
int temp = *a;
*a = *b;
*b = temp;
}
// 引用传递
void swap3(int& a, int& b) {
int temp = a;
a = b;
b = temp;
}
int main() {
int a = 10;
int b = 20;
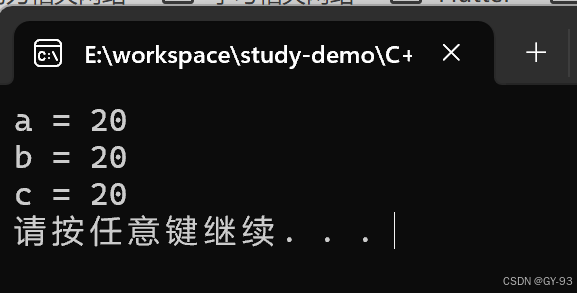
swap(a, b);
cout << "a = " << a << endl;
cout << "b = " << b << endl;
cout << "==========================" << endl;
int c = 10;
int d = 20;
swap2(&c, &d);
cout << "c = " << c << endl;
cout << "d = " << d << endl;
cout << "==========================" << endl;
int e = 10;
int f = 20;
swap3(e, f);
cout << "e = " << e << endl;
cout << "f = " << f << endl;
}
总结:通过引用参数产生的效果同按地址传递是一样的, 引用的语法更清楚简单
引用做函数返回值
作用: 引用是可以作为喊出的返回值存在的
注意:不要返回局部变量引用
用法: 函数调用作为左值
#include <iostream>
using namespace std;
int & test01() {
int a = 10;
return a;
}
int& test02() {
static int a = 10;
return a;
}
int main() {
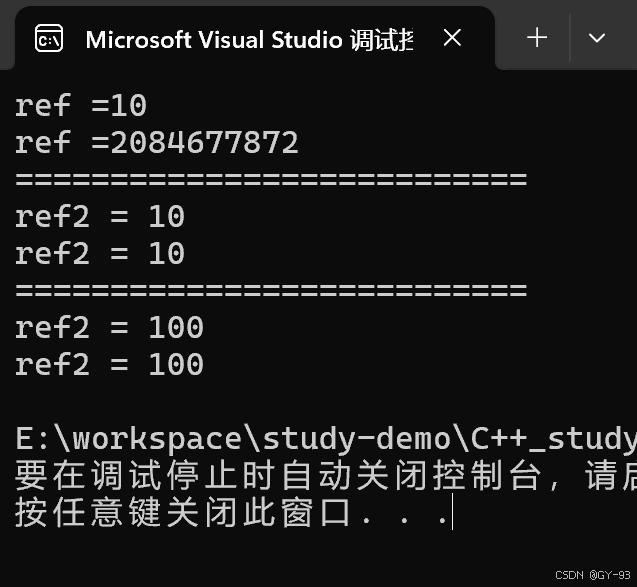
int& ref = test01();
cout << "ref =" << ref << endl;
cout << "ref =" << ref << endl;
cout << "===========================" << endl;
int& ref2 = test02();
cout << "ref2 = " << ref2 << endl;
cout << "ref2 = " << ref2 << endl;
cout << "===========================" << endl;
test02() = 100;
cout << "ref2 = " << ref2 << endl;
cout << "ref2 = " << ref2 << endl;
return 0;
}
输出结果:
引用的本质
本质:引用的本质在C++内部实现是一个指针常量
#include <iostream>
using namespace std;

void func(int& ref) {

	ref = 100; // ref是引用,转换为 *ref = 100;
}

int main() {

	int a = 10;
	// 自动转换为 int *const ref = &a; 指针常量是指针指向不可改,也说明为什么引用不可更改
	int& ref = a;

	ref = 20;

	cout << "a :" << a << endl;
	cout << "ref :" << ref << endl;

	func(a);

	return 0;
}
输出结果:
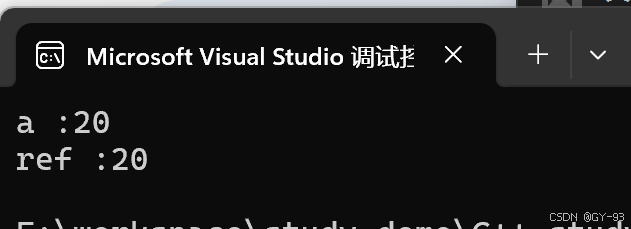
**总结:C++推荐引用技术,因为语法简单,引用本质是指针常量,但是所有的指针操作编译器帮我们做了 **
常量引用
作用: 常量引用主要用来修饰形参,防止误操作
在函数形参列表中,可以加 const 修饰形参, 防止形参改
变实参。
#include <iostream>
using namespace std;

// const 修饰不能修改
void showValue(const int& v) {
	//v += 18;
	cout << v << endl;
}

int main() {

	//int& ref = 10; // 引用本身需要一个合法的内存空间,因此这行错误
	// 加入const就可以了, 编译器优化代码 int temp  = 10; const int &ref = temp;

	const int& ref = 10; // 必须引用一块合法的内存

	//ref = 100; // 加入const后不可以修改变量
	cout << ref << endl;


	// 函数中利用常量引用防止误操作修改实参
	int a = 10;
	showValue(a);

	system("pause");


	return 0;
}
函数提高
函数的默认参数
在C++中,函数的形参列表中的形参是可以有默认参数的。
语法:返回值类型 函数名 (参数 = 默认值){}
int func(int a, int b = 10, int c = 10) {
	return a + b + c;
}

int func2(int a = 10, int b = 10);
int func2(int a, int b) {
	return a + b;
}
- 如果某个位置参数有默认值, 那么从这个位置往后, 从左向右必须都要有默认值
- 如果函数声明有默认值,函数实现的时候就不能有默认参数
函数的占位参数
C++中函数的形参列表里可以有占位参数,用来占位,调用函数时必须填补该位置
语法:返回值类型 函数名 (参数类型) {}
在现阶段函数的占位参数存在意义不大,但是后面的课程中会用到该技术
#include <iostream>
using namespace std;

void func(int a, int) {
	cout << "that is func" << endl;
}

int main() {
	func(10, 10);// 占位参数必须填补


	system("pause");

	return 0;

}
函数的重载
函数重载的概述
作用: 函数名可以相同, 提高复用性
函数重载满足条件:
- 同一个作用于下
- 函数名相同
- 函数参数类型不同 或者 参数个数不同 或则 参数顺序不同
注意: 函数的返回值不可以作为函数重载的条件
#include <iostream>
using namespace std;
//1. 函数的参数个数不一致
void func() {
cout << "func" << endl;
}
void func(int a) {
cout << "func(int a)" << endl;
}
// 2, 函数参数类型不一样
void func(double a) {
cout << "func(double a)" << endl;
}
// 3. 参数顺序不一致
void func(int a, double b) {
cout << "func(int a, double b)" << endl;
}
void func(double b, int a) {
cout << "func(double b, int a)" << endl;
}
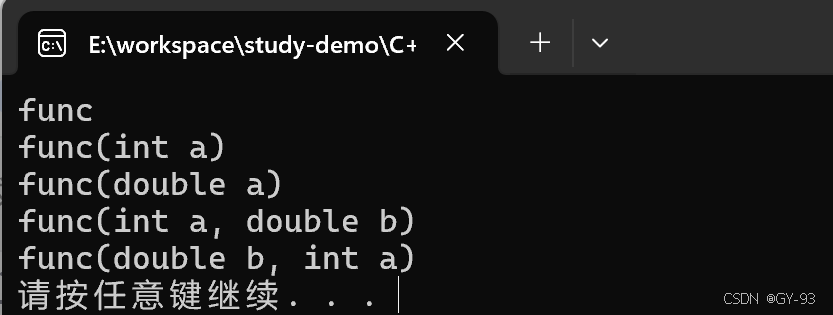
int main() {
func();
func(10);
func(3.14);
func(1, 3.14);
func(3.14, 1);
system("pause");
return 0;
}
结果:
函数重载的注意事项
- 引用作为重载条件
- 函数重载碰到默认参数
#include <iostream>
using namespace std;

// 1、引用作为函数重载条件
void func(int& a) { //加入我们直接传递一个10,  int &a = 10 这句代码是不能通过的(引用必须是一块合法的内存空间)
	cout << "func(int& a)" << endl;
}

void func(const int& a) { // coonst int &a =10 是合法的, 编译器做了优化会创建一个临时的变量接受这个常量
	cout << "func(const int& a)" << endl;
}
//注意: 引用  加不加const是可以作为重载的条件的


// 函数重载遇到默认参数
void test_func(int a, int b = 10){
	cout << "test_func(int a, int b)" << endl;
}

void test_func(int a) {
	cout << "test_func(int a)" << endl;
}

int main() {

	int a = 10;

	func(a);

	func(10);

	// 默认参数
	//test_func(20) //  调用报错, 当函数重载碰到默认参数, 出现二义性, 报错。尽量避免这种情况
	// 函数重载的时候,尽量不要写默认参数,避免这种情况出现


	system("pause");
	return 0;
}
类和对象
C++面向对象三大特性: 封装、继承、多太
C++认为万事万物都皆对象, 对象上有期属性和行为
封装
封装的意义
封装是C++面向对象的三大特性之一
封装的意义:
- 将属性和行为作为一个整体, 表现生活中的事务
- 将属性和行为加以权限控制
封装的意义一:在设计类的时候,属性和行为写在一起,表现事务
语法:class 类名 { 访问权限: 属性/行为 };
示例: 设计一个圆类, 求圆的周长
#include <iostream>
using namespace std;

const double PI = 3.14;

class Circle
{
public:
	// 半径
	int m_r;
	// 获取圆的周长
	double calculateZC() {
		return 2 * PI * m_r;
	}

};

int main() {

	// 实例化: 通过一个类, 创建一个对象的过程
	Circle circle;
	circle.m_r = 10;

	cout << "圆的周长为: " << circle.calculateZC() << endl;

	system("pause");
	return 0;
}
封装的意义二:
类在设计的时, 可以把属性和行为在不同的权限下,加以控制
访问权限有三种:
public: 公共权限(类内可以访问, 类外可以访问)protected:保护权限(类内可以访问, 类外不可以访问;子类可以访问父类中的保护内容)private:私有权限(类内可以访问, 类外不可以访问;子类不可以访问父类中的私有内容)
#include <iostream>
using namespace std;
#include <string>

class Person
{
public:
	// 名称
	string m_Name;

private:
	string m_Card;
	string m_Password;
};


int main() {

	Person p1;
	p1.m_Name = "张三"; // 公共权限可以方法

	//p1.m_Card = "奔驰"; // 保护权限外界无法访问
	//p1.m_Password = "1223";// 私有权限外界无法访问


	system("pause");
	return 0;
}
struct 和 class的区别
在C++中struct和class唯一的区别就在于默认的访问权限不同
- struct默认权限是公共权限
- class默认权限为私有
#include <iostream>
using namespace std;

class C1 {
	int m_A; // 默认是私有权限
};


struct C2
{
	int m_A; // 默认是公共权限
};

int main() {

	C1 c1;
	//c1.m_A = 100; // 访问报错, 因为默认是私有权限,外界不能方法

	C2 c2;
	c2.m_A = 100; // 默认是公共权限, 所以可以访问


	system("pause");
	return 0;
}
成员属性设置为私有
优点:
- 将所有成员属性设置为私有, 可以自己控制读写权限
- 对于读写权限, 我们可以检测数据的有效性
#include <iostream>
using namespace std;
#include <string>

class Person {
private:
	string m_Name;
	int m_Age = 18;

public:
	void setName(string name) {
		m_Name = name;
	}

	string getName() {

		return m_Name;
	}

	void setAge(int age) {
		if (age < 0 || age > 150)
		{
			cout << "您设置的年龄不符合要求" << endl;
			return;
		}
		m_Age = age;
	}

	int getAge() {

		return m_Age;
	}
};

int main() {

	Person p;
	p.setName("张三");
	p.setAge(160);

	cout << "姓名:" << p.getName() << "   年龄:" << p.getAge() << endl;


	system("pause");
	return 0;
}
案例: 点和圆的关系
// 点的类
#pragma once
#include <iostream>
using namespace std;

class Point
{
public:
	void setX(int x);
	int getX();

	void setY(int y);
	int getY();

private:
	int m_X;
	int m_Y;
};


#include "Point.h"

void Point::setX(int x) {
	m_X = x;
}

void Point::
setY(int y) {
	m_Y = y;
}

int Point::
getX() {

	return m_X;
}

int Point::
getY() {

	return m_Y;
}


// 圆的类
#pragma once // 防止头文件重复包含的意思
#include <iostream>
using namespace std;
#include "Point.h"

class Circle {
private:

// 圆心
	Point m_Center;
// 半径
	double m_Radius;

public:
	void setCenter(Point point);
	Point getCenter();

	void setRadius(double radius);
	double getRadius();

	/// <summary>
	///判断点和圆的关系
	/// </summary>
	void isPointAndCircle(Point point);
};

#include "Circle.h"
#include <cmath>

void Circle:: // 给函数添加一个作用域, 告诉这个函数是Circle类下面的一个函数
setCenter(Point point) {
	m_Center = point;
}

Point Circle::getCenter() {
	return m_Center;
}

void Circle::
setRadius(double radius) {
	m_Radius = radius;
}

double Circle::getRadius() {
	return m_Radius;
}

void Circle::isPointAndCircle(Point point) {
	// 首先计算出圆心到点的距离
	double xLength = (m_Center.getX() - point.getX()) * (m_Center.getX() - point.getX());
	double yLength = (m_Center.getY() - point.getY()) * (m_Center.getY() - point.getY());
	double result = std::sqrt(xLength + yLength);

	if (result == m_Radius)
	{
		cout << "点在圆上" << endl;
	}
	else if (result > m_Radius)
	{
		cout << "点在圆外" << endl;
	}
	else
	{
		cout << "点在圆内" << endl;
	}
}

测试代码:
#include <iostream>
using namespace std;
#include "Point.h"
#include "Circle.h"

int main() {

	// 测试
	Point point;
	point.setX(4);
	point.setY(2);

	Point center;
	center.setX(10);
	center.setY(10);
	Circle circle;
	circle.setCenter(center);
	circle.setRadius(10);

	circle.isPointAndCircle(point);

}
对象的初始化和清理
- 在生活中我们买的电子产品都基本会有出厂设置, 在某一天我们不用的时候也会删除一些自己信息数据保证安全
- C++中的面向对象来源于生活,每个对象也都会有初始化设置以及对象的销毁前的清理数据的设置。
构造函数和析构函数
对象的初始化和清理也是两个非常重要的安全问题
-
一个对象或者变量没有初始状态, 对其使用后果未知
-
同样的使用完一个对象或者变量,没有及时清理, 也会造成一定的安全问题
C++利用构造函数和析构函数解决上述问题, 这两个函数将会被编译器自动调用,完成对象的初始化和清理工作。
对象的初始化和清理工作是编译器需要我们做的事情,因此如果我们不提供构造和析构,编译器会提供,编译器提供的构造函数析构函数是空实现
- 构造函数: 主要用于创建对象时为对象的成员属性赋值, 构造函数由编译器自动调用,无需手动调用
- 析构函数:主要作用在与对象销毁前系统自动调用,执行一些清理工作。
*构造函数语法:类名(){}
- 构造函数,没有返回值也不写void
- 函数名与类名相同
- 构造函数可以有参数,因此可以 发生重载
- 程序在调用对象时候会自动调用构造,无须手动调用,而且只会调用一次
析构函数语法:~类名(){}
- 析构函数,没有返回值也不写void
- 函数名称与类名相同,在名称前面加上符号~
- 析构函数不可以有参数,因此不可以发生重载
- 程序在对象销毁前会自动调用析构函数,无须手动调用而且只会调用一次
#include <iostream>
using namespace std;
// 创建一个对象
class Person {
public:
/// <summary>
/// 无参构造方法
/// </summary>
Person() {
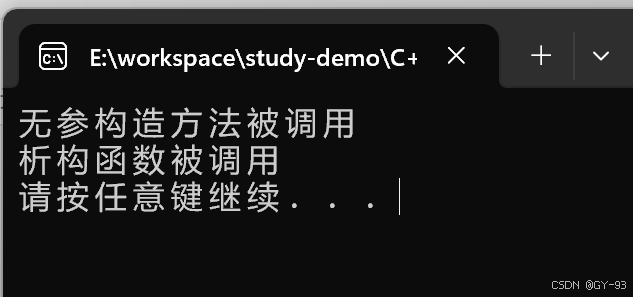
cout << "无参构造方法被调用" << endl;
}
~Person()
{
cout << "析构函数被调用" << endl;
}
};
void test() {
Person person; // 调用无参构造函数
}
int main() {
test();
system("pause");
return 0;
}
输出结果:
构造函数的分类及调用
两种分类方式:
- 按参数分:有参构造和无参构造
- 按类型分: 普通构造函数和拷贝函数
三种调用方式:
- 括号法
- 显示发
- 隐式转换法
class Person1 {
public:
	Person1() {
		cout << "调用无参构造函数" << endl;
	}

	Person1(int a) {
		age = a;
		cout << "Person1的有参构造函数被调用===" << age << endl;
	}

	// 拷贝构造函数
	Person1(const Person1 &p) {
		// 将传入的对象的属性拷贝到当前对象上
		age = p.age;
		cout << "person1的拷贝都早函数被调用===" << age << endl;
	}

	~Person1()
	{
		cout << "Persons1的析构函数被调用" << endl;
	}
	int age;
};
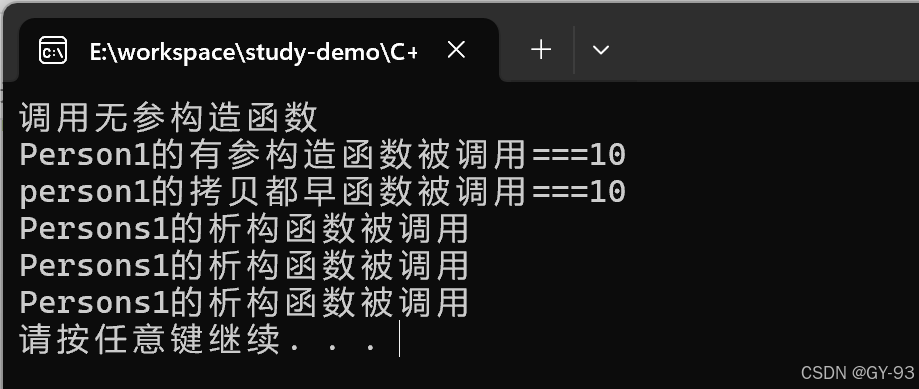
括号发调用:
 	void test01() {
	//1.括号法
	Person1 p; // 调用默认构造函数
	Person1 p2(10); // 有参拷贝函数调用
	Person1 p3(p2); // 拷贝函数调用
}
输出结果:
注意:调用默认构造函数的时候后面不需要加括号,Person1 p()这种是错误的, 如果这么写的话,编译器会认为是一个函数的申明(void func ()),不会认为在创建对象
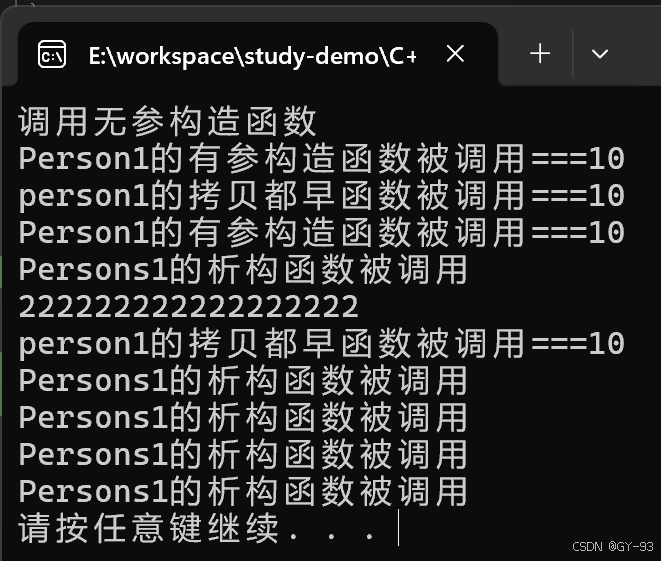
显示法调用:
void test02() {
	// 显示法
	Person1 p; // 默认构造器
	Person1 p2 = Person1(10); // 有参构造
	Person1 p3 = Person1(p2); // 拷贝构造

Person1(10);// 匿名对象 特点;当前执行结束后,系统会立即回收掉匿名对象
cout << "222222222222222222" << endl;
}
输出结果:
注意事项: Person1(p3) 不要利用拷贝构造函数,初始化匿名对象, 编译器会认为 Peron1(p3) === Person1 p3;
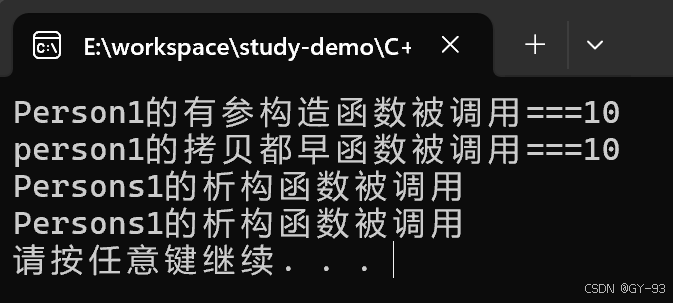
隐私转换法
void test03() {

	Person1 p = 10; // 相当于 写了 Person1 p = Person1(10)有参构造方法
	Person1 p1 = p; // 调用拷贝构造函数
}
输出结果:
拷贝函数的调用时机
C++中拷贝函数调用时机通常有三种情况:
- 使用一个已经创建完毕的对象来初始化一个新对象
- 值传递的方式给函数传值
- 以值传递方式返回局部对象
class Person_t {
public:
	int age;
	Person_t() {
		cout << "Person_t的无餐构造函数被调用" << endl;
	}

	Person_t(int age) {
		age = age;
		cout << "Person_t的有参构造函数被调用" << endl;
	}
	Person_t(const Person_t& p) {
	age = p.age;
	cout << "Person_t的拷贝构造函数被调用" << endl;
	}
	~Person_t()
	{
		cout << "Person_t的析构函数被调用" << endl;
	}
};
** 使用一个已经存在的对象去初始化一个新对象:**
// 使用一个已经创建完毕的对象来初始化一个新对象
void test_t() {
	Person_t p(10);
	Person_t p1(p);

	cout << "p1的年龄:" << p1.age << endl;
}
值传递方式给函数参数传值:
// 2、值传递的方式给函数参数传值
void doWork(Person_t p) {

}

void test_t02() {
	Person_t p;
	doWork(p);
}

// 值传递是会报实参的值拷贝一份给形参, 所以上述代码把p作为参数传递给函数的时候, 这个时候doWork函数的形参会拷贝一份实参,处罚形参的拷贝构造函数
输出结果:
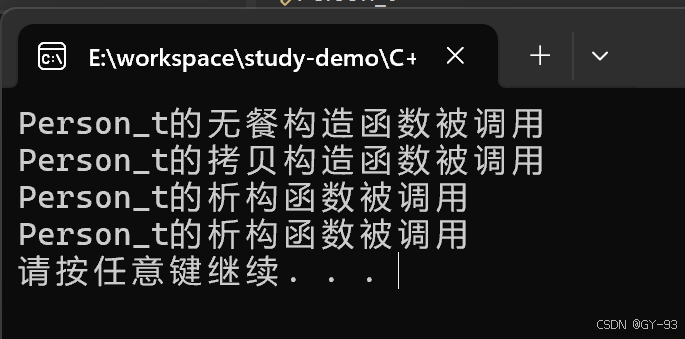
值传递的方式返回局部对象:
// 3、值方式返回的局部对象
Person_t doWork2() {
	Person_t p;

	return p;
}

void test_t03() {
	Person_t p = doWork2();
}


int main() {
	test_t03();

	system("pause");
	return 0;
}
输出结果:
我使用的是比较新的 编译器, 查询了相关资料, 这种情况没有调用拷贝构造函数, 可能是 编译器应用了RVO或NRVO做了编译优化 。
构造函数的调用规则
默认情况下, C++编译器至少给一个类添加3个函数
- 默认构造函数(无参,函数体为空)
- 默认析构函数(无参, 函数体为空)
- 默认拷贝构造函数, 对象属性进行值拷贝
构造函数调用规则如下:
- 如果用户定义有参构造函数, C++不在提供默认无参构造,但是会提供默认拷贝函数
- 如果用户定义拷贝构造函数, C++不会在提供其他构造函数
class Person02 {
public:
	int age;

	Person02() {
		cout << "Person02的无参构造函数被调用了" << endl;
	}

	Person02(int age) {
		age = age;
		cout << "Person02的有参构造函数被调用了" << endl;
	}

	~Person02()
	{
		cout << "Person02的析构函数被调用" << endl;
	}

};

void test01() {
	// 注释掉无参构造方法,即可测试
	Person02 p;

	Person02 p1(10);
	Person02 p2(p1);
}

void test02() {
	// 注释掉无参和有参构造方法, 保留拷贝构造方法, 即可测试
	Person02 p;

	Person02 p1(10);
}
深拷贝与浅拷贝
浅拷贝: 简单的赋值操作
深拷贝: 在堆区重新申请空间, 进行拷贝操作
#include <iostream>
using namespace std;

class Person03 {
public:
	int m_Age;
	int* m_Height;

	Person03() {
		cout << "无参构造函数被调用" << endl;
	}

	Person03(int age) {
		m_Age = age;
		m_Height = new int(200);
	}

	~Person03() {
		cout << "析构函数被调用" << endl;
	}
};

void test04() {
	Person03 p1(10);

	Person03 p2(p1);

	cout << "p1的年龄:" << p1.m_Age << "   p1的身高:" << *p1.m_Height << endl;

	cout << "p2的年龄:" << p2.m_Age << "   p2的身高:" << *p2.m_Height << endl;
}

int main() {

	test04();


	system("pause");
	return 0;
}
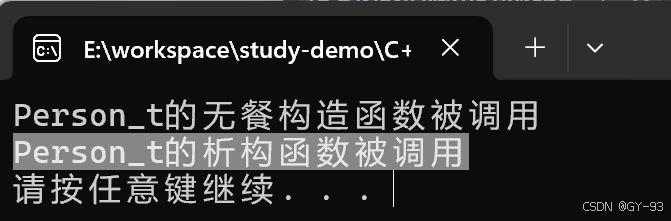
输出结果:

由上面结果可知, 当我们没有实现拷贝构造函数时,系统给我们默认实现了拷贝构造函数, 但是上面还有一个问题, 我们在堆区申请了内存,我们也需要释放, 改造代码如下:
// 修改析构函数如下:

	~Person03() {
		if (m_Height != NULL)
		{
			delete m_Height;
			m_Height = NULL;
		}
		cout << "析构函数被调用" << endl;
	}
我们运行之后,发现程序崩溃了,报如下错误:
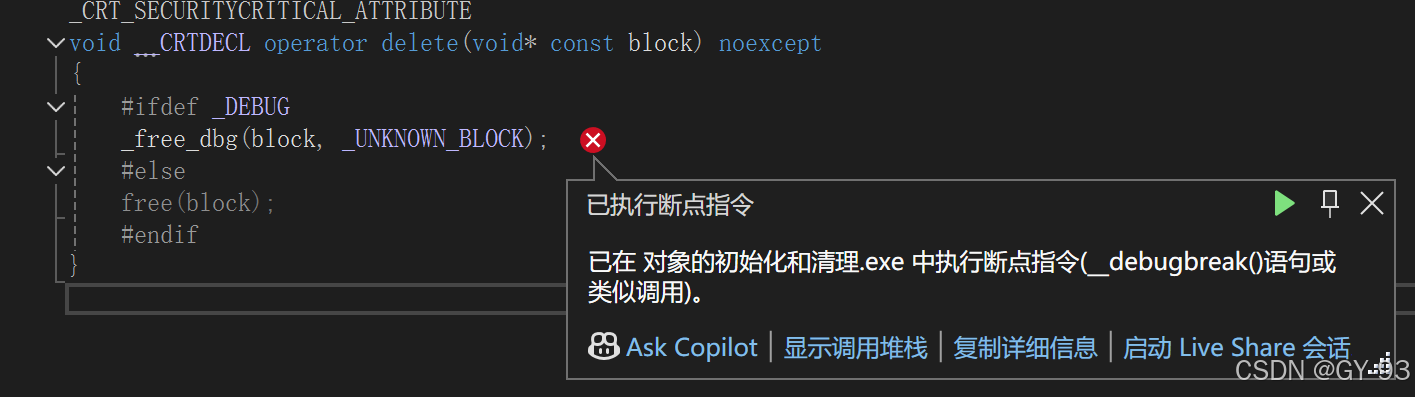
分析:这是由于浅拷贝造成的问题, 系统默认实现的拷贝函数,只能浅拷贝值, 所以当我们有一个堆区内存开辟的变量, 拷贝的时候,只是拷贝的地址值。但是我们在析构函数中确释放了多遍。
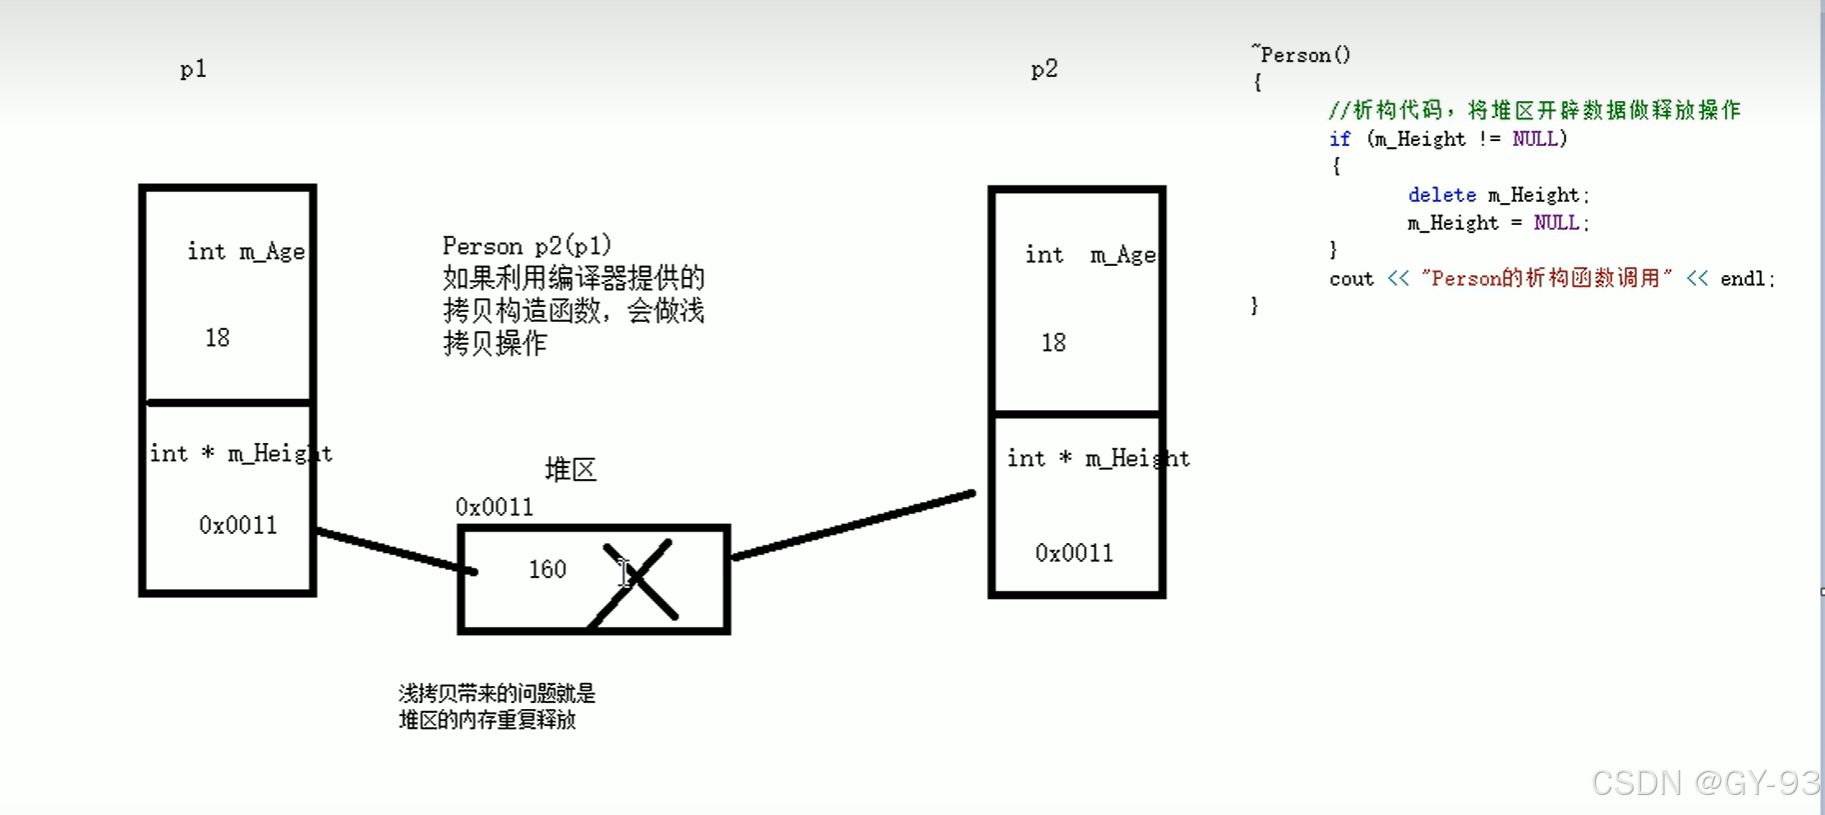
解决方案: 浅拷贝造成的这个问题,我们可以利用深拷贝来解决
// 重写拷贝函数
Person03(const Person03 &p) {
	cout << "拷贝函数被调用了" << endl;
	m_Age = p.m_Age;
	//m_Height = p.m_Height; 编译器默认实现的是这行代码
	m_Height = new int(*p.m_Height);
}
输出结果:
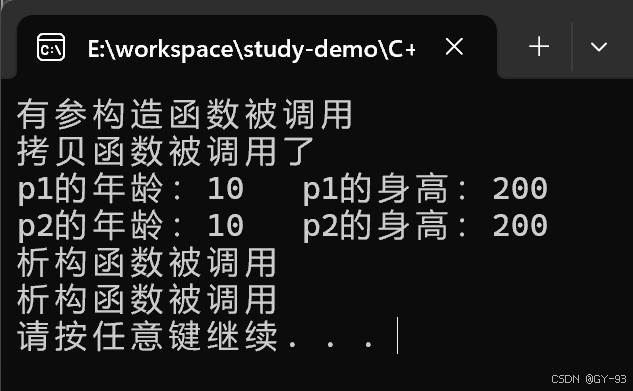
总结: 如果属性中有堆区开辟的,一定要自己提供拷贝构造函数,防止浅拷贝带来的问题。
初始化列表
作用:
C++提供了初始化列表语法,用来初始化属性
语法:构造函数(): 属性1(值1),属性2(值)...{}
#include <iostream>
using namespace std;
class Person05 {
public:
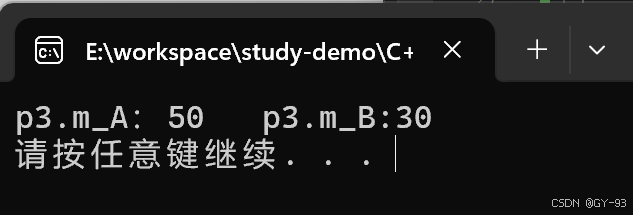
Person05() :m_A(10), m_B(20), m_C(30) {
}
Person05(int a, int b, int c) : m_A(a), m_B(b), m_C(c) {
}
void PerintPerson05() {
cout << "mA" << m_A << endl;
cout << "mB" << m_B << endl;
cout << "mC" << m_C << endl;
}
private:
int m_A;
int m_B;
int m_C;
};
int main() {
Person05 p;
p.PerintPerson05();
cout << "=================================" << endl;
Person05 p1(30, 20, 10);
p1.PerintPerson05();
system("pause");
return 0;
}
类对象作为类成员
C++类中的成员可以是另一个类的对象,我们称该成员为对象成员
例如:
class A{}
class B {
	A a;
}
B类中有对象A作为成员, A为对象成员
那么当创建B对象时, A与B的构造函数和析构函数是谁先谁后?
#include <iostream>
using namespace std;
#include <string>

class Phone {
	string p_Name;

public:
	Phone(string name) {
		p_Name = name;

		cout << "Phone的有参构造函数被调用了" << endl;
	}

	~Phone(){
		cout << "Phone的析构函数被调用了" << endl;
	}
};

class Person07 {

	string m_Name;

	Phone m_Phone;

public:
	//  m_Phone(pName)  =    Phone p_Name = pName 隐式转换法
	Person07(string name, string pName) : m_Name(name), m_Phone(pName) {

		cout << "Person07的有参构造函数被调用" << endl;
	}

	~Person07() {
		cout << "Person07的析构函数被调用了" << endl;
	}
};

void test07() {

	Person07 p("张三", "李四");
}

int main() {

	test07();


	system("pause");
	return 0;
}
输出结果:
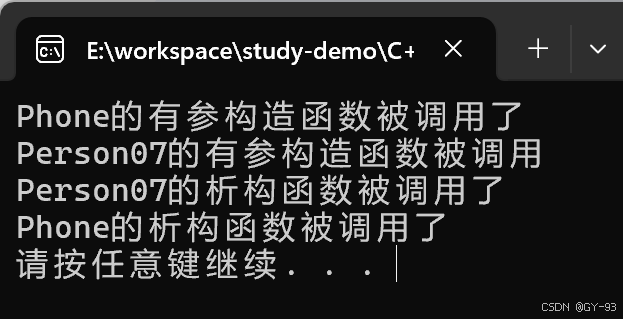
当其他类的对象作为本类成员时,构造时候先构造类对象,在构造自身,而析构函数则和构造函数的调用顺序相反
静态成员
静态成员就是在成员变量和成员函数前面加上关键字static,称为静态成员
静态成员分为:
- 静态成员变量
- 所有对象共享一份数据
- 在编译阶段分配内存
- 类内声明, 类外初始化
- 静态成员函数
- 所有对象共享一个函数
- 静态成员函数只能访问静态成员变量
#include <iostream>
using namespace std;

class Student {
public:
	// 类内申明
	static int m_A;
	// 静态成员变量也是有访问权限的

	static int getm_B() {
		return m_B;
	}
private:
	static int m_B;
};

// 类外初始化
int Student::m_A = 10;
int Student::m_B = 203;


int main() {

	Student s;

	cout << s.m_A << endl;

	Student s2;
	s2.m_A = 2000;
	cout << s.m_A << endl;
	cout << Student::m_A << endl;

	// 私有的静态属性是无法通过对象访问的, 只能通过静态成员函数来进行访问
	cout << Student::getm_B() << endl;

	system("pause");
	return 0;
}
注意: 类外是访问不到私有的静态成员变量的
静态成员函数也有两种访问方法:一种是通过对象; 一种是通过类名
// 通过对象访问
s.getm_B();
// 通过类名方法
Student::getm_B()
静态成员函数也是有作用域的, 如果是私有的,类外是不可以访问的; 静态成员函数也是共享的
C++对象模型和this指针
成员变量和成员函数分开储存
在C++中,类内的成员变量和成员函数分开存储, 只有非静态成员变量才属于类的对象上
class Person {

};

void test() {
	Person p;
	// 空对象占用内存空间为: 1
	// C++编译器会给每个空对象也分配一个字节空间,是为了区分空对象占内存的位置
	// 每个空对象应该有独一无二的地址
	cout << "空对象所占内存大小: " << sizeof(p) << endl;
}
输出 结果:

class Person {
	int m_age;

};
void test01() {
	Person p;
	cout << "包含一个非静态成员属性的对象所占内存大小: " << sizeof(p) << endl;
}
输出结果:

class Person {
	int m_age;

public:
//函数也不占对象空间,所有的对象共享一个函数实例
	Person() {
	}
	Person(int age) {
		m_age = age;
	}
};
输出结果:
class Person {
int m_age;
public:
Person() {
}
Person(int age) {
m_age = age;
}
static void test() {
cout << "静态函数" << endl;
}
};
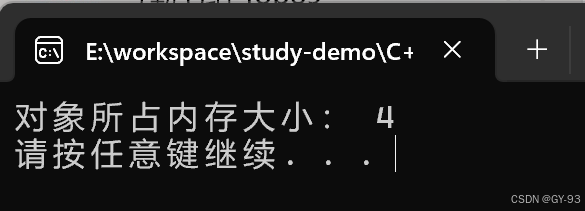
void test03() {
Person p;
cout << "对象所占内存大小: " << sizeof(p) << endl;
}
输出结果:
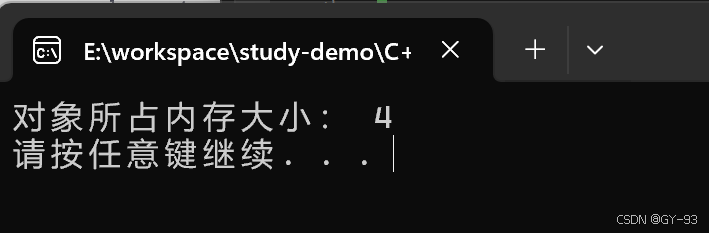
由上述实例代码可知:
- 非静态成员变量, 属于类的对象上
- 静态成员变量、非静态成员函数、静态成员函数,不属于类的对象上。
this指针概念
经过上一节的学习,我们知道在C++中成员变量和成员函数是分开存储的
每一个非静态成员函数只会诞生一份函数实例,也就是多个同类型的对象会公用一块代码
问题:那么这一块内存是如何区分哪个对象调用自己的呢?
C++通过提供特殊的对象指针,this指针, 解决上述问题。this指针指向被调用的成员函数所属的对象
this指针是隐含在每一个非静态成员函数的一种指针
this指针不需要定义, 直接使用
this指针的用途:
- 当形参和成员量同名时, 可以通this指针来区分
- 在类的非静态函数中返回对象, 可以使用
retutn *this
解决命名冲突:
public:
	Person_t(int age) {
		// this指针指向,被调用的成员函数所属对象 , 解决了命名冲突
		this->age = age;
	};
private:
	int age = 0;

private:

};
链式调用:
#include <iostream>
using namespace std;
class Person_t
{
public:
	int age = 0;
	Person_t(int age) {
		// this指针指向,被调用的成员函数所属对象 , 解决了命名冲突
		this->age = age;
	};

	Person_t(const Person_t& p) {
		this->age = p.age;

		cout << "Persons_t的拷贝构造函数被调用" << endl;
	}

	// 增加一个方法
	Person_t& PersonAddAge(Person_t& p) {

		cout << "p.age: " << p.age << endl;
		cout << "this.age:" << this->age << endl;
		this->age += p.age;

		cout << "this.age: " << this->age << endl;
		// this指向p2的指针, 而*this指向的就是p2这个对象本身
		return *this;
	}

};

void test_02() {
	Person_t p2 = Person_t(10);

	p2.PersonAddAge(p2).PersonAddAge(p2).PersonAddAge(p2).PersonAddAge(p2);

	cout << "age: " << p2.age << endl;
}

int main() {
	test_02();

	system("pause");
	return 0;
}
输出结果:
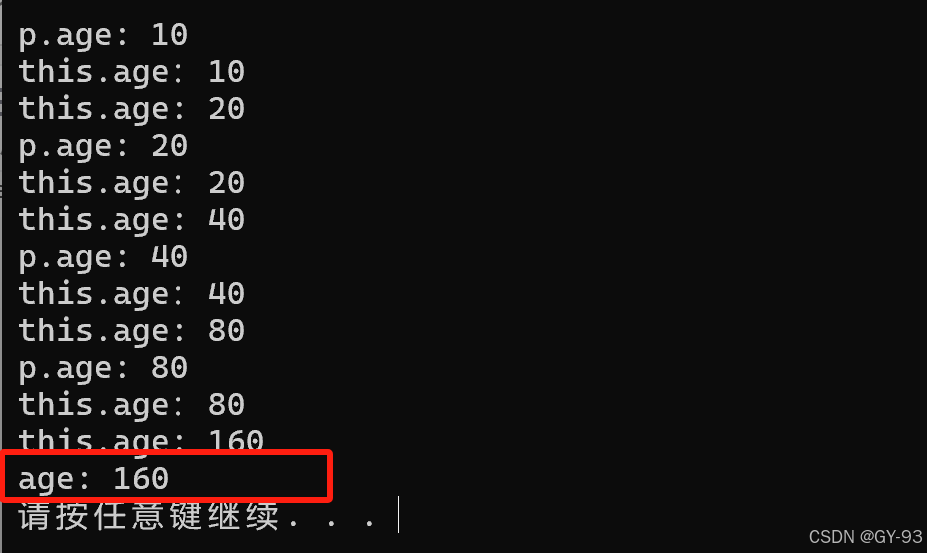
如果返回一个引用, 则是可以产生链式调用,但是加入返回的是值时,那么链式调用还会生效吗?
很显然当返回是值时, 链式调用不会生效, 为什么?
当我们把上述方法修成返回值,看下链式调用的效果:
Person_t PersonAddAge(Person_t& p) {

	cout << "p.age: " << p.age << endl;
	cout << "this.age:" << this->age << endl;
	this->age += p.age;

	cout << "this.age: " << this->age << endl;
	// this指向p2的指针, 而*this指向的就是p2这个对象本身
	return *this;
}
输出结果:
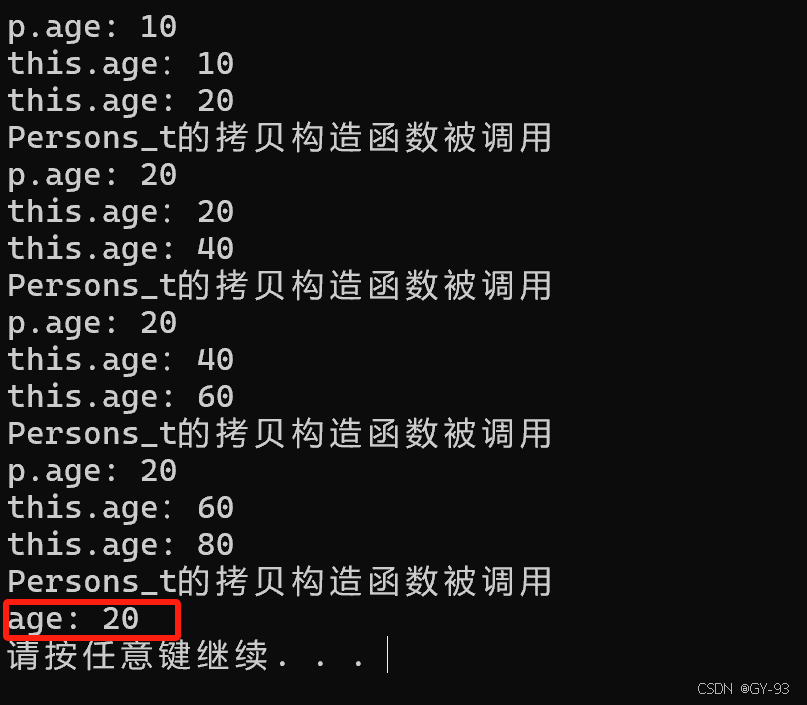
因为当你使用p对象调用方法完之后,返回一个值对象, 这个时候会调用person的拷贝构造函数方法,拷贝p对象给另外一个对象, 假如是p1, 然后p1在接着调用后面的方法, 以此循环, 最终打印p对象的age值, 实际上p对象只调用了一次方法
如果是以值的形式返回, 那么就会一直创建新的对象, 如果是引用的方式返回, 那不会创建新的对象。(调用结果可知,一直在调用Person_t对象的拷贝构造方法)
空指针访问成员函数
C++中空指针也是可以调用成员函数的, 但是也要注意有没有用到this指针
如果用到this指针, 需要加以判断保证代码的健壮性。
#include <iostream>
using namespace std;

class Person_s {
public:
	Person_s(int age) {
		this->age = age;
	}
	void showClassName() {
		cout << "我是Person类!" << endl;
	}

	void ShowPerson() {
		// 如果没有加这个判断, 会报错, 因为传入的指针是NUll
		if (this == NULL)
		{
			return;
		}

		cout << "age = " << this->age << endl;
	}

private:
	int age = 0;
};

void test_t() {
	Person_s* p = NULL;

	p->showClassName();
	p->ShowPerson();
}

int main() {

	test_t();

	system("pause");
	return 0;
}
输出结果:

const 修饰成员函数
常函数:
- 成员函数后加
const后,我们称这个函数为常函数 - 常函数内不可以修改成员属性
- 成员属性声明加关键字
mutable后,在常函数中依然修改
class Person1 {
public:
	// this指针的本质, 是指针常量, 指针的指向是不可以修改的
	// const(相当于函数后面的const) Person1 * const this
	// 在成员函数后面加`const`,修饰的是`this`指向, 让指针指向的值夜不可以修改
	void showPerson() const {
		//this->m_A = 100;
	}

	int m_A;
};
如果我们需要修改在常函数中修改变量的值,需要在变量声明前面加上mutable
class Person1 {
public:
	// this指针的本质, 是指针常量, 指针的指向是不可以修改的
	// const(相当于函数后面的const) Person1 * const this
	void showPerson() const {
		//this->m_A = 100;
		this->m_B = 200;
	}

	int m_A;
	mutable int m_B;
};
注意:this指针的本质是 一个指针常量
常对象:
- 声明对象前加
const称该对象为常对象 - 常对象只能调用常函数
void test10() {
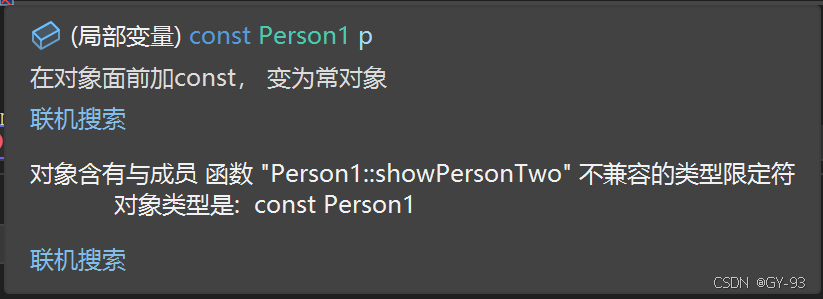
const Person1 p; // 在对象面前加const, 变为常对象
//p.m_A = 100; 会报错
p.m_B = 100; //m_B是特殊值,在常对象下也可以修改
// 常对象只能调用常函数
p.showPerson();
// p.showPersonTwo(); 报错
}
p.showPersonTwo() 会报如下错误:
友元
生活中在你家里面,有些区域是所有人都能够进去的, 有些区域是指定人才可以进去的。
那么在程序里, 写私有属性也想让类外特殊的一些函数或者类进行访问,就需要用到友元的技术。
友元的目的就是让一个函数或则类,访问另一个类中私有成员
友元的关键字: friend
友元的三种实现:
- 全局函数做友元
- 类做友元
- 成员函数做友元
全局函数做友元
#include <iostream>
using namespace std;
#include <string>
// 创建一个类
class Building {
public:
// goodGay全局函数是 Building好朋友, 可以访问Building中私有成员
friend void goodGay(Building& building);
Building() {
this->m_SittingRoom = "客厅";
this->m_bedRoom = "卧室";
}
public:
string m_SittingRoom; // 客厅
private:
string m_bedRoom; // 卧室
};
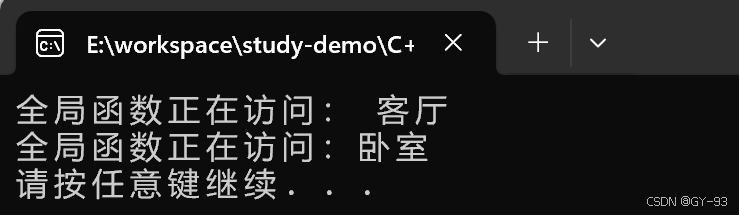
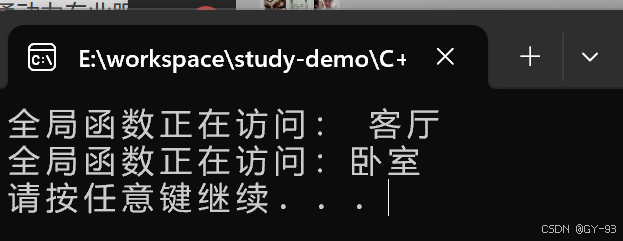
void goodGay(Building& building) {
cout << "全局函数正在访问: " << building.m_SittingRoom << endl;
cout << "全局函数正在访问:" << building.m_bedRoom << endl;
}
void test11() {
Building building;
goodGay(building);
}
int main() {
test11();
system("pause");
return 0;
}
输出结果:
类做友元
#include <iostream>
using namespace std;
#include <string>

// 创建一个类
class Building_t {

public:
	friend class GoodGay;

	Building_t() {
		this->m_SittingRoom = "客厅";
		this->m_bedRoom = "卧室";
	}

public:
	string m_SittingRoom; // 客厅

private:
	string m_bedRoom; // 卧室
};


class GoodGay {
public:
	GoodGay();
	void visit();

private:
	Building_t * building;
};

GoodGay::GoodGay() {
	// 创建建筑物对象
	building = new Building_t();
}

void GoodGay::visit() {
	cout << "全局函数正在访问: " << building->m_SittingRoom << endl;

	// 如果不设置friend class GoodGay; 那么是无法访问这个私有属性的
	cout << "全局函数正在访问:" << building->m_bedRoom << endl;
}


void test12() {
	GoodGay gg;
	gg.visit();
}


int main() {

	test12();
	system("pause");
	return 0;
}
输出结果:
成员函数做友元
#include <iostream>
using namespace std;
#include <string>
class Building_s;
class goodGay {
public:
goodGay();
void visit();// 只让visit作为Building_s友元, 可以访问私有变量
void visit2();
private:
Building_s* building;
};
// 创建一个类
class Building_s {
public:
friend void goodGay::visit();
Building_s() {
this->m_SittingRoom = "客厅";
this->m_bedRoom = "卧室";
}
public:
string m_SittingRoom; // 客厅
private:
string m_bedRoom; // 卧室
};
// 该方法必须要在Building_s 实现之后, 不然会报错,找不到Building_s对象
goodGay::goodGay() {
building = new Building_s();
}
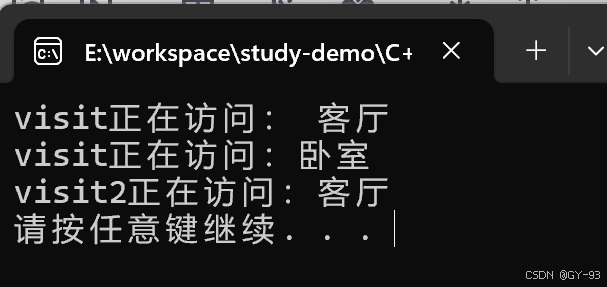
void goodGay::visit() {
cout << "visit正在访问: " << building->m_SittingRoom << endl;
cout << "visit正在访问:" << building->m_bedRoom << endl;
}
void goodGay::visit2() {
cout << "visit2正在访问:" << building->m_SittingRoom << endl;
//cout << "visit2正在访问:" << building->m_bedRoom << endl; 报错无法访问
}
void test13() {
goodGay gg;
gg.visit();
gg.visit2();
}
int main() {
test13();
system("pause");
return 0;
}
输出结果:
运算符重载
运算符重载概念: 对已有的运算符重新进行定义,赋予其另一种功能,以适应不同的数据类型
加号运算符重载
作用: 实现两个自定义数据类型相加的运算
class Person {
public:
	Person() {};
	Person(int a, int b) {
		this->m_A = a;
		this->m_B = b;
	}

	int m_A;
	int m_B;

};
- 通过全局函数重载加好运算符:
// 全局函数实现 + 运算符的重载
Person operator+ (Person &p1, Person &p2) {
Person temp;
temp.m_A = p1.m_A + p2.m_A;
temp.m_B = p1.m_B + p2.m_B;
return temp;
}
// 测试代码
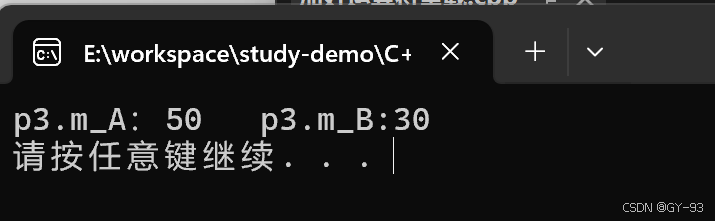
int main() {
Person p1(10, 20);
Person p2(40, 10);
//Person p3 = operator+(p1, p2);
Person p3 = p1 + p2; // 简写
cout << "p3.m_A:" << p3.m_A << " " << "p3.m_B:" << p3.m_B << endl;
system("pause");
return 0;
}
输出结果:
- 通过成员函数来重载加号运算符:
// 成员函数重载 加法运算符
Person operator+ (Person& p1) {
	Person temp;
	temp.m_A = this->m_A + p1.m_A;
	temp.m_B = this->m_B + p1.m_B;

	return temp;
}

// 测试代码
int main() {

	Person p1(10, 20);
	Person p2(40, 10);
	// 通过成员函数来实现加法运算符的重载
	//Person p3 = p1.operator+(p2);
	Person p3 = p1 + p2;
	cout << "p3.m_A:" << p3.m_A << "   " << "p3.m_B:" << p3.m_B << endl;


	system("pause");
	return 0;
}
输出结果:
**注意:编译器其实是通过一个通用的名称operator+重载了 + **
总结:
- 对于内置的数据类型表达式的运算符是不可能被改变的
- 不要滥用运算符重载
左移运算符重载
作用: 可以自定义数据类型。
#include <iostream>
using namespace std;

class Person2 {
public:
	Person2() {};
	Person2(int a, int b) {
		this->m_A = a;
		this->m_B = b;
	}

	// 如果我们利用成员函重载 左移运算符, operator<< (cout), 简化版本 p << cout
	// 这样的简化形式是不符合我们的要求的,我们期望是cout 在左侧, 所以这里是无法实现使用成员函数来重载<< 运算符的
	/*void operator<< (ostream& cout) {

	}*/

	int m_A;
	int m_B;
};

// 利用全局函数来重载左移运算符 本质是 operator<< (cout, p) 可以简写成为 cout << p
//void operator<< (ostream& cout, Person2& p) {
//	cout << "m_A = " << p.m_A << "m_B = " << p.m_B << endl;
//
//}

// 我们还可以用全局方法实现链式调用
ostream& operator<< (ostream& cout, Person2& p) {
	cout << "m_A = " << p.m_A << "m_B = " << p.m_B;

	return cout;
}

int main() {

	Person2 p(50, 60);
	cout << p << "实现链式调用" << endl;


	system("pause");
	return 0;
}
这里建议大家可以把属性设置为私有属性,然后利用友元的技术把这个重写的函数设置称为友元,那么就可以直接通过方法访问私有变量了。
#include <iostream>
using namespace std;

class Person2 {

	friend ostream& operator<< (ostream& cout, Person2& p);

public:
	Person2() {};
	Person2(int a, int b) {
		this->m_A = a;
		this->m_B = b;
	}
private:
	int m_A;
	int m_B;
};
// 我们还可以用全局方法实现链式调用
ostream& operator<< (ostream& cout, Person2& p) {
	cout << "m_A = " << p.m_A << "m_B = " << p.m_B;

	return cout;
}

int main() {

	Person2 p(50, 60);
	cout << p << "实现链式调用" << endl;
	system("pause");
	return 0;
}
为什么要重载左移运算符?
因为我们想打印一个对象的信息, 直接打印对象就行, 而不是一个对象属性一个对象属性的打印。
注意:cout是ostream类型,标准输出流,而且全局只能有一个对象
总结:重载左移运算符配合友元可以实现输出自定义数据的数据类型
递增运算符重载
作用:通过重载递增运算符, 自己
#include <iostream>
using namespace std;
class MyInterger {
public:
friend ostream& operator<< (ostream& cout, MyInterger myint);
MyInterger() {
m_Num = 0;
}
// 重载前置++运算符, 返回引用是为了一直对一个数据进行递增操作
MyInterger& operator++() {
// 前置++ 是首先进行加1
m_Num++;
return *this;
}
private:
int m_Num;
};
ostream& operator<< (ostream& cout, MyInterger myint) {
cout << "myint = " << myint.m_Num << endl;
return cout;
}
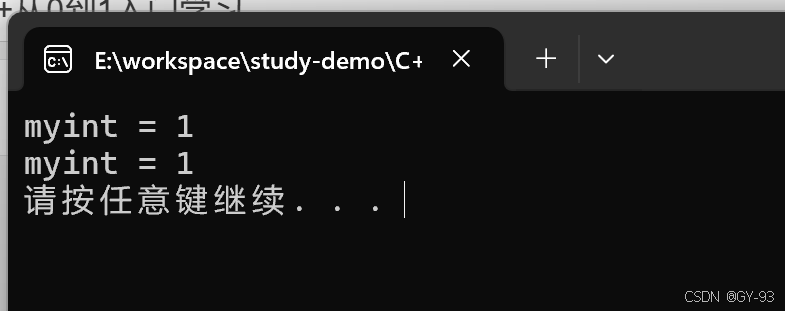
void test01() {
MyInterger myint;
cout << ++myint;
cout << myint;
}
int main() {
test01();
system("pause");
return 0;
}
输出结果:
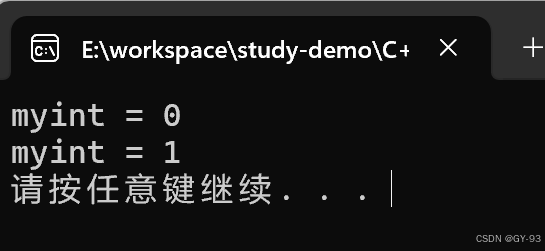
后置++运算符重载: 后置递增返回的是值, 前置递增返回的是引用
// 重载后置++运算符, 返回是一个值 int: 代表占位参数, 用来区分前置++  和 后置++
MyInterger operator++(int) {
	MyInterger temp = *this;

	m_Num++;

	return temp;
}

void test02() {
	MyInterger myint;

	cout << myint++;
	cout << myint;
}
输出结果:
在C++中,operator++(int) 是一个特殊的成员函数,用于重载后缀递增运算符 ++。这个函数的括号中的参数(在这里是 int 类型)并不是传统意义上的“必需参数”,而是有一个特定的语义用途:它区分了前缀递增运算符 ++x 和后缀递增运算符 x++。
对于后缀递增运算符 x++,编译器实际上是这样调用的:x.operator++(0)(这里的 0 是一个示例值,实际上可以是任何整数值,因为参数的值本身并不重要)。这个参数的存在仅仅是为了语法上的区分,告诉编译器这是后缀递增的版本。在函数体内,这个参数通常不会被使用。
赋值运算符重载
C++编译器至少给一个类添加4个函数
- 默认构造函数(无参, 函数体为空)
- 默认析构函数(无参, 函数体为空)
- 默认拷贝构造函数,对属性进行值拷贝
- 赋值运算符
operator=,对属性进行值拷贝
如果类中有属性执行堆区,做赋值操作也会出现深浅拷贝问题。
#include <iostream>
using namespace std;

class Person3 {
public:
	Person3() {
		cout << "构造函数被调用" << endl;
		m_Age = new int(10);
	}

	~Person3() {
		cout << "析构函数被调用" << endl;
		// 释放m_Age属性
		delete m_Age;
		m_Age = NULL;
	}

private:
	int* m_Age;
};

void test03() {
	// 如果我们没有重写默认赋值运算符 我看看赋值是怎么样的
	Person3 person;

	Person3 p1 = person;
}


int main() {
	test03();
	system("pause");

	return 0;
}
上述代码,我们并没有重载赋值运算符, 所以当我们对具有对属性的对象拷贝时, 会发生重复释放堆属性的问题。
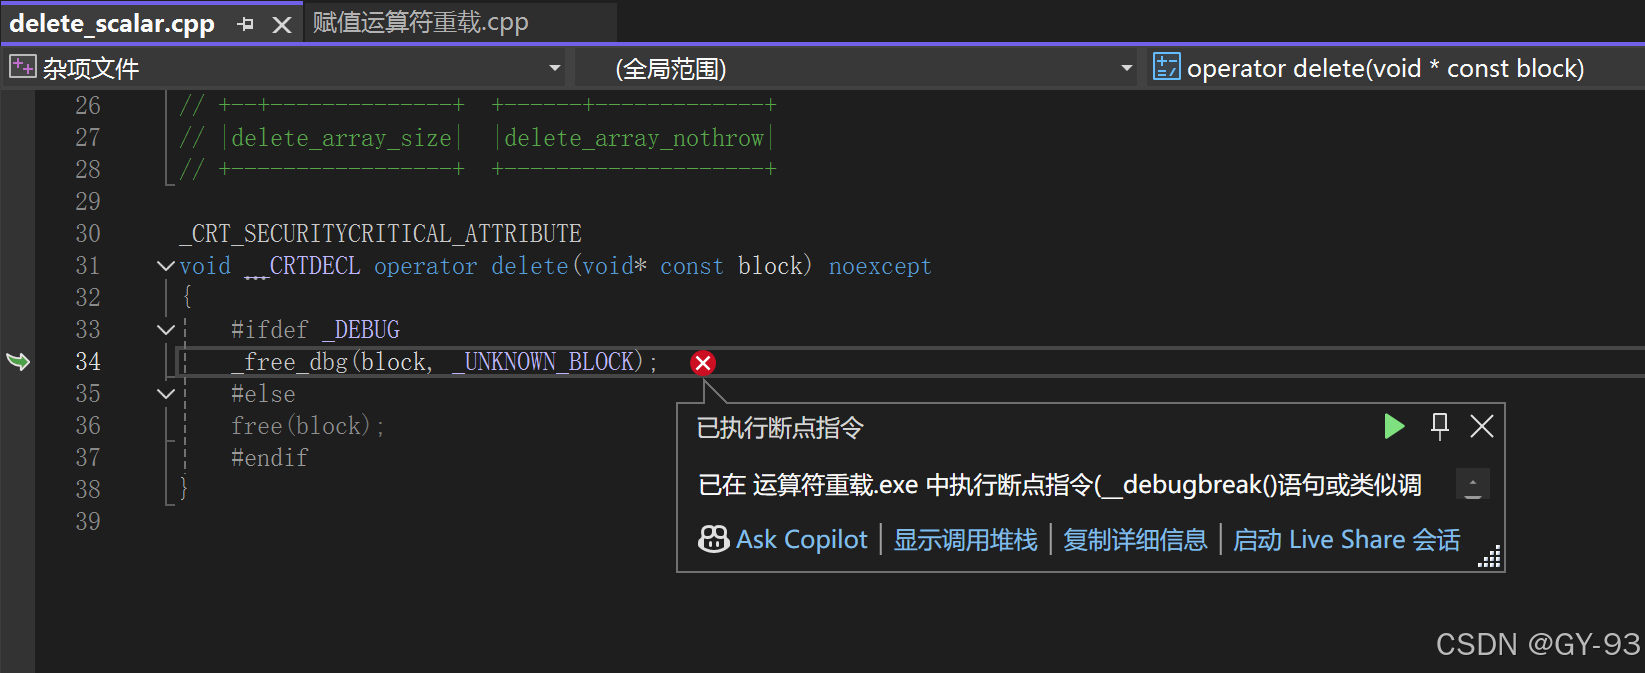
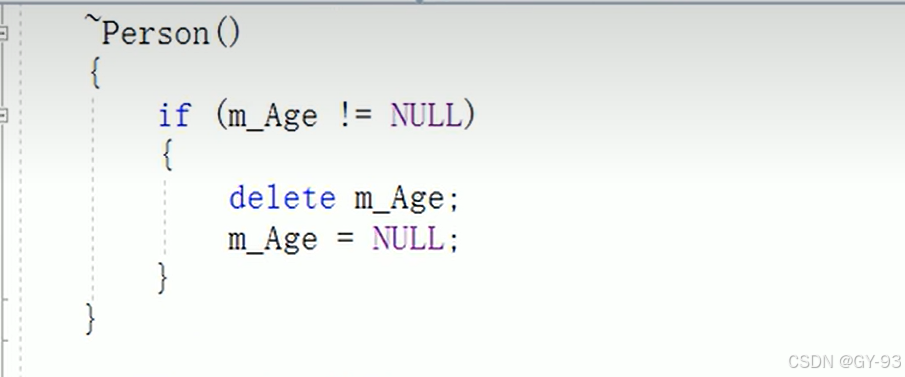
这时候我们可以重载赋值运算符,示例代码如下:
~Person3() {
	cout << "析构函数被调用" << endl;
	// 释放m_Age属性
	if (m_Age != NULL)
	{
		delete m_Age;
		m_Age = NULL;
	}
}

void operator=(Person3& p) {
	// 首先编译器默认的实现, 是浅拷贝
	//m_Age = p.m_Age;

	// 应该首先判断是否有属性在堆区, 如果有则先释放干净, 然后在深拷贝
	if (m_Age != NULL)
	{
		delete m_Age;
		m_Age = NULL;
	}

	// 深拷贝
	m_Age = new int(*p.m_Age);
}
但是我们又发现一个情况,上述代码只能两个数赋值, 不能连续赋值,但是我们有些时候需要a = b = c的情况
Person3& operator=(Person3& p) {
	// 首先编译器默认的实现, 是浅拷贝
	//m_Age = p.m_Age;

	// 应该首先判断是否有属性在堆区, 如果有则先释放干净, 然后在深拷贝
	if (m_Age != NULL)
	{
		delete m_Age;
		m_Age = NULL;
	}

	// 深拷贝
	m_Age = new int(*p.m_Age);

	return *this;
}
关系运算符重载
重载关系运算符, 可以让两个自定义类型进行对象的比较
#include <iostream>
using namespace std;
#include "string"

class Person4 {
public:
	Person4(string name, int age) {
		this->m_Name = name;
		this->m_Age = age;
	}

	bool operator==(Person4& p) {
		if (this->m_Name == p.m_Name && this->m_Age == p.m_Age)
		{
			return true;
		}
		return false;
	}

private:
	string m_Name;
	int m_Age;
};

void test04() {
	Person4 p("zhangsan", 22);
	Person4 p1("zhangsan", 22);

	if (p == p1)
	{
		cout << "相等" << endl;
	}
	else {
		cout << "不相等" << endl;
	}
}

int main() {

	test04();

	system("pause");
	return 0;
}
函数调用运算符重载
- 函数调用运算符
()也可以重载 - 由于重载后使用的方式非常像函数的调用, 因此称为仿函数
- 仿函数没有固定写法, 非常灵活。
#include <iostream>
using namespace std;
#include "string"

class MyPoint {

public:
	void operator()(string text) {
		cout << text << endl;
	}
};

void test06() {
	// 重载的() 操作符,也称为仿函数
	MyPoint myFunc;

	myFunc("hello world");
}

int main() {

	test06();

	system("pause");
	return 0;
}
输出解雇:
继承
继承的基本语法
继承是面向对象的三大特性之一
有些类与类之间存在特殊的关系,例如下图中:
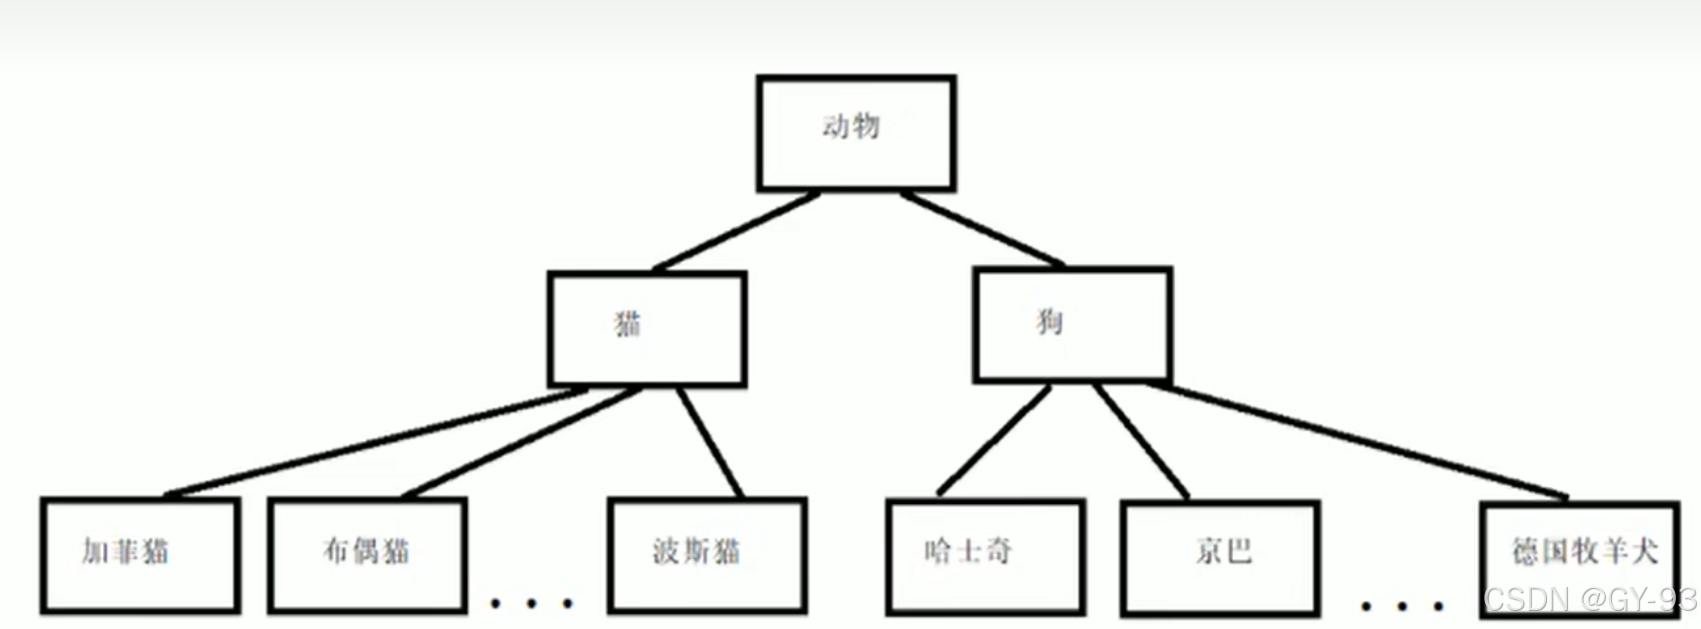
我们发现,定义这些类时, 下级的成员除了拥有上一级的共性, 还有自己的特性。
这个时候我们就可以利用继承的技术, 减少重复代码。
#include <iostream>
using namespace std;
class BasePage {
public:
void header() {
cout << "首页、公开课、登录、注册。。。(公共部分)" << endl;
}
void footer() {
cout << "帮助中心、交流合作、站内地图。。。(公共底部)" << endl;
}
void left() {
cout << "Java, Python 、 C++(公共部分列表)" << endl;
}
};
class Java : public BasePage {
public:
void javaTest() {
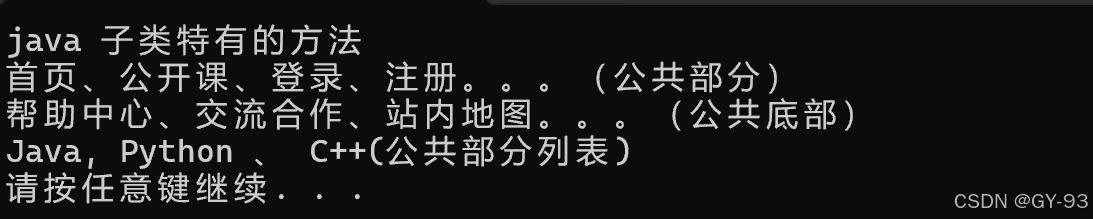
cout << "java 子类特有的方法" << endl;
}
};
void test1() {
Java javaImp;
javaImp.javaTest();
javaImp.header();
javaImp.footer();
javaImp.left();
}
int main() {
test1();
system("pause");
return 0;
}
总结:
继承的好处: 可以减少重复的代码
class A : public B;
A 类称为子类 或 派生类
B 类称为父类 或 基类
派生类中的成员,包含量大部分:
一类是从基类继承过来的, 一类是自己增加的成员。
从基类继承过来的表现其共性, 而新增的成员具体体现了其个性。
继承方式
集成的语法: class 子类 : 继承方式 父类
继承方式一共有三种:
- 公共继承
- 保护继承
- 私有继承
class A {
public:
	int a;

protected:
	int b;

private:
	int c;
};

// 公有继承
class B : public A {
public:
	void func() {
		a = 10; // 父类中的公共权限成员,到子类中依然是公共权限成员
		b = 20; // 父类中的保护权限成员到子类中依然是保护权限
		//c = 30;  父类中的私有权限成员,子类访问不到
	}
};

void testB() {
	// 公有继承
	B b;
	b.a = 10;
	/*b.b = 20;  b是保护权限, 类外无法访问
	b.c = 30;*/
}

// 保护继承
class C : protected A {
	void func() {
		a = 10; // 父类中的公共权限成员,到子类中变为保护权限
		b = 20; // 父类中的保护权限成员到子类中依然是保护权限
		//c = 30;  父类中的私有权限成员,子类访问不到
	}
};

void testC() {
	C c;
	/*c.a = 100;  都变成了保护权限, 类外无法访问
	c.b = 200;*/
}

// 私有继承
class D : private A {
	void func() {
		a = 10; // 父类中的公共权限成员,到子类中员变为 私有成员
		b = 20; // 父类中的保护权限成员到子类中变成 私有成员
		//c = 30;  父类中的私有权限成员,子类访问不到
	}
};

void testD() {
	D d;
	/*d.a = 100;
	d.b = 100;*/
}
继承中的对象模型
#include <iostream>
using namespace std;

class Base {
public:
	int m_A;

protected:
	int m_B;

private:
	int m_C;
};

class Son : public Base {
public:
	int m_D;
};

void testSon() {
	// 16
	// 父类中所有非静态成员属性都会被子类继承下去
	// 父类中的私有成员属性, 是被编译器给隐藏了, 因此是访问不到的,但是确实被继承下去了
	cout << "sizeof Son = " << sizeof(Son) << endl;
}

int main() {
	testSon();

	system("pause");
	return 0;
}
输出 结果:

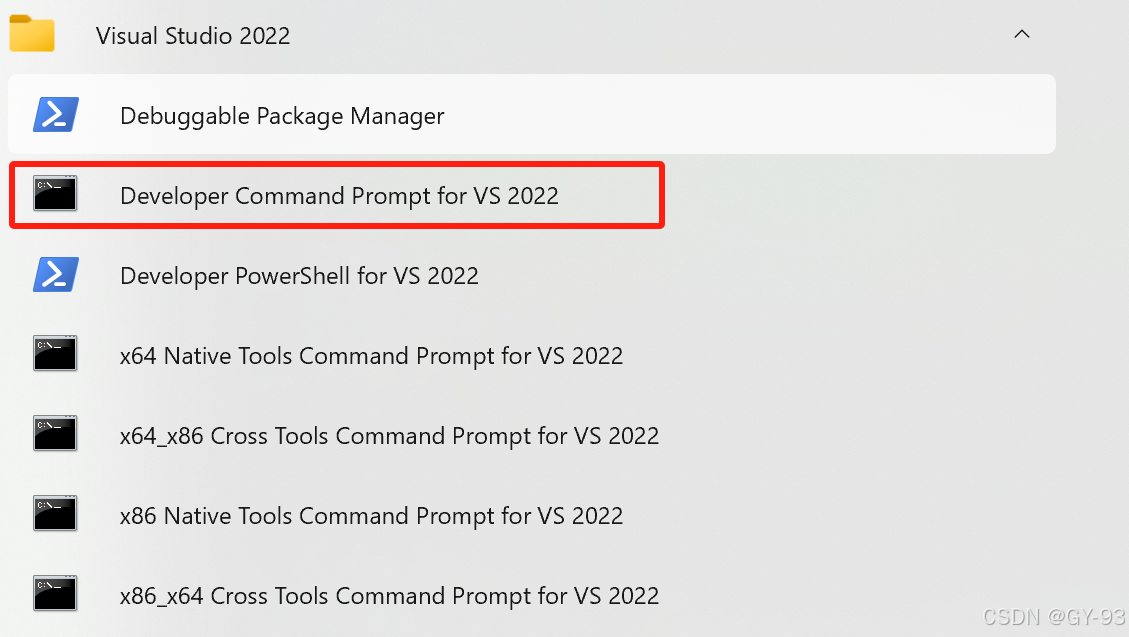
还可以利用开发工具的命令行窗口通过指令查看类的结果:
总结: 父类中私有成员也被子类继承下去了, 只是由编译器给隐藏后访问不到。
继承中的构造和析构顺序
子类继承父类后,当创建子类对象,也会调用父类的构造函数
问题: 父类和子类的构造和析构顺序是谁先谁后?
#include <iostream>
using namespace std;

class Base {
public:
	Base() {
		cout << "Base构造函数!" << endl;
	}

	~Base() {

		cout << "Base的析构函数!" << endl;
	}
};

class Son : public Base {
public:
	Son() {
		cout << "Son的构造函数" << endl;
	}

	~Son() {
		cout << "Son的析构函数" << endl;
	}
};

void testSon1() {
	Son son;
}

int main() {
	testSon1();


	system("pause");
	return 0;
}
输出结果:

总结: 继承中 先调用父类的构造函数,在调用子类的构造函数,析构函数与构造相反
继承同名成员处理方式
- 访问子类同名成员 直接访问即可
- 访问父类同名成 需要加作用域
#include <iostream>
using namespace std;

class BaseParam {
public:
	BaseParam() {
		this->m_A = 10;
		cout << "BaseParam构造函数!" << endl;
	}

	~BaseParam() {

		cout << "BaseParam的析构函数!" << endl;
	}

	void func() {
		cout << "BaseParam 类中func函数被调用" << endl;
	}

	void func(int a) {
		cout << "BaseParam 类中func带参被调用 ===  " << a << endl;
	}

	int m_A;
};

class SonParam : public BaseParam {
public:
	SonParam() {
		this->m_A = 20;
		cout << "SonParam的构造函数" << endl;
	}

	~SonParam() {
		cout << "SonParam的析构函数" << endl;
	}

	void func() {
		cout << "SonParam 类中func函数被调用" << endl;
	}

	int m_A;
};

void testparam() {
	SonParam son;

	cout << "SonParam 下 m_A = " << son.m_A << endl;

	// 如果是通过子类对象,访问到父类汇中同名成员, 需要加作用域
	cout << "BaseParam 下 m_A = " << son.BaseParam::m_A << endl;
}

void testMethod() {
	SonParam son;

	// 直接调用,调用的是子类中的同名成员
	son.func();

	// 如何调用父类中同名成员函数
	son.BaseParam::func();

	// 如果子类中出现和父类同名的函数, 子类函数的同名成员汇隐藏掉父类中所有的同名成员函数
	// 如果想访问到父类中被隐藏的同名成员函数, 需要加作用域
	son.BaseParam::func(100);
}

int main() {
	testparam();

	testMethod();

	system("pause");
	return 0;
}
输出结果:
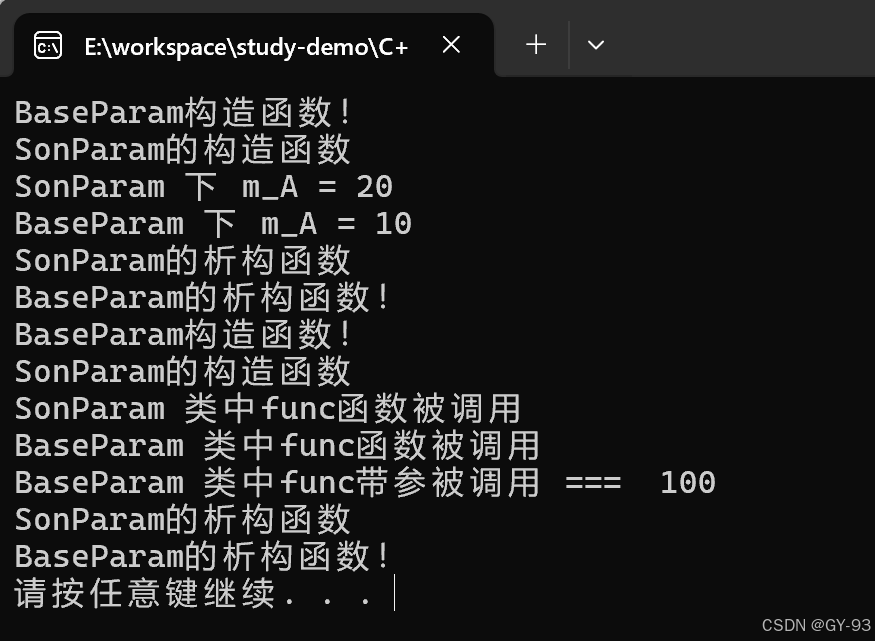
总结:
- 子类对象可以直接访问到子类中同名成员
- 子类对象加作用域可以访问到父类同名成员
- 当子类与父类拥有同名的成员函数, 子类会隐藏父类中同名成员函数,加作用域可以访问到父类中同名函数
继承同名静态成员处理方式
静态成员和非静态成员出现同名,处理方式一致。
- 访问子类同名成员 直接访问即可
- 访问父类同名成员 需要加作用域
#include <iostream>
using namespace std;
class BaseStatic {
public:
static int m_A;
};
int BaseStatic::m_A = 100;
class SonStatic : public BaseStatic {
public:
static int m_A;
};
int SonStatic::m_A = 200;
// 同名静态属性
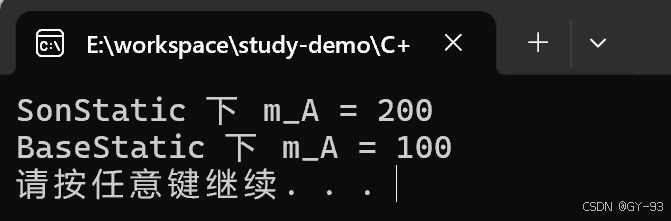
void testStatic() {
SonStatic s;
cout << "SonStatic 下 m_A = " << s.m_A << endl;
cout << "BaseStatic 下 m_A = " << s.BaseStatic::m_A << endl;
}
int main() {
testStatic();
system("pause");
return 0;
}
输出结果:
多继承语法
C+允许一个类继承多个类
语法:class 子类:继承方式 父类1,继承方式 父类2...
多继承可能会引发父类中有同名成员出现,需要加作用域区分
#include <iostream>
using namespace std;
class Base1 {
public:
Base1() {
m_A = 100;
}
int m_A;
};
class Base2 {
public:
Base2() {
m_A = 200;// kaishi
}
int m_A;
};
class SonChildren : public Base1, public Base2 {
public:
SonChildren() {
m_C = 300;
m_D = 400;
}
int m_C;
int m_D;
};
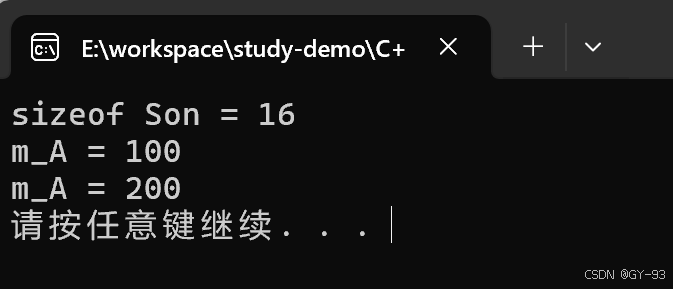
void testMulExtend() {
SonChildren son;
cout << "sizeof Son = " << sizeof(son) << endl;
// 当父类中出现同名成员时, 需要加作用域区分
cout << "m_A = " << son.Base1::m_A << endl;
cout << "m_A = " << son.Base2::m_A << endl;
}
int main() {
testMulExtend();
system("pause");
return 0;
}
输出结果:
菱形继承
菱形继承的概念:
	两个派生类继承同一个类
	又有某个类同时集成两个派生类
	这种集成被称为菱形继承, 或者钻石继承
菱形继承问题:
- 数据的二义性
- 多分数据造成的资源浪费
#include <iostream>
using namespace std;
class Animal {
public:
int m_A;
};
class Sheep : public Animal {};
class Tuo : public Animal {};
class SheepTuo : public Sheep, public Tuo {
public:
SheepTuo(){
m_A = 100;
}
int m_A;
};
void testSheepTuo() {
SheepTuo st;
st.Sheep::m_A = 18;
st.Tuo::m_A = 28;
// 当菱形继承时, 两个父类有相同的数据, 需要加以作用域区分
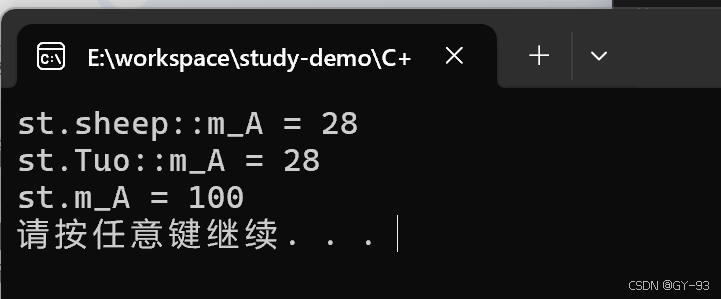
cout << "st.sheep::m_A = " << st.Sheep::m_A << endl;
cout << "st.Tuo::m_A = " << st.Tuo::m_A << endl;
cout << "st.m_A = " << st.m_A << endl;
// 其实这份数据我们知道只需要有一份就可以, 菱形继承导致数据有两份,资源浪费
}
int main() {
testSheepTuo();
system("pause");
return 0;
}
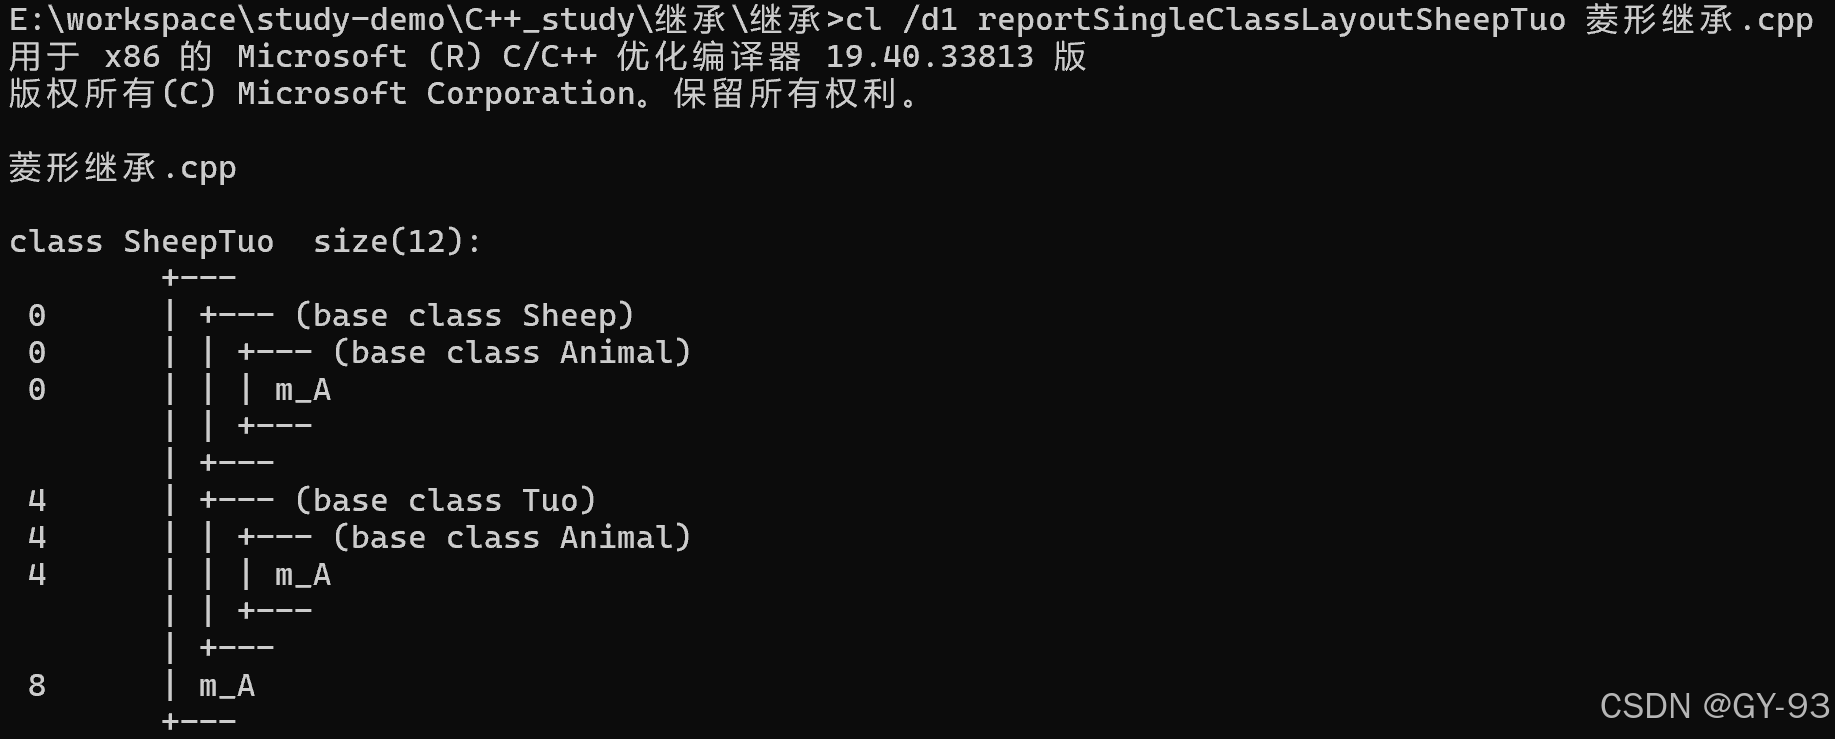
输出结果:

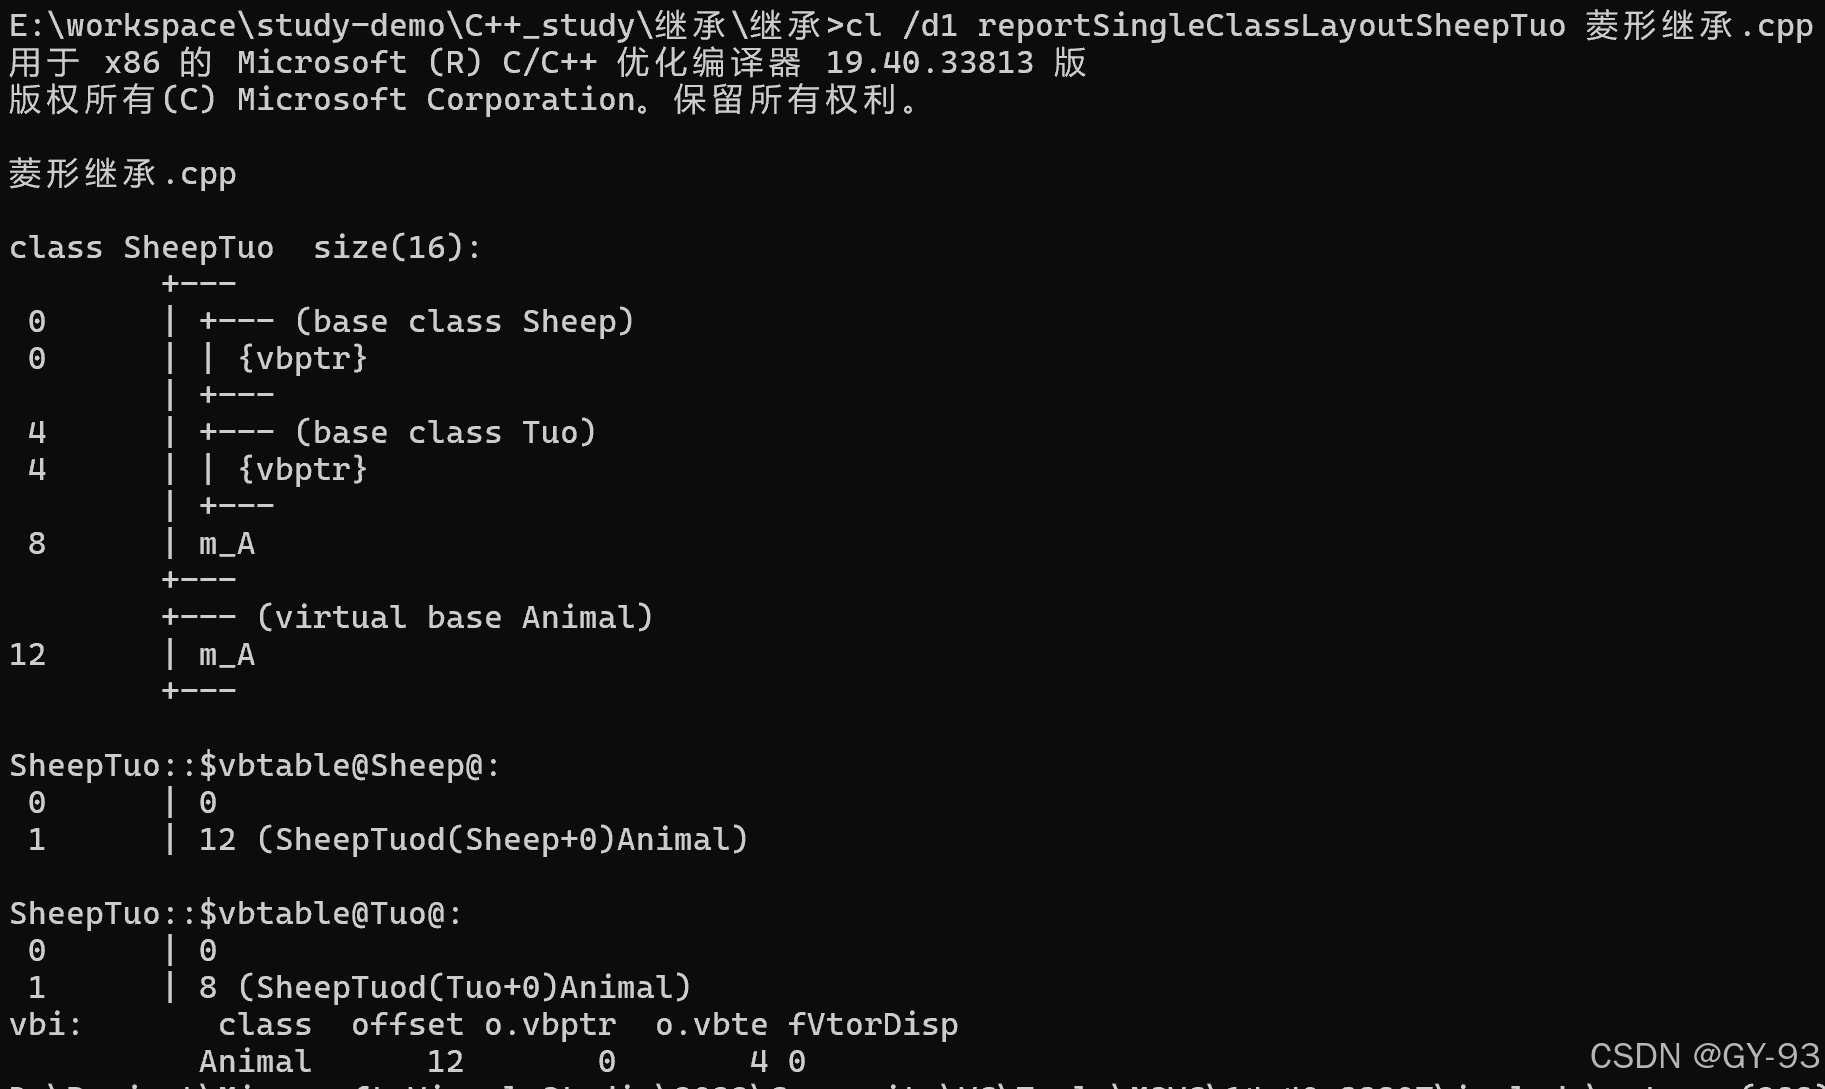
使用visual studio的开发命令行工具查看类的结果如下:cl /d1 reportSingleClassLayoutxxx(类名) xxx.cpp
那么如何解决这个问题:使用虚继承,解决菱形继承问题
/// <summary>
/// 利用虚继承, 来解决菱形继承的问题
/// 继承之前 加上关键字 virtual 变为虚继承
/// Animal 类被称为虚基类
/// </summary>
class Sheep : virtual public Animal {};

class Tuo : virtual public Animal {};
输出结果:
原因: 两个类会继承一个虚类指针, 通过偏移量找到唯一数据, 也那个就解决了 有两个变量的问题了
通过命令行工具查看类的结果:
总结:
- 菱形继承带来的主要问题是子类继承两份相同的数据, 导致资源浪费以及毫无意义
- 利用虚继承可以解决菱形继承问题
多态
多态的基本概念
多态是C++面向对象三大特性之一
多态分为两类:
- 静态函数: 函数重载 和 运算符重载属于静态多态, 复用函数名
- 动态多态: 派生类和虚函数实现运行时多态
静态多态和动态多态的区别:
*静态多态的函数地址早绑定 - 编译阶段确定函数地址
动态多态的函数地址晚绑定 - 运行阶段确定函数地址
#include <iostream>
using namespace std;
class Animal {
public:
void speak() {
cout << "动物在说话 " << endl;
}
};
class Cat : public Animal {
public:
void speak() {
cout << "Cat 在说话" << endl;
}
};
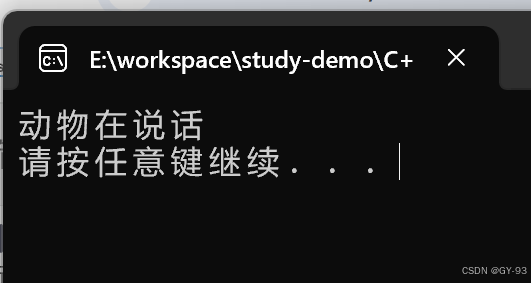
// 执行说话的函数,地址早绑定, 在编译阶段确定函数地址
void doSpeak(Animal& animal) {
animal.speak();
}
void testSpeak() {
Cat cat;
doSpeak(cat);
}
int main() {
testSpeak();
system("pause");
return 0;
}
输出结果:
如果想执行子类的speak方法, 那么这个函数地址就不能提前绑定,需要在运行阶段进行绑定, 地址晚绑定。
class Animal {
public:

	virtual void speak() {
		cout << "动物在说话 " << endl;
	}
};
输出结果:
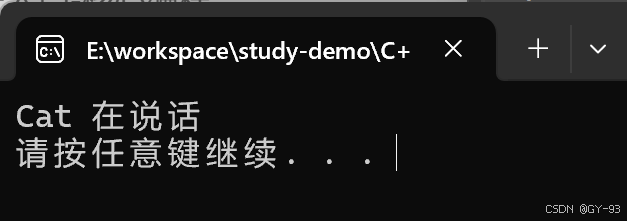
在父类的方法面前加上virtual关键字 ,被称为虚函数
总结:
多态满足条件
- 有继承关系
- 子类重写父类中的虚函数
多态使用条件
- 父类指针或者引用指向子类对象
重写: 年数的返回值类型 函数名 参数列表完全一致称为重写
- 多态原理分析
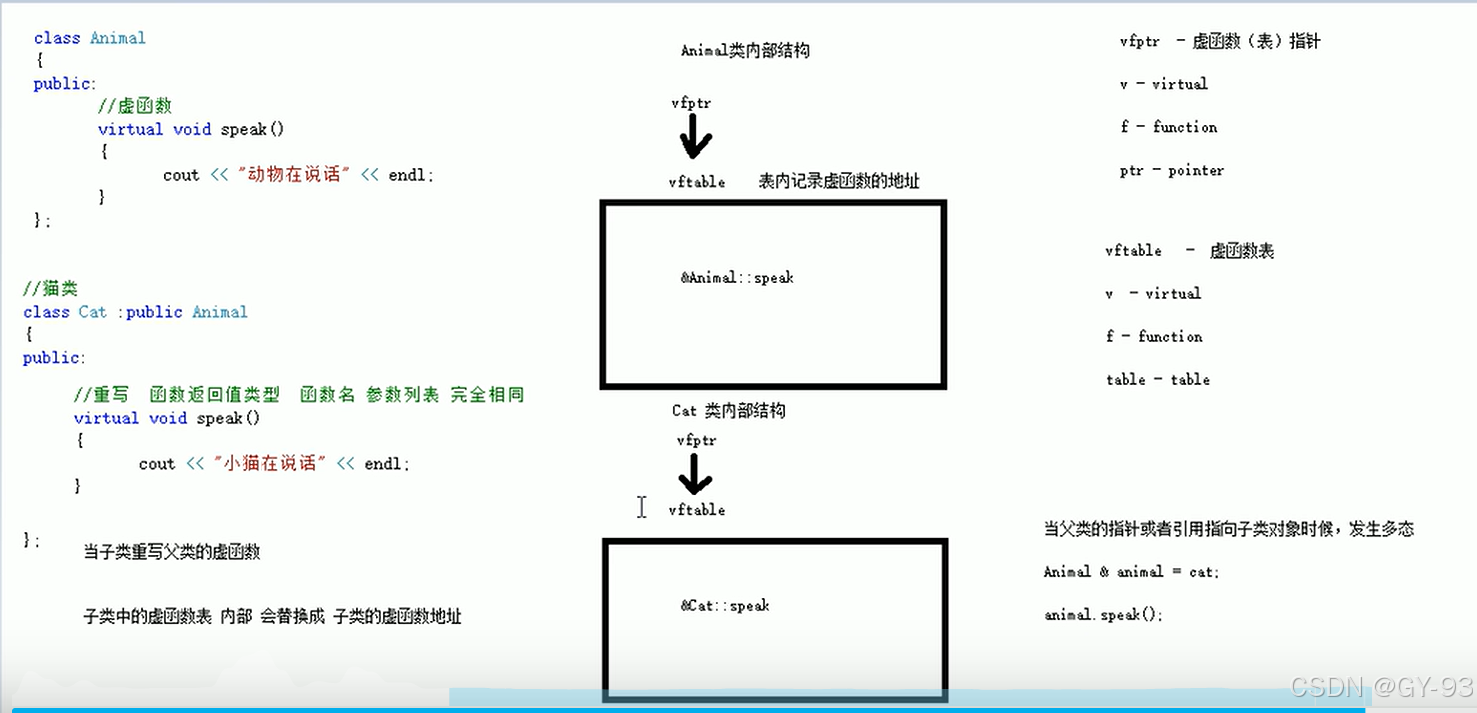
Animal的类结构:
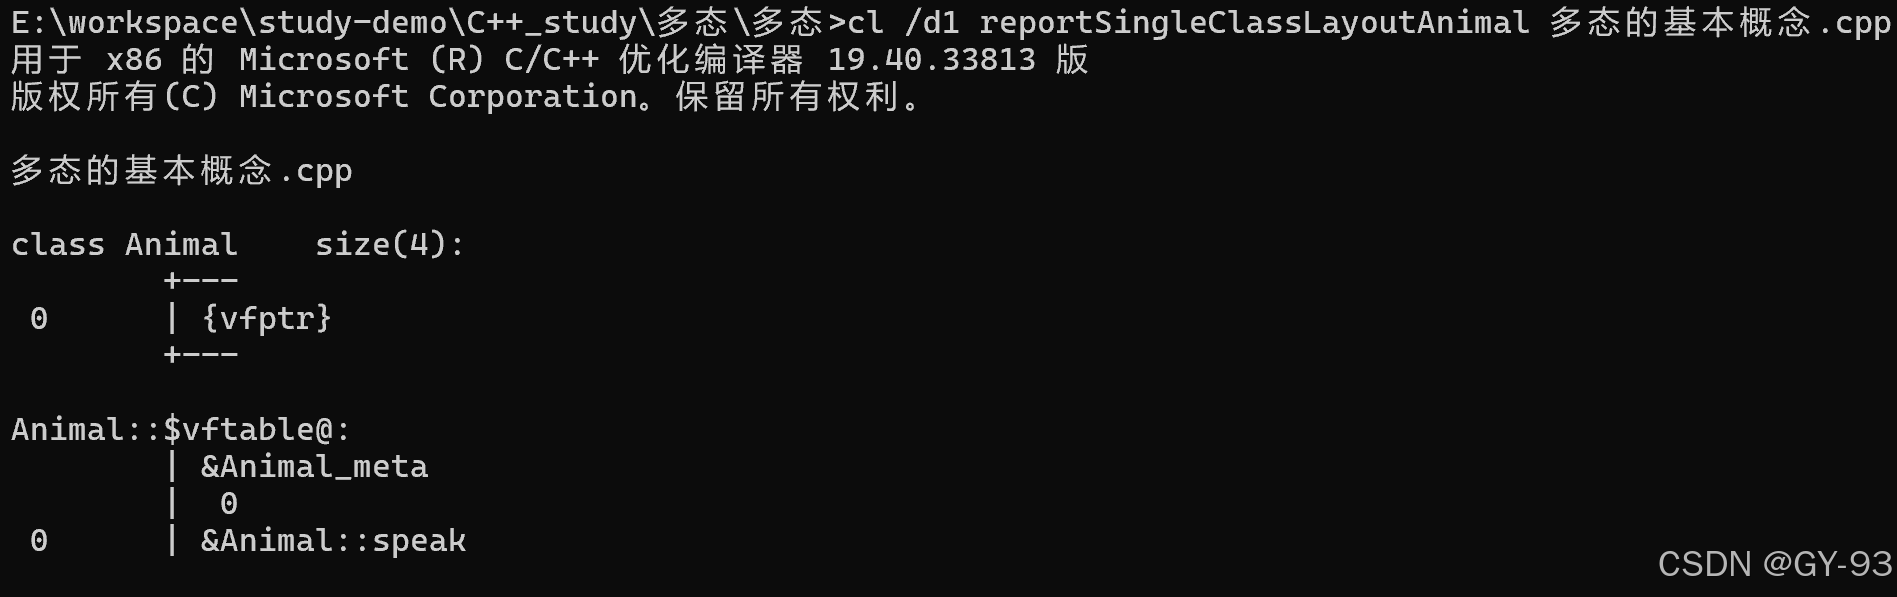
Cat类的结构:

纯虚函数和抽象类
在多态中, 通常父类中虚函数的实现是毫无意义的, 主要都是调用子类重写的内容
因此可以将虚函数改为纯虚函数
纯虚函数语法: virtual 返回值类型 函数名 (参数列表)= 0;
当类中有了纯虚函数, 这个类也称为抽象类
抽象类特点:
- 无法实例化对象
- 子类必须重写抽象类中的纯虚函数, 否则也属于抽象类
#include <iostream>
using namespace std;
class Base {
public:
// 纯虚函数
// 只要有一个纯虚函数,这个类被称为抽象类
// 抽象类特点: 无法实例化对象, 抽象类的子列必须重写父类中的纯虚函数, 否则也属于抽象类
virtual void func() = 0;
};
class Son : public Base {
public:
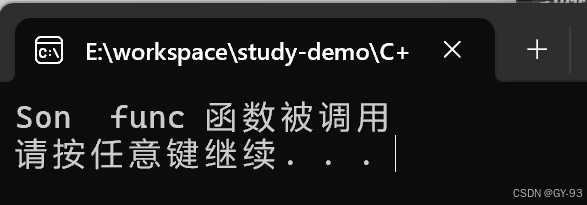
void func() {
cout << "Son func 函数被调用" << endl;
}
};
void test() {
//Base b; 抽象类无法实现实例化
Son s;
s.func();
}
int main() {
test();
system("pause");
return 0;
}
输出结果:
虚析构和纯虚析构
多态使用时, 如果子类中有属性开辟到堆区, 那么父类指针在释放时无法调用到子类的析构代码
解决方式: 将父类中的析构函数改为虚析构或者纯虚析构
虚析构和纯虚析构共性:
- 可以解决父类指针释放子类对象
- 都需要有具体的函数实现
虚构和纯虚析构区别:
- 如果是纯虚析构, 该类属于抽象类, 无法实例化对象
虚析构语法:
virtual ~类名() {}
纯虚析构语法:
virtual ~类名() = 0; // 类内申明
//类外实现
类名::类名() {}
#include <iostream>
using namespace std;
#include <string>

class AnimalOne {
public:
	AnimalOne() {
		cout << "AnimalOne 构造函数调用" << endl;
	}

	~AnimalOne() {

		cout << "AnimalOne 析构函数被调用" << endl;
	}

	virtual void speak() = 0;
};

class CatOne : public AnimalOne {
public:
	CatOne(string name) {
		cout << " CatOne 的构造函数被调用" << endl;
		this->name = new string(name);
	}

	~CatOne()
	{
		cout << "CatOne 的析构函数被调用" << endl;

		if (name)
		{
			delete name;
			name = NULL;
		}
	}
	void speak() {
		cout << "CatOne 调用speak方法" << endl;
	}

private:
	string* name;

};

void test01() {
	AnimalOne* animal = new CatOne("Tom");
	animal->speak();

	// 父类指针在析构时,不会调用子类中的析构函数, 导致子类如果有堆区属性,出现内存泄漏
	delete animal;
}

int main() {
	test01();


	system("pause");
	return 0;
}
输出结果:
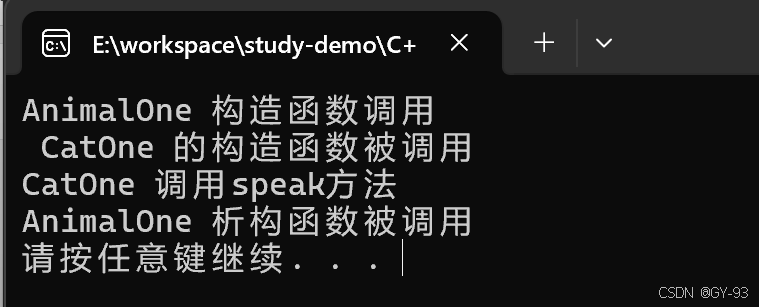
由上述的结果可知, 子类的析构函数没有执行,导致子类堆区的数据没有释放。
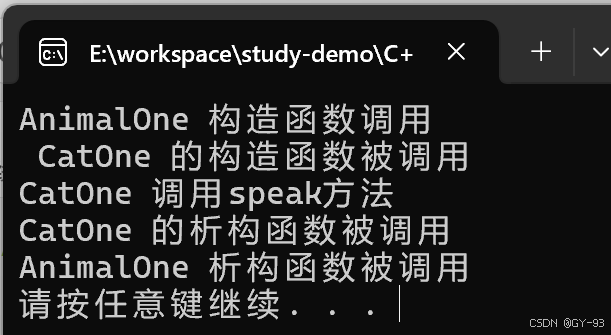
- 把父类的析构函数编程虚析构函数,解决该问题:
class AnimalOne {
public:
	AnimalOne() {
		cout << "AnimalOne 构造函数调用" << endl;
	}

// 把父类的析构函数变成虚函数
	virtual ~AnimalOne() {

		cout << "AnimalOne 析构函数被调用" << endl;
	}

	virtual void speak() = 0;
};
输出结果:
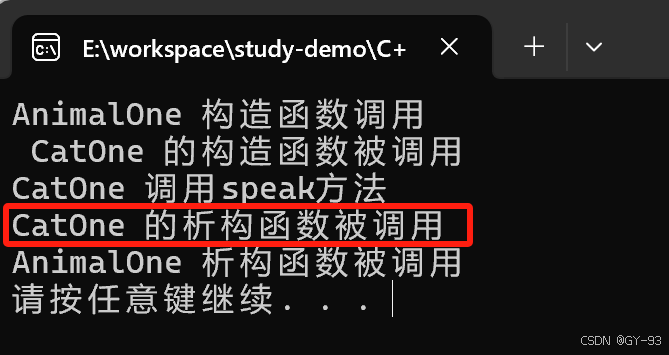
- 把父类的析构函数变成纯虚函数也可解决该问题:
class AnimalOne {
public:
	AnimalOne() {
		cout << "AnimalOne 构造函数调用" << endl;
	}

	virtual ~AnimalOne() = 0;

	virtual void speak() = 0;
};

AnimalOne::~AnimalOne() {
	cout << "AnimalOne 析构函数被调用" << endl;
}
输出结果:
注意:纯虚析构,需要声明也需要实现, 有了纯虚析构之后, 这个类也属于抽象类,无法实例化对象
总结:
- 虚析构或纯虚析构就是用来解决通过父类指针释放子类对象
- 如果子类中没有堆区数据, 可以不写为虚析构或纯虚析构
- 拥有纯虚析构函数的类也属于抽象类
文件操作
程序运行时产生的数据都属于临时数据, 程序一旦运行结果都会被释放
通过文件可以将数据持久化
C++中对文件操作需要包含头文件<fstream>
文件类型分为两种:
- 文本文件 - 文件以文本的ASCll码形式存储在计算机中
- 二进制文件 - 文件以文本的二进制形式存储在计算机中, 用户一般不能直接读懂它们
操作文件的三大类:
ofstream: 写操作ifstream: 读操作fstream: 读写操作
文本文件
写文件
文件打开方式:
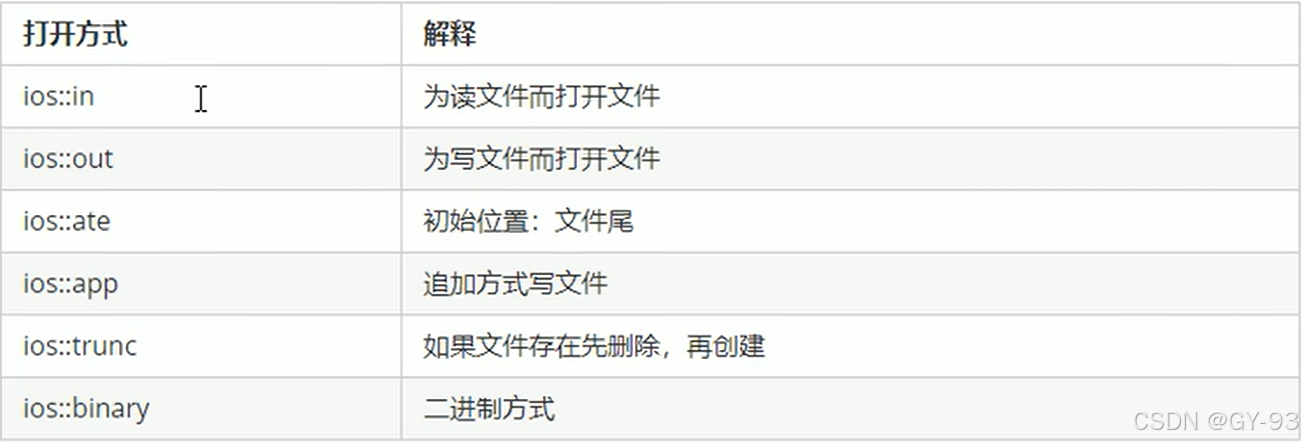
注意: 文件打开方式可以配合使用, 利用 | 操作符
例如:用二进制方式写文件ios::binary | ios::out
#include <iostream>
using namespace std;
#include <fstream>


int main() {
	//1.包含头文件fstream

	//2.创建流的对象
	ofstream ofs;

	//3、指定打开方式
	ofs.open("test.txt", ios::out);

	//写内容
	ofs << "姓名:张三" << endl;
	ofs << "性别:男" << endl;
	ofs << "年龄:18" << endl;

	// 关闭文件
	ofs.close();

	system("pause");
	return 0;
}
打开项目根目录, 发现多了一个test.txt的文件,内容如下:

总结:
- 文件操作必须包含头文件fstream
- 读文件可以利用ofstream,或者fstream类
- 打开文件的时候需要指定操作文件的路径, 以及打开方式
- 利用
<<可以向文件中写数据 - 操作完毕,要关闭文件
读文件
#include <iostream>
using namespace std;
#include <fstream>
#include <string>

int main() {

	//1、 导入头文件

	//2、 创建流对象
	ifstream ifs;

	//3、 打开文件并判断文件是否打开成功
	ifs.open("test.txt", ios::in);
	if (!ifs.is_open())
	{
		cout << "文件打开失败" << endl;
	}

	// 4、读取文件内容
	// 第一种读取数据
	/*char buf[1024] = { 0 };
	while (ifs >> buf)
	{
		cout << buf << endl;
	}*/


	//第二种读取方式
	/*char buf[1024] = { 0 };
	while (ifs.getline(buf,sizeof(buf)));
	{
		cout << buf << endl;
	}*/

	//第三种读取方式
	/*string buf;
	while (getline(ifs,buf))
	{
		cout << buf << endl;
	}*/

	// 第四种读取方式(但是不推荐,这个是一个字符一个字符的读)
	char c;
	while ((c = ifs.get()) != EOF)
	{
		cout << c << endl;
	}

	//5、关闭文件
	ifs.close();

	system("pause");
	return 0;
}
总结:
- 读文件可以利用
ifstream,或者fstream类 - 利用
is_open函数可以判断文件是否打开成功 close关闭文件
二进制文件
以二进制的方式对文件进行读写操作
打开方式要指定iOS::binary
写文件
二进制方式写文件主要利用流对象调用成员函数的write
函数原型:ostream& write(const char * buffer, int len)
参数解释: 字符指针buffer指向内存在中一段存储空间, len是读写的字节数。
#include <iostream>
using namespace std;
#include <fstream>

class Person {
public:
	char m_Name[64]; // 姓名
	int m_Age; // 年龄
};

int main() {

	// 1、创建头文件
	// 2、创建流对象
	ofstream ofs("Person.txt", ios::out | ios::binary);

	// 3、打开文件
	//ofs.open("Person.txt", ios::out | ios::binary);

	// 4、写文件
	Person p = { "张三", 18 };
	ofs.write((const char*)&p, sizeof(Person));

	// 关闭文件
	ofs.close();


	system("pause");
	return 0;
}
总结 : 文件输出流对象可以通过write函数,以二进制的方式写数据。
读文件
二进制方式读文件主要利用流对象调用成员函数read
函数原型:istream& read(char *buffer, int len);
参数解释:字符指针buffer指向内存中一段存储空间。len是读写的字节数。
#include <iostream>
using namespace std;
#include <fstream>


class Person {
public:
	char m_Name[64]; // 姓名
	int m_Age; // 年龄
};

void test() {
	ifstream ifs;
	ifs.open("Person.txt", ios::in | ios::binary);
	if (!ifs.is_open())
	{
		cout << "文件打开失败" << endl;
		return;
	}
	Person p;
	ifs.read((char*)&p, sizeof(Person));
	cout << "姓名:" << p.m_Name << "年龄:" << p.m_Age << endl;

	//关闭文件
	ifs.close();
}

int main() {
	test();
	system("pause");
	return 0;
}
总结:文件输入流对象,可以通过read函数,以二进制的方式读数据。
实战演练
职工管理系统可以用来管理公司内部所有员工信息。
管理系统重需要实现的功能如下:
- 退出管理程序:退出当前管理系统
- 增加职工信息: 实现批量添加职工功能,将信息录入到文件中,职工信息为:职工编号、姓名、部门编号
- 显示职工信息: 显示公司内部所有职工信息
- 修改职工信息: 按照编号删除指定员工
- 查找员工信息:按照职工的编号或者姓名进行查找相关的人员信息
- 按照编号排序: 按照职工的编号,进行排序,排序规则由用户指定
- 清空所有文档:清空文件中记录的所有职工信息(清空钱需要再次确认,防止误删)


 1227
1227

 被折叠的 条评论
为什么被折叠?
被折叠的 条评论
为什么被折叠?
 到【灌水乐园】发言


