


一、配置环境
1.1、Centos7配置go
wget https://go.dev/dl/go1.22.5.linux-amd64.tar.gz
rm -rf /usr/local/go && tar -C /usr/local -xzf go1.22.5.linux-amd64.tar.gz
vim /etc/profile
export GO111MODULE=on
export GOROOT=/usr/local/go
export GOPATH=/root/gopath
export PATH=$PATH:$GOROOT/bin

#设置go下载依赖包,国内源
go env -w GOPROXY=https://goproxy.cn,direct

go env -w CGO_ENABLED="0"

set CGO_ENABLED=1

mkdir /root/gopath
chmod 777 /root/gopath/
1.2、配置go远程调试
go install github.com/go-delve/delve/cmd/dlv@latest

 git clone https://github.com/go-delve/delve
 go install github.com/go-delve/delve/cmd/dlv
 find / -name dlv 2>/dev/null

go mod vendor

go mod tidy


dlv debug --headless --listen=:2345 --api-version=2

dlv --listen=:2345 --headless=true --api-version=2 --accept-multiclient exec ./test001_linux -- -s 123

dlv debug --headless --listen=:2345 --api-version=2 --accept-multiclient -- -name=xxx
二、创建go项目
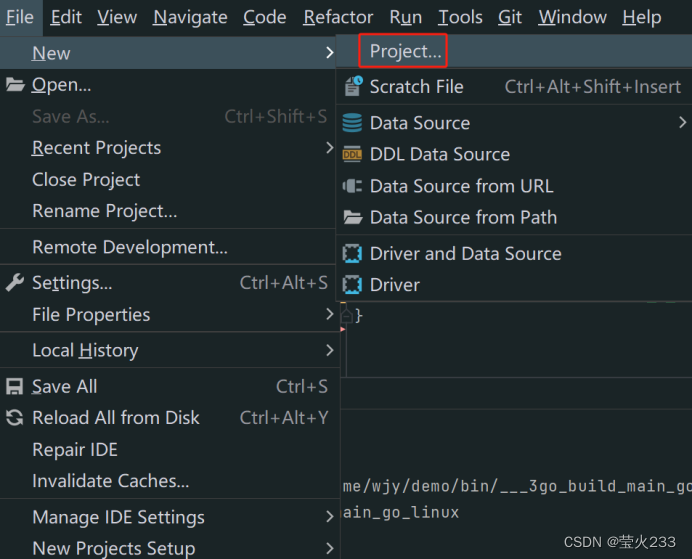
2.1 使用goland创建golang项目
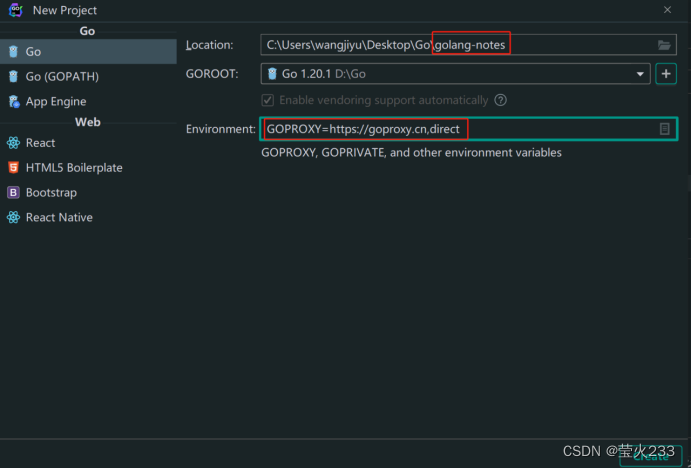
2.2 选择项目路径,输入项目名称,配置环境变量GORPOXY=https://goproxy.cn,direct(国内下载源)
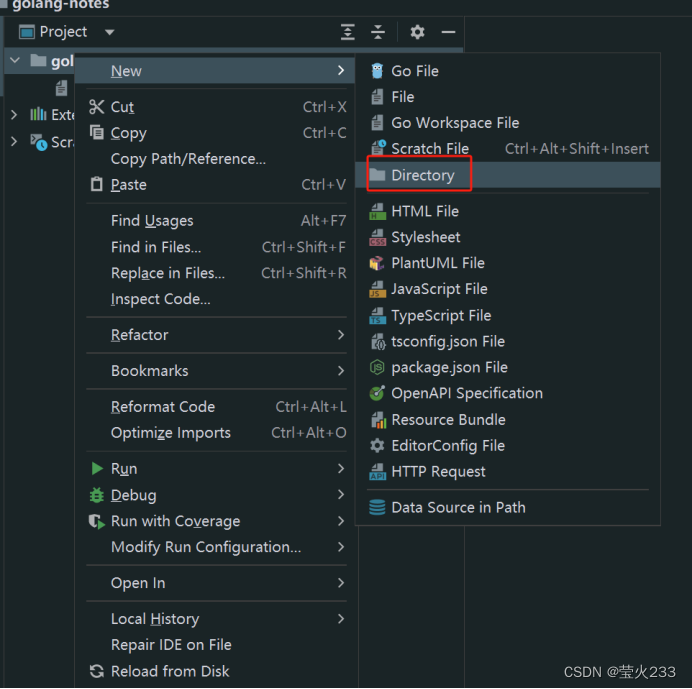
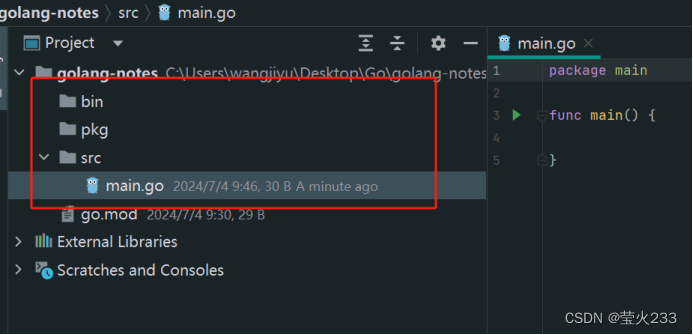
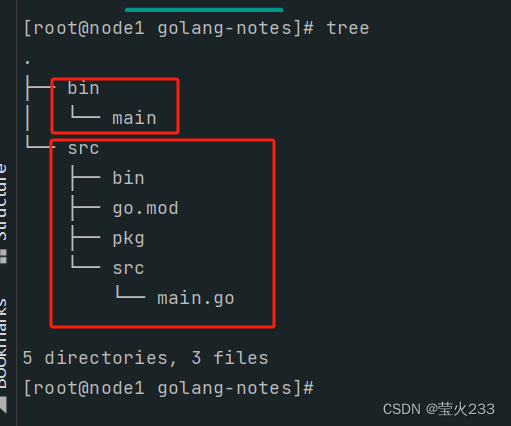
根据需要,创建项目目录
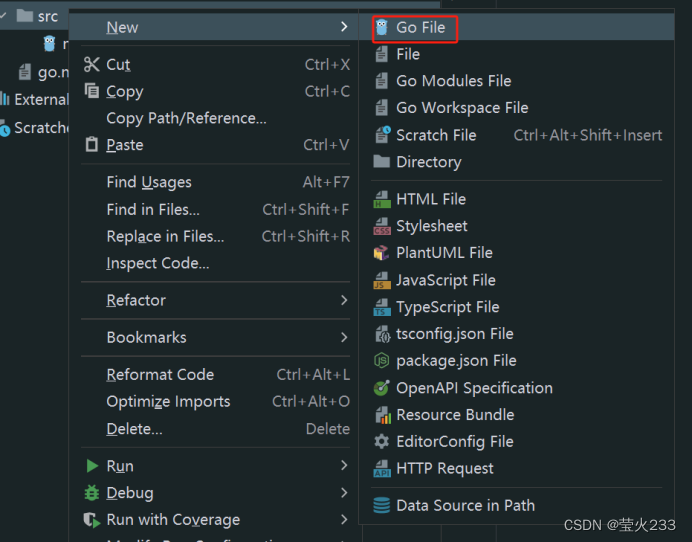
在目录下创建go文件
三、配置远程开发环境
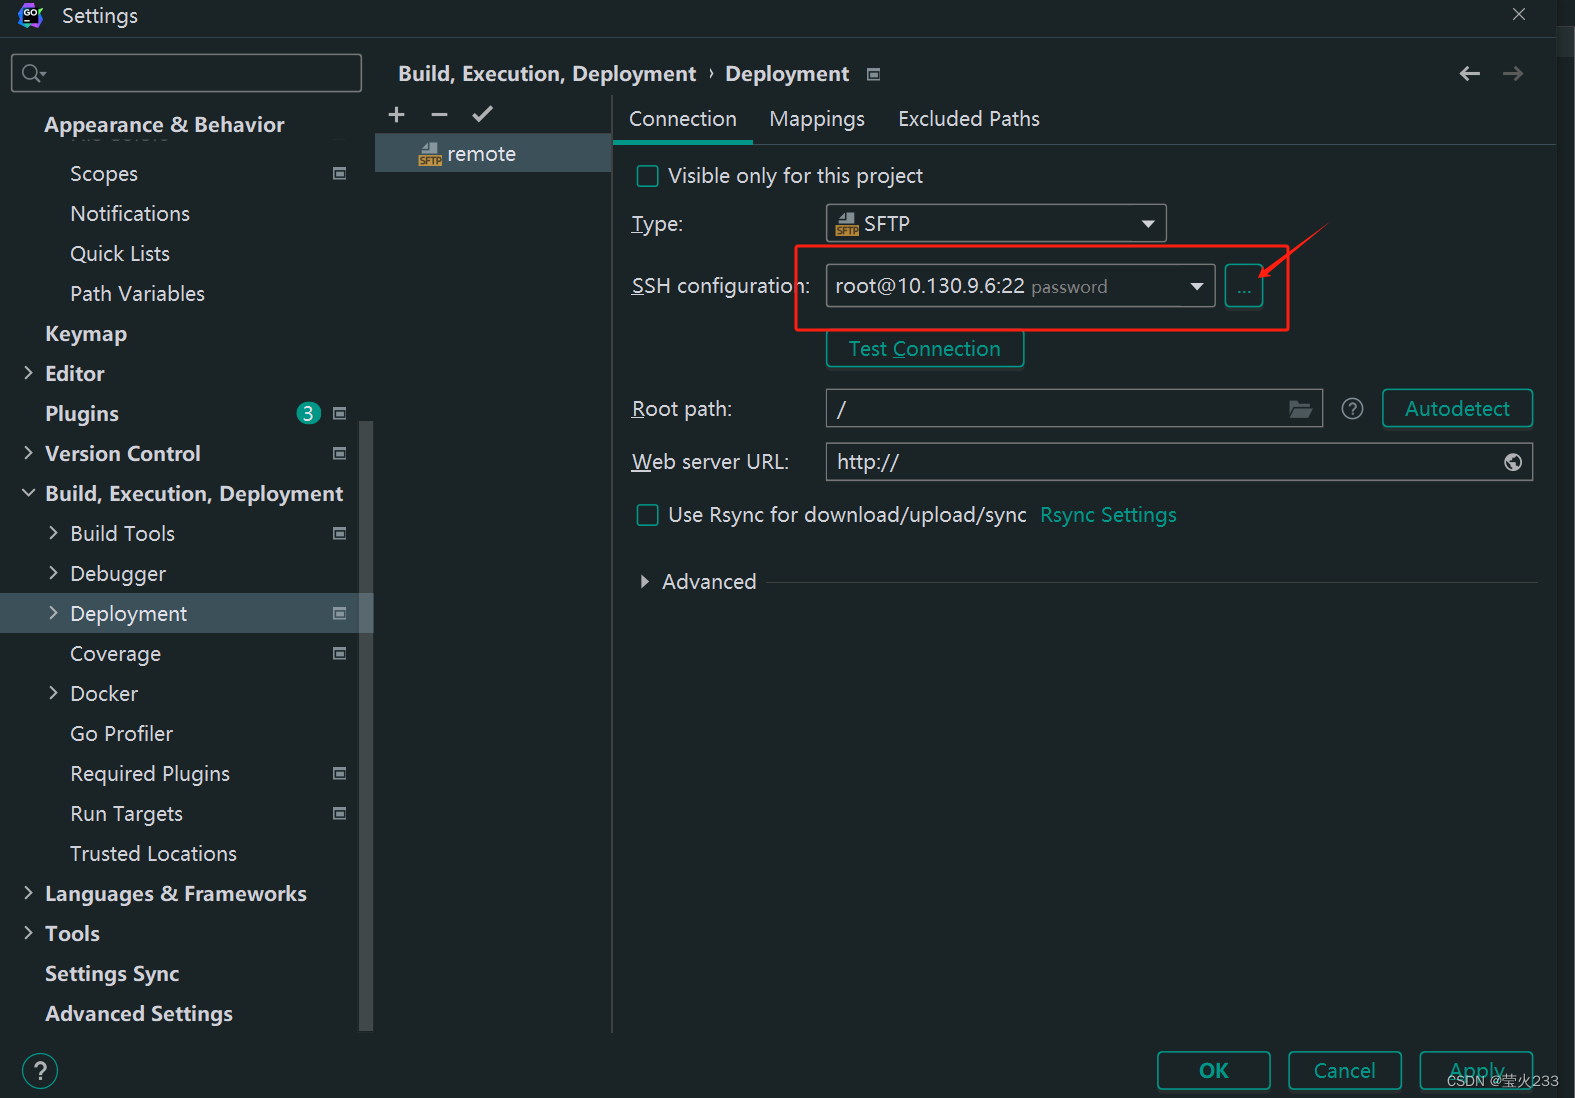
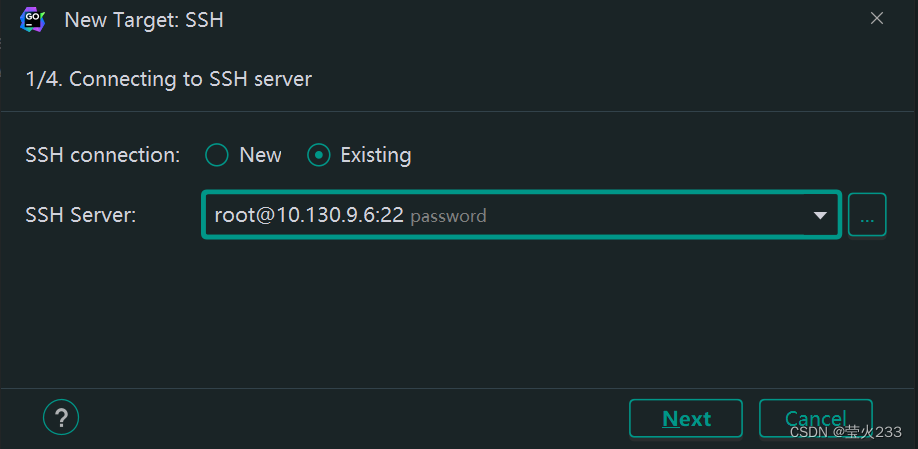
3.1 输入远程ip, 密码等,创建远程连接
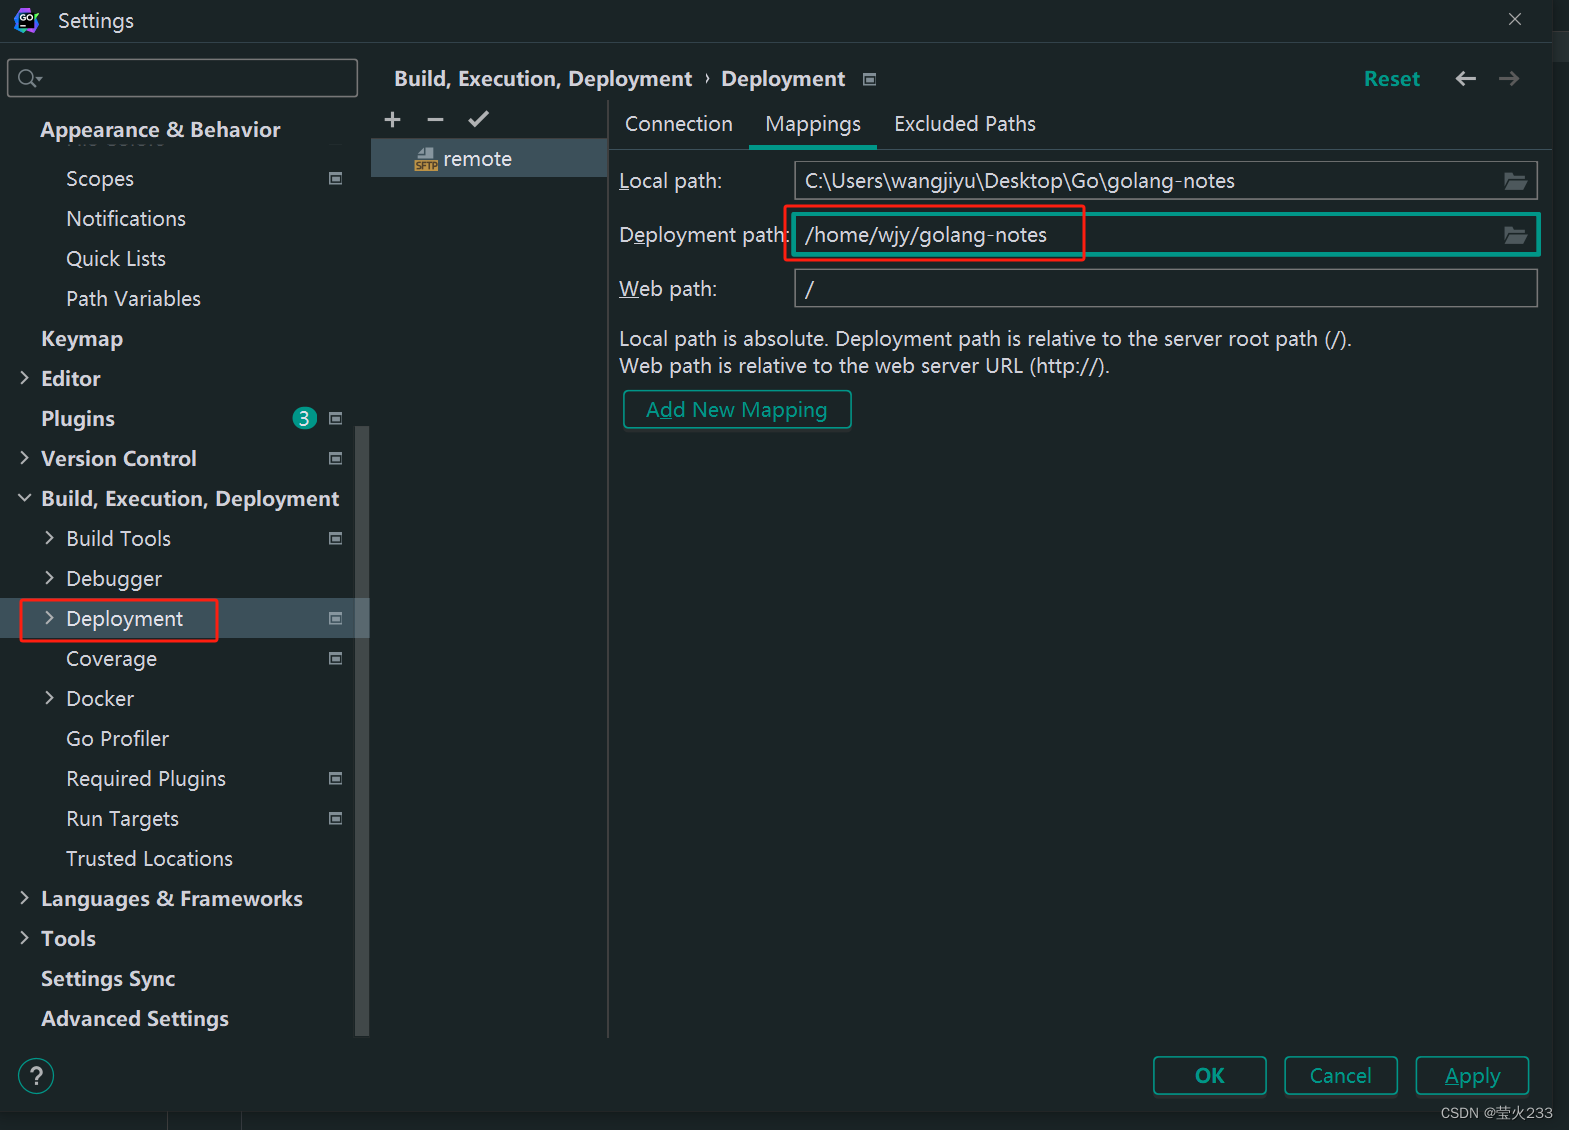
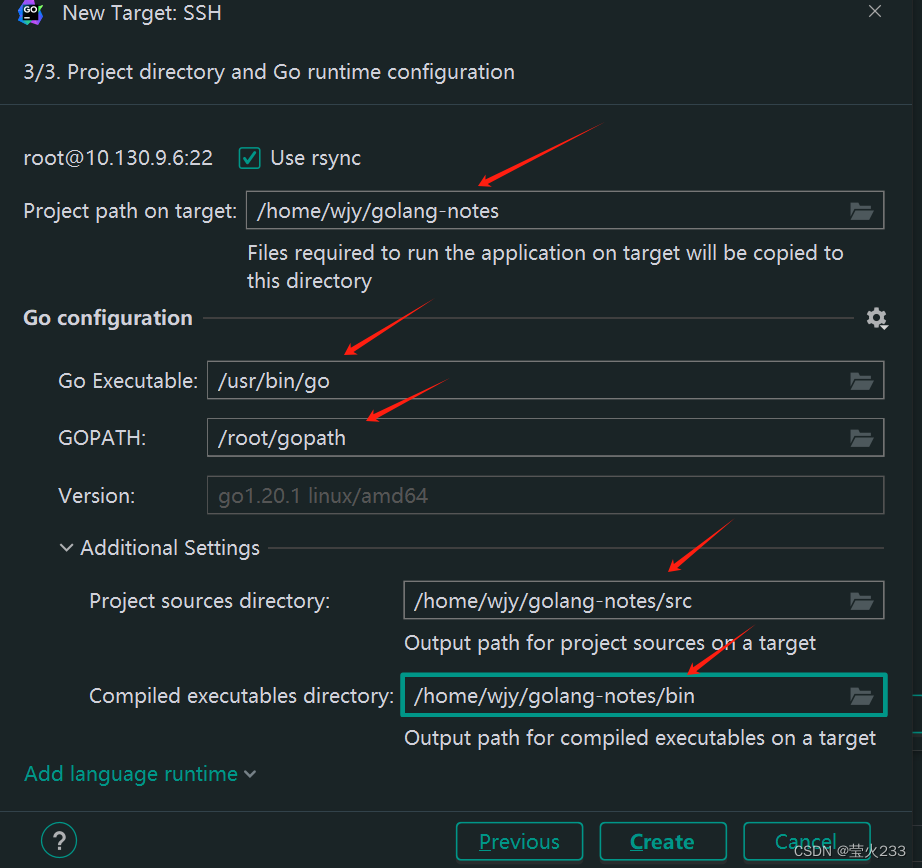
3.2 创建远程映射路径
3.3 使用远程Linux环境
3.4 配置远程编译运行

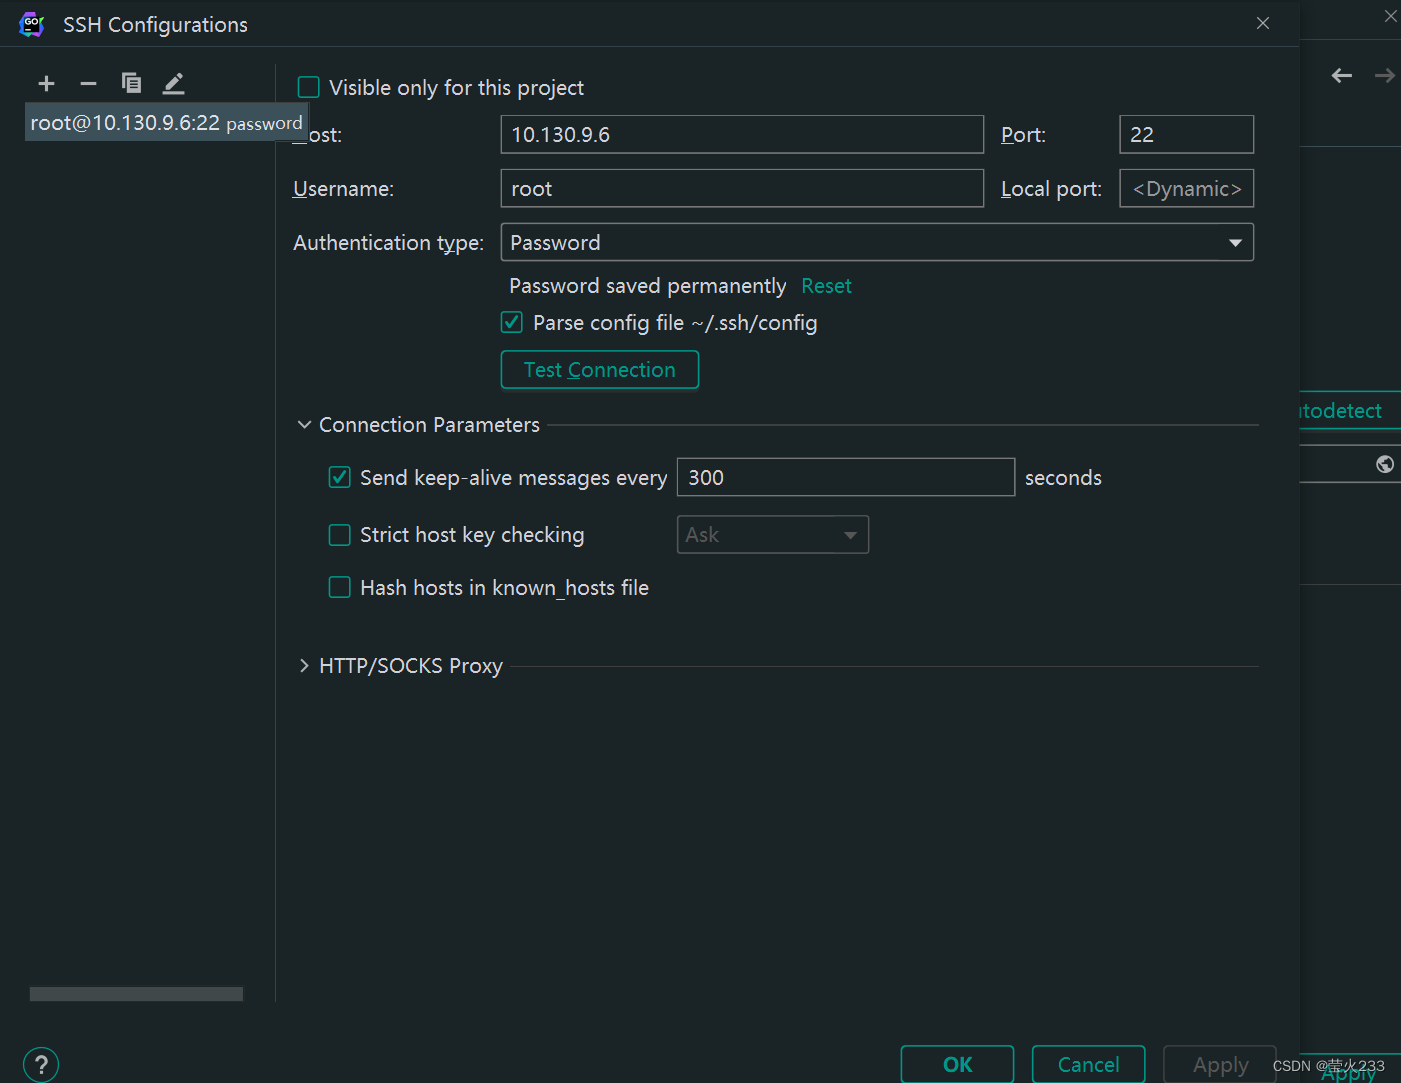
3.5 配置ssh远程环境
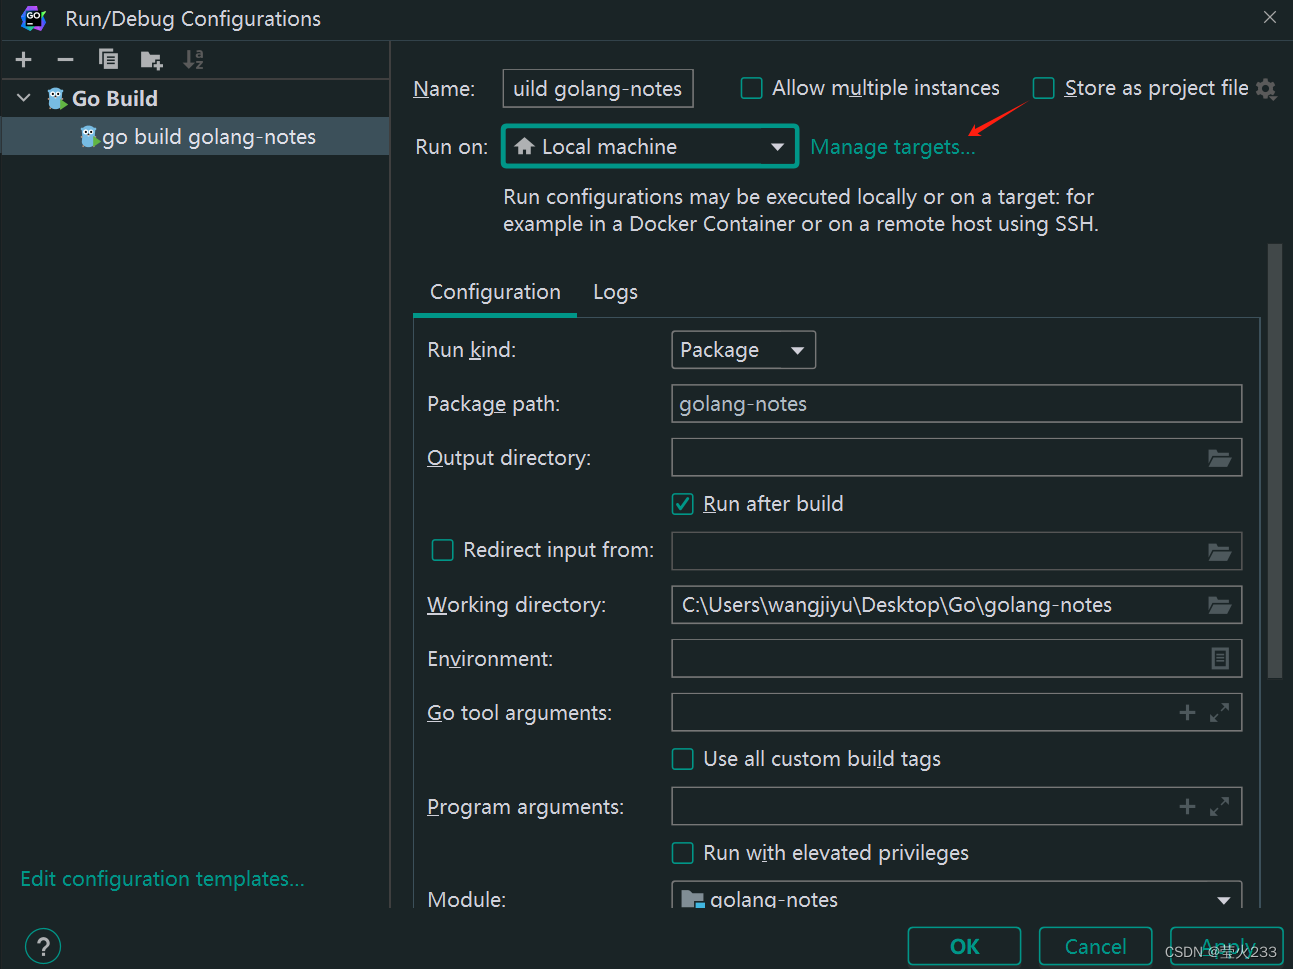
3.6 配置相关路径
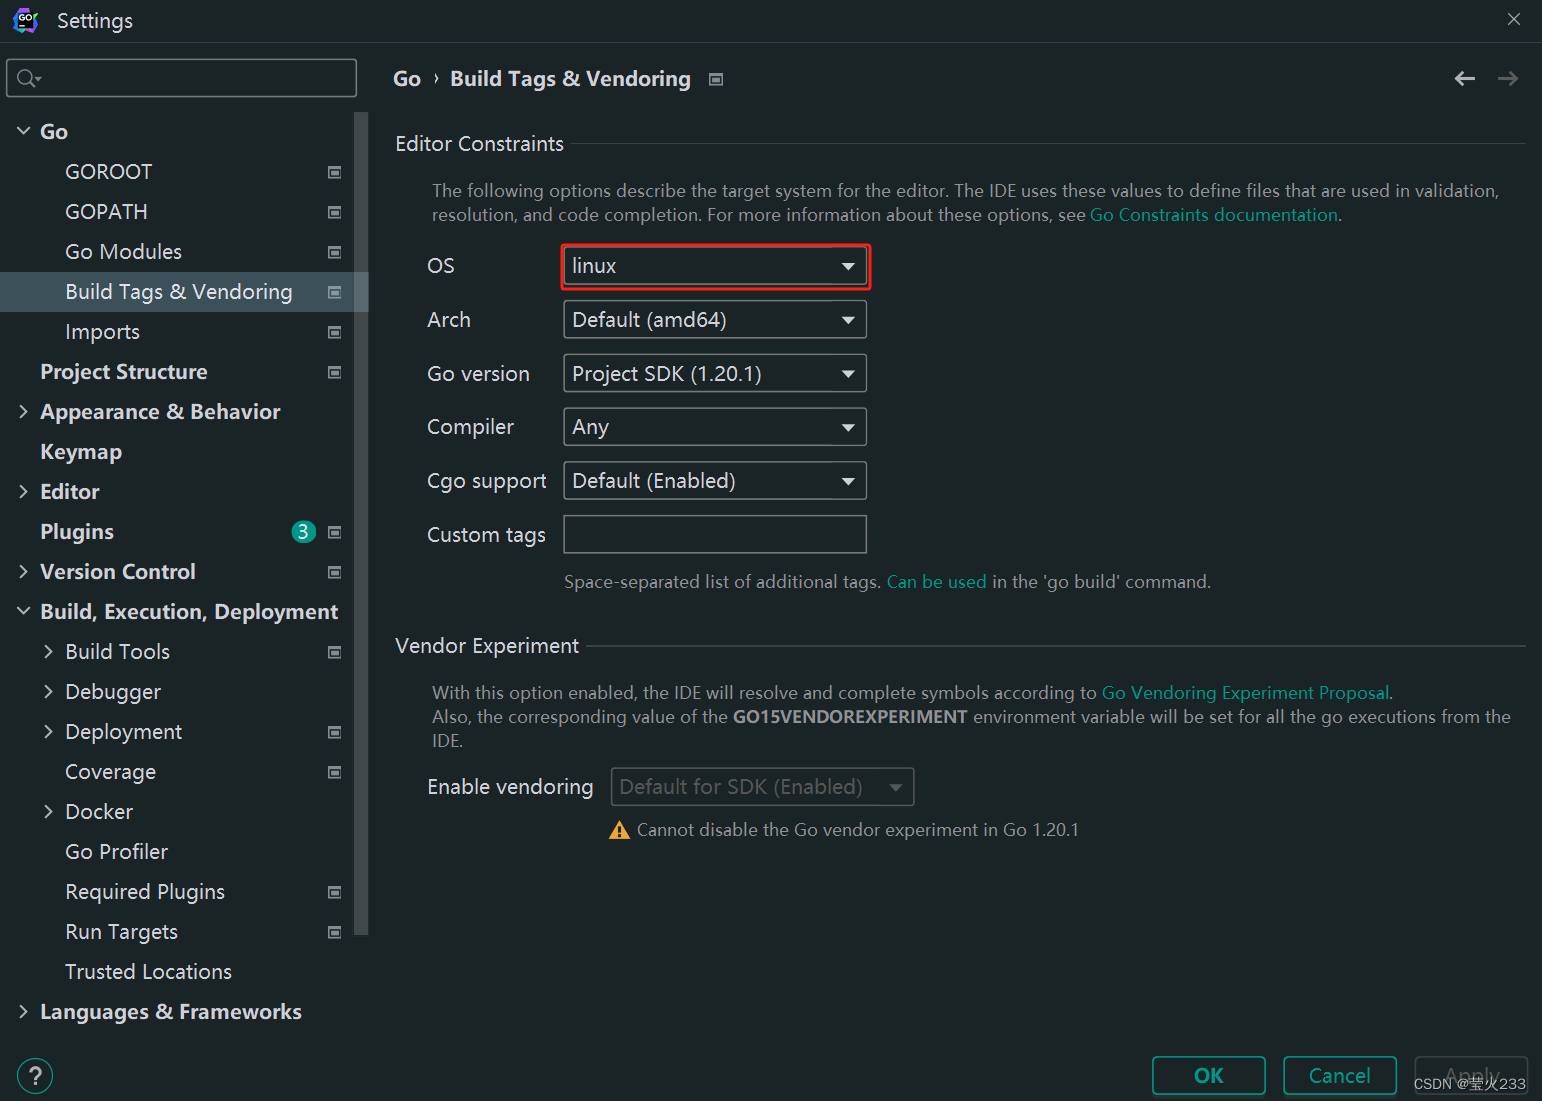
3.7 默认编译环境,选择远程Linux环境
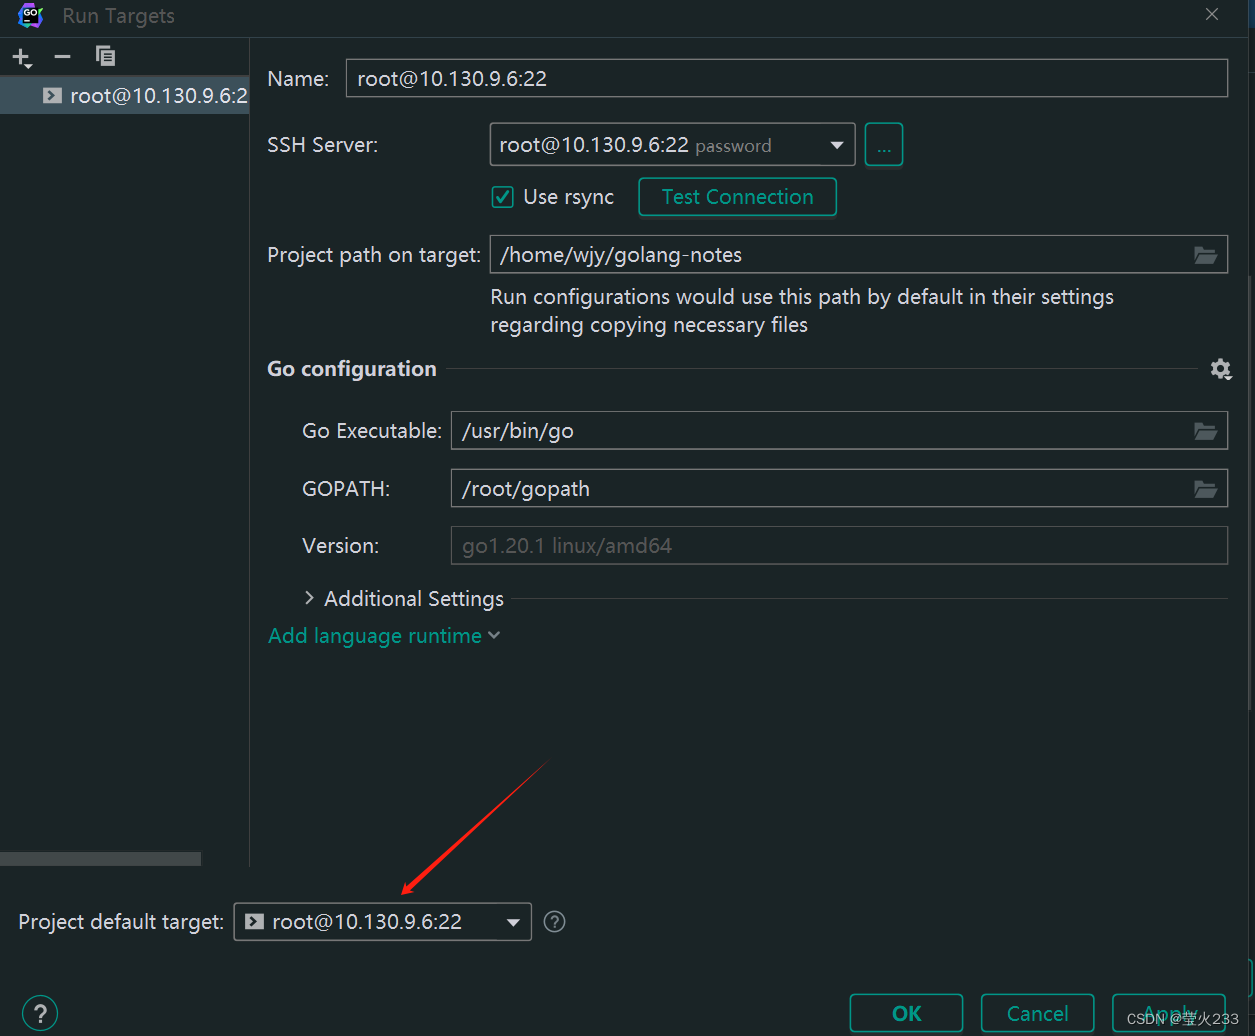
3.8 配置运行参数GOARCH=amd64;GOOS=linux;CGO_ENABLED=0;GOROOT=/usr/local/go
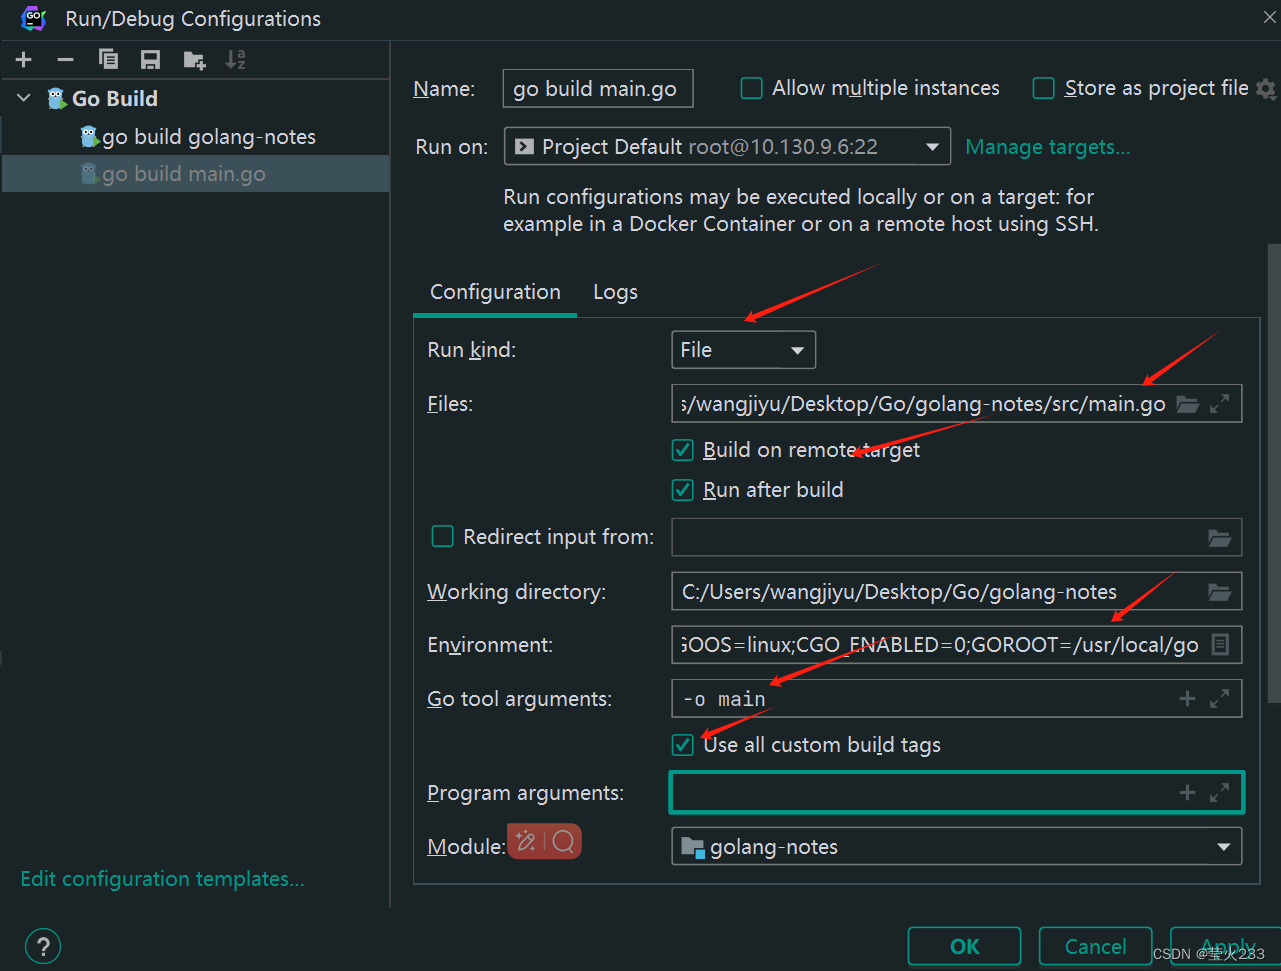
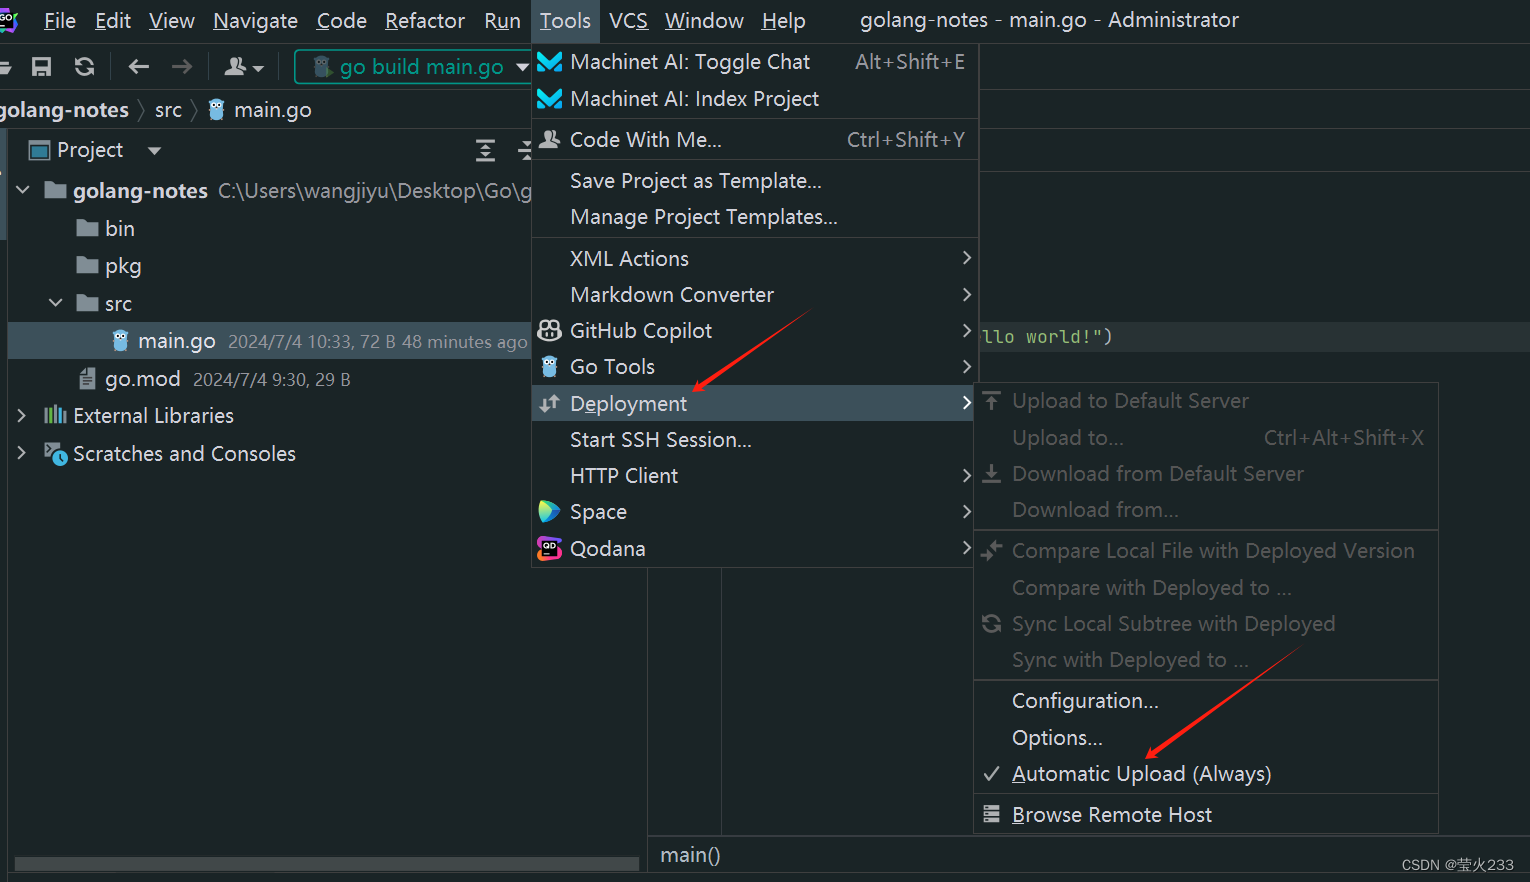
3.9 配置自动上传
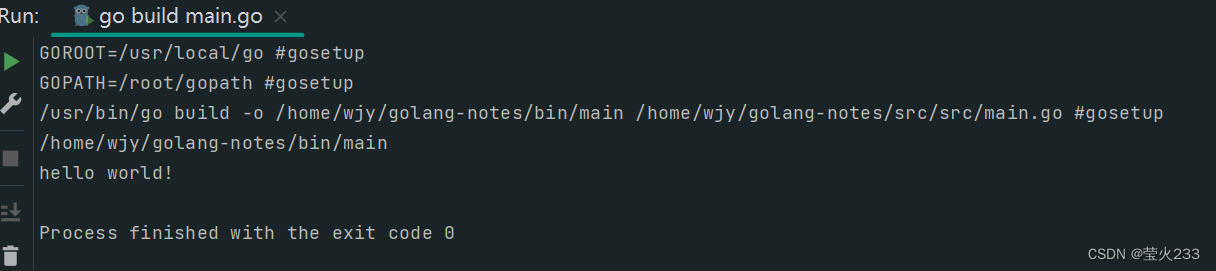
3.10 远程编译运行程序
四、建立github仓库,并上传代码
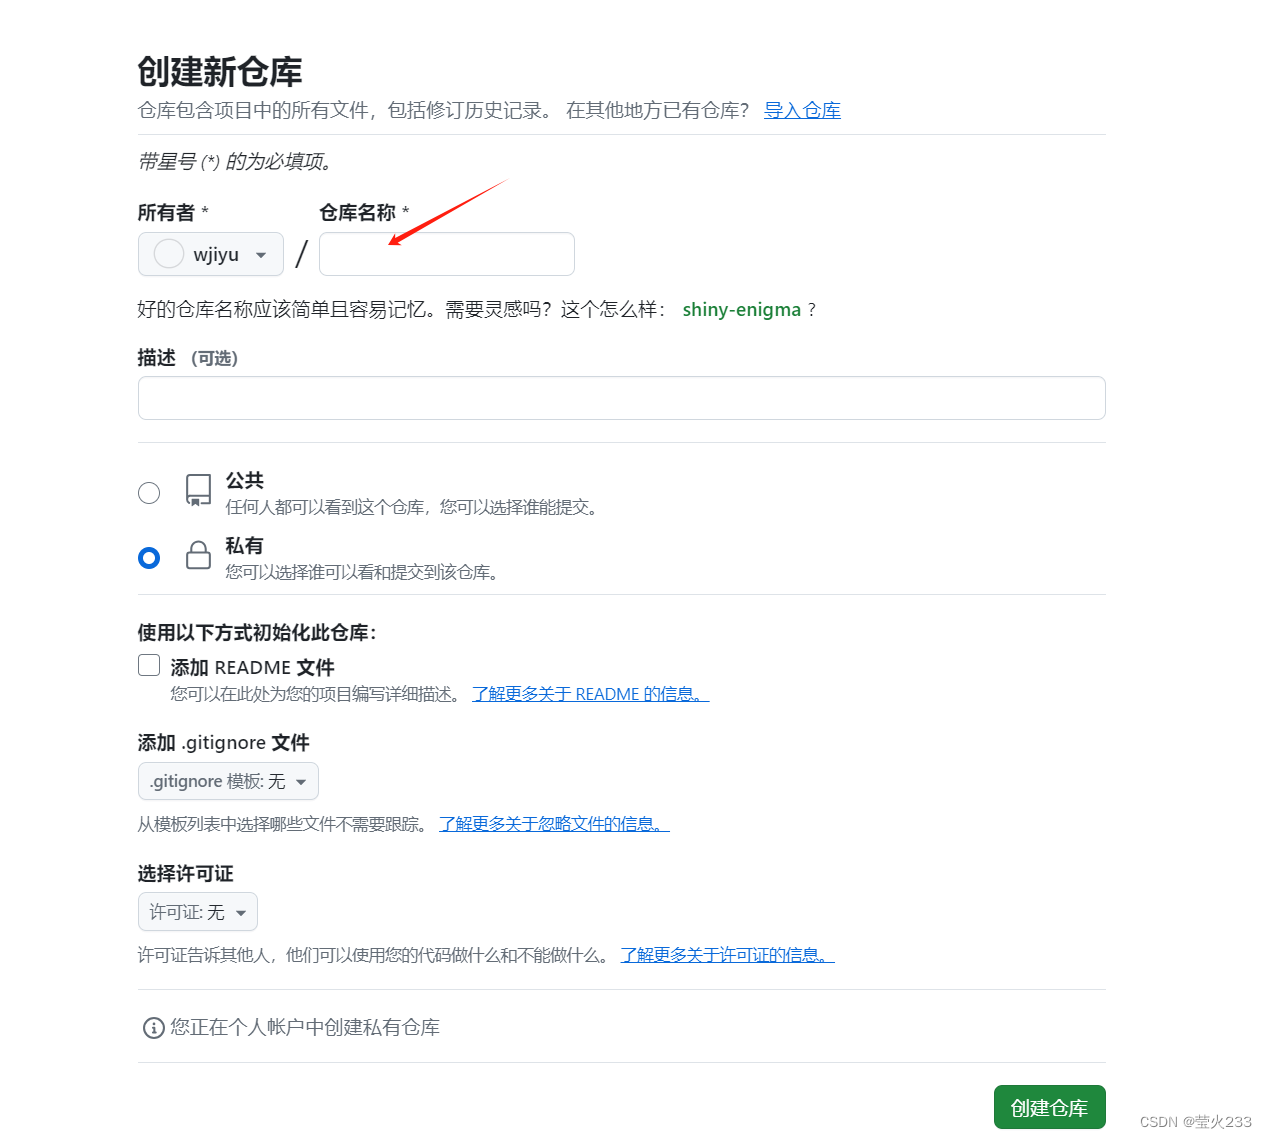
4.1 创建github仓库
4.2 将创建的项目,上传到github仓库
git init
git add src
git commit -m "first commit"
git branch -M master
git remote add origin https://github.com/wjiyu/golang-notes.git
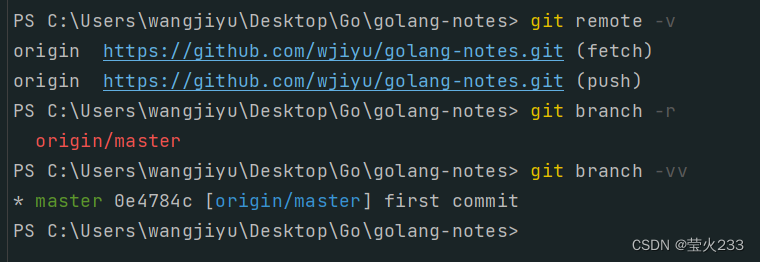
git push -u origin master4.3 成功后,查看相关信息
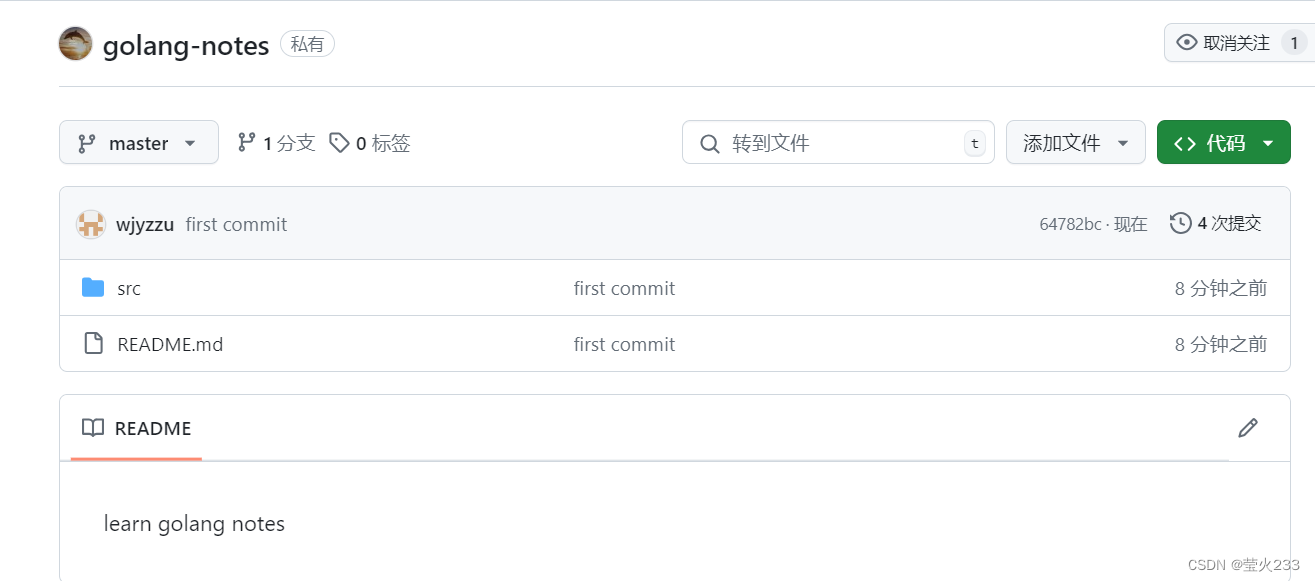
 4.4 查看github


 4万+
4万+

 被折叠的 条评论
为什么被折叠?
被折叠的 条评论
为什么被折叠?
 到【灌水乐园】发言


