


 本文详细介绍ImagePy,一款基于Python的开源图像处理框架。涵盖基础资料、项目实战指南,包括Mac下安装启动、基础教程、插件开发流程。通过实战演示如何在ImagePy中集成并使用自定义插件。
- ImagePy可以迅速地将python版本的算法嵌入到GUI当中,方便demo展示
- 灵活简单的插件集成,有助于多种算法的组合调优,查看即时效果
一、基础资料
1. 相关介绍
2. 相关插件的写法
- ImagePy项目地址:https://github.com/Image-Py/imagepy
- 基础插件: https://github.com/Image-Py/demoplugin
- OpenCV插件:https://github.com/Image-Py/opencv-plgs
- SimpleITK插件:https://github.com/Image-Py/opencv-plgs
- SkImg插件:https://github.com/Image-Py/skimg-plgs
- xlreport插件(报表展示):https://github.com/Image-Py/xlreport
- 参数手册:https://github.com/Image-Py/demoplugin/blob/901cdca802bcab1b8fef8a39229803fc646b2554/doc/start.md
3. 文档的写法
IBook:https://github.com/Image-Py/IBook
4. 小的项目
地址图像分割项目 - seaice: https://github.com/Image-Py/seaice
二、项目实战
1. Mac下安装及启动
pip3 install -U wxPython
pip3 install --user imagepy
python3 -m imagepy
2. 基础教程
- 首先了解《插件项目发布》,掌握发布插件的基本理念
- 克隆仓库:
git clone https://github.com/Image-Py/opencv-plgs.git到本地 - 新建目录:
opencv-plgs/menus/Opencv/your_filters - 参照已有范例,修改成自己的filter,并提交commit
- push代码到自己的github仓库,例如:https://github.com/KindleHe/demoplugin
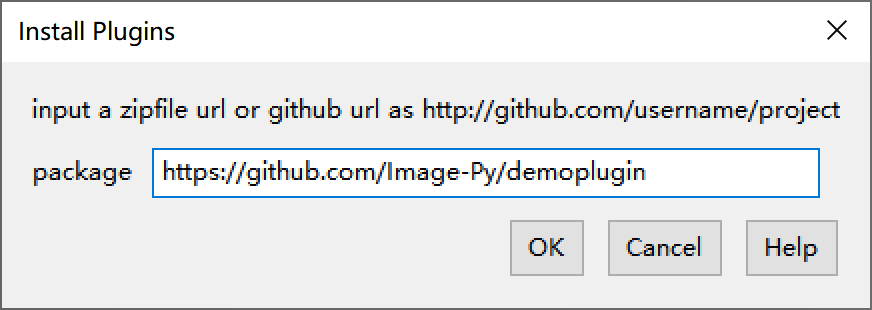
- 安装插件:将下图路径修改为https://github.com/KindleHe/demoplugin,然后点击
OK按钮,即可在导航栏看到名为demoplugin的插件
Plugins > Install > Install Plugin在对话框中输入插件仓库的github连接,ImagePy即开始下载插件,解决依赖,并自动加载。加载成功后我们可以看到菜单栏,工具栏,组件栏自动更新。这样,把你的插件项目地址发给其他人,就可以安装,使用了。
- 删除插件:
Plugins>Contribute>Plugins Manager中remove已经安装的插件demo plugin
3. 一些小坑
- 安装插件时,应选择github的网址,而非git地址
- 安装插件时,貌似无法选择某一个分支
- 目前只能在一个独立py文件的run函数中,填写OpenCV组合而成的功能函数
- run函数引用同文件和其他文件当中的类或函数,仍需要继续踩坑,未完待续


 1万+
1万+

 被折叠的 条评论
为什么被折叠?
被折叠的 条评论
为什么被折叠?
 到【灌水乐园】发言


