


 本文从IO到NIO再到Netty,介绍了Java网络编程的发展历程,包括各阶段的特点、优缺点及适用场景。并通过示例代码展示了基于IO、NIO、Netty的网络程序实现,并附带了一个基于Spring Boot和Netty的聊天室项目。
Java网络编程进化史:从IO到NIO再到Netty
一、从IO到NIO再到Netty
1.IO
server端首先创建了一个 serverSocket来监听8000端口,然后创建一个线程,线程里面不断调用阻塞方法 serversocket.accept();获取新的连接,当获取到新的连接之后,给每条连接创建一个新的线程,这个线程负责从该连接中读取数据,然后读取数据是以字节流的方式。
客户端的代码则相对来说简单,连接上服务端8000端口之后,便向服务端发消息。
在传统的IO模型中,每个连接创建成功之后都需要一个线程来维护,每个线程包含一个while死循环,那么1w个连接对应1w个线程,继而1w个while死循环,这就带来如下几个问题:
- 线程资源受限:线程是操作系统中非常宝贵的资源,同一时刻有大量的线程处于阻塞状态是非常严重的资源浪费,操作系统耗不起
- 线程切换效率低下:单机cpu核数固定,线程爆炸之后操作系统频繁进行线程切换,应用性能急剧下降。
- IO编程中,我们看到数据读写是以字节流为单位,效率不高。
IO编程模型在客户端较少的情况下运行良好,但是对于客户端比较多的业务来说,单机服务端可能需要支撑成千上万的连接,IO模型可能就不太合适了
2.NIO
NIO核心思路:
- NIO模型中通常会有两个线程,每个线程绑定一个轮询器selector,在我们这个例子中 serverSelector负责轮询是否有新的连接, clientSelector负责轮询连接是否有数据可读
- 服务端监测到新的连接之后,不再创建一个新的线程,而是直接将新连接绑定到 clientSelector上,这样就不用IO模型中1w个while循环在死等
- clientSelector被一个while死循环包裹着,如果在某一时刻有多条连接有数据可读,那么通过 clientSelector.select(1)方法可以轮询出来,进而批量处理
- 数据的读写以内存块为单位
基于JDK原生NIO编程的问题:
- JDK的NIO编程需要了解很多的概念,编程复杂,对NIO入门非常不友好,编程模型不友好,ByteBuffer的api简直反人类
- 对NIO编程来说,一个比较合适的线程模型能充分发挥它的优势,而JDK没有给你实现,你需要自己实现,就连简单的自定义协议拆包都要你自己实现
JDK的NIO底层由epoll实现,该实现饱受诟病的空轮训bug会导致cpu飙升100% - 项目庞大之后,自行实现的NIO很容易出现各类bug,维护成本较高
3.Netty
Netty的优点有很多:
- API使用简单,学习成本低。
- 功能强大,内置了多种解码编码器,支持多种协议。
- 性能高,对比其他主流的NIO框架,Netty的性能最优。
- 社区活跃,发现BUG会及时修复,迭代版本周期短,不断加入新的功能。
- Dubbo、Elasticsearch都采用了Netty,质量得到验证。
4.基于IO的Java网络程序
代码:
import java.io.IOException;
import java.io.InputStream;
import java.net.ServerSocket;
import java.net.Socket;
public class Main {
public static void main(String[] args) throws IOException {
// write your code here
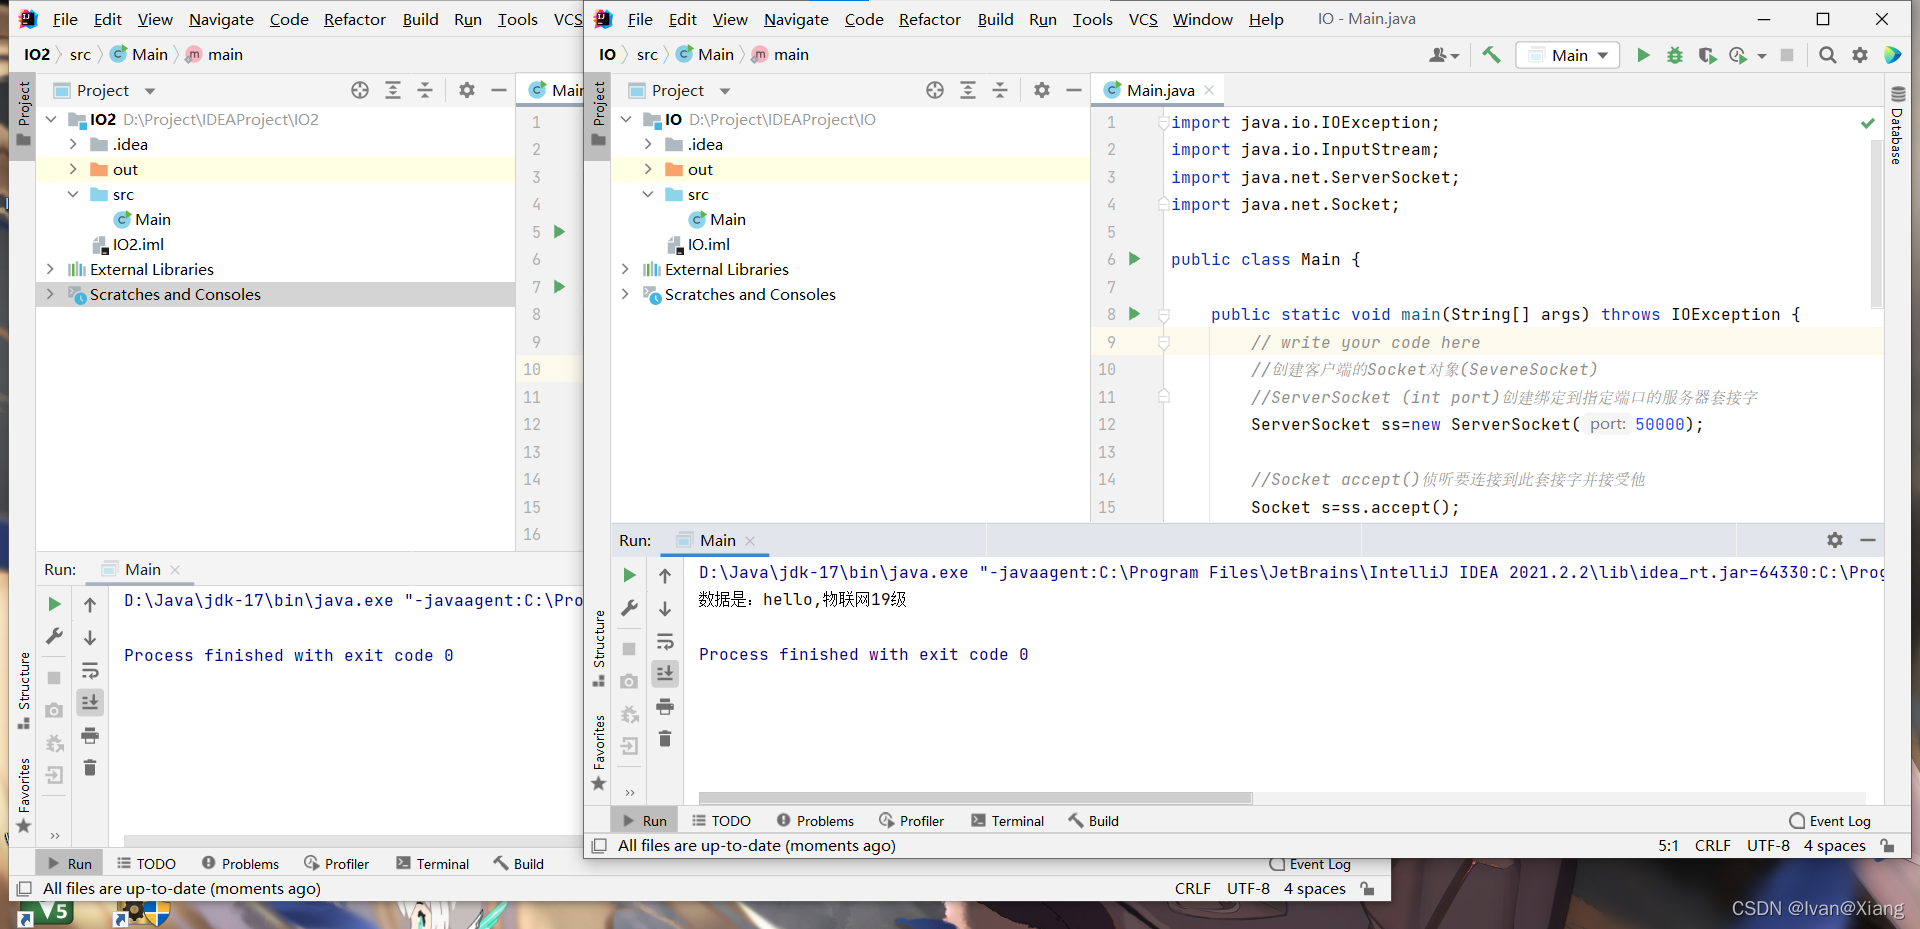
//创建客户端的Socket对象(SevereSocket)
//ServerSocket (int port)创建绑定到指定端口的服务器套接字
ServerSocket ss=new ServerSocket(50000);
//Socket accept()侦听要连接到此套接字并接受他
Socket s=ss.accept();
//获取输入流,读数据,并把数据显示在控制台
InputStream is=s.getInputStream();
byte[] bys=new byte[1024];
int len=is.read(bys);
String data=new String(bys,0,len);
System.out.println("数据是:"+data);
//释放资源
s.close();
ss.close();
}
}
import java.io.IOException;
import java.io.OutputStream;
import java.net.Socket;

public class Main {

    public static void main(String[] args) throws IOException {
        // write your code here
        //创建客户端的Socket对象
        Socket s=new Socket("10.60.178.23", 50000);//自己电脑IP

        //获取输出流,写数据
        OutputStream os=s.getOutputStream();
        os.write("hello,物联网19级".getBytes());

        //释放资源
        s.close();
    }
}
5.基于NIO的Java网络程序
代码:
import java.net.InetSocketAddress;
import java.nio.ByteBuffer;
import java.nio.channels.SelectionKey;
import java.nio.channels.Selector;
import java.nio.channels.ServerSocketChannel;
import java.nio.channels.SocketChannel;
import java.util.Iterator;
import java.util.Set;

public class Main {
    //网络通信IO操作,TCP协议,针对面向流的监听套接字的可选择通道(一般用于服务端)
    private ServerSocketChannel serverSocketChannel;
    private Selector selector;

    /*
     *开启服务端
     */
    public void start(Integer port) throws Exception {
        serverSocketChannel = ServerSocketChannel.open();
        selector = Selector.open();
        //绑定监听端口
        serverSocketChannel.socket().bind(new InetSocketAddress(port));
        //设置为非阻塞模式
        serverSocketChannel.configureBlocking(false);
        //注册到Selector上
        serverSocketChannel.register(selector, SelectionKey.OP_ACCEPT);
        startListener();
    }
    private void startListener() throws Exception {
        while (true) {
            // 如果客户端有请求select的方法返回值将不为零
            if (selector.select(1000) == 0) {
                System.out.println("当前没有任务!!!");
                continue;
            }
            // 如果有事件集合中就存在对应通道的key
            Set<SelectionKey> selectionKeys = selector.selectedKeys();
            Iterator<SelectionKey> iterator = selectionKeys.iterator();
            // 遍历所有的key找到其中事件类型为Accept的key
            while (iterator.hasNext()) {
                SelectionKey key = iterator.next();
                if (key.isAcceptable())
                    handleConnection();
                if (key.isReadable())
                    handleMsg(key);
                iterator.remove();
            }
        }
    }
    /**
     * 处理建立连接
     */
    private void handleConnection() throws Exception {
        SocketChannel socketChannel = serverSocketChannel.accept();
        socketChannel.configureBlocking(false);
        socketChannel.register(selector, SelectionKey.OP_READ, ByteBuffer.allocate(1024));
    }
    /*
     * 接收信息
     */
    private void handleMsg(SelectionKey key) throws Exception {
        SocketChannel channel = (SocketChannel) key.channel();
        ByteBuffer attachment = (ByteBuffer) key.attachment();
        channel.read(attachment);
        System.out.println("当前信息: " + new String(attachment.array()));
    }

    public static void main(String[] args) throws Exception {
        // write your code here
        Main Server = new Main();
        Server.start(8080);
    }
}
import java.io.IOException;
import java.net.InetSocketAddress;
import java.nio.ByteBuffer;
import java.nio.channels.SocketChannel;

public class Main {

    public static void main(String[] args) throws IOException {
        // write your code here
        SocketChannel socketChannel = SocketChannel.open();
        socketChannel.configureBlocking(false);

        // 连接服务器
        if (!socketChannel.connect(new InetSocketAddress("10.60.178.23", 8080))) {
            while (!socketChannel.finishConnect()) {
                System.out.println("connecting...");
            }
        }
        //发送数据
        String str = "hello,物联网19级";
        ByteBuffer byteBuffer = ByteBuffer.wrap(str.getBytes());
        socketChannel.write(byteBuffer);
        System.in.read();
    }
}
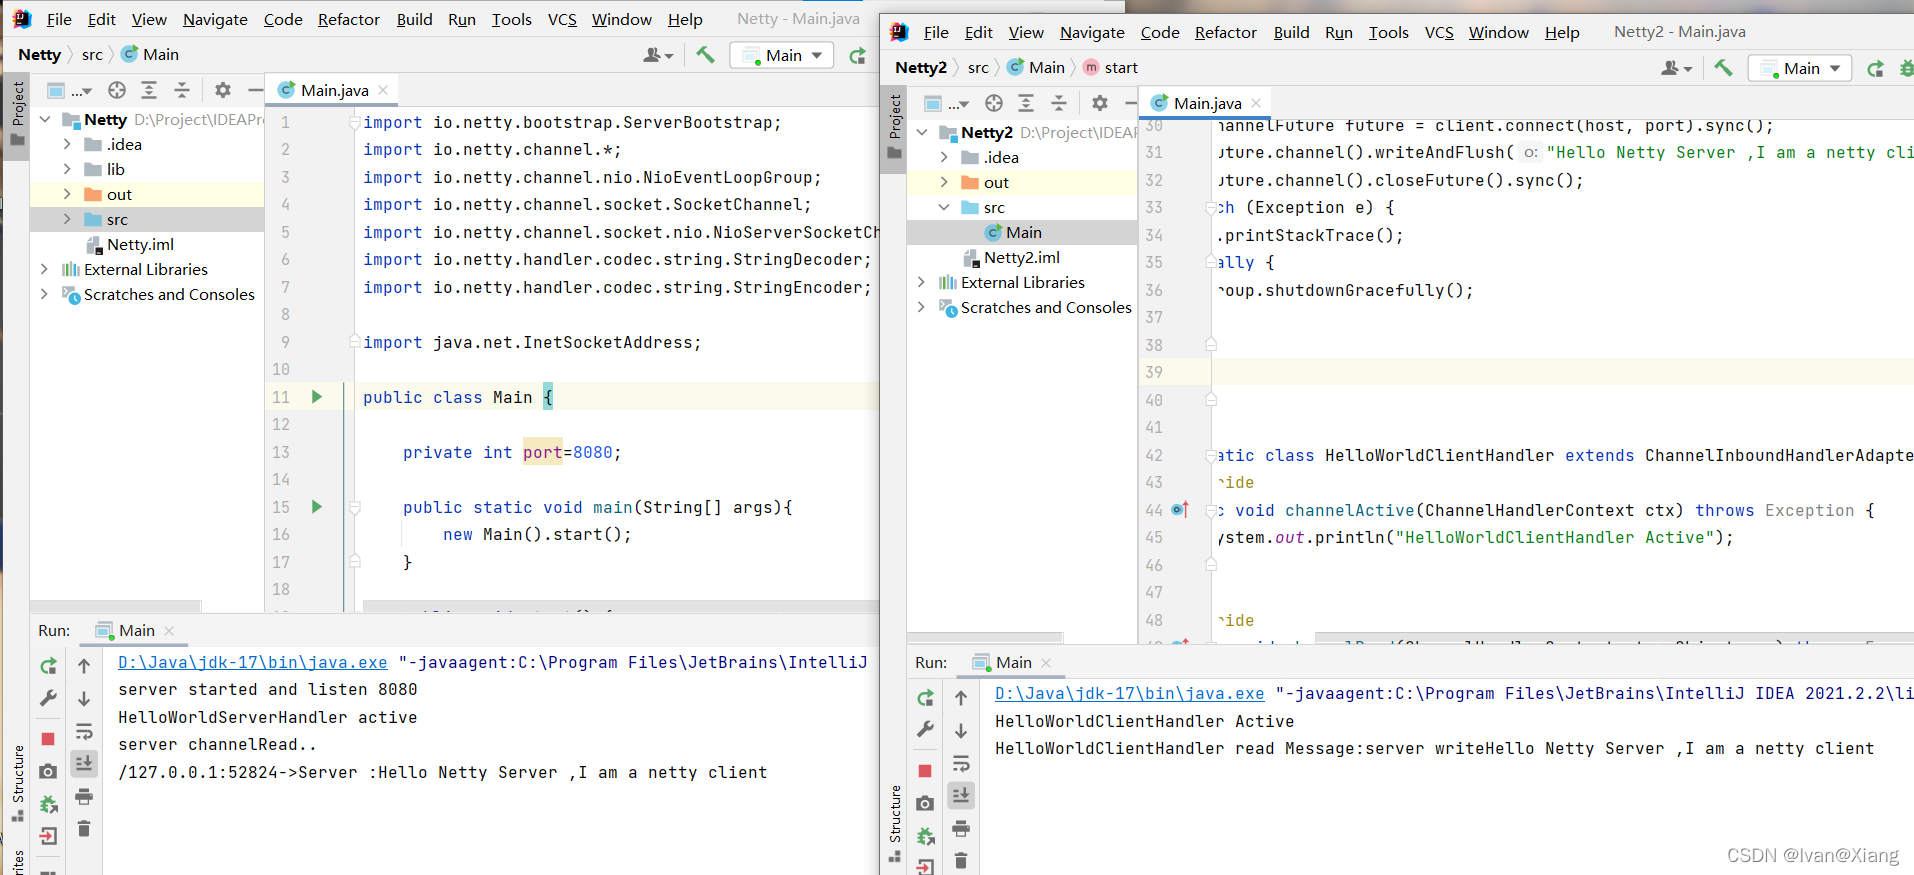
6.基于Netty的Java网络程序
创建项目后添加模型
选择Project Structure–>Modules–>Dependencies->±>Library->from maven
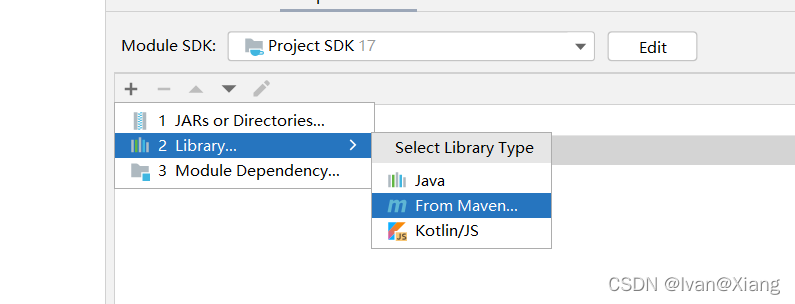
选择1.63final下载
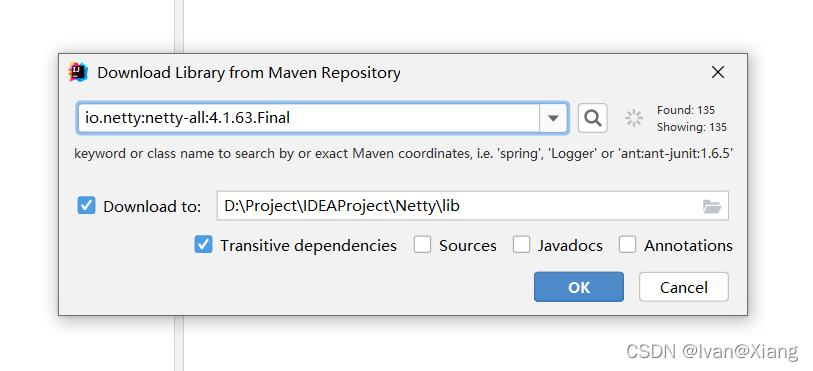
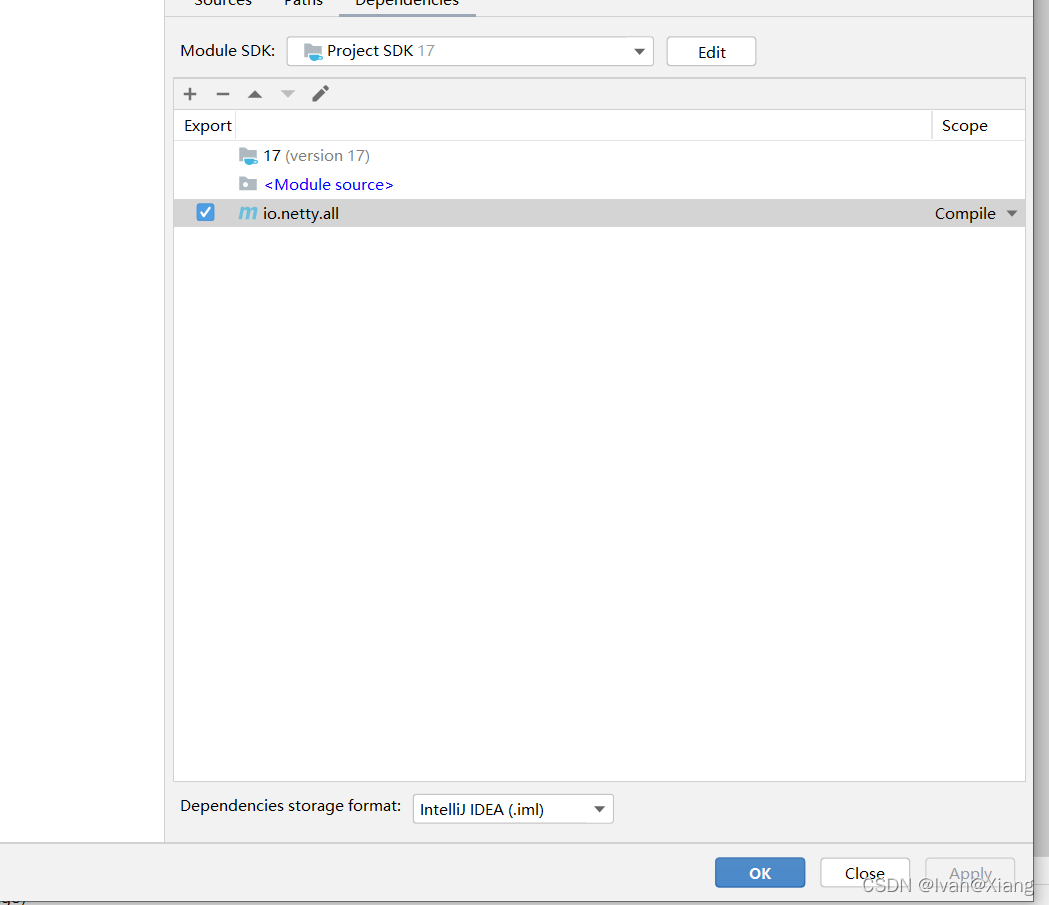
下载好后勾选此包,点击Apply->OK
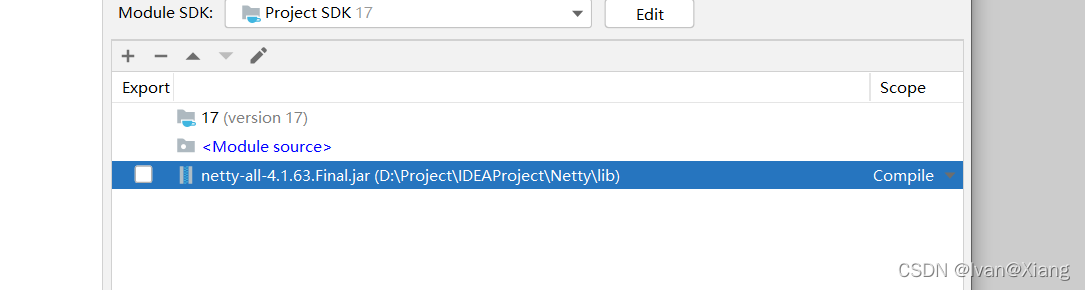
在创建另一个netty端时可以直接引用已经下载好的包
代码:
import io.netty.bootstrap.ServerBootstrap;
import io.netty.channel.*;
import io.netty.channel.nio.NioEventLoopGroup;
import io.netty.channel.socket.SocketChannel;
import io.netty.channel.socket.nio.NioServerSocketChannel;
import io.netty.handler.codec.string.StringDecoder;
import io.netty.handler.codec.string.StringEncoder;

import java.net.InetSocketAddress;

public class Main {

    private int port=8080;

    public static void main(String[] args){
        new Main().start();
    }

    public void start() {
        /**
         * 创建两个EventLoopGroup,即两个线程池,boss线程池用于接收客户端的连接,
         * 一个线程监听一个端口,一般只会监听一个端口所以只需一个线程
         * work池用于处理网络连接数据读写或者后续的业务处理(可指定另外的线程处理业务,
         * work完成数据读写)
         */
        EventLoopGroup boss = new NioEventLoopGroup(1);
        EventLoopGroup work = new NioEventLoopGroup();
        try {
            /**
             * 实例化一个服务端启动类,
             * group()指定线程组
             * channel()指定用于接收客户端连接的类,对应java.nio.ServerSocketChannel
             * childHandler()设置编码解码及处理连接的类
             */
            ServerBootstrap server = new ServerBootstrap()
                    .group(boss, work).channel(NioServerSocketChannel.class)
                    .localAddress(new InetSocketAddress(port))
                    .option(ChannelOption.SO_BACKLOG, 128)
                    .childOption(ChannelOption.SO_KEEPALIVE, true)
                    .childHandler(new ChannelInitializer<SocketChannel>() {
                        @Override
                        protected void initChannel(SocketChannel ch) throws Exception {
                            ch.pipeline()
                                    .addLast("decoder", new StringDecoder())
                                    .addLast("encoder", new StringEncoder())
                                    .addLast(new HelloWorldServerHandler());
                        }
                    });
            //绑定端口
            ChannelFuture future = server.bind().sync();
            System.out.println("server started and listen " + port);
            future.channel().closeFuture().sync();
        } catch (Exception e) {
            e.printStackTrace();
        }finally {
            boss.shutdownGracefully();
            work.shutdownGracefully();
        }
    }

    public static class HelloWorldServerHandler extends ChannelInboundHandlerAdapter {

        @Override
        public void channelActive(ChannelHandlerContext ctx) throws Exception {
            System.out.println("HelloWorldServerHandler active");
        }

        @Override
        public void channelRead(ChannelHandlerContext ctx, Object msg) throws Exception {
            System.out.println("server channelRead..");
            System.out.println(ctx.channel().remoteAddress()+"->Server :"+ msg.toString());
            ctx.write("server write"+msg);
            ctx.flush();
        }
    }
}
import io.netty.bootstrap.Bootstrap;
import io.netty.channel.*;
import io.netty.channel.nio.NioEventLoopGroup;
import io.netty.channel.socket.SocketChannel;
import io.netty.channel.socket.nio.NioSocketChannel;
import io.netty.handler.codec.string.StringDecoder;
import io.netty.handler.codec.string.StringEncoder;

public class Main {
    private static final String HOST = "localhost";
    private static final int PORT= 8080;

    public static void main(String[] args){
        new Main().start(HOST, PORT);
    }

    public void start(String host, int port) {
        EventLoopGroup group = new NioEventLoopGroup();
        try {
            Bootstrap client = new Bootstrap().group(group).channel(NioSocketChannel.class)
                    .option(ChannelOption.TCP_NODELAY, true).handler(new ChannelInitializer<SocketChannel>() {
                        @Override
                        protected void initChannel(SocketChannel ch) throws Exception {
                            ch.pipeline()
                                    .addLast("decoder", new StringDecoder())
                                    .addLast("encoder", new StringEncoder())
                                    .addLast(new HelloWorldClientHandler());
                        }
                    });
            ChannelFuture future = client.connect(host, port).sync();
            future.channel().writeAndFlush("Hello Netty Server ,I am a netty client");
            future.channel().closeFuture().sync();
        } catch (Exception e) {
            e.printStackTrace();
        } finally {
            group.shutdownGracefully();

        }

    }

    public static class HelloWorldClientHandler extends ChannelInboundHandlerAdapter {
        @Override
        public void channelActive(ChannelHandlerContext ctx) throws Exception {
            System.out.println("HelloWorldClientHandler Active");
        }

        @Override
        public void channelRead(ChannelHandlerContext ctx, Object msg) throws Exception {
            System.out.println("HelloWorldClientHandler read Message:"+msg);
        }
    }
}
基于WEB的聊天室
1.创建工程
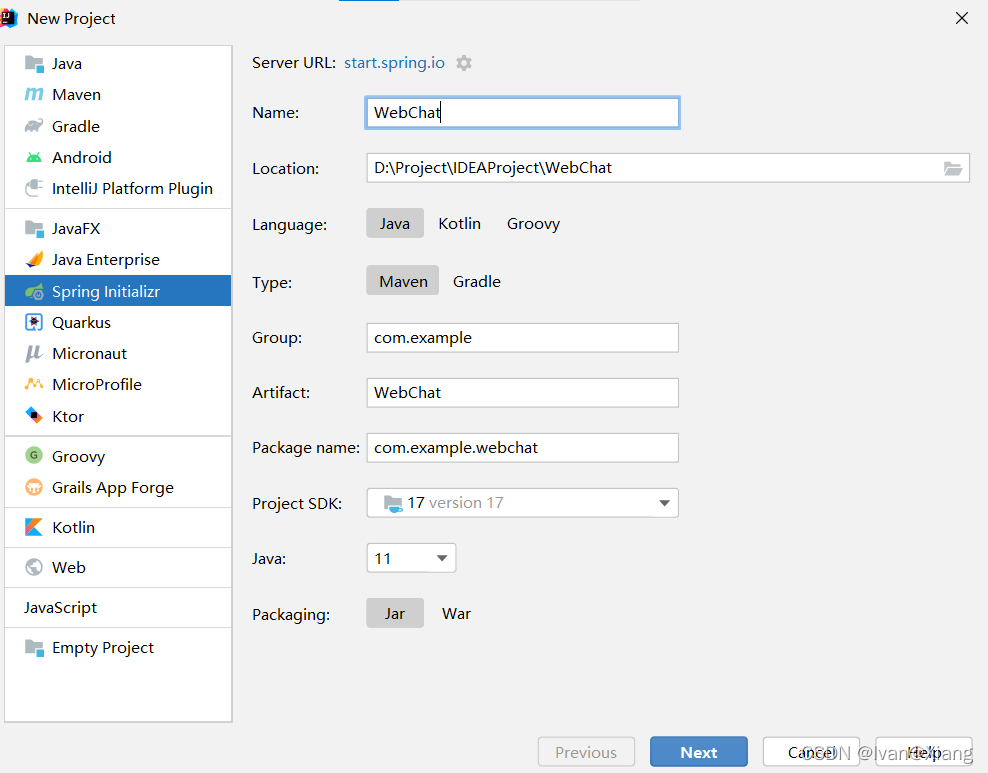
选择spring->next
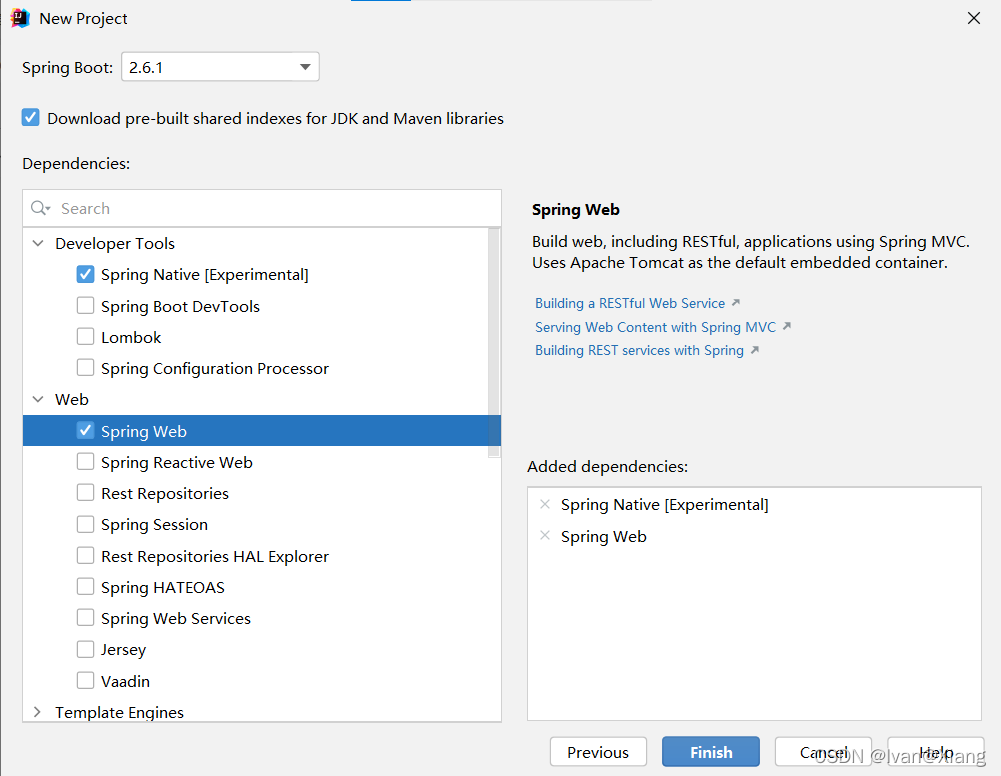
添加依赖,finish
再次如上面netty网络程序一样添加netty包
2.代码
WebChatApplication
package com.example.webchat;

import org.springframework.boot.SpringApplication;
import org.springframework.boot.autoconfigure.SpringBootApplication;
import org.springframework.context.ConfigurableApplicationContext;
import org.springframework.core.env.Environment;

import java.net.InetAddress;
import java.net.UnknownHostException;


@SpringBootApplication
public class WebChatApplication {

    public static void main(String[] args) throws UnknownHostException {
        ConfigurableApplicationContext application = SpringApplication.run(WebChatApplication.class, args);
        Environment env = application.getEnvironment();
        String host = InetAddress.getLocalHost().getHostAddress();
        String port = env.getProperty("server.port");
        System.out.println("[----------------------------------------------------------]");
        System.out.println("聊天室启动成功!点击进入:\t http://" + host + ":" + port);
        System.out.println("[----------------------------------------------------------");
        WebSocketServer.inst().run(53134);
    }
}
SessionGroup
package com.example.webchat;

import com.google.gson.Gson;
import io.netty.channel.ChannelFuture;
import io.netty.channel.ChannelFutureListener;
import io.netty.channel.ChannelHandlerContext;
import io.netty.channel.group.ChannelGroup;
import io.netty.channel.group.ChannelGroupFuture;
import io.netty.channel.group.DefaultChannelGroup;
import io.netty.handler.codec.http.websocketx.TextWebSocketFrame;
import io.netty.util.concurrent.ImmediateEventExecutor;
import org.springframework.util.StringUtils;

import java.util.Iterator;
import java.util.Map;
import java.util.concurrent.ConcurrentHashMap;

public final class SessionGroup {

    private static SessionGroup singleInstance = new SessionGroup();

    // 组的映射
    private ConcurrentHashMap<String, ChannelGroup> groupMap = new ConcurrentHashMap<>();

    public static SessionGroup inst() {
        return singleInstance;
    }

    public void shutdownGracefully() {

        Iterator<ChannelGroup> groupIterator = groupMap.values().iterator();
        while (groupIterator.hasNext()) {
            ChannelGroup group = groupIterator.next();
            group.close();
        }
    }

    public void sendToOthers(Map<String, String> result, SocketSession s) {
        // 获取组
        ChannelGroup group = groupMap.get(s.getGroup());
        if (null == group) {
            return;
        }
        Gson gson=new Gson();
        String json = gson.toJson(result);
        // 自己发送的消息不返回给自己
//      Channel channel = s.getChannel();
        // 从组中移除通道
//      group.remove(channel);
        ChannelGroupFuture future = group.writeAndFlush(new TextWebSocketFrame(json));
        future.addListener(f -> {
            System.out.println("完成发送:"+json);
//          group.add(channel);//发送消息完毕重新添加。

        });
    }

    public void addSession(SocketSession session) {

        String groupName = session.getGroup();
        if (StringUtils.isEmpty(groupName)) {
            // 组为空,直接返回
            return;
        }
        ChannelGroup group = groupMap.get(groupName);
        if (null == group) {
            group = new DefaultChannelGroup(ImmediateEventExecutor.INSTANCE);
            groupMap.put(groupName, group);
        }
        group.add(session.getChannel());
    }

    /**
     * 关闭连接, 关闭前发送一条通知消息
     */
    public void closeSession(SocketSession session, String echo) {
        ChannelFuture sendFuture = session.getChannel().writeAndFlush(new TextWebSocketFrame(echo));
        sendFuture.addListener(new ChannelFutureListener() {
            public void operationComplete(ChannelFuture future) {
                System.out.println("关闭连接:"+echo);
                future.channel().close();
            }
        });
    }

    /**
     * 关闭连接
     */
    public void closeSession(SocketSession session) {

        ChannelFuture sendFuture = session.getChannel().close();
        sendFuture.addListener(new ChannelFutureListener() {
            public void operationComplete(ChannelFuture future) {
                System.out.println("发送所有完成:"+session.getUser().getNickname());
            }
        });

    }

    /**
     * 发送消息
     * @param ctx 上下文
     * @param msg 待发送的消息
     */
    public void sendMsg(ChannelHandlerContext ctx, String msg) {
        ChannelFuture sendFuture = ctx.writeAndFlush(new TextWebSocketFrame(msg));
        sendFuture.addListener(f -> {//发送监听
            System.out.println("对所有发送完成:"+msg);
        });
    }
}
SocketSession
package com.example.webchat;

import io.netty.channel.Channel;
import io.netty.channel.ChannelHandlerContext;
import io.netty.util.AttributeKey;

import java.util.HashMap;
import java.util.Map;
import java.util.UUID;

public class SocketSession {

    public static final AttributeKey<SocketSession> SESSION_KEY = AttributeKey.valueOf("SESSION_KEY");

    /**
     * 用户实现服务端会话管理的核心
     */
// 通道
    private Channel channel;
    // 用户
    private User user;

    // session唯一标示
    private final String sessionId;

    private String group;

    /**
     * session中存储的session 变量属性值
     */
    private Map<String, Object> map = new HashMap<String, Object>();

    public SocketSession(Channel channel) {//注意传入参数channel。不同客户端会有不同channel
        this.channel = channel;
        this.sessionId = buildNewSessionId();
        channel.attr(SocketSession.SESSION_KEY).set(this);
    }

    // 反向导航
    public static SocketSession getSession(ChannelHandlerContext ctx) {//注意ctx,不同的客户端会有不同ctx
        Channel channel = ctx.channel();
        return channel.attr(SocketSession.SESSION_KEY).get();
    }

    // 反向导航
    public static SocketSession getSession(Channel channel) {
        return channel.attr(SocketSession.SESSION_KEY).get();
    }

    public String getId() {
        return sessionId;
    }

    private static String buildNewSessionId() {
        String uuid = UUID.randomUUID().toString();
        return uuid.replaceAll("-", "");
    }

    public synchronized void set(String key, Object value) {
        map.put(key, value);
    }

    public synchronized <T> T get(String key) {
        return (T) map.get(key);
    }

    public boolean isValid() {
        return getUser() != null ? true : false;
    }

    public User getUser() {
        return user;
    }

    public void setUser(User user) {
        this.user = user;
    }

    public String getGroup() {
        return group;
    }

    public void setGroup(String group) {
        this.group = group;
    }

    public Channel getChannel() {
        return channel;
    }
}
User
package com.example.webchat;

import java.util.Objects;

public class User {

    public String id;
    public String nickname;

    public User(String id, String nickname) {
        super();
        this.id = id;
        this.nickname = nickname;
    }

    public String getId() {
        return id;
    }

    public void setId(String id) {
        this.id = id;
    }

    public String getNickname() {
        return nickname;
    }

    public void setNickname(String nickname) {
        this.nickname = nickname;
    }

    @Override
    public boolean equals(Object o) {
        if (this == o)
            return true;
        if (o == null || getClass() != o.getClass())
            return false;
        User user = (User) o;
        return id.equals(user.getId());
    }

    @Override
    public int hashCode() {

        return Objects.hash(id);
    }

    public String getUid() {

        return id;
    }
}
WebSocketServer
package com.example.webchat;

import io.netty.bootstrap.ServerBootstrap;
import io.netty.channel.Channel;
import io.netty.channel.ChannelInitializer;
import io.netty.channel.ChannelPipeline;
import io.netty.channel.EventLoopGroup;
import io.netty.channel.nio.NioEventLoopGroup;
import io.netty.channel.socket.SocketChannel;
import io.netty.channel.socket.nio.NioServerSocketChannel;
import io.netty.handler.codec.http.HttpObjectAggregator;
import io.netty.handler.codec.http.HttpServerCodec;
import io.netty.handler.codec.http.websocketx.WebSocketServerProtocolHandler;
import io.netty.handler.codec.http.websocketx.extensions.compression.WebSocketServerCompressionHandler;
import io.netty.handler.stream.ChunkedWriteHandler;
import io.netty.handler.timeout.IdleStateHandler;

import java.util.concurrent.TimeUnit;

public class WebSocketServer {

    private static WebSocketServer wbss;

    private static final int READ_IDLE_TIME_OUT = 60; // 读超时
    private static final int WRITE_IDLE_TIME_OUT = 0;// 写超时
    private static final int ALL_IDLE_TIME_OUT = 0; // 所有超时

    public static WebSocketServer inst() {
        return wbss = new WebSocketServer();
    }

    public void run(int port) {
        EventLoopGroup bossGroup = new NioEventLoopGroup();
        EventLoopGroup workerGroup = new NioEventLoopGroup();
        ServerBootstrap b = new ServerBootstrap();
        b.group(bossGroup, workerGroup).channel(NioServerSocketChannel.class)
                .childHandler(new ChannelInitializer <SocketChannel>() {
                    @Override
                    protected void initChannel(SocketChannel ch) throws Exception {
                        ChannelPipeline pipeline = ch.pipeline();
                        // Netty自己的http解码器和编码器,报文级别 HTTP请求的解码和编码
                        pipeline.addLast(new HttpServerCodec());
                        // ChunkedWriteHandler 是用于大数据的分区传输
                        // 主要用于处理大数据流,比如一个1G大小的文件如果你直接传输肯定会撑暴jvm内存的;
                        // 增加之后就不用考虑这个问题了
                        pipeline.addLast(new ChunkedWriteHandler());
                        // HttpObjectAggregator 是完全的解析Http消息体请求用的
                        // 把多个消息转换为一个单一的完全FullHttpRequest或是FullHttpResponse,
                        // 原因是HTTP解码器会在每个HTTP消息中生成多个消息对象HttpRequest/HttpResponse,HttpContent,LastHttpContent
                        pipeline.addLast(new HttpObjectAggregator(64 * 1024));
                        // WebSocket数据压缩
                        pipeline.addLast(new WebSocketServerCompressionHandler());
                        // WebSocketServerProtocolHandler是配置websocket的监听地址/协议包长度限制
                        pipeline.addLast(new WebSocketServerProtocolHandler("/ws", null, true, 10 * 1024));

                        // 当连接在60秒内没有接收到消息时,就会触发一个 IdleStateEvent 事件,
                        // 此事件被 HeartbeatHandler 的 userEventTriggered 方法处理到
                        pipeline.addLast(
                                new IdleStateHandler(READ_IDLE_TIME_OUT, WRITE_IDLE_TIME_OUT, ALL_IDLE_TIME_OUT, TimeUnit.SECONDS));

                        // WebSocketServerHandler、TextWebSocketFrameHandler 是自定义逻辑处理器,
                        pipeline.addLast(new WebSocketTextHandler());
                    }
                });
        Channel ch = b.bind(port).syncUninterruptibly().channel();
        ch.closeFuture().syncUninterruptibly();

        // 返回与当前Java应用程序关联的运行时对象
        Runtime.getRuntime().addShutdownHook(new Thread() {
            @Override
            public void run() {
                SessionGroup.inst().shutdownGracefully();
                bossGroup.shutdownGracefully();
                workerGroup.shutdownGracefully();
            }
        });
    }
}
WebSocketTextHandler
package com.example.webchat;

import com.google.gson.Gson;
import com.google.gson.reflect.TypeToken;
import io.netty.channel.ChannelHandlerContext;
import io.netty.channel.SimpleChannelInboundHandler;
import io.netty.handler.codec.http.websocketx.TextWebSocketFrame;
import io.netty.handler.codec.http.websocketx.WebSocketServerProtocolHandler;
import io.netty.handler.timeout.IdleState;
import io.netty.handler.timeout.IdleStateEvent;

import java.util.HashMap;
import java.util.Map;

import static com.fasterxml.jackson.databind.type.LogicalType.Map;

public class WebSocketTextHandler extends SimpleChannelInboundHandler<TextWebSocketFrame> {

    @Override
    protected void channelRead0(ChannelHandlerContext ctx, TextWebSocketFrame msg) throws Exception {
        SocketSession session = SocketSession.getSession(ctx);
        TypeToken<HashMap<String, String>> typeToken = new TypeToken<HashMap<String, String>>() {
        };

        Gson gson=new Gson();
        java.util.Map<String,String> map = gson.fromJson(msg.text(), typeToken.getType());
        User user = null;
        switch (map.get("type")) {
            case "msg":
                Map<String, String> result = new HashMap<>();
                user = session.getUser();
                result.put("type", "msg");
                result.put("msg", map.get("msg"));
                result.put("sendUser", user.getNickname());
                SessionGroup.inst().sendToOthers(result, session);
                break;
            case "init":
                String room = map.get("room");
                session.setGroup(room);
                String nick = map.get("nick");
                user = new User(session.getId(), nick);
                session.setUser(user);
                SessionGroup.inst().addSession(session);
                break;
        }
    }

    @Override
    public void userEventTriggered(ChannelHandlerContext ctx, Object evt) throws Exception {

        // 是否握手成功,升级为 Websocket 协议
        if (evt == WebSocketServerProtocolHandler.ServerHandshakeStateEvent.HANDSHAKE_COMPLETE) {
            // 握手成功,移除 HttpRequestHandler,因此将不会接收到任何消息
            // 并把握手成功的 Channel 加入到 ChannelGroup 中
            new SocketSession(ctx.channel());
        } else if (evt instanceof IdleStateEvent) {
            IdleStateEvent stateEvent = (IdleStateEvent) evt;
            if (stateEvent.state() == IdleState.READER_IDLE) {
                System.out.println("bb22");
            }
        } else {
            super.userEventTriggered(ctx, evt);
        }
    }
}
index.html
新建一个html文件测试
<!DOCTYPE html>
<html lang="en">
<!DOCTYPE HTML>
<head>
    <meta http-equiv="Content-Type" content="text/html; charset=utf-8"/>
    <title>群聊天室</title>
    <style type="text/css">
        body {
            margin-right:50px;
            margin-left:50px;
        }
        .ddois {
            position: fixed;
            left: 120px;
            bottom: 30px;
        }
    </style>
</head>
<body>
群名:<input type="text" id="room" name="group" placeholder="请输入群">
<br /><br />
昵称:<input type="text" id="nick" name="name" placeholder="请输入昵称">
<br /><br />
<button type="button" onclick="enter()">进入聊天群</button>
<br /><br />
<div id="message"></div>
<br /><br />
<div class="ddois">
    <textarea name="send" id="text" rows="10" cols="30" placeholder="输入发送消息"></textarea>
    <br /><br />
    <button type="button" onclick="send()">发送</button>
</div>
<script type="text/javascript">
    var webSocket;

    if (window.WebSocket) {
        webSocket = new WebSocket("ws://localhost:53134/ws");
    } else {
        alert("抱歉,您的浏览器不支持WebSocket协议!");
    }

    //连通之后的回调事件
    webSocket.onopen = function() {
        console.log("已经连通了websocket");
//                setMessageInnerHTML("已经连通了websocket");
    };
    //连接发生错误的回调方法
    webSocket.onerror = function(event){
        console.log("出错了");
//              setMessageInnerHTML("连接失败");
    };

    //连接关闭的回调方法
    webSocket.onclose = function(){
        console.log("连接已关闭...");

    }

    //接收到消息的回调方法
    webSocket.onmessage = function(event){
        console.log("bbdds");
        var data = JSON.parse(event.data)
        var msg = data.msg;
        var nick = data.sendUser;
        switch(data.type){
            case 'init':
                console.log("mmll");
                break;
            case 'msg':
                console.log("bblld");
                setMessageInnerHTML(nick+":  "+msg);
                break;
            default:
                break;
        }
    }
    function enter(){
        var map = new Map();
        var nick=document.getElementById('nick').value;
        var room=document.getElementById('room').value;
        map.set("type","init");
        map.set("nick",nick);
        console.log(room);
        map.set("room",room);
        var message = Map2Json(map);
        webSocket.send(message);
    }

    function send() {
        var msg = document.getElementById('text').value;
        var nick = document.getElementById('nick').value;
        console.log("1:"+msg);
        if (msg != null && msg != ""){
            var map = new Map();
            map.set("type","msg");
            map.set("msg",msg);
            var map2json=Map2Json(map);
            if (map2json.length < 8000){
                console.log("4:"+map2json);
                webSocket.send(map2json);
            }else {
                console.log("文本太长了");
            }
        }
    }

    //将消息显示在网页上
    function setMessageInnerHTML(innerHTML) {
        document.getElementById("message").innerHTML += innerHTML + "<br/>";
    }

    function Map2Json(map) {
        var str = "{";
        map.forEach(function (value, key) {
            str += '"'+key+'"'+':'+ '"'+value+'",';
        })
        str = str.substring(0,str.length-1)
        str +="}";
        return str;
    }

</script>

</body>
</html>
3.结果


三、动态网页的信息爬取
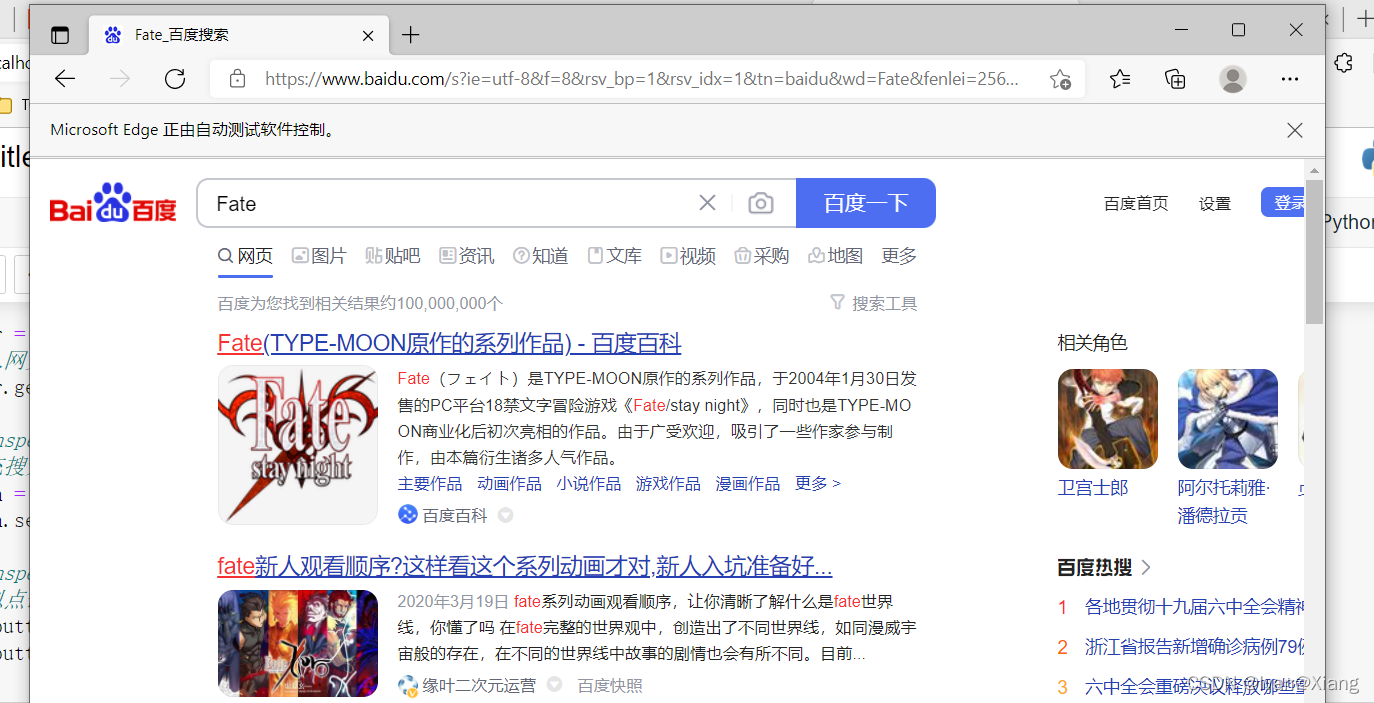
1.自动填充百度网页的查询关键字,完成自动搜索
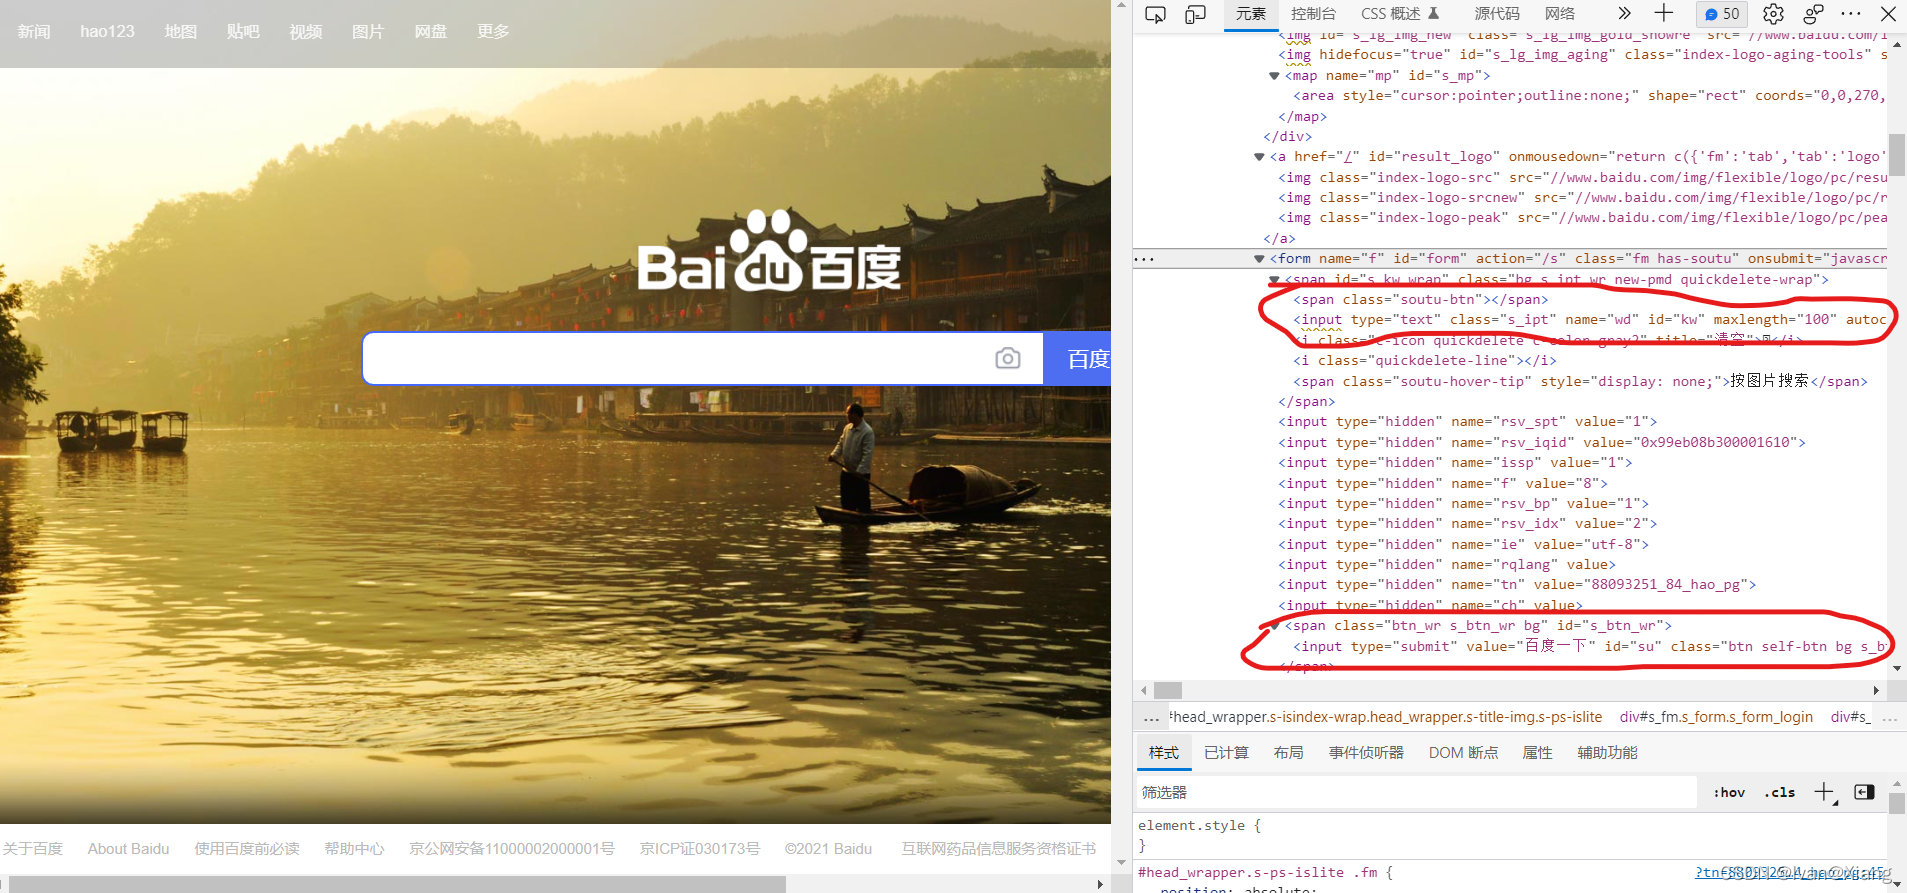
打开百度网页
F12百度网页的源码找到搜素框的id以及搜素按钮的id
代码
from selenium import webdriver

driver = webdriver.Edge(r"D:\Project\AIpack\edgedriver_win64\msedgedriver.exe")
# 进入网页
driver.get("https://www.baidu.com/")

# noinspection PyDeprecation
# 填充搜索框
search = driver.find_element_by_id("kw")
search.send_keys("Fate")

# noinspection PyDeprecation
# 模拟点击
send_button = driver.find_element_by_id("su")
send_button.click()
结果
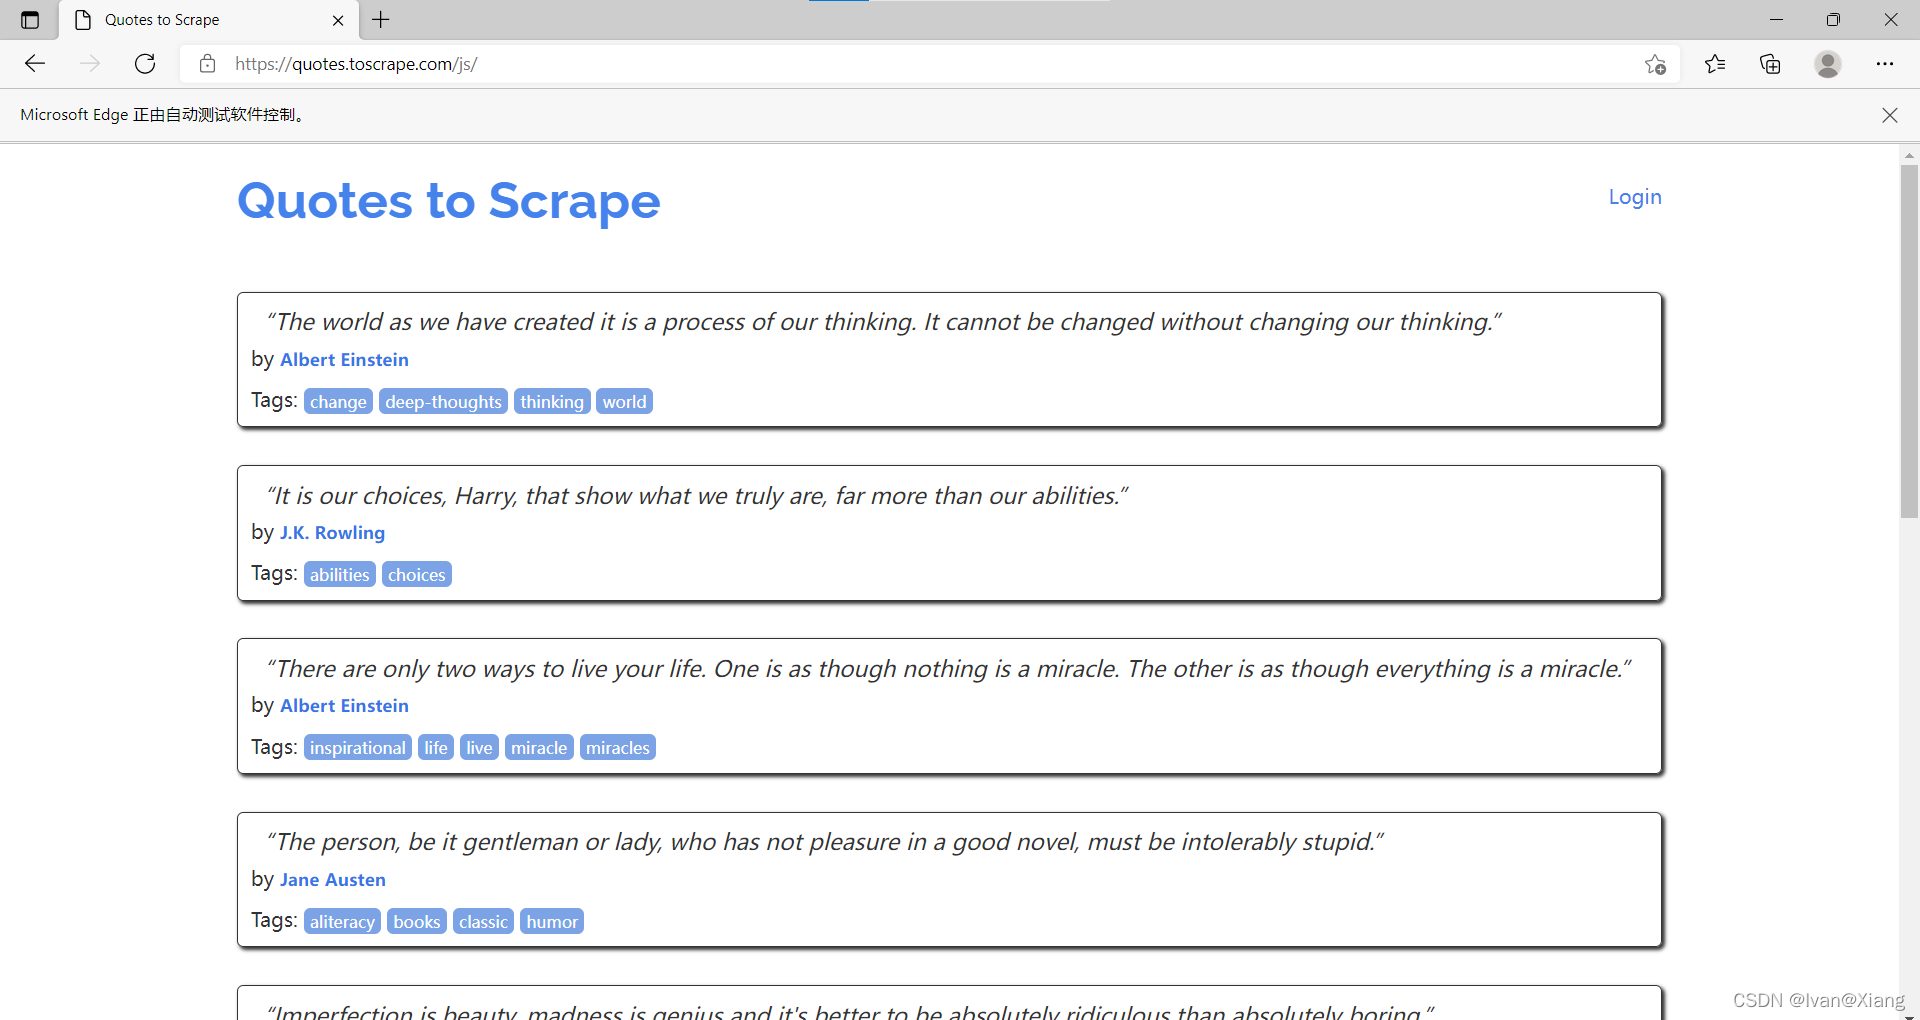
2.爬取动态网页数据
代码
from selenium import webdriver

driver = webdriver.Edge(r"D:\Project\AIpack\edgedriver_win64\msedgedriver.exe")
# 名言所在网站
driver.get("https://quotes.toscrape.com/js/")
# 表头
csvHeaders = ['作者', '名言']
# 所有数据
subjects = []
# 单个数据
subject = []
# 获取所有含有quote的标签
res_list = driver.find_elements_by_class_name("quote")

# 分离出需要的内容
for tmp in res_list:
    subject.append(tmp.find_element_by_class_name("author").text)
    subject.append(tmp.find_element_by_class_name("text").text)
    print(subject)
    subjects.append(subject)
    subject = []
结果
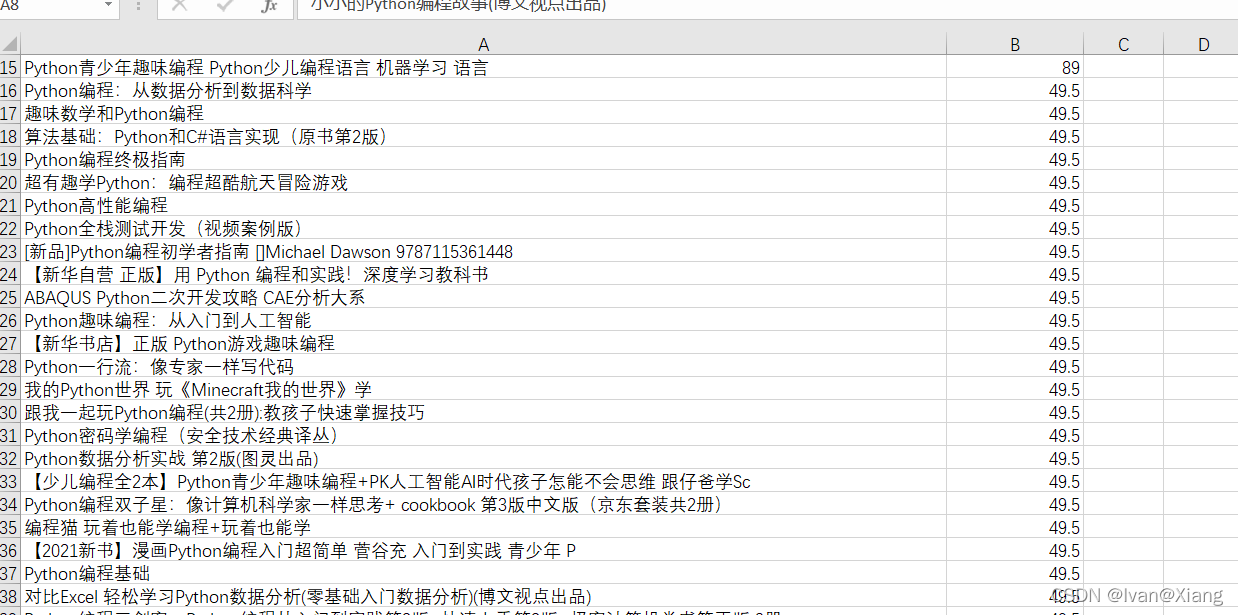
3.requests+Selenum爬取京东图书
代码
import csv
import time

from selenium import webdriver

driver = webdriver.Edge(r"D:\Project\AIpack\edgedriver_win64\msedgedriver.exe")
driver.set_window_size(1920, 1080)
# 京东网站
driver.get("https://www.jd.com/")

# 输入需要查找的关键字
key = driver.find_element_by_id("key").send_keys("python编程")
time.sleep(1)

# 点击搜素按钮
button = driver.find_element_by_class_name("button").click()
time.sleep(1)

# 获取所有窗口
windows = driver.window_handles
# 切换到最新的窗口
driver.switch_to.window(windows[-1])
time.sleep(1)

# js语句
js = 'return document.body.scrollHeight'
# 获取body高度
max_height = driver.execute_script(js)
max_height = (int(max_height / 1000)) * 1000
# 当前滚动条高度
tmp_height = 1000
# 所有书籍的字典
res_dict = {}

# 需要爬取的数量
num = 200
while len(res_dict) < num:
    # 当切换网页后重新设置高度
    tmp_height = 1000
    while tmp_height < max_height:
        # 向下滑动
        js = "window.scrollBy(0,1000)"
        driver.execute_script(js)
        tmp_height += 1000

        # 书籍列表
        J_goodsList = driver.find_element_by_id("J_goodsList")
        ul = J_goodsList.find_element_by_tag_name("ul")
        # 所有书籍
        res_list = ul.find_elements_by_tag_name("li")
        # 把没有记录过的书籍加入字典
        for res in res_list:
            # 以书名为键,价格为值
            # 两种方式获取指定标签值
            res_dict[res.find_element_by_class_name('p-name').find_element_by_tag_name('em').text] \
                = res.find_element_by_xpath("//div[@class='p-price']//i").text
            if len(res_dict) == num:
                break
        time.sleep(2)
        if len(res_dict) == num:
            break
    # 下一页按钮所在父标签
    J_bottomPage = driver.find_element_by_id("J_bottomPage")
    # 下一页按钮
    next_button = J_bottomPage.find_element_by_class_name("pn-next").click()
    # 切换窗口
    windows = driver.window_handles
    driver.switch_to.window(windows[-1])
    time.sleep(3)

# 表头
csvHeaders = ['书名', '价格']
# 所有书籍
csvRows = []
# 书籍
row = []

# 字典转列表
for key, value in res_dict.items():
    row.append(key)
    row.append(value)
    csvRows.append(row)
    row = []
# 保存爬取结果
with open('./jd_books.csv', 'w', newline='') as file:
    fileWriter = csv.writer(file)
    fileWriter.writerow(csvHeaders)
    fileWriter.writerows(csvRows)
结果
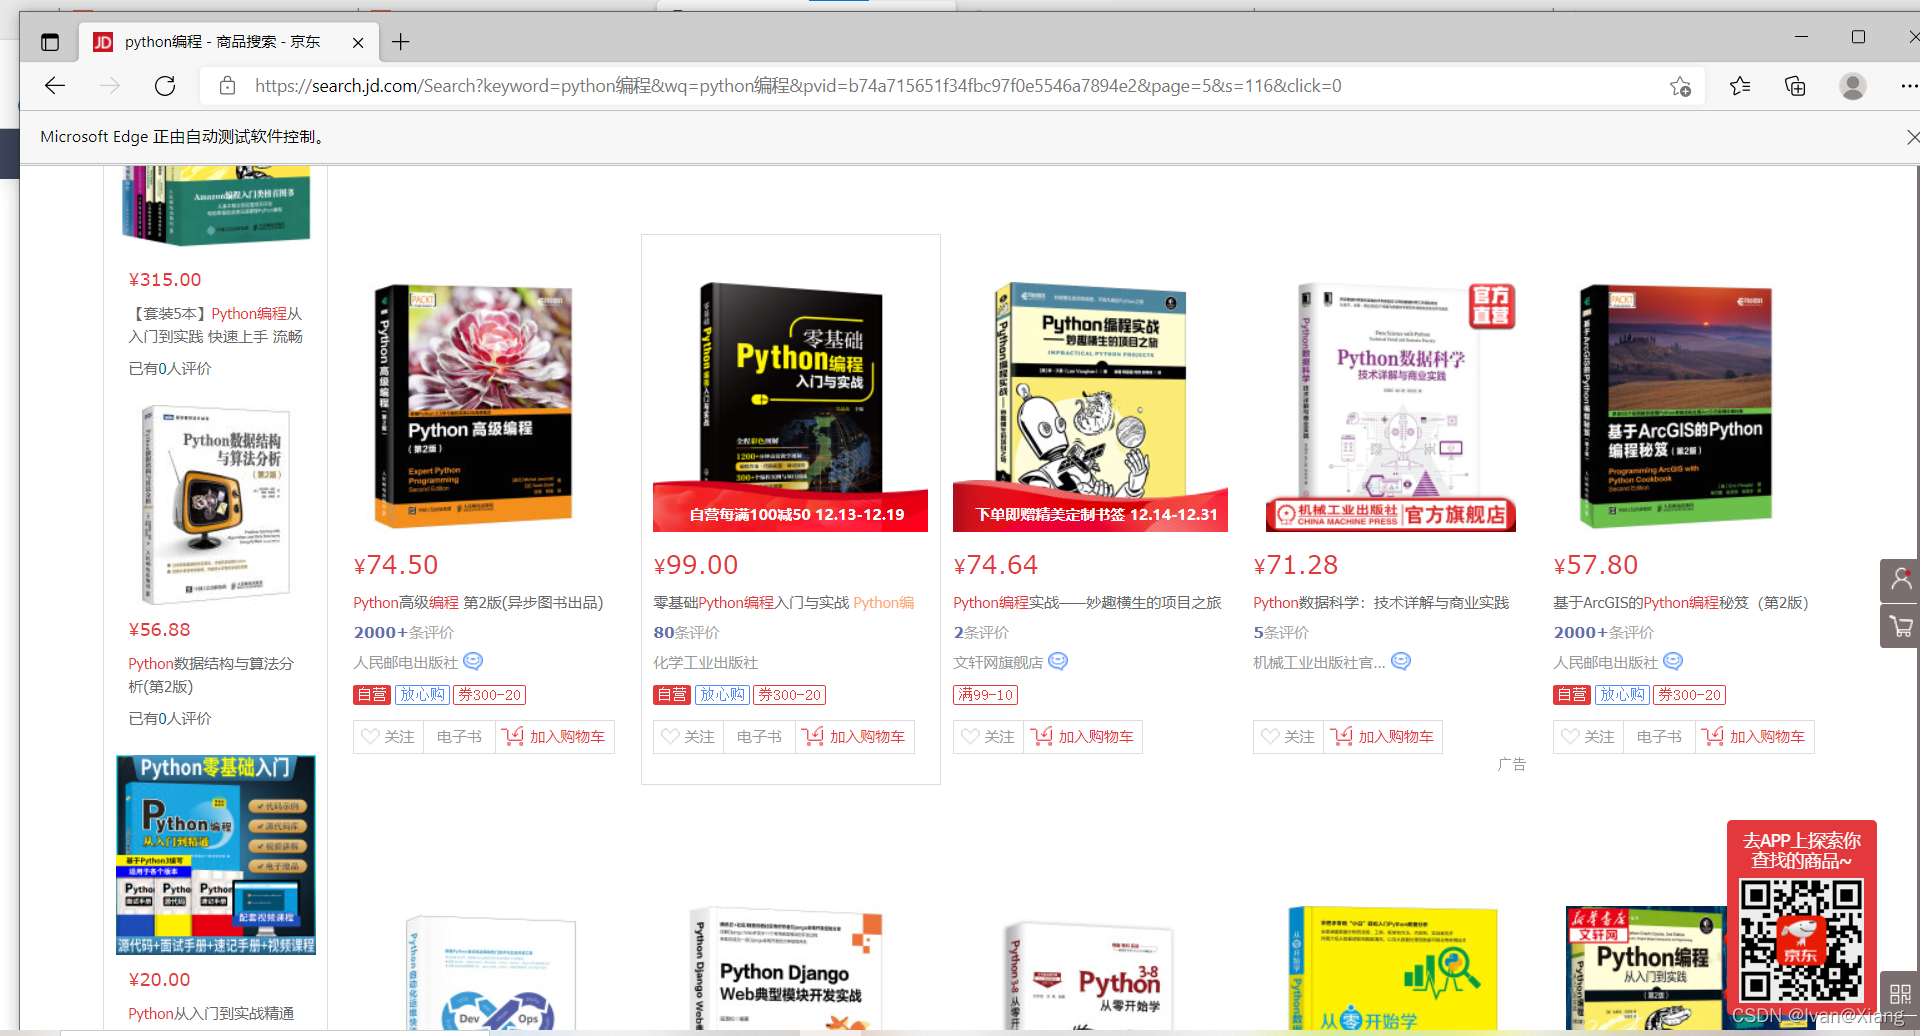
爬取成功,且能自动翻滚页面
csv保存成功
四、参考
1.超详细Netty入门,看这篇就够了!
2.分别基于IO、NIO、Netty的Java网络程序
3.Python基于Selenium实现爬取京东特定商品
4.springboot和netty整合的聊天室


 1276
1276

 被折叠的 条评论
为什么被折叠?
被折叠的 条评论
为什么被折叠?
 到【灌水乐园】发言


