原文地址::https://learn.adafruit.com/adafruits-raspberry-pi-lesson-4-gpio-setup/configuring-i2c
I2C is a very commonly used standard designed to allow one chip to talk to another. So, since the Raspberry Pi can talk I2C we can connect it to a variety of I2C capable chips and modules.
Here are some of the Adafruit projects that make use of I2C devices and modules:
-
http://learn.adafruit.com/mcp230xx-gpio-expander-on-the-raspberry-pi
-
http://learn.adafruit.com/adafruit-16x2-character-lcd-plus-keypad-for-raspberry-pi
-
http://learn.adafruit.com/adding-a-real-time-clock-to-raspberry-pi
-
http://learn.adafruit.com/matrix-7-segment-led-backpack-with-the-raspberry-pi
-
http://learn.adafruit.com/mcp4725-12-bit-dac-with-raspberry-pi
-
http://learn.adafruit.com/adafruit-16-channel-servo-driver-with-raspberry-pi
-
http://learn.adafruit.com/using-the-bmp085-with-raspberry-pi
The I2C bus allows multiple devices to be connected to your Raspberry Pi, each with a unique address, that can often be set by changing jumper settings on the module. It is very useful to be able to see which devices are connected to your Pi as a way of making sure everything is working.
To do this, it is worth running the following commands in the Terminal to install the i2c-tools utility.
- sudo apt-get install -y python-smbus
- sudo apt-get install -y i2c-tools
Installing Kernel Support (with Raspi-Config)
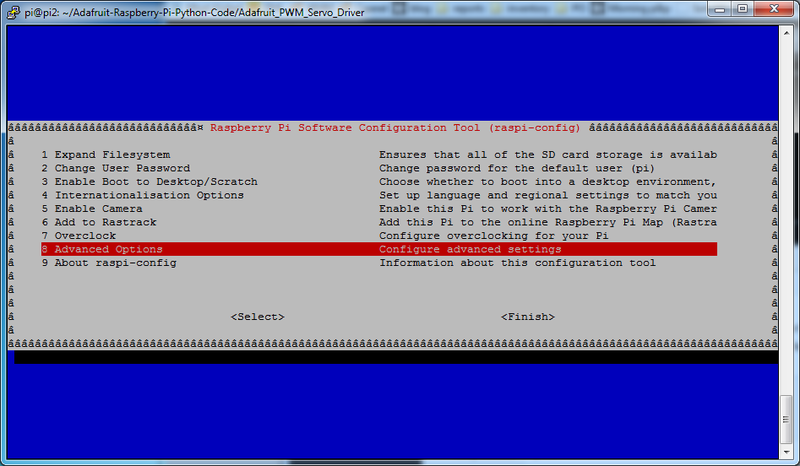
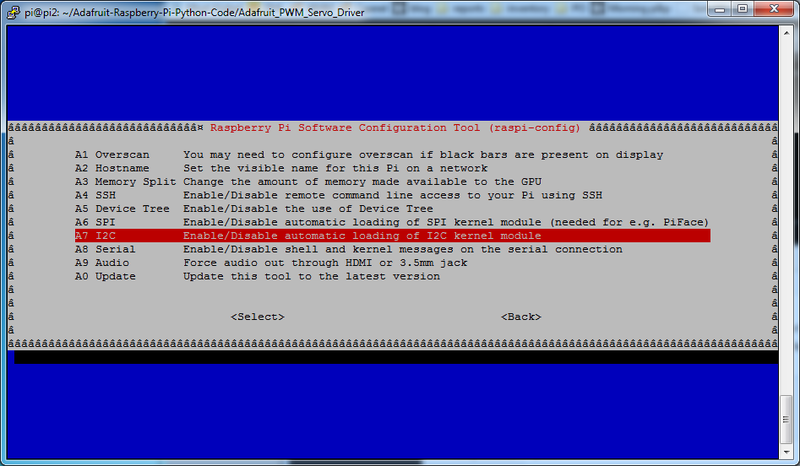
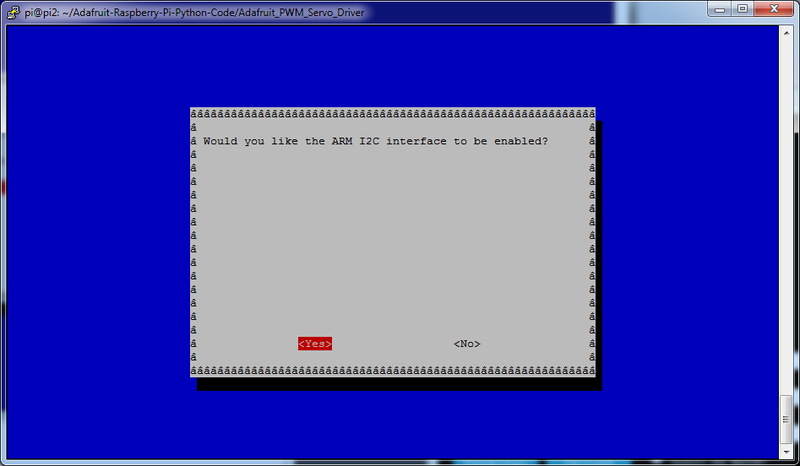
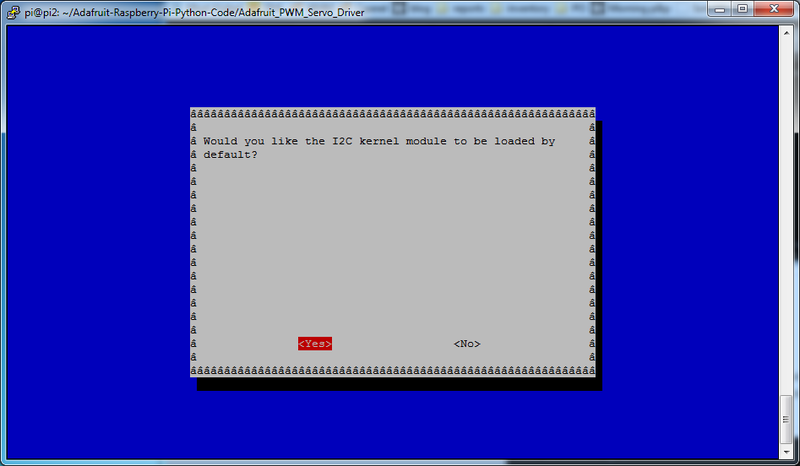
Run sudo raspi-config and follow the prompts to install i2c support for the ARM core and linux kernel
Then reboot!
We also recommend going through the steps below to manually check everything was added by raspi-config!
Installing Kernel Support (Manually)
If you're not using a modern Raspbian or you want to do it by hand, you can! Open LXTerminal or console or ssh and enter the following command:
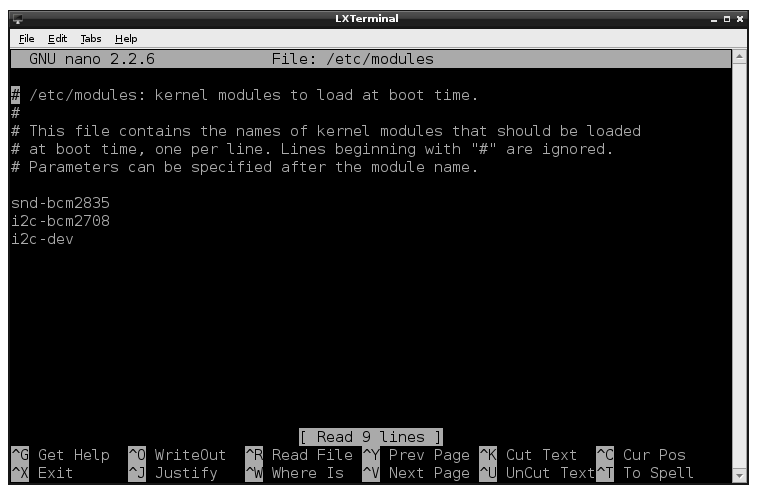
- sudo nano /etc/modules
and add these two lines to the end of the file:
- i2c-bcm2708
- i2c-dev
like so:
Then save the file with Control-X Y <return>
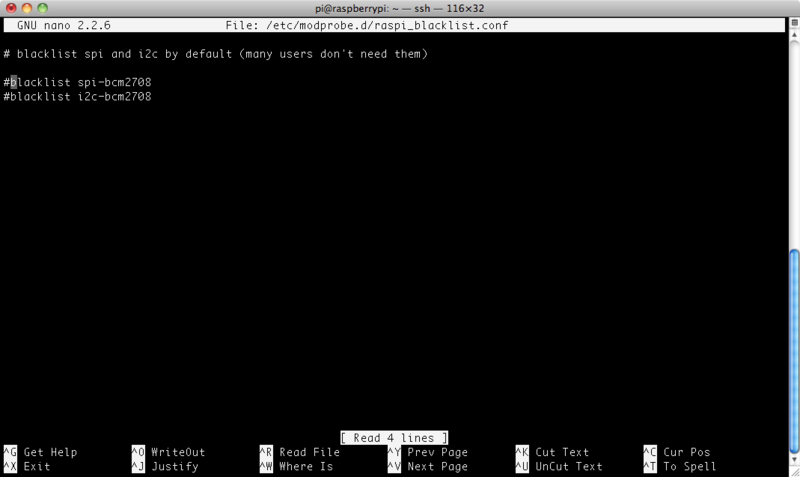
Depending on your distribution, you may also have a file called /etc/modprobe.d/raspi-blacklist.conf
If you do not have this file then there is nothing to do, however, if you do have this file, you need to edit it and comment out the lines below:
- blacklist spi-bcm2708
- blacklist i2c-bcm2708
Open an editor on the file by typing:
- sudo nano /etc/modprobe.d/raspi-blacklist.conf
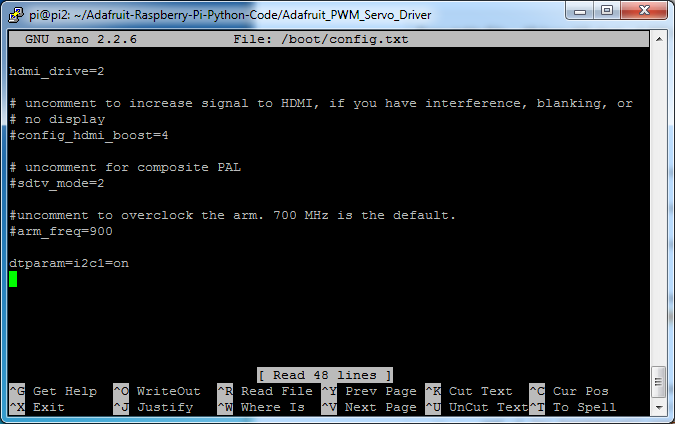
If you are running a recent Raspberry Pi (3.18 kernel or higher) you will also need to update the /boot/config.txt file. Edit it with sudo nano /boot/config.txt and add the text
dtparam=i2c1=on
dtparam=i2c_arm=on
at the bottom. note that the "1" in "i2c1" is a one not an L!
Once this is all done, reboot!
sudo reboot
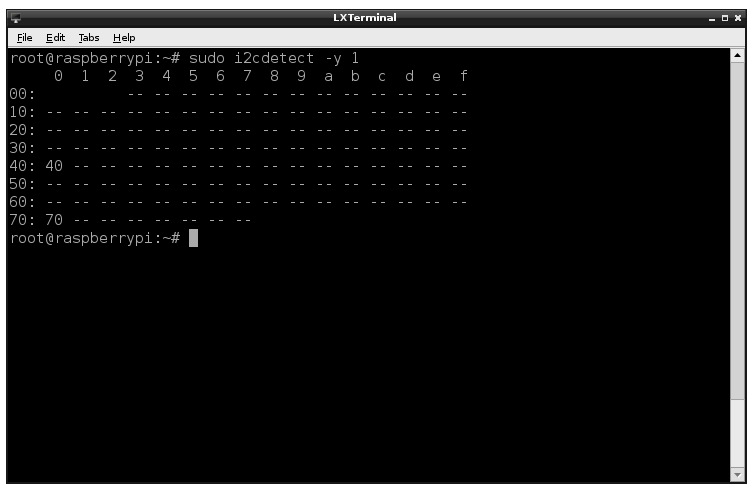
- sudo i2cdetect -y 1
This shows that two I2C addresses are in use – 0x40 and 0x70.
Note that if you are using one of the very first Raspberry Pis (a 256MB Raspberry Pi Model B) then you will need to change the command to:
- sudo i2cdetect -y 0
The Raspberry Pi designers swapped over I2C ports between board releases. Just remember: 512M Pi's use i2c port 1, 256M ones use i2c port 0!


 本文介绍了如何在Raspberry Pi上配置I2C总线,并提供了几个使用I2C设备的实际项目案例。通过安装必要的软件包和支持内核模块,用户可以轻松地将各种I2C设备连接到Raspberry Pi并进行检测。


 3082
3082

 被折叠的 条评论
为什么被折叠?


