


 本文详细介绍了使用RabbitMQ进行消息传递的五种常见方式:HelloWorld、工作队列(平均分配和能者多劳)、发布/订阅、路由和主题。通过示例代码展示了如何创建连接、发送和接收消息,涵盖了从基本的点对点通信到广播式通信的各种场景,适合初学者参考和实践。
目录
方式二: work(以下方式都是通过工具类来创建connection对象)
方式三 Publish/Subscribe (以下所有连接方式都需要用到交换机)
前提准备
rabbitmq官方手册 RabbitMQ Tutorials — RabbitMQ (可以对照手册进行对比)
在编写连接方式之前, 我们先做一些前提的操作,用于我们编写连接代码时更方便
a). 创建一个连接rabbitmq的工具类
public class RabbitmqUtil {
    private static ConnectionFactory factory;

    static{
        factory = new ConnectionFactory();
        factory.setHost("虚拟机的ip地址");
        factory.setPort(5672);
        factory.setVirtualHost("用户的模块");
        factory.setUsername("用户名");
        factory.setPassword("密码");
    }

    public static Connection getConnection(){
        try {
            return factory.newConnection();
        }catch (Exception e){
            e.printStackTrace();
        }
        return null;
    }

    public static void closeConnectionAndChannel(Connection connection, Channel channel){
        try {
            if (connection != null) connection.close();
            if (channel != null)channel.close();
        }catch (Exception e){
//            e.printStackTrace();
        }
    }
}
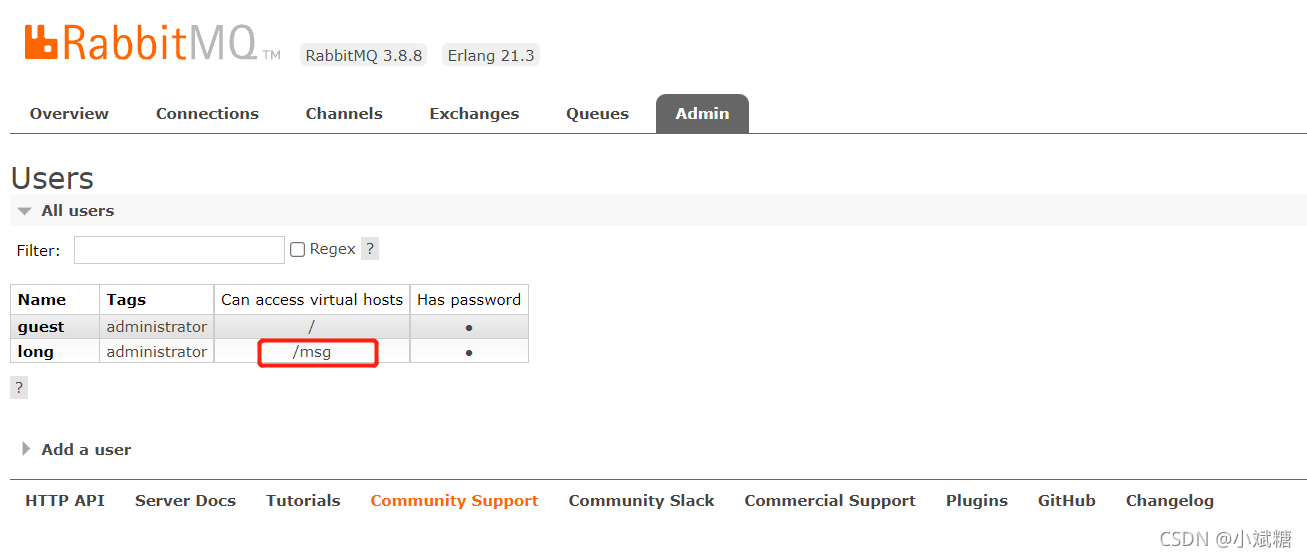
图中画红色框框的就是用户的模块
导入相应的rabbitmq依赖
<dependency>
    <groupId>com.rabbitmq</groupId>
    <artifactId>amqp-client</artifactId>
    <version>5.12.0</version>
</dependency>
下面我们进入正题
方式一: Hello World
服务端(provider)代码
如果不是springboot项目,这里方法可以替换中主函数进行运行
如果没有配置rabbitmq 就需要把注释掉的代码解开
public class Provider {
    @Test
    public void sendMessage() throws IOException, TimeoutException {
//        ConnectionFactory factory = new ConnectionFactory();
//
//        //设置ip地址
//        factory.setHost("虚拟机ip地址");
//        //设置端口号
//        factory.setPort(5672);
//        //设置虚拟主机
//        factory.setVirtualHost("虚拟主机");
        设置连接用的用户名和密码
//        factory.setUsername("用户名");
//        factory.setPassword("密码");
//
//        //通过factory获取连接对象
//        Connection connection = factory.newConnection

        Connection connection = RabbitmqUtil.getConnection();
        Connection connection = RabbitmqUtil.getConnection();
        //通过connection获取通道
        Channel channel = connection.createChannel();

        /**
         * 绑定对应的消息列
         *      参数1  队列名称  如果不存在自动创建
         *      参数2  队列是否持久化 false不持久化
         *      参数3  是否独占队列  true 独占队列
         *      参数4  消息传完是否自动删除队列 true自动删除
         *      参数5  其他参数
         */
        channel.queueDeclare("hello",false,false,false,null);

        /**
         * 发送消息
         *      参数1  交换机名称
         *      参数2  通道名称
         *      参数3  传递消息额外设置   MessageProperties.PERSISTENT_TEXT_PLAIN  rabbitmq 重启后消息依然在,
         *                            null 重启后消息消失
         *      参数4  传递的信息
         */
        channel.basicPublish("","hello", MessageProperties.PERSISTENT_TEXT_PLAIN,"hello rabbit".getBytes());

        //关闭连接
        RabbitmqUtil.closeConnectionAndChannel(connection,channel);
    }
}
客户端(customer)代码
public class Customer {

    public static void main(String[] args) throws IOException, TimeoutException {
//        //创建工厂并设置参数
//        ConnectionFactory factory = new ConnectionFactory();
//        factory.setHost("192.168.47.221");
//        factory.setPort(5672);
//        factory.setVirtualHost("/msg");
//        factory.setUsername("long");
//        factory.setPassword("123");
//        Connection connection1 = factory.newConnection();
//        获取对象通过对象获取通道
        Connection connection = RabbitmqUtil.getConnection();
        Channel channel = connection.createChannel();
        //绑定消息列
        channel.queueDeclare("hello",false,false,false,null);
        //读取信息
        channel.basicConsume("hello",true,new DefaultConsumer(channel){
            @Override
            public void handleDelivery(String consumerTag, Envelope envelope, AMQP.BasicProperties properties, byte[] body) throws IOException {
                System.out.println("new String(body) = " + new String(body));
            }
        });


    }
}
方式二: work(以下方式都是通过工具类来创建connection对象)
有两种方式 第一种为平均分配
provider端代码
public class Provider {

    public static void main(String[] args) throws IOException {

        // 获取连接对象
        Connection connection = RabbitmqUtil.getConnection();
        // 通过连接对象获取通道
        Channel channel = connection.createChannel();

        //绑定对应的消息栈
        /**
         * 绑定对应的消息列
         *      参数1  队列名称  如果不存在自动创建
         *      参数2  队列是否持久化 false不持久化
         *      参数3  是否独占队列  true 独占队列
         *      参数4  消息传完是否自动删除队列 true自动删除
         *      参数5  其他参数
         */
        channel.queueDeclare("work",true,false,false,null);

        /**
         * 发送消息
         *      参数1  交换机名称
         *      参数2  通道名称
         *      参数3  传递消息额外设置   MessageProperties.PERSISTENT_TEXT_PLAIN  rabbitmq 重启后消息依然在,
         *                            null 重启后消息消失
         *      参数4  传递的信息
         */
        for(int i=1;i<=20;i++) {
            channel.basicPublish("", "work", null,  (i + "hello work").getBytes());
        }
        //关闭连接
        RabbitmqUtil.closeConnectionAndChannel(connection,channel);

    }
}
customer端代码(大家可以多写几个customer端代码进行测试,我这里就类举一个了)
public class Customer1 {

    public static void main(String[] args) throws IOException {
        //获取连接对象
        Connection connection = RabbitmqUtil.getConnection();
        //获取连接
        Channel channel = connection.createChannel();
        //绑定消息列
        channel.queueDeclare("work",true,false,false,null);
        //读取信息

        /**
         *  参数一:  消息队列的名称
         *  参数二:  消息自动确认
         *              true;消费整自动向 rabbitmq 确认信息消费
         *              false:不会自动确认消息
         *  参数三:  从rabbitmq中获取消息
         */
        channel.basicConsume("work",false,new DefaultConsumer(channel){
            @Override
            public void handleDelivery(String consumerTag, Envelope envelope, AMQP.BasicProperties properties, byte[] body) throws IOException {
                System.out.println("customer1 message :" + new String(body));

            }
        });
    }

}
第二种为能者多劳方式
provider端代码一样,修改customer端代码即可
public class Customer1 {

    public static void main(String[] args) throws IOException {
        //获取连接对象
        Connection connection = RabbitmqUtil.getConnection();
        //获取连接
        Channel channel = connection.createChannel();
        //绑定消息列
        channel.queueDeclare("work",true,false,false,null);
        //读取信息

        /**
         *  参数一:  消息队列的名称
         *  参数二:  消息自动确认
         *              true;消费整自动向 rabbitmq 确认信息消费
         *              false:不会自动确认消息
         *  参数三:  从rabbitmq中获取消息
         */
        channel.basicQos(1);// 每次只消费一个消息
        channel.basicConsume("work",false,new DefaultConsumer(channel){
            @Override
            public void handleDelivery(String consumerTag, Envelope envelope, AMQP.BasicProperties properties, byte[] body) throws IOException {
                System.out.println("customer1 message :" + new String(body));

                channel.basicAck(envelope.getDeliveryTag(),false);// 进行手动提交
            }
        });
    }

}
方式三 Publish/Subscribe (以下所有连接方式都需要用到交换机)
服务端发送消息,所有的客户端都可以获取消息(类似于广播效果)
provider端代码
public class Provider {

    public static void main(String[] args) throws IOException {

        // 获取连接对象
        Connection connection = RabbitmqUtil.getConnection();
        //通过连接对象获取通道
        Channel channel = connection.createChannel();
        //绑定交换机
        /**
         *  参数一: 交换机的名称   如何rabbitmq中没有会自动创建
         *  参数二: 交换机的类型   固定为fanout
         */
        channel.exchangeDeclare("logs","fanout");

        /**
         *   参数一: 交换机的名称
         *   参数二: 路由的key
         *   参数三: 其他参数
         *   参数四: 要传送的数据
         */
        channel.basicPublish("logs","",null,"hello  fanout".getBytes());

        //关闭连接
        RabbitmqUtil.closeConnectionAndChannel(connection,channel);

    }
}
customer端代码
public class Customer {

    public static void main(String[] args) throws IOException{
        // 获取当前连接对象
        Connection connection = RabbitmqUtil.getConnection();
        // 通过连接对象获取通道
        Channel channel = connection.createChannel();

        //声明交换机
        channel.exchangeDeclare("logs","fanout");
        //获取临时通道的名称
        String queue = channel.queueDeclare().getQueue();
        //创建临时对列绑定交换机
        /**
         *   参数一: 临时通道的名称
         *   参数二: 交换机的名称
         *   参数三: 路由的key
         */
        channel.queueBind(queue,"logs","");

        //获取信息
        channel.basicConsume(queue,true,new DefaultConsumer(channel){

            @Override
            public void handleDelivery(String consumerTag, Envelope envelope, AMQP.BasicProperties properties, byte[] body) throws IOException {
                System.out.println("fanout message :" + new String(body));
            }
        });

    }
}
方式四 Routeing
根据route对消息进行发布,provider只对对应的route发送消息 代码如下
provider端代码
public class Provider {

    public static void main(String[] args) throws IOException {
        // 获取连接对象
        Connection connection = RabbitmqUtil.getConnection();
        // 通过连接对象获取通道
        Channel channel = connection.createChannel();

        String exchangeName = "logs_direct";
        // 声明交换机
        /**
         *   参数一: 交换机的名称
         *   参数二: 交换机的类型
         */
        channel.exchangeDeclare(exchangeName,"direct");
        String key = "Info";
        //发布消息
        channel.basicPublish(exchangeName,key,null,("provider发布的消息类型为:["+ key+"],  hello direct").getBytes());

        //关闭
        RabbitmqUtil.closeConnectionAndChannel(connection,channel);
    }
}
customer端代码(customer端代码一样,大家可以多写几个进行试验)
public class Customer {

    public static void main(String[] args) throws IOException {
        // 获取连接对象
        Connection connection = RabbitmqUtil.getConnection();
        //通过连接对象获取通道
        Channel channel = connection.createChannel();

        String exchangeName = "logs_direct";
        //声明交换机
        channel.exchangeDeclare(exchangeName,"direct");
        //声明虚拟队列
        String queueName = channel.queueDeclare().getQueue();// 获取虚拟队列的名称
        /**
         *  参数一: 队列名称
         *  参数二: 交换机名称
         *  参数三: 路由的key
         */
        channel.queueBind(queueName,exchangeName,"error");// 绑定交换机
        channel.queueBind(queueName,exchangeName,"Info");// 绑定交换机
        channel.queueBind(queueName,exchangeName,"Warn");// 绑定交换机

        //获取消息
        channel.basicConsume(queueName,true,new DefaultConsumer(channel){
            @Override
            public void handleDelivery(String consumerTag, Envelope envelope, AMQP.BasicProperties properties, byte[] body) throws IOException {
                System.out.println("接受到的消息为"+ new String(body));
            }
        });
    }
}
方式五:Topics
动态路由, 在方式四的基础上添加了统配符 通配符的种类有两种 如下
*: 代表任意一个单纯,如 user.* / *.user / *.user.* 以第一种为例:代表只接受 有user开头,route的个数是两个单纯的消息(单词和单词之间用 . 分割 这个的route是只接受两个单词的消息,如以user开头,有三个请求他是接受不到的,要注意!!!)
#:代表一个多多个单词,如user.# / #.user / #.user.# 以第一种为例: 代表只要是以user开头的消息都可以被接受到
provider端代码
public class Provider{

    public static void main(String[] args) throws IOException {
        // 获取连接对象
        Connection connection = RabbitmqUtil.getConnection();
        // 通过连接对象获取通道
        Channel channel = connection.createChannel();
        // 绑定交换机
        String exchangeName = "topics";
        channel.exchangeDeclare(exchangeName,"topic");
        // 声明routekey  发布消息
        String routeKey = "user.save";
        channel.basicPublish(exchangeName,routeKey,null,("topic要发送参数了啊,routeKey["+routeKey+"]").getBytes());

        //关闭
        RabbitmqUtil.closeConnectionAndChannel(connection,channel);

    }
}
customer端代码
public class Customer {

    public static void main(String[] args) throws IOException{
        Connection connection = RabbitmqUtil.getConnection();
        Channel channel = connection.createChannel();
        String exchangeName = "topics";

        channel.exchangeDeclare(exchangeName,"topic");
        String queueName = channel.queueDeclare().getQueue();
        channel.queueBind(queueName,exchangeName,"user.*");

        channel.basicConsume(queueName,true,new DefaultConsumer(channel){
            @Override
            public void handleDelivery(String consumerTag, Envelope envelope, AMQP.BasicProperties properties, byte[] body) throws IOException {
                System.out.println("customer1接受到消息:"+ new String(body));
            }
        });
    }
}
以上就是常用的五种rabbitmq的连接方式,希望可以对大家有所帮助 !!!


 1059
1059

 被折叠的 条评论
为什么被折叠?
被折叠的 条评论
为什么被折叠?
 到【灌水乐园】发言


