


 本文详细介绍了Linux系统中的SElinux,包括安全上下文、强制模式与警告模式、布尔值管理和如何修改http服务端口连接。通过实际操作展示了如何启用、禁用SElinux,以及如何临时和永久改变文件的安全上下文,确保服务正常运行。
SElinux
SELinux(Security-Enhanced Linux) 是 美国国家安全局(NSA)对于 强制访问控制的实现,是 Linux历史上最杰出的新安全子系统。NSA是在Linux社区的帮助下开发了一种访问控制体系,在这种访问控制体系的限制下,进程只能访问那些在他的任务中所需要文件。SELinux 默认安装在 Fedora 和 Red Hat Enterprise Linux 上,也可以作为其他发行版上容易安装的包得到。大部分使用 SELinux 的人使用的都是 SELinux 就绪的发行版,例如 Fedora、Red Hat Enterprise Linux (RHEL)、 Debian或 Centos。它们都是在 内核中启用 SELinux 的,并且提供一个可定制的安全策略,还提供很多 用户层的库和工具,它们都可以使用 SELinux 的功能。
实验准备:
[root@localhost ~]#systemctl start vsftpd #开启vftpd服务
[root@localhost ~]# vim /etc/sysconfig/selinux #修改SElinux配置文件
disabled--->enforcing #开启SElinux安全服务

[root@localhost ~]# reboot #修改SElinux配置文件后必须重启才能生效
SElinux状态
1、enforcing #强制,如果违反策略,会发出警告,但无法继续操作
2、disable #关闭状态
3、permissive #警告,如果违反策略,会发出警告,但可以继续操作。查看警告信息:cat /var/log/messages
1.安全上下文
所有的操作系统访问控制都是基于与主体和客体相关的访问控制属性的。在SELinux中,访问控制属性杯称作安全上下文。所有的客体(文件,进程间通信,通信管道,套接字,网络主机等)和主体(进程)有一个和他们相关的单一安全上下文。一个安全上下文有三个元素:用户,角色和类型标识符。指定和显示一个安全上下文常用的格式如下:
用户(user):角色(role):类型标识符(type)
(1)系统根据pam子系统中的pam_selinux.so模块设定登录者运行程序的安全上下文
(2)rpm包安装会根据rpm包内记录来生成安全上下文,
(3)如果是手工他建的,会根据policy中规定来设置安全上下文,
(4)如果是cp,会重新生成安全上下文。
(5)如果是mv,安全上下文不变。
SELinux通过添加-Z选项修改了系统命令来展示主体和客体的安全上下文
ls -Z 显示文件系统对象的安全上下文
ps -Z 显示进程的安全上下文
id -Z 显示shell的安全上下文(当前的用户,角色和类型)
临时修改安全上下文
操作方法:
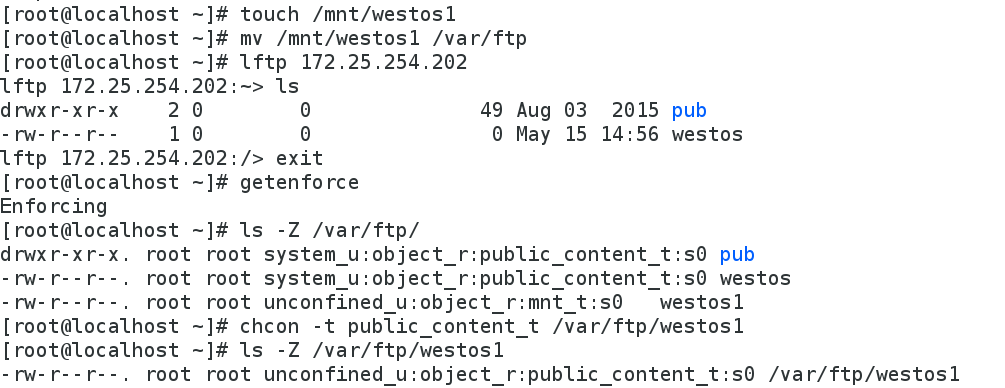
[root@localhost ~]# touch /mnt/westos1
[root@localhost ~]# lftp 172.25.254.202
lftp 172.25.254.202:~> ls #没有显示westos1
[root@localhost ~]# ls -Z /var/ftp/ #查看/var/ftp目录与文件的安全上下文
-rw-r--r-- root root ? westos1 #westos1安全上下文缺失
[root@localhost ~]# getenforce #查看SElinux状态
[root@localhost ~]# chcon -t public_content_t /var/ftp/westos1 #临时修改/var/ftp/westos1安全上下文
[root@localhost ~]# ls -Z /var/ftp/westos1 #查看/var/ftp/westos1的安全上下文
测试:
修改安全上下文之后可以用lftp匿名查看

该操作为临时修改上下文,重启SElinux将失效
[root@localhost ~]# vim /etc/sysconfig/selinux #编辑SElinux配置文件,将SElinux状态改为disabled
[root@localhost ~]# reboot
[root@localhost ~]# vim /etc/sysconfig/selinux #编辑SElinux配置文件,将SElinux状态改为enforcing
[root@localhost ~]# reboot #两次修改SElinux配置文件后重启相当于重启SElinux
[root@localhost ~]# ls -Z /var/ftp/westos1 #查看/var/ftp/westos1的安全上下文
drwxr-xr-x. root root unconfined_u:object_r:default_t:s0 /var/ftp/westos #重启SElinux后安全上下文失效
永久修改安全上下文
[root@localhost ~]# mkdir /westos
[root@localhost ~]# touch /westos/westosfile
[root@localhost ~]# vim /etc/vsftpd/vsftpd.conf #编辑vsftp配置文件,将匿名用户访问的家目录改为/westos
13 anon_root=/westos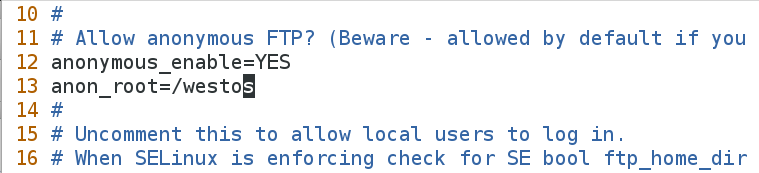
[root@localhost ~]# systemctl restart vsftpd #重启vsftp服务
[root@localhost ~]# lftp 172.25.254.202
lftp 172.25.254.202:~> ls #没有显示westosfile
lftp 172.25.254.202:/> exit
[root@localhost ~]# ls -Zd /westos #查看/westos权限和安全上下文
drwxr-xr-x. root root unconfined_u:object_r:default_t:s0 /westos
[root@localhost ~]# semanage fcontext -l |grep /westos #内核记录的/westos目录的安全上下文
[root@localhost ~]# semanage fcontext -a -t public_content_t '/westos(/.*)?'
#永久修改/westos目录以及里面所有内容安全上下文,-a 添加,-t 类型
[root@localhost ~]# semanage fcontext -l |grep /westos #内核记录的/westos目录的安全上下文
/westos(/.*)? all files system_u:object_r:public_content_t:s0
[root@localhost ~]# restorecon -FvvR /westos #刷新安全上下文,显示修改过程
restorecon reset /westos context unconfined_u:object_r:default_t:s0->system_u:object_r:public_content_t:s0
restorecon reset /westos/westosfile context unconfined_u:object_r:default_t:s0->system_u:object_r:public_content_t:s0
[root@localhost ~]# touch /.autorelabel #刷新,相当于重启SElinux
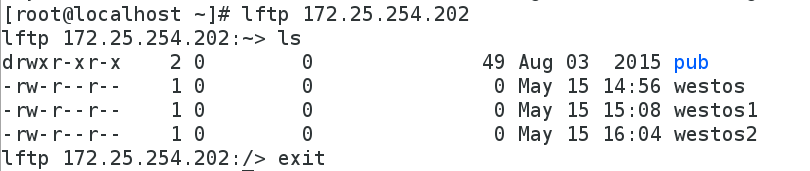
[root@localhost ~]# lftp 172.25.254.202
lftp 172.25.254.202:~> ls
-rw-r--r-- 1 0 0 0 May 17 00:58 westosfile #可以查看westos里的文件
lftp 172.25.254.202:/> exit
2.警告模式&强制模式
setenforce 0 #警告模式(发出警告,允许访问)执行getenforce显示permisive状态
setenforce 1 #强制模式(发出警告,禁止访问) 执行getenforce显示enforcing状态
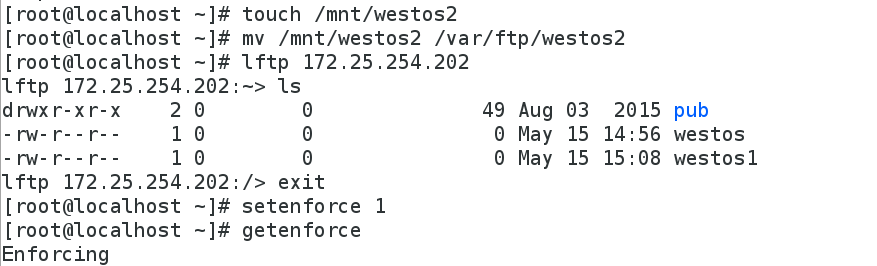
[root@localhost ~]# touch /mnt/westos2
[root@localhost ~]# mv /mnt/westos2 /var/ftp/westos2
[root@localhost ~]# lftp 172.25.254.202
lftp 172.25.254.202:~> ls
强制模式:
[root@localhost ~]# setenforce 1 #强制模式
[root@localhost ~]# getenforce #查看SElinux的状态
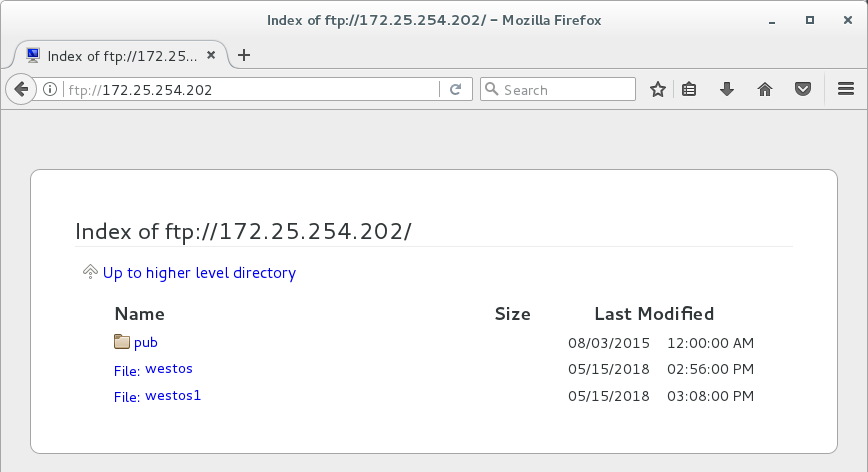
用真机浏览器 ftp://172.25.254.202/ #查看ftp共享的内容(无法查看到westos2,会产生警告日志)
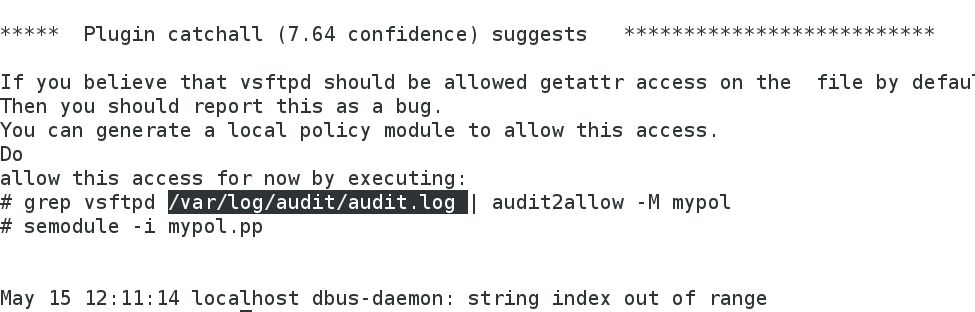
[root@localhost ~]# cat /var/log/messages #查看警告日志,里面含有解决方案
[root@localhost ~]# cat /var/log/audit/audit.log #查看报错信息
其中提供解决方案的不是系统而是一个软件程序,但但此软件不安全,只是解决当前不能访问的问题;查找安装包: rpm -qa |grep setrouble ; 如果删除此工具,日志/var/log/messages不会提供解决方案,但是/var/log/audit/audit.log可以看到日志。
测试:
浏览器测试:看不到westos2,并产生日志
[root@localhost ~]# cat /var/log/messages

[root@localhost ~]# restorecon -v /var/ftp/* #根据日志中的解决方案解决冲突
restorecon reset /var/ftp/westos2 context unconfined_u:object_r:mnt_t:s0->unconfined_u:object_r:public_content_t:s0
解决完成后可在浏览器中看到westos2

警告模式:
[root@localhost ~]# setenforce 0 #设置为警告模式
[root@localhost ~]# getenforce #查看SElinux状态
Permissive
用真机浏览器 ftp://172.25.254.202/ #查看ftp共享的内容(可以查看到westos2,会产生警告日志)
[root@localhost ~]# cat /var/log/messages #查看警告日志
[root@localhost ~]# cat /var/log/audit/audit.log #查看报错信息
测试:
浏览器测试:可以看到westos2,并且产生日志

[root@localhost ~]# cat /var/log/messages

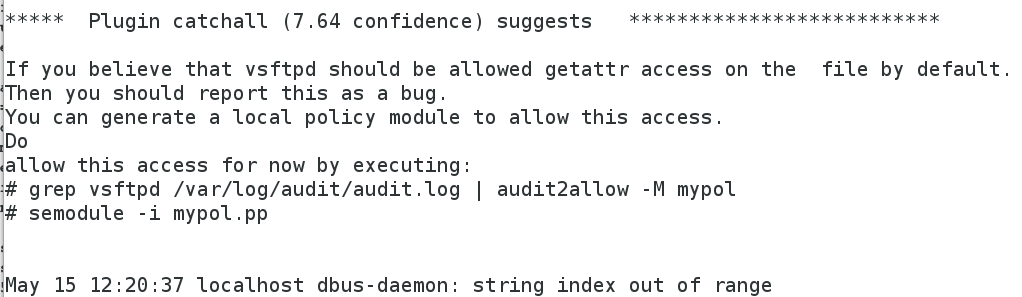
在警告模式下可以用lftp匿名查看,浏览器访问依然产生报错信息
3.SElinux 布尔值
开启SElinux后,系统进程会默认加载布尔值
setsebool -P 修改对象 on|off #开启或关闭某个功能
getsebool -a | 名称 #查看当前系统所有布尔值
在实验前需确认ftp服务默认本地用户可写,SElinux为enforcing状态
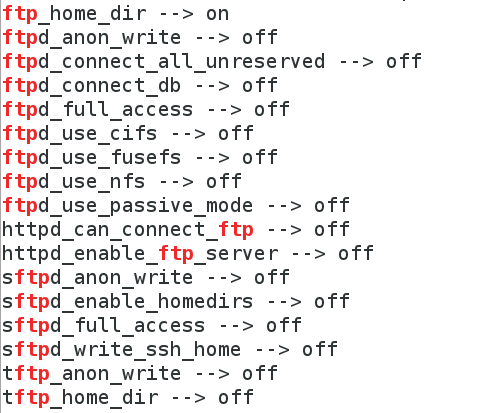
[root@localhost ~]# getsebool -a | grep ftp #查看ftp的SElinux布尔值
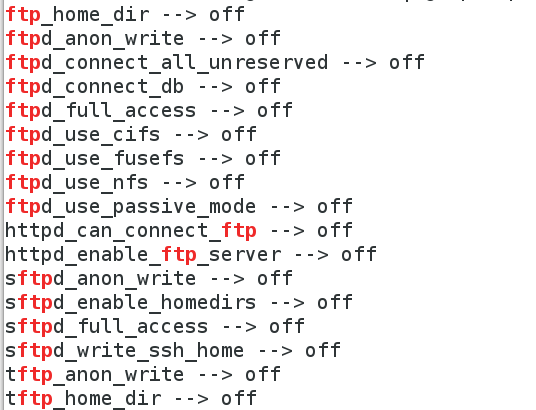
# ftp_home_dir --> off ##用户访问根目录功能处于关闭状态
测试:
[root@localhost ~]# lftp 172.25.254.202 -u student #本地用户登录
Password:
lftp student@172.25.254.202:~> put /etc/passwd #上传/etc/passwd
put: Access failed: 553 Could not create file. (passwd) #不能上传,因为ftp的用户家目录的布尔值为关闭状态
lftp student@172.25.254.202:~> exit
[root@localhost ~]# setsebool -P ftp_home_dir on #允许用户访问根目录
[root@localhost ~]# getsebool -a |grep ftp #查看ftp的SElinux布尔值
# ftp_home_dir --> on ##用户访问根目录功能处于开启状态
[root@localhost ~]# lftp 172.25.254.202 -u student #本地用户登录
Password:
lftp student@172.25.254.202:~> put /etc/passwd
2188 bytes transferred in 10 seconds (213b/s) #上传成功
lftp student@172.25.254.202:~> exit
4.修改http服务的端口连接
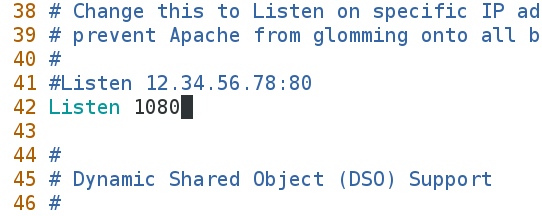
[root@localhost ~]# vim /etc/httpd/conf/httpd.conf #编辑http配置文件
[root@localhost ~]# systemctl restart httpd #重启http服务,新添加的端口不在默认端口里,重启失败
Job for httpd.service failed. See 'systemctl status httpd.service' and 'journalctl -xn' for details.
[root@localhost ~]# setenforce 0 #将SElinux设置为警告模式
[root@localhost ~]# systemctl restart httpd #重启httpd服务
[root@localhost ~]# semanage port -l |grep http #查看端口
[root@localhost ~]# semanage port -a -t http_port_t -p tcp 1018 #添加端口号
[root@localhost ~]# semanage port -l |grep http #查看端口
[root@localhost ~]# setenforce 1 #将SElinux设置为强制模式
[root@localhost ~]# systemctl restart httpd #重启httpd
通过端口号查看服务器
cat /etc/services | grep -E "\<21\>"


 390
390

 被折叠的 条评论
为什么被折叠?
被折叠的 条评论
为什么被折叠?
 到【灌水乐园】发言


