


引言
在前几篇博文中,我们相继实现了用内核定时器、任务队列(Tasklet)、工作队列(Workqueue)实现中断的下半部处理,相关博文链接如下:
https://blog.youkuaiyun.com/wenhao_ir/article/details/145281064
https://blog.youkuaiyun.com/wenhao_ir/article/details/145309140
https://blog.youkuaiyun.com/wenhao_ir/article/details/145321621
但实际上还有一种Linux中断自带的机制实现中断的下半部的处理,那就是注册中断时,附带一个属于这个中断的线程,在这个线程中我们可以实现中断的下半部处理,这称为叫线程化的中断处理机制。
利用函数request_threaded_irq就可以在注册中断时同时创建一个属于这个中断的线程。
本篇博文就利用这种处理机制来编写代码,把对按键值的读取任务放在附带的线程中进行处理。
完整源代码
驱动程序gpio_key_drv.c中的代码
#include <linux/module.h>

#include <linux/fs.h>
#include <linux/errno.h>
#include <linux/miscdevice.h>
#include <linux/kernel.h>
#include <linux/major.h>
#include <linux/mutex.h>
#include <linux/proc_fs.h>
#include <linux/seq_file.h>
#include <linux/stat.h>
#include <linux/init.h>
#include <linux/device.h>
#include <linux/tty.h>
#include <linux/kmod.h>
#include <linux/gfp.h>
#include <linux/gpio/consumer.h>
#include <linux/platform_device.h>
#include <linux/of_gpio.h>
#include <linux/of_irq.h>
#include <linux/interrupt.h>
#include <linux/irq.h>
#include <linux/slab.h>


struct gpio_key{
	int gpio;
	struct gpio_desc *gpiod;
	int flag;
	int irq;
} ;

static struct gpio_key *gpio_keys_100ask;

/* 主设备号                                                                 */
static int major = 0;
static struct class *gpio_key_class;

static int g_key = 0;

static DECLARE_WAIT_QUEUE_HEAD(gpio_key_wait);


/* 环形缓冲区 */
#define BUF_LEN 128
static int g_keys[BUF_LEN];
static int r, w;

#define NEXT_POS(x) ((x+1) % BUF_LEN)

static int is_key_buf_empty(void)
{
	return (r == w);
}

static int is_key_buf_full(void)
{
	return (r == NEXT_POS(w));
}

static void put_key(int key_value)
{
	if (!is_key_buf_full())
	{
		g_keys[w] = key_value;
		w = NEXT_POS(w);
	}
}

static int get_key(void)
{
	int key_value = 0;
	if (!is_key_buf_empty())
	{
		key_value = g_keys[r];
		r = NEXT_POS(r);
	}
	return key_value;
}


/* 实现文件操作结构体中的read函数  */
static ssize_t gpio_key_drv_read (struct file *file, char __user *buf, size_t size, loff_t *offset)
{
	//printk("%s %s line %d\n", __FILE__, __FUNCTION__, __LINE__);
	int err;
	int key_value;

	wait_event_interruptible(gpio_key_wait, !is_key_buf_empty());
	//从缓形缓冲区中取出数据
	key_value = get_key();
	err = copy_to_user(buf, &key_value, 4);

	// 返回值为4表明读到了4字节的数据
	return 4;
}


/* 定义自己的file_operations结构体                                              */
static struct file_operations gpio_key_drv = {
	.owner	 = THIS_MODULE,
	.read    = gpio_key_drv_read,
};


static irqreturn_t gpio_key_thread_func(int irq, void *data)
{
	struct gpio_key *gpio_key = data;
	int val;

	val = gpiod_get_value(gpio_key->gpiod);

    // 打印中断号、GPIO引脚编号和电平值
    // printk("Interrupt number: %d; GPIO pin number: %d; Pin Logical value: %d\n", irq, gpio_key->gpio, val);

	// g_key的高8位中存储的是GPIO口的编号,低8位中存储的是按键按下时的逻辑值
	g_key = (gpio_key->gpio << 8) | val;
	//装按键值放入环形缓冲区
	put_key(g_key);

	printk("gpio_key_thread_func: the process is %s pid %d\n",current->comm, current->pid);
	printk("gpio_key_thread_func key %d %d\n", gpio_key->gpio, val);

	wake_up_interruptible(&gpio_key_wait);

	return IRQ_HANDLED;
}


static irqreturn_t gpio_key_isr(int irq, void *dev_id)
{
    return IRQ_WAKE_THREAD;  // 表示中断的上半部处完毕,有实现下半部处理的线程需要唤醒
}


/* 1. 从platform_device获得GPIO
 * 2. gpio=>irq
 * 3. request_irq
 */
static int gpio_key_probe(struct platform_device *pdev)
{
	int err;

	// 获取设备树节点指针
	struct device_node *node = pdev->dev.of_node;

	// count用于存储设备树中描述的GPIO口的数量
	int count;

	int i;
	enum of_gpio_flags flag;
	unsigned flags = GPIOF_IN;

	printk("%s %s line %d\n", __FILE__, __FUNCTION__, __LINE__);

	count = of_gpio_count(node);
	if (!count)
	{
		printk("%s %s line %d, there isn't any gpio available\n", __FILE__, __FUNCTION__, __LINE__);
		return -1;
	}

	gpio_keys_100ask = kzalloc(sizeof(struct gpio_key) * count, GFP_KERNEL);
	if (!gpio_keys_100ask) {
		printk("Memory allocation failed for gpio_keys_100ask\n");
		return -ENOMEM;
	}


	for (i = 0; i < count; i++)
	{
		//  获取GIPO的全局编号及其标志位信息的代码
		gpio_keys_100ask[i].gpio = of_get_gpio_flags(node, i, &flag);
		if (gpio_keys_100ask[i].gpio < 0)
		{
			printk("%s %s line %d, of_get_gpio_flags fail\n", __FILE__, __FUNCTION__, __LINE__);
			return -1;
		}

		// 获取GPIO口的GPIO描述符的代码
		gpio_keys_100ask[i].gpiod = gpio_to_desc(gpio_keys_100ask[i].gpio);
		if (!gpio_keys_100ask[i].gpiod) {
			printk("Failed to get GPIO descriptor for GPIO %d\n", gpio_keys_100ask[i].gpio);
			return -EINVAL;
		}

		// 结构体gpio_key的成员flag用于存储对应的GPIO口是否是低电平有效,假如是低电平有效,成员flag的值为1,假如不是低电平有效,成员flag的值为0。
		// 后续代码实际上并没有用到成员flag,这里出现这句代码只是考虑到代码的可扩展性,所以在这里是可以删除的。
		gpio_keys_100ask[i].flag = flag & OF_GPIO_ACTIVE_LOW;

		// 每次循环都重新初始化flags
    	flags = GPIOF_IN;

		// 假如GPIO口是低电平有效,则把flags添加上低电平有效的信息
		if (flag & OF_GPIO_ACTIVE_LOW)
			flags |= GPIOF_ACTIVE_LOW;

		// 请求一个GPIO硬件资源与设备结构体`pdev->dev`进行绑定
		// 注意,这个绑定操作会在调用函数platform_driver_unregister()注销platform_driver时自动由内核解除绑定操作,所以gpio_key_remove函数中不需要显示去解除绑定
		// 由`devm`开头的函数通常都会内核自动管理资源,咱们在退出函数中不用人为的去释放资源或解除绑定。
		err = devm_gpio_request_one(&pdev->dev, gpio_keys_100ask[i].gpio, flags, NULL);

		// 获取GPIO口的中断请求号
		gpio_keys_100ask[i].irq  = gpio_to_irq(gpio_keys_100ask[i].gpio);
	}

	for (i = 0; i < count; i++)
	{
		char irq_name[32];  // 用于存储动态生成的中断名称

		//使用snprintf()函数将动态生成的中断名称写入irq_name数组
		snprintf(irq_name, sizeof(irq_name), "swh_gpio_irq_%d", i);  // 根据i生成名称

		//调用函数request_threaded_irq()来请求并设置一个带线程的中断,线程用于处理中断下半部
		// err = request_irq(gpio_keys_100ask[i].irq, gpio_key_isr, IRQF_TRIGGER_FALLING, irq_name, &gpio_keys_100ask[i]);
		err = request_threaded_irq(gpio_keys_100ask[i].irq, gpio_key_isr, gpio_key_thread_func, IRQF_TRIGGER_FALLING, irq_name, &gpio_keys_100ask[i]);

	}

	/* 注册file_operations 	*/
	major = register_chrdev(0, "swh_read_keys_major", &gpio_key_drv);

	gpio_key_class = class_create(THIS_MODULE, "swh_read_keys_class");
	if (IS_ERR(gpio_key_class)) {
		printk("%s %s line %d\n", __FILE__, __FUNCTION__, __LINE__);
		unregister_chrdev(major, "swh_read_keys_major");
		return PTR_ERR(gpio_key_class);
	}

	// 由于这里是把多个按键看成是一个设备,你可以想像一个键盘上对应多个按键,但键盘本身是一个设备,所以只有一个设备文件
	device_create(gpio_key_class, NULL, MKDEV(major, 0), NULL, "read_keys0"); /* /dev/read_keys0 */


    return 0;

}

static int gpio_key_remove(struct platform_device *pdev)
{
    struct device_node *node = pdev->dev.of_node;
    int count;
    int i;

	device_destroy(gpio_key_class, MKDEV(major, 0));
	class_destroy(gpio_key_class);
	unregister_chrdev(major, "swh_read_keys_major");

    count = of_gpio_count(node);
    for (i = 0; i < count; i++)
	{
        // 只有在irq有效时才释放中断资源
        if (gpio_keys_100ask[i].irq >= 0) {
            // 释放GPIO中断资源,下面这句代码做了下面两件事:
			// 1、解除 `gpio_keys_100ask[i].irq` 中断号和 `gpio_key_isr` 中断处理函数的绑定。
			// 2、解除 `gpio_keys_100ask[i].irq` 中断号和中断处理函数与 `gpio_keys_100ask[i]` 数据结构的绑定。
            free_irq(gpio_keys_100ask[i].irq, &gpio_keys_100ask[i]);
        }

        // 释放GPIO描述符
        if (gpio_keys_100ask[i].gpiod) {
            gpiod_put(gpio_keys_100ask[i].gpiod);
        }
    }

    // 释放内存
    kfree(gpio_keys_100ask);
    return 0;
}


static const struct of_device_id irq_matach_table[] = {
    { .compatible = "swh-gpio_irq_key" },
    { },
};

/* 1. 定义platform_driver */
static struct platform_driver gpio_keys_driver = {
    .probe      = gpio_key_probe,
    .remove     = gpio_key_remove,
    .driver     = {
        .name   = "swh_irq_platform_dirver",
        .of_match_table = irq_matach_table,
    },
};

/* 2. 在入口函数注册platform_driver */
static int __init gpio_key_init(void)
{
    int err;

	printk("%s %s line %d\n", __FILE__, __FUNCTION__, __LINE__);

    err = platform_driver_register(&gpio_keys_driver);

	return err;
}

/* 3. 有入口函数就应该有出口函数:卸载驱动程序时,就会去调用这个出口函数
 *     卸载platform_driver
 */
static void __exit gpio_key_exit(void)
{
	printk("%s %s line %d\n", __FILE__, __FUNCTION__, __LINE__);

    platform_driver_unregister(&gpio_keys_driver);
}


/* 7. 其他完善:提供设备信息,自动创建设备节点                                     */

module_init(gpio_key_init);
module_exit(gpio_key_exit);

MODULE_LICENSE("GPL");
测试程序button_test.c中的代码
#include <sys/types.h>
#include <sys/stat.h>
#include <fcntl.h>
#include <unistd.h>
#include <stdio.h>
#include <string.h>
#include <pthread.h>
#include <stdlib.h>
#include <time.h>

/*
 * ./button_test /dev/100ask_button0
 *
 */

// 打印线程的执行函数
void* print_while_waiting(void* arg)
{
    while (1)
    {
        printf("I am another thread, and while the main thread is waiting for a button to be pressed, I can still run normally.\n");
        sleep(10); // 每隔10秒打印一次
    }
    return NULL;
}

int main(int argc, char **argv)
{
    int fd;
    int val;
    pthread_t print_thread;
    int keystroke = 0; //记录按键次数

    /* 1. 判断参数 */
    if (argc != 2)
    {
        printf("Usage: %s <dev>\n", argv[0]);
        return -1;
    }

    /* 2. 打开文件 */
    fd = open(argv[1], O_RDWR);
    if (fd == -1)
    {
        printf("Can not open file %s\n", argv[1]);
        return -1;
    }

    // 创建一个线程,每隔一段时间打印输出一条信息表示在等待按键期间,另外的线程在继续正常执行。
    if (pthread_create(&print_thread, NULL, print_while_waiting, NULL) != 0)
    {
        printf("Failed to create print thread\n");
        close(fd);
        return -1;
    }

    while (1)
    {
        /* 3. 读文件 */
        read(fd, &val, 4);

        /* 提取 GPIO 编号和逻辑值 */
        int gpio_number = (val >> 8) & 0xFF; // 高8位为 GPIO 编号
        int gpio_value = val & 0xFF;         // 低8位为逻辑值

        keystroke++;

        /* 打印读到的信息 */
        printf("GPIO Number: %d, Logical Value: %d\n", gpio_number, gpio_value);
        printf("keystrokes is %d\n", keystroke);
    }

	//pthread_join的作用是使主线程等待线程print_threa结束后再继续执行剩下的代码。
	//如果主线程在结束时未等待子线程完成,可能会导致未完成的资源清理或意外的程序终止。
	//这里由于主线程中有个条件永远为真的while循环,实际上这句代码没有实际作用。
    pthread_join(print_thread, NULL);

    close(fd);

    return 0;
}
与线程化的中断处理有关的代码解读
线程化的中断处理其实非常简单。
首先在注册中断时把函数request_irq换为函数request_threaded_irq,相关代码如下:
err = request_threaded_irq(gpio_keys_100ask[i].irq, gpio_key_isr, gpio_key_thread_func, IRQF_TRIGGER_FALLING, irq_name, &gpio_keys_100ask[i]);
其中:
第2个参数gpio_key_isr是中断处理函数(中断上半部的处理函数);
第3个参数gpio_key_thread_func是线程对应的中断处理函数,即中断下半部的处理函数;
第4个参数是传递给两个函数的数据。
中断处理函数gpio_key_isr的返回值要修改下,具体代码如下:
static irqreturn_t gpio_key_isr(int irq, void *dev_id)
{
    return IRQ_WAKE_THREAD;  // 表示中断的上半部处完毕,有实现下半部处理的线程需要唤醒
}
可见,返回值由IRQ_HANDLED换成了IRQ_WAKE_THREAD,返回值IRQ_WAKE_THREAD表明中断上半部处理完毕,但是有中断下半部需要处理,所以请唤醒中断下半部的线程。
中断下半部的线程唤醒后,去运行函数gpio_key_thread_func,代码如下:
static irqreturn_t gpio_key_thread_func(int irq, void *data)
{
	struct gpio_key *gpio_key = data;
	int val;

	val = gpiod_get_value(gpio_key->gpiod);

    // 打印中断号、GPIO引脚编号和电平值
    // printk("Interrupt number: %d; GPIO pin number: %d; Pin Logical value: %d\n", irq, gpio_key->gpio, val);

	// g_key的高8位中存储的是GPIO口的编号,低8位中存储的是按键按下时的逻辑值
	g_key = (gpio_key->gpio << 8) | val;
	//装按键值放入环形缓冲区
	put_key(g_key);

	printk("gpio_key_thread_func: the process is %s pid %d\n",current->comm, current->pid);
	printk("gpio_key_thread_func key %d %d\n", gpio_key->gpio, val);

	wake_up_interruptible(&gpio_key_wait);

	return IRQ_HANDLED;
}
代码很简单,只是要注意下:current->comm是当前线程的名字。
设备树文件的修改和更新
和下面两篇博文一样:
https://blog.youkuaiyun.com/wenhao_ir/article/details/145225508
https://blog.youkuaiyun.com/wenhao_ir/article/details/145176361
Makfile文件内容
# 使用不同的Linux内核时, 一定要修改KERN_DIR,KERN_DIR代表已经配置、编译好的Linux源码的根目录

KERN_DIR = /home/book/100ask_imx6ull-sdk/Linux-4.9.88

all:
	make -C $(KERN_DIR) M=`pwd` modules
	# 因为测试程序中有线程的创建,所以下面的语句需要添加 -lpthread 链接选项
	$(CROSS_COMPILE)gcc -o button_test_02 button_test.c -lpthread

clean:
	make -C $(KERN_DIR) M=`pwd` clean
	rm -rf modules.order
	rm -f button_test_02

obj-m += gpio_key_drv.o
交叉编译出驱动模块和测试程序
源码复制到Ubuntu中。
make
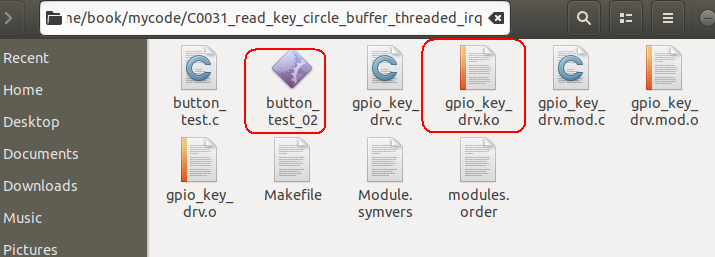
将交叉编译出的gpio_key_drv.ko和button_test_02复制到NFS文件目录中,备用。
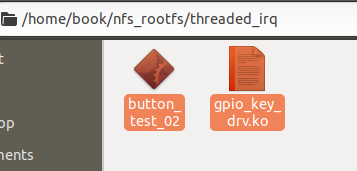
加载模块
打开串口终端→打开开发板→挂载网络文件系统
mount -t nfs -o nolock,vers=3 192.168.5.11:/home/book/nfs_rootfs /mnt
insmod /mnt/threaded_irq/gpio_key_drv.ko
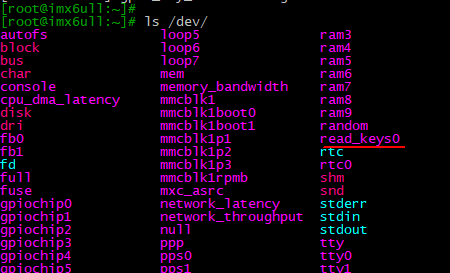
检查设备文件生成没有
ls /dev/
有了:
运行测试程序
先设置内核的printk打印显示:
echo "7 4 1 7" > /proc/sys/kernel/printk
然后:
cd /mnt/threaded_irq
./button_test_02 /dev/read_keys0

线程名字的来历
可见,程序能正常运行,并且还打印出了线程名字为irq/208-swh_gpi,这个名字的来历如下:
第1步:将中断号 208 和中断名称 swh_gpio_irq_0 拼接成:irq/208-swh_gpio_irq_0。
第2步:将线程名截断为 15 个字符(包含结束符 \0),结果为:irq/208-swh_gpi。
卸载驱动程序模块
rmmod gpio_key_drv.ko
由于用函数request_threaded_irq注册请求的中断和用函数request_irq注册请求的中断,其注销释放都是用函数free_irq进行,所以和之前博文 https://blog.youkuaiyun.com/wenhao_ir/article/details/145228617 中的代码没有区别。

经测试,卸载一段时间后,系统仍然能正常运行,所以代码没有问题。


 被折叠的 条评论
为什么被折叠?
被折叠的 条评论
为什么被折叠?
 到【灌水乐园】发言


