


以yolov8添加SimAM注意力机制为例
代码如下
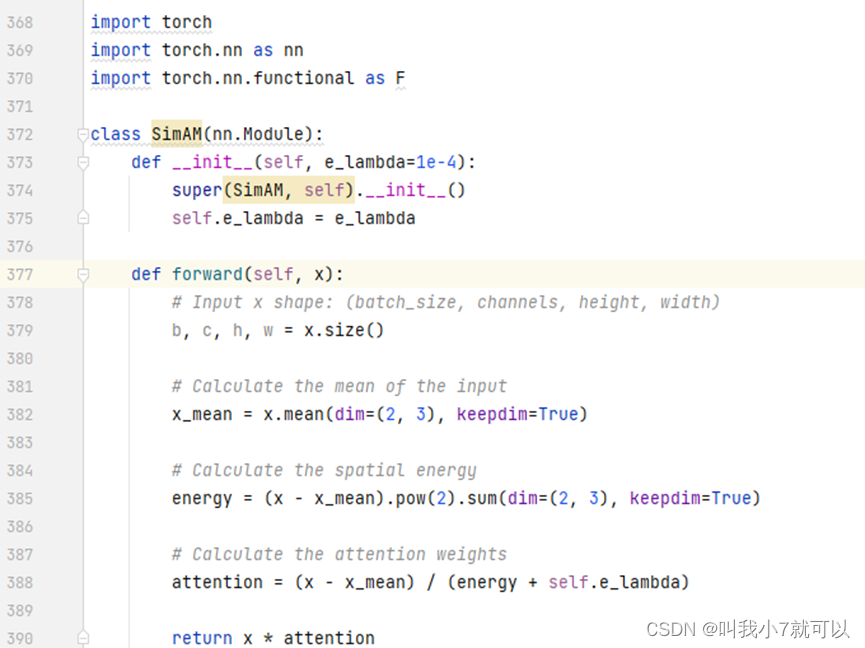
- 导入(首先在nn.modules.conv.py端导入这部分代码)
import torch
import torch.nn as nn
import torch.nn.functional as F

class SimAM(nn.Module):
    def __init__(self, e_lambda=1e-4):
        super(SimAM, self).__init__()
        self.e_lambda = e_lambda

    def forward(self, x):
        # Input x shape: (batch_size, channels, height, width)
        b, c, h, w = x.size()

        # Calculate the mean of the input
        x_mean = x.mean(dim=(2, 3), keepdim=True)

        # Calculate the spatial energy
        energy = (x - x_mean).pow(2).sum(dim=(2, 3), keepdim=True)

        # Calculate the attention weights
        attention = (x - x_mean) / (energy + self.e_lambda)

        return x * attention
如下图导入代码
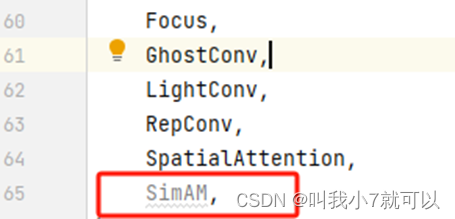
2、定义(也称register)
①在nn.modules.init.py文件里进行注册
②在nn.tasks.py文件里进入一个注册(修改三个部分)
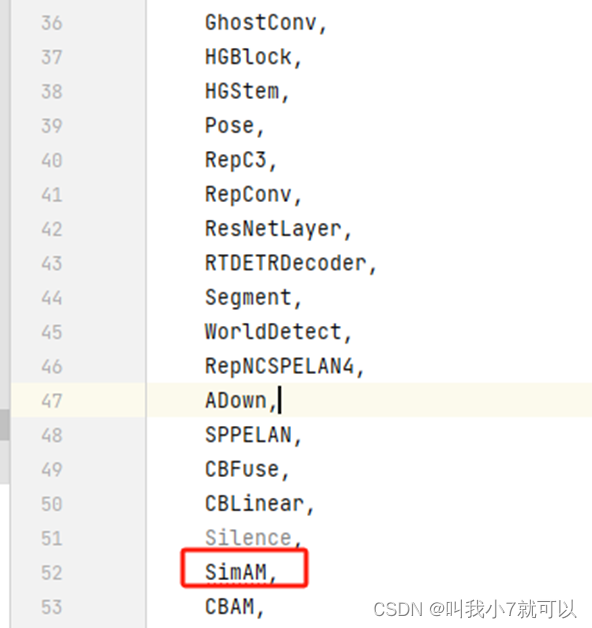
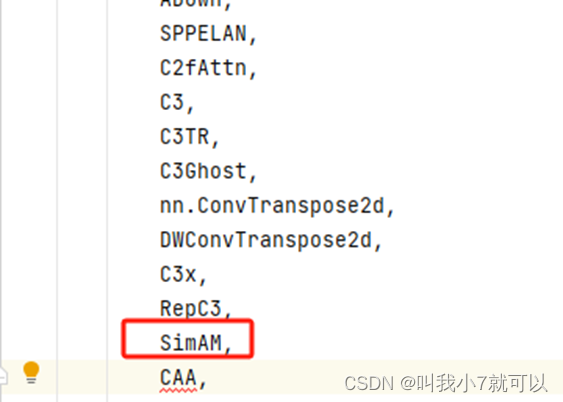
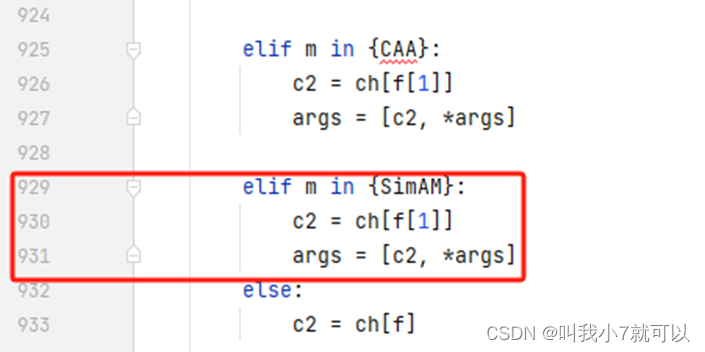
elif m in {SimAM}:

    c2 = ch[f[1]]

    args = [c2, *args]
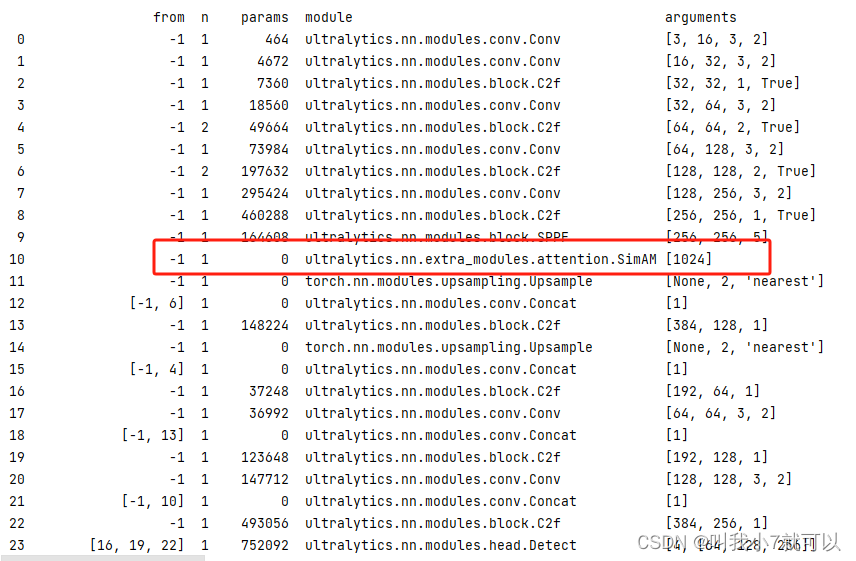
3、接下来就是修改yaml配置文件了(自己根据需求来调整SimAM的位置)
# Ultralytics YOLO 🚀, AGPL-3.0 license

# YOLOv8 object detection model with P3-P5 outputs. For Usage examples see https://docs.ultralytics.com/tasks/detect


# Parameters

nc: 80  # number of classes

scales: # model compound scaling constants, i.e. 'model=yolov8n.yaml' will call yolov8.yaml with scale 'n'

  # [depth, width, max_channels]

  n: [0.33, 0.25, 1024]  # YOLOv8n summary: 225 layers,  3157200 parameters,  3157184 gradients,   8.9 GFLOPs

  s: [0.33, 0.50, 1024]  # YOLOv8s summary: 225 layers, 11166560 parameters, 11166544 gradients,  28.8 GFLOPs

  m: [0.67, 0.75, 768]   # YOLOv8m summary: 295 layers, 25902640 parameters, 25902624 gradients,  79.3 GFLOPs

  l: [1.00, 1.00, 512]   # YOLOv8l summary: 365 layers, 43691520 parameters, 43691504 gradients, 165.7 GFLOPs

  x: [1.00, 1.25, 512]   # YOLOv8x summary: 365 layers, 68229648 parameters, 68229632 gradients, 258.5 GFLOPs


# YOLOv8.0n backbone

backbone:

  # [from, repeats, module, args]

  - [-1, 1, Conv, [64, 3, 2]]  # 0-P1/2

  - [-1, 1, Conv, [128, 3, 2]]  # 1-P2/4

  - [-1, 3, C2f, [128, True]]

  - [-1, 1, Conv, [256, 3, 2]]  # 3-P3/8

  - [-1, 6, C2f, [256, True]]

  - [-1, 1, Conv, [512, 3, 2]]  # 5-P4/16

  - [-1, 6, C2f, [512, True]]

  - [-1, 1, Conv, [1024, 3, 2]]  # 7-P5/32

  - [-1, 3, C2f, [1024, True]]

  - [-1, 1, SPPF, [1024, 5]]  # 9

  - [-1, 1, SimAM, [1024]] # 10


# YOLOv8.0n head

head:

  - [-1, 1, nn.Upsample, [None, 2, 'nearest']]

  - [[-1, 6], 1, Concat, [1]]  # cat backbone P4

  - [-1, 3, C2f, [512]]  # 13


  - [-1, 1, nn.Upsample, [None, 2, 'nearest']]

  - [[-1, 4], 1, Concat, [1]]  # cat backbone P3

  - [-1, 3, C2f, [256]]  # 16 (P3/8-small)


  - [-1, 1, Conv, [256, 3, 2]]

  - [[-1, 13], 1, Concat, [1]]  # cat head P4

  - [-1, 3, C2f, [512]]  # 19 (P4/16-medium)


  - [-1, 1, Conv, [512, 3, 2]]

  - [[-1, 10], 1, Concat, [1]]  # cat head P5

  - [-1, 3, C2f, [1024]]  # 22 (P5/32-large)


  - [[16, 19, 22], 1, Detect, [nc]]  # Detect(P3, P4, P5)
4、最后把yaml文件放到train.Py文件里就可以运行了
成功结果如下(可以看到SimAM已经成功导入进去啦!!!!完结撒花)
于是乎SimAM注意力机制就成功导入啦!其他即插即用的注意力机制也可以按照这个方法哦。
如果出现显示未定义等报错,大家一定要看看自己注册那几个步骤有没有遗漏。
祝各位视觉小伙伴们研学之路顺顺利利。


 2259
2259

 被折叠的 条评论
为什么被折叠?
被折叠的 条评论
为什么被折叠?
 到【灌水乐园】发言


