


目标:
-
部署好DPC++编译器环境
-
实现示例程序的本地编译并分析
内容:
1.了解什么是DPC++
DPC++是Data Parallel C++(数据并行C++)的首字母缩写,它是Intel为了将SYCL引入LLVM和oneAPI所开发的开源项目。SYCL是为了提高各种加速设备上的编程效率而开发的一种高级别的编程模型,简单来说它是一种跨平台的抽象层,用户不需要关心底层的加速器具体是什么,按照标准编写统一的代码就可以在各种平台上运行。可以说SYCL大大提高了编写异构计算代码的可移植性和编程效率,已经成为了异构计算的行业标准
2.实验环境准备
DPC++的实践环境分为以下三种:
①基于Intel DevCloud环境
②Dpcpp编译器的本地安装
③基于Docker的环境
由于部分方式受限于Git访问受限和下载速度堪忧,本文着重介绍方法①
3.DevCloud注册
①点击链接,创建账户
https://idzcn.com/devcloud.htm https://idzcn.com/devcloud.htm
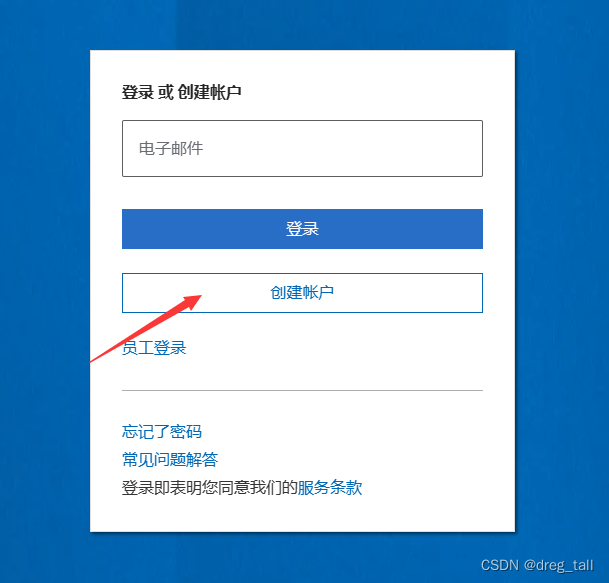
②填写个人账户信息
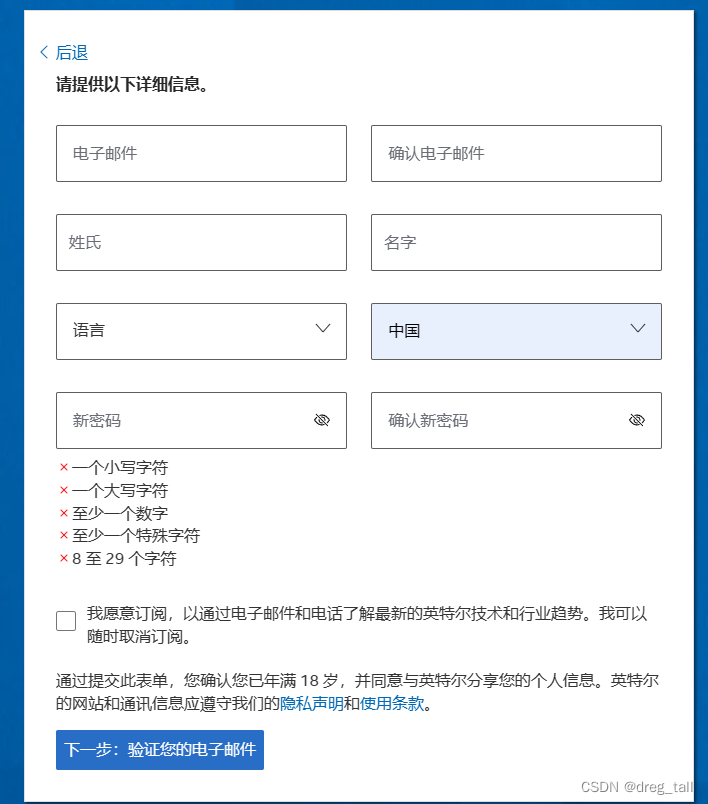
③验证电子邮件后跳转至主页
若未能正常跳转请直接访问主页:Overview | Intel® DevCloud
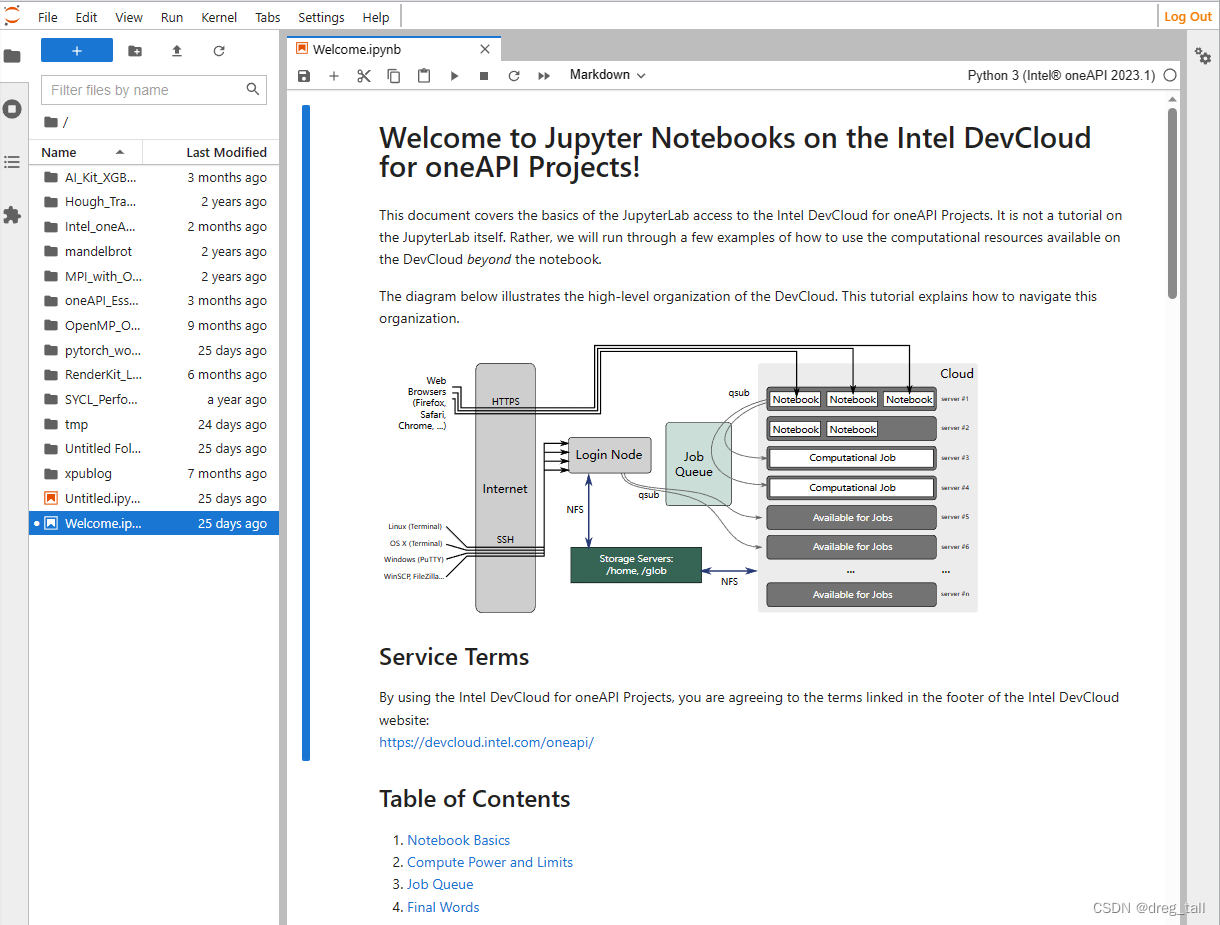
3.JupyterLab登录
①登录个人账号
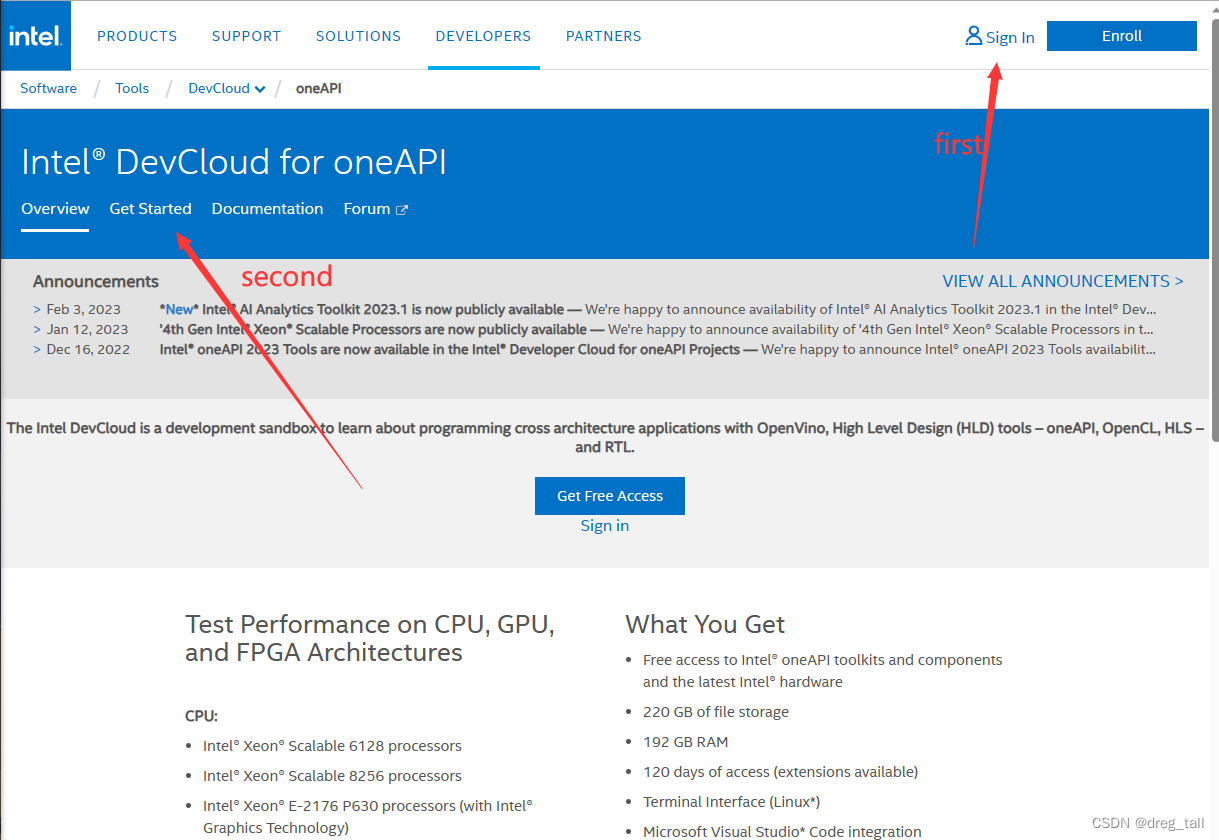
②Get Started后选择页面最下方 Lauch JupyterLab

③实现登录到JupyterLab页面后则恭喜环境搭建完成
4.实现hello world程序
①创建新笔记本写代码,使用终端编译运行
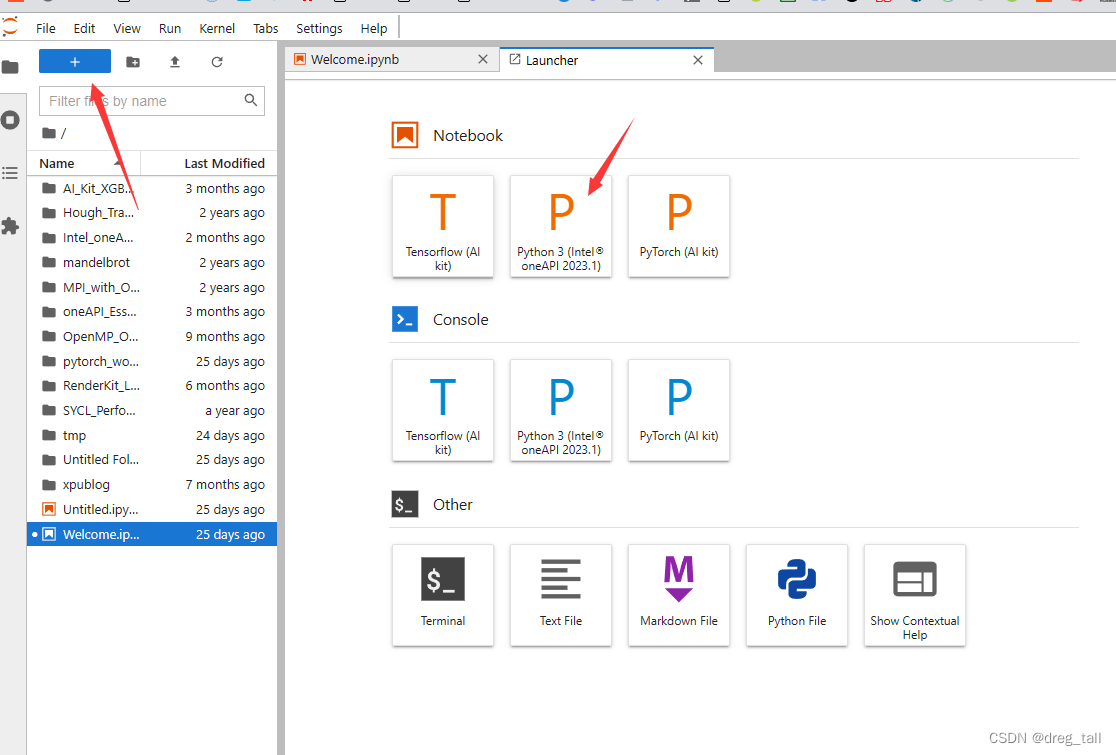
②编写输出“Hello World”代码
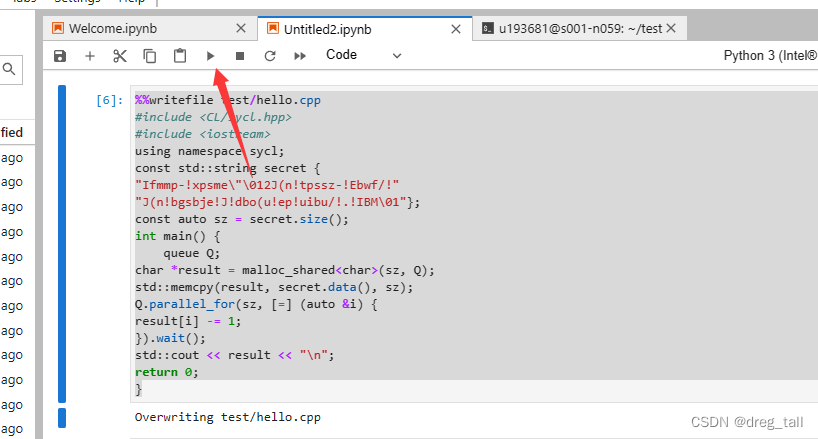
在笔记本中编写代码,注意的是下附代码第一行表示在test/hello.cpp文件下编写,则需我们到终端中创建文件路径
%%writefile test/hello.cpp
#include <CL/sycl.hpp>
#include <iostream>
using namespace sycl;
const std::string secret {
"Ifmmp-!xpsme\"\012J(n!tpssz-!Ebwf/!"
"J(n!bgsbje!J!dbo(u!ep!uibu/!.!IBM\01"};
const auto sz = secret.size();
int main() {
    queue Q;
char *result = malloc_shared<char>(sz, Q);
std::memcpy(result, secret.data(), sz);
Q.parallel_for(sz, [=] (auto &i) {
result[i] -= 1;
}).wait();
std::cout << result << "\n";
return 0;
}![]()
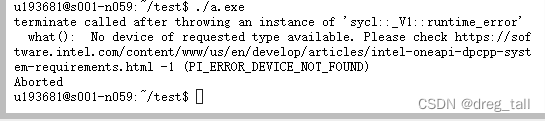
③运行笔记本代码,终端编译执行
点击笔记本上方运行三角号
ps:此时在终端中目标路径输入ls指令,应该可以看见已经编写好的cpp文件
![]()
在终端中编译 运行
icpx -fsycl hello.cpp -o hello
./hello

5.示例代码运行
①DPC++设备选择方式1:默认的设备选择器
代码如下:
#include <CL/sycl.hpp>
#include <iostream>
using namespace sycl;
int main(){
    queue Q;
    std::cout << "Select device: "<<
    Q.get_device().get_info<info::device::name>() << "\n";
    return 0;
}
编译运行结果:

此时输出的是默认设备
②DPC++设备选择方式2:使用host_selector
代码如下:
#include <CL/sycl.hpp>
#include <iostream>
using namespace sycl;
int main(){
    queue Q (host_selector{} );
    std::cout << "Select device: "<<
    Q.get_device().get_info<info::device::name>() << "\n";
    std::cout <<" -> Device vendor: " <<
    Q.get_device().get_info<info::device::vendor>() << "\n";
    return 0;
}
由于老版的sycl支持host_selector,到sycl 2020版本host_selector被弃用,无法运行的原因,
执行结果无法运行:
③DPC++设备选择方式3:使用cpu_selector
代码如下:
#include <CL/sycl.hpp>
#include <iostream>
using namespace sycl;
int main(){
    queue Q ( cpu_selector_v );
    std::cout << "Select device: "<<
    Q.get_device().get_info<info::device::name>() << "\n";
    std::cout <<" -> Device vendor: " <<
    Q.get_device().get_info<info::device::vendor>() << "\n";
    return 0;
}
运行结果:
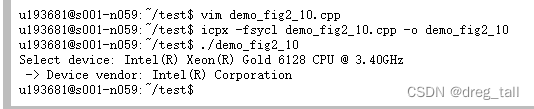
该运行结果显示出cpu设备选择器
④DPC++设备选择方式4:使用多个设备选择器
代码如下:
#include <CL/sycl.hpp>
#include <iostream>
using namespace sycl;

int main(){
        queue my_default_queue(default_selector_v);
        queue my_accelerator_queue(accelerator_selector_v);

        std::cout << "Selected device 1:" << my_default_queue.get_device().get_info<info::device::name>() << "\n";
        std::cout << "Selected device 2:" << my_accelerator_queue.get_device().get_info<info::device::name>() << "\n";

        return 0;
}
运行结果:

代码中的accelerator_selector_v为选择一个加速器设备(如 FPGA、ASIC 等)
⑤向数组中填充数据
代码如下:
#include <CL/sycl.hpp>
#include <array>
#include <iostream>
using namespace sycl;

int main(){
        constexpr int size = 16;
        std::array<int,size> data;
        buffer  B {data};

        queue Q{};
        std::cout << "Selected device is : " << Q.get_device().get_info<info::device::name>() << "\n";

        Q.submit([&](handler& h){
                                accessor acc{B,h};
                                h.parallel_for(size,[=](auto&idx){
                                                        acc[idx] = idx;
                                                });
                        });
        return 0;
}
运行结果:

这段代码使用SYCL(ComputeCpp)库实现了并行计算的示例。它创建了一个队列,选择一个计算设备,并在该设备上执行并行任务。任务使用访问器访问缓冲区,并在每个迭代中将索引值赋给缓冲区中的元素。代码的主要目的是展示SYCL的基本用法,以及如何利用SYCL库在异构计算设备上进行并行计算。


 7137
7137

 被折叠的 条评论
为什么被折叠?
被折叠的 条评论
为什么被折叠?
 到【灌水乐园】发言


