


 该文展示了如何在uniapp中实现图片上传、预览和删除功能。通过Vue组件的方式,利用uniapp的chooseImage接口选择图片,结合预览和删除方法,创建了一个简单的图片管理界面。代码示例包括模板、脚本和样式部分。
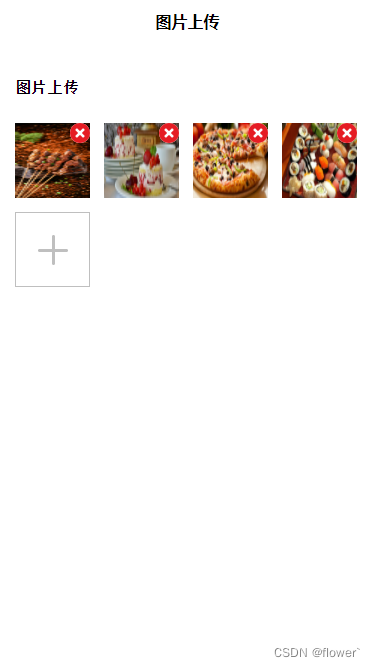
一、样例图
实现图片上传、预览,删除功能
二、完整代码
<template>
	<view>
		<view class="box">
			<view class="tips-title">图片上传</view>
			<view class="img-box">
				<!-- 图片列表 -->
				<block v-if="imgList.length>0">
					<view class="img-item" v-for="(item,index) in imgList" :key="index">
						<image class="img" lazy-load="true" :src="item" @tap="preImg(index)"></image>
						<view class="img-delete-box" @tap="deImg(index)">
							<image class="img-delete-icon" lazy-load="true" src="../../static/delete-icon.png"></image>
						</view>
					</view>
				</block>
				<!-- 上传图标 -->
				<view class="img-item upload-icon" @tap="upBtn()"></view>
			</view>
		</view>
	</view>
</template>
<script>
	export default {
		components: {},
		data() {
			return {
				imgList: [],
			}
		},
		onReady() {},
		onLoad() {},
		methods: {
			// 上传图片
			upBtn() {
				var that = this
				uni.chooseImage({
					count: 6, //默认9
					sizeType: ['original', 'compressed'], //可以指定是原图还是压缩图,默认二者都有
					sourceType: ['album'], //从相册选择
					success: function(res) {
						console.log(res.tempFilePaths);
						that.imgList = that.imgList.concat(res.tempFilePaths)
						console.log("that.imgList", that.imgList)
					}
				});
			},
			// 删除图片
			deImg(index) {
				this.imgList.splice(index, 1)
			},
			// 预览图片
			preImg(index) {
				uni.previewImage({
					current: index,
					urls: this.imgList
				})
			}
		}
	}
</script>
<style lang="scss">
	.box {
		padding: 30rpx;

		.tips-title {
			padding: 30rpx 0;
			font-size: 30rpx;
			font-weight: bold;
		}

		.img-box {
			display: flex;
			flex-wrap: wrap;

			.img-item {
				width: 150rpx;
				height: 150rpx;
				position: relative;
				box-sizing: border-box;
				margin: 15rpx;

				.img {
					width: 100%;
					height: 100%;
				}

				.img-delete-box {
					width: 40rpx;
					height: 40rpx;
					position: absolute;
					right: 0;
					top: 0;

					.img-delete-icon {
						width: 100%;
						height: 100%;
					}
				}

			}

			.upload-icon {
				box-sizing: border-box;
				border: 2rpx solid #bfbfbf;
			}

			.upload-icon:before {
				content: '';
				position: absolute;
				top: 50%;
				left: 50%;
				width: 60rpx;
				height: 6rpx;
				background-color: #bfbfbf;
				margin: -3rpx 0 0 -30rpx;
				border-radius: 5rpx;
			}

			.upload-icon::after {
				content: '';
				position: absolute;
				top: 50%;
				left: 50%;
				width: 6rpx;
				height: 60rpx;
				background-color: #bfbfbf;
				margin: -30rpx 0 0 -3rpx;
				border-radius: 5rpx;
			}

			.img-item:nth-child(4n+1) {
				margin-left: 0;
			}

			.img-item:nth-child(4n+4) {
				margin-right: 0;
			}
		}
	}
</style>
总结
以上就是今天要讲的内容,本文仅仅介绍了uniapp图片上传的简单使用,更多使用方式请前往uniapp官网进行查看喔。


 被折叠的 条评论
为什么被折叠?
被折叠的 条评论
为什么被折叠?
 到【灌水乐园】发言


