


 本文详细介绍了如何配置Nginx的HTTPS服务,开启状态界面,并结合Zabbix进行服务器监控。内容涵盖环境说明、Zabbix服务端的安装与配置,包括web界面的安装与设置,以及监控各项指标如连接数等。
基于用户的访问
安装包
[root@localhost ~]# yum provides *bin/htpasswd
已加载插件:fastestmirror
Repository 'base': Error parsing config: Error parsing "baseurl = 'local'": URL must be http, ftp, file or https not ""
Loading mirror speeds from cached hostfile
* base: mirrors.cn99.com
* extras: mirrors.aliyun.com
* updates: mirrors.aliyun.com
httpd-tools-2.4.6-93.el7.centos.x86_64 : Tools for use with the Apache HTTP Server
源 :base
匹配来源:
文件名 :/usr/bin/htpasswd
[root@localhost ~]# yum -y install httpd-tools
[root@localhost ~]# which htpasswd
/usr/bin/htpasswd
[root@localhost ~]# htpasswd -c -m /usr/local/nginx/conf/.passwd admin
New password:
Re-type new password:
Adding password for user admin
[root@localhost ~]# ls /usr/local/nginx/conf/ -a
. fastcgi_params.default nginx.conf uwsgi_params
.. koi-utf nginx.conf.default uwsgi_params.default
fastcgi.conf koi-win .passwd win-utf
fastcgi.conf.default mime.types scgi_params
fastcgi_params mime.types.default scgi_params.default
[root@localhost ~]# cat /usr/local/nginx/conf/.passwd 即加密后的密码
admin:$apr1$Ky/Dnmpe$DVuYt3vuP/BNdUt3/OP8R/
配置页面
[root@localhost ~]# cd /usr/local/nginx/html/
[root@localhost html]# ls
50x.html index.html zabbix
[root@localhost html]# mkdir abc
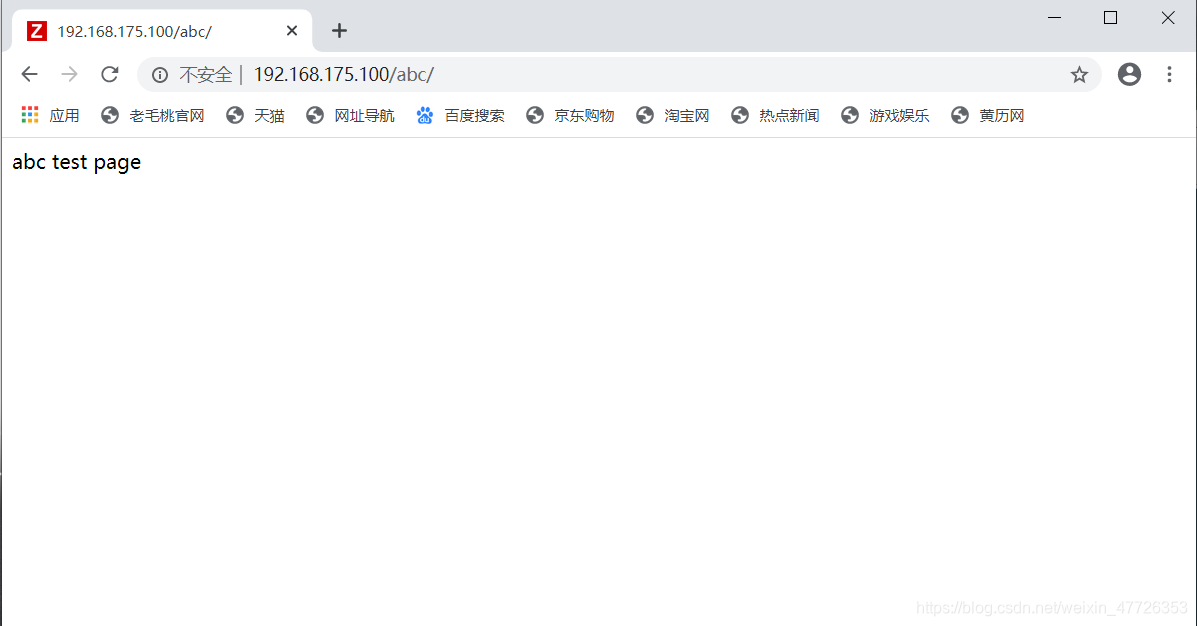
[root@localhost html]# echo 'abc test page' > abc/index.html
[root@localhost ~]# vim /usr/local/nginx/conf/nginx.conf
[root@localhost ~]# nginx -s reload
#access_log logs/host.access.log main;
location / {
root html;
index index.html index.htm;
}
location /abc { //配置abc页面
root html;
index index.html;
}
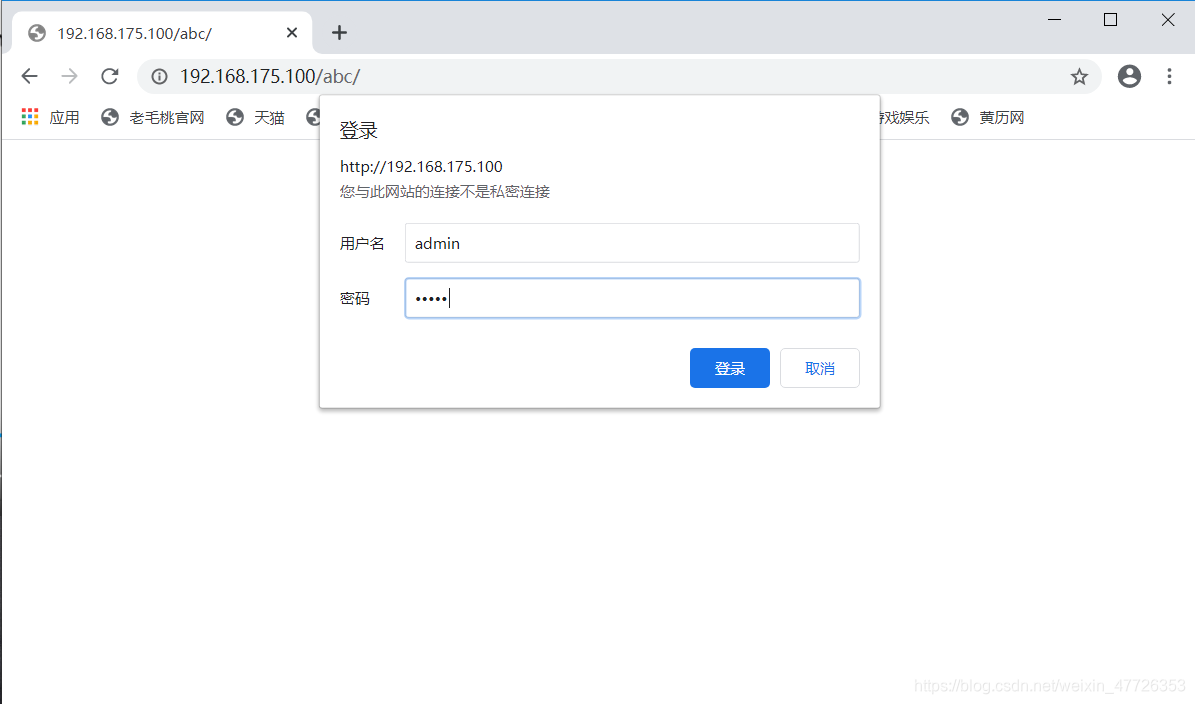
配置密码
[root@localhost ~]# nginx -t
nginx: the configuration file /usr/local/nginx/conf/nginx.conf syntax is ok
nginx: configuration file /usr/local/nginx/conf/nginx.conf test is successful
[root@localhost ~]# nginx -s reload
        #access_log  logs/host.access.log  main;

         location / {
            root   html;
            index  index.html index.htm;
        }
        location /abc {
            auth_basic "jjyy";
            auth_basic_user_file /usr/local/nginx/conf/.passwd;   添加密码位置
            root html;
            index index.html;
        }
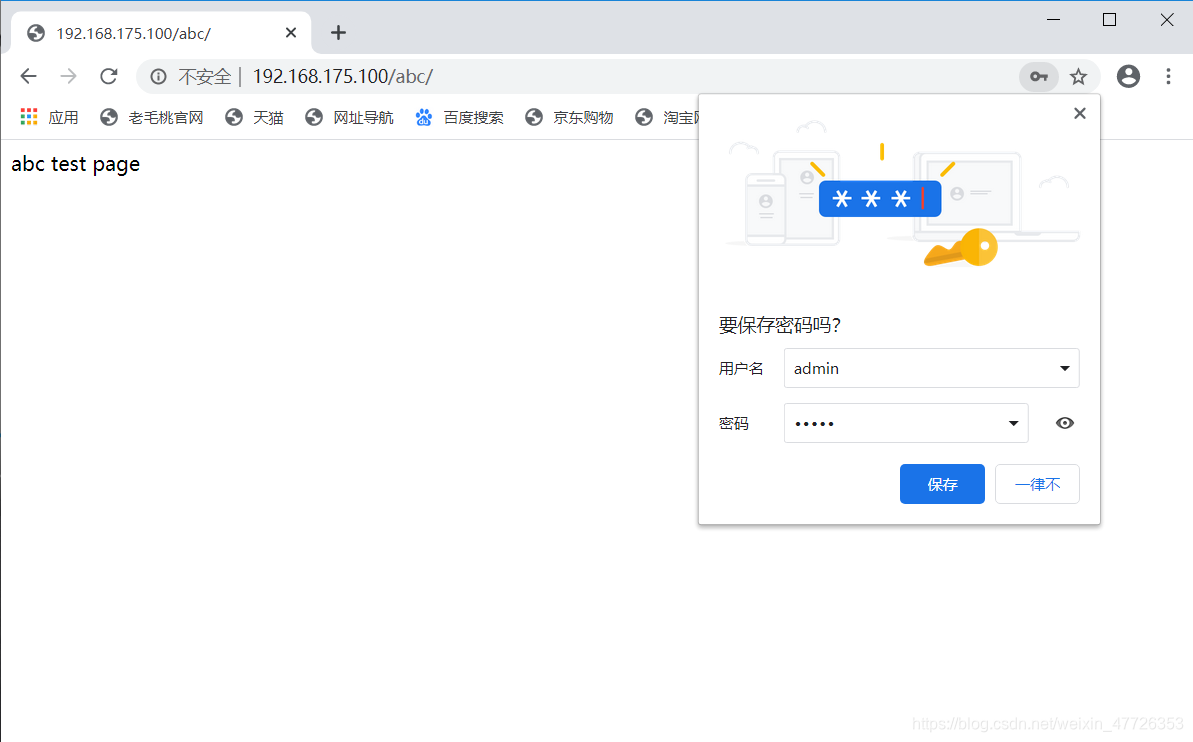
页面测试
配置HTTPS
下载证书需要的包
[root@localhost ~]# yum -y install mod_ssl
[root@localhost ~]# vim /etc/httpd/conf.modules.d/00-base.conf
添加以下内容
LoadModule ssl_module modules/mod_ssl.so

[root@localhost ~]# openssl genrsa -out server.key 2048
Generating RSA private key, 2048 bit long modulus
.............................................+++
.................................+++
e is 65537 (0x10001)

[root@localhost ~]# openssl req -new -key server.key -out server.csr
You are about to be asked to enter information that will be incorporated
into your certificate request.
What you are about to enter is what is called a Distinguished Name or a DN.
There are quite a few fields but you can leave some blank
For some fields there will be a default value,
If you enter '.', the field will be left blank.
-----
Country Name (2 letter code) [XX]:
State or Province Name (full name) []:
Locality Name (eg, city) [Default City]:
Organization Name (eg, company) [Default Company Ltd]:
Organizational Unit Name (eg, section) []:
Common Name (eg, your name or your server's hostname) []:
Email Address []:

Please enter the following 'extra' attributes
to be sent with your certificate request
A challenge password []:
An optional company name []:

[root@localhost ~]# openssl x509 -req -days 365 -in server.csr -signkey server.key -out server.crt
Signature ok
subject=/C=XX/L=Default City/O=Default Company Ltd
Getting Private key
[root@localhost ~]# mv server.crt www.a.com.crt
[root@localhost ~]# mv server.key www.a.com.key
[root@localhost ~]# vim /usr/local/nginx/conf/nginx.conf
最后几行#去掉
server {
        listen       443 ssl;
        server_name  localhost;

        ssl_certificate      /root/www.a.com.crt;
        ssl_certificate_key  /root/www.a.com.key;

        ssl_session_cache    shared:SSL:1m;
        ssl_session_timeout  5m;

        ssl_ciphers  HIGH:!aNULL:!MD5;
        ssl_prefer_server_ciphers  on;

        location / {
            root   html;
            index  index.html index.htm;
        }
    }
[root@localhost ~]# nginx -s reload
开启状态界面
[root@localhost conf]# vim nginx.conf
location / {
44 root html;
45 index index.html index.htm;
46 }
47
48 location /status { //添加内容
49 stub_status on; //添加内容
50 allow 192.168.175.0/24; //添加内容
51 deny all; //添加内容
52 }
[root@localhost conf]# nginx -t
nginx: the configuration file /usr/local/nginx/conf/nginx.conf syntax is ok
nginx: configuration file /usr/local/nginx/conf/nginx.conf test is successful
[root@localhost conf]# nginx -s reload
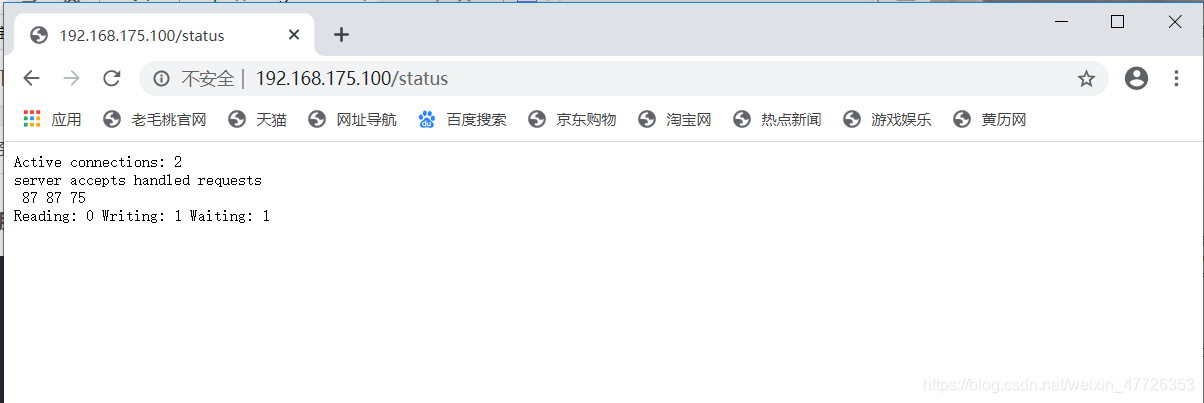
查看
[root@yangcan2 ~]# curl http://192.168.175.100/status
Active connections: 1
server accepts handled requests
85 85 74
Reading: 0 Writing: 1 Waiting: 0
nginx状况监控
环境说明
| 环境 | IP | 需要安装的应用 |
|---|---|---|
| yangcan1 | 192.168.175.150 | lnmp架构、zabbix_server、zabbix_agent |
| yangcan2 | 192.168.175.100 | nginx、zabbix_agent |
zabbix服务端安装
安装依赖包
[root@yangcan1 ~]# yum -y install net-snmp-devel libevent-devel
下载zabbix
[root@yangcan1 ~]# cd /usr/src/
[root@yangcan1 src]# ls
debug mysql-5.7.30-linux-glibc2.12-x86_64.tar.gz php-7.4.7.tar.xz
kernels php-7.4.7 zabbix-5.0.2.tar.gz
解压
[root@yangcan1 src]# tar xf zabbix-5.0.2.tar.gz
[root@yangcan1 src]# ls
debug php-7.4.7 zabbix-5.0.2.tar.gz
kernels php-7.4.7.tar.xz
mysql-5.7.30-linux-glibc2.12-x86_64.tar.gz zabbix-5.0.2
创建zabbix用户和组
[root@yangcan1 ~]# groupadd -r zabbix
[root@yangcan1 ~]# useradd -r -g zabbix -M -s /sbin/nologin zabbix
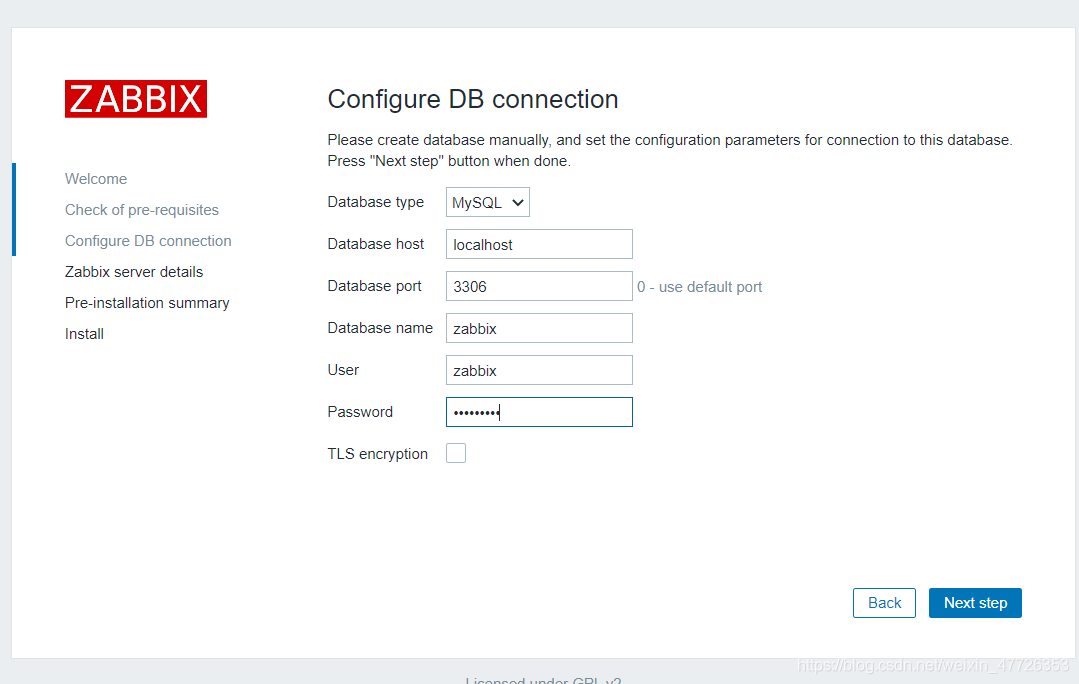
配置zabbix数据库
[root@yangcan1 ~]# cd /usr/local/mysql
[root@yangcan1 mysql]# mysql -uroot -p
Enter password:
Welcome to the MySQL monitor. Commands end with ; or \g.
Your MySQL connection id is 3
Server version: 5.7.30 MySQL Community Server (GPL)
Copyright (c) 2000, 2020, Oracle and/or its affiliates. All rights reserved.
Oracle is a registered trademark of Oracle Corporation and/or its
affiliates. Other names may be trademarks of their respective
owners.
Type 'help;' or '\h' for help. Type '\c' to clear the current input statement.
mysql> create database zabbix character set utf8 collate utf8_bin;
Query OK, 1 row affected (0.00 sec)
mysql> grant all privileges on zabbix.* to zabbix@localhost identified by 'zabbix123';
Query OK, 0 rows affected, 2 warnings (0.00 sec)
mysql> flush privileges;
Query OK, 0 rows affected (0.00 sec)
mysql> quit
Bye
[root@yangcan1 ~]# cd /usr/src/zabbix-5.0.2/database/mysql/
[root@yangcan1 mysql]# ls
data.sql double.sql images.sql Makefile.am Makefile.in schema.sql
[root@yangcan1 mysql]# mysql -uzabbix -pzabbix123 zabbix < schema.sql
mysql: [Warning] Using a password on the command line interface can be insecure.
[root@yangcan1 mysql]# mysql -uzabbix -pzabbix123 zabbix < images.sql
mysql: [Warning] Using a password on the command line interface can be insecure.
[root@yangcan1 mysql]# mysql -uzabbix -pzabbix123 zabbix < data.sql
mysql: [Warning] Using a password on the command line interface can be insecure.
编译安装zabbix
[root@yangcan1 ~]# cd /usr/src/zabbix-5.0.2
[root@yangcan1 zabbix-5.0.2]# ./configure --enable-server \
> --enable-agent \
> --with-mysql \
> --with-net-snmp \
> --with-libcurl \
> --with-libxml2
[root@yangcan1 zabbix-5.0.2]# make install
zabbix服务端配置
[root@yangcan1 ~]# ls /usr/local/etc/
zabbix_agentd.conf  zabbix_agentd.conf.d  zabbix_server.conf  zabbix_server.conf.d

修改服务端配置文件
设置数据库信息
[root@yangcan1 ~]# vim /usr/local/etc/zabbix_server.conf
......
DBPassword=zabbix123    设置zabbix数据库连接

启动zabbix_server和zabbix_agentd
[root@yangcan1 ~]# zabbix_server
[root@yangcan1 ~]# zabbix_agentd
[root@yangcan1 ~]# ss -antl
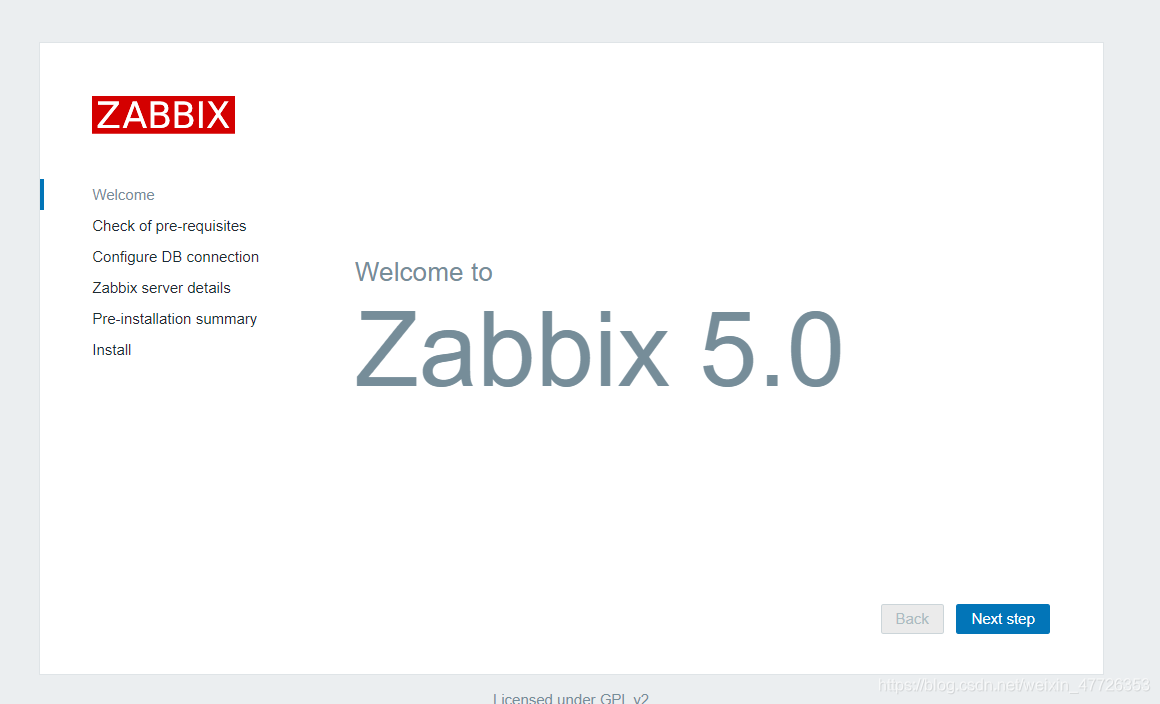
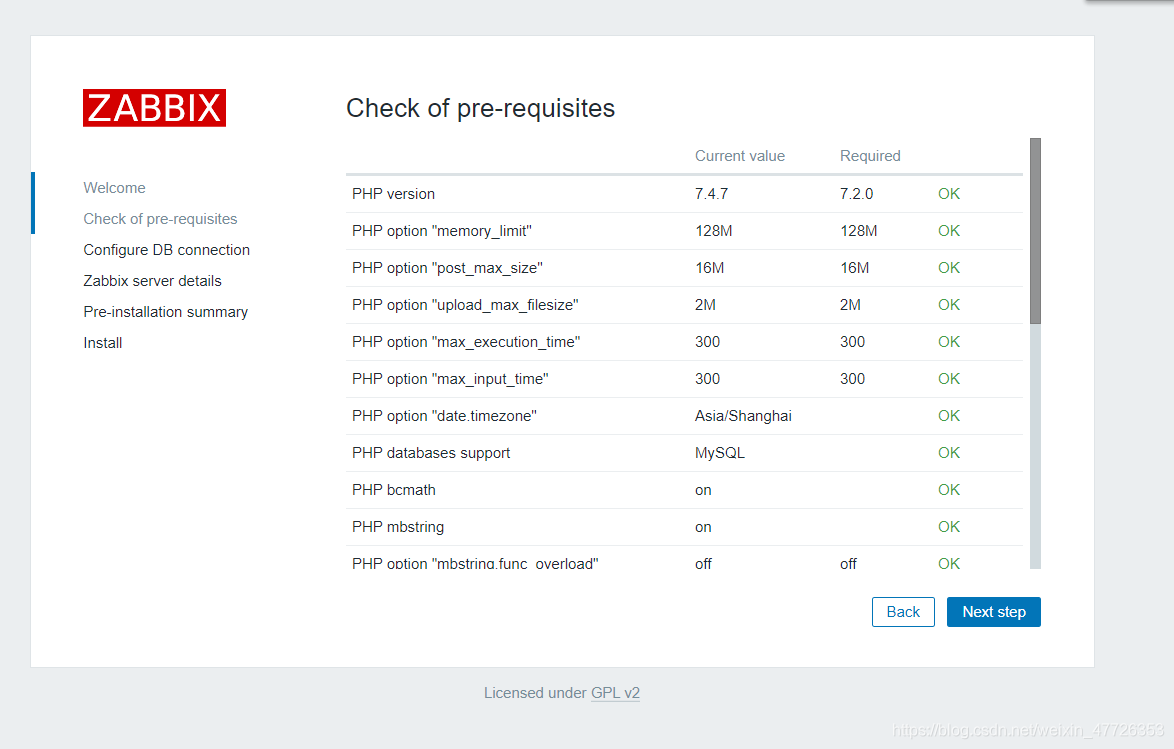
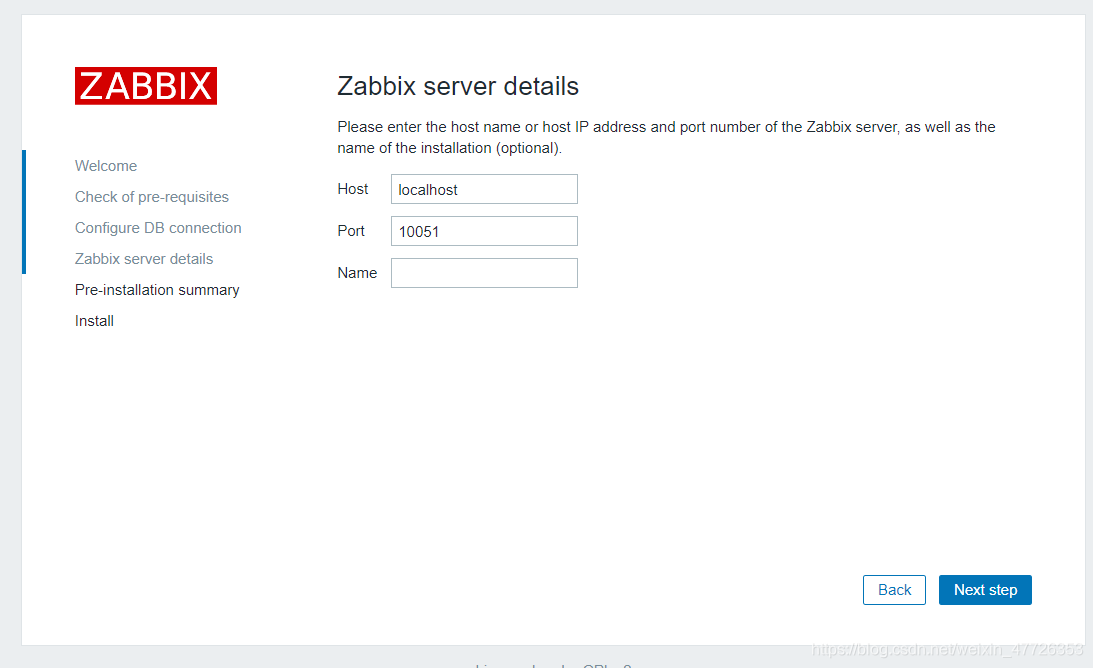
zabbix服务端web界面安装与配置
zabbix web界面安装前的配置
创建zabbix网站
[root@yangcan1 ~]# mkdir /usr/local/nginx/html/zabbix
[root@yangcan1 ~]# cp -a /usr/src/zabbix-5.0.2/ui/* /usr/local/nginx/html/zabbix/
[root@yangcan1 ~]# chown -R nginx.nginx /usr/local/nginx/html

修改nginx的虚拟主机
[root@yangcan1 ~]# vim /usr/local/nginx/conf/nginx.conf
        location ~ \.php$ {
            root           html/zabbix;
            fastcgi_pass   127.0.0.1:9000;
            fastcgi_index  index.php;
            fastcgi_param  SCRIPT_FILENAME  $document_root$fastcgi_script_name;
            include        fastcgi_params;

[root@yangcan1 ~]#chmod 777  /usr/local/nginx/html/zabbix/conf

修改/etc/php.ini的配置并重启php-fpm
[root@yangcan1 ~]# sed -ri 's/(post_max_size =).*/\1 16M/g' /etc/php.ini
[root@yangcan1 ~]#  sed -ri 's/(max_execution_time =).*/\1 300/g' /etc/php.ini
[root@yangcan1 ~]# sed -ri 's/(max_input_time =).*/\1 300/g' /etc/php.ini
[root@yangcan1 ~]# sed -i '/;date.timezone/a date.timezone = Asia/Shanghai' /etc/php.ini
[root@yangcan1 ~]# service php-fpm restart
Gracefully shutting down php-fpm . done
Starting php-fpm  done
zabbix页面
yangcan2安装zabbix_agentd服务
安装zabbix
[root@yangcan2 ~]# ls
! nginx-1.18.0 v0.61.tar.gz zabbix-5.0.2.tar.gz
anaconda-ks.cfg nginx-1.18.0.tar.gz www.a.com.crt
echo-nginx-module-0.61 server.csr www.a.com.key
解压
[root@yangcan2 ~]# tar xf zabbix-5.0.2.tar.gz
[root@yangcan2 ~]# ls
! nginx-1.18.0 v0.61.tar.gz zabbix-5.0.2
anaconda-ks.cfg nginx-1.18.0.tar.gz www.a.com.crt zabbix-5.0.2.tar.gz
echo-nginx-module-0.61 server.csr www.a.com.key
安装需要的包
[root@yangcan2 zabbix-5.0.2]# yum -y install gcc pcre*
编译
[root@yangcan2 zabbix-5.0.2]# ./configure --enable-agent
[root@yangcan2 zabbix-5.0.2]# make install
[root@yangcan2 zabbix-5.0.2]# useradd -r -M -s /sbin/nologin zabbix
[root@localhost zabbix-5.0.2]# vim /usr/local/etc/zabbix_agentd.conf
Server=192.168.175.150
ServerActive=192.168.175.150
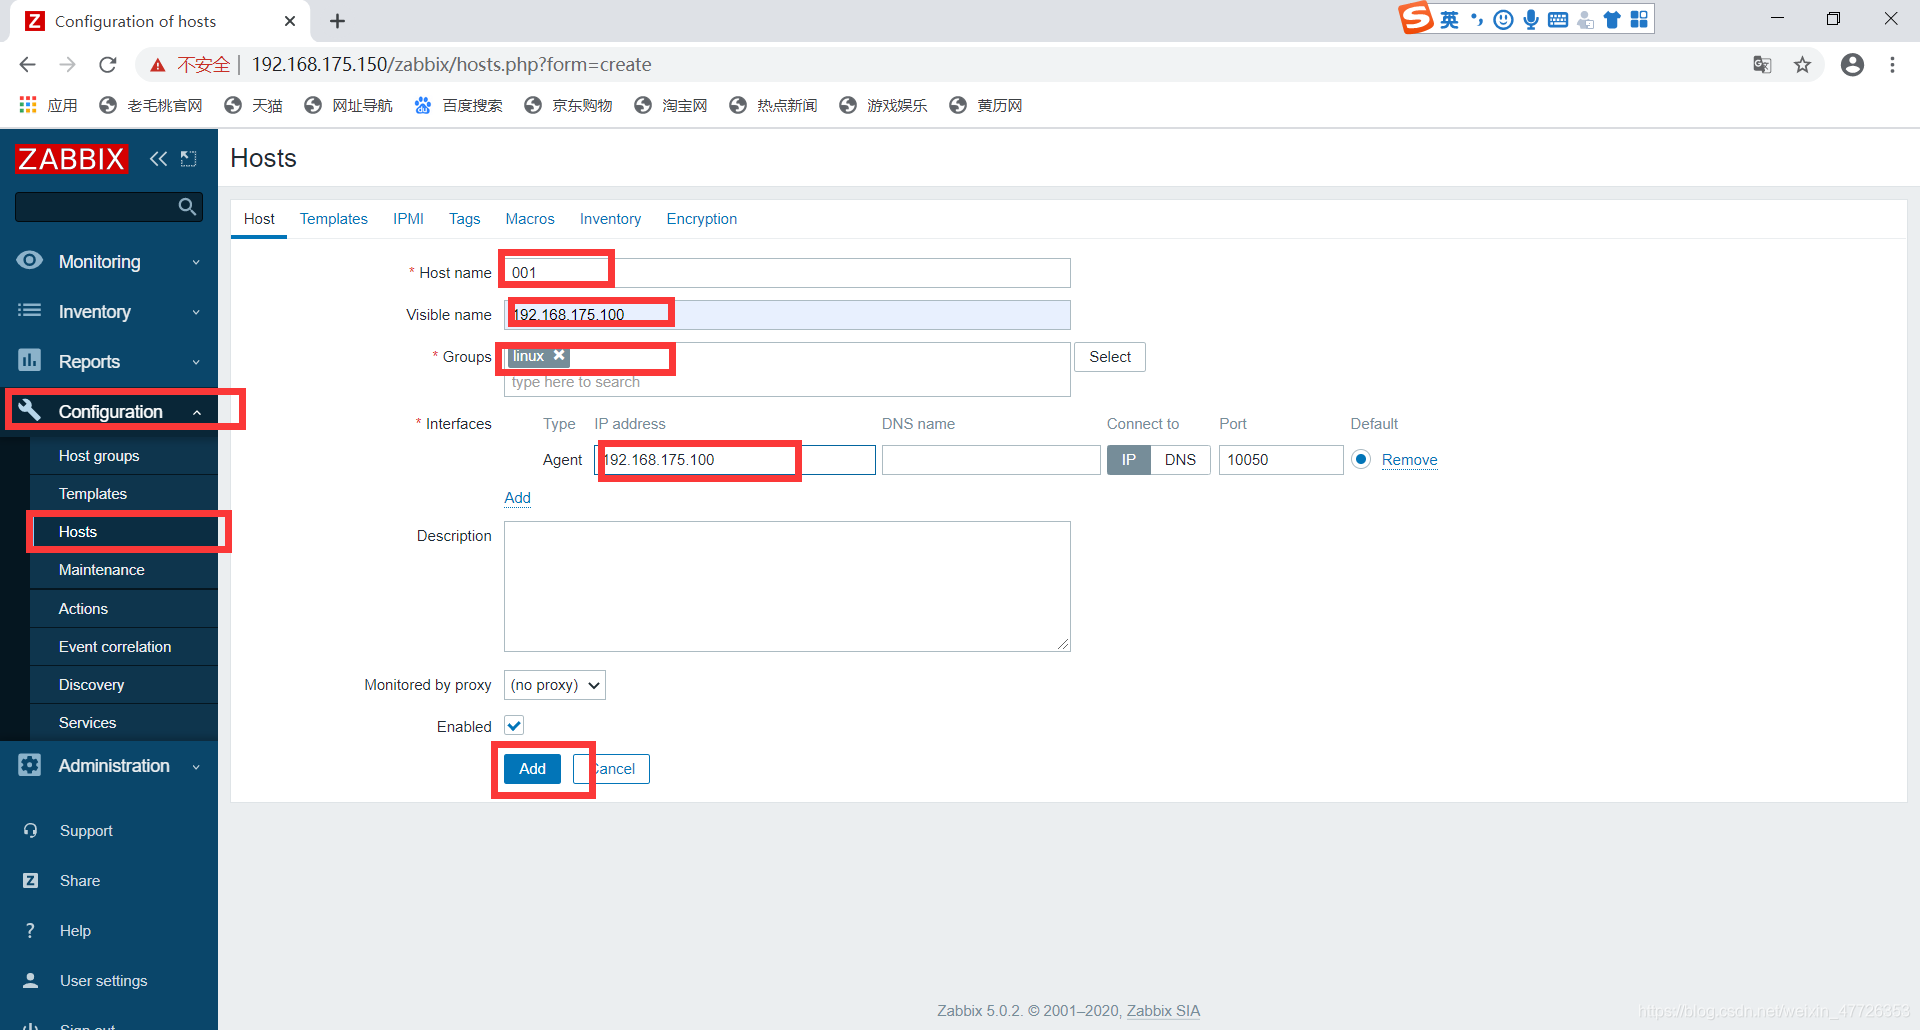
Hostname=001
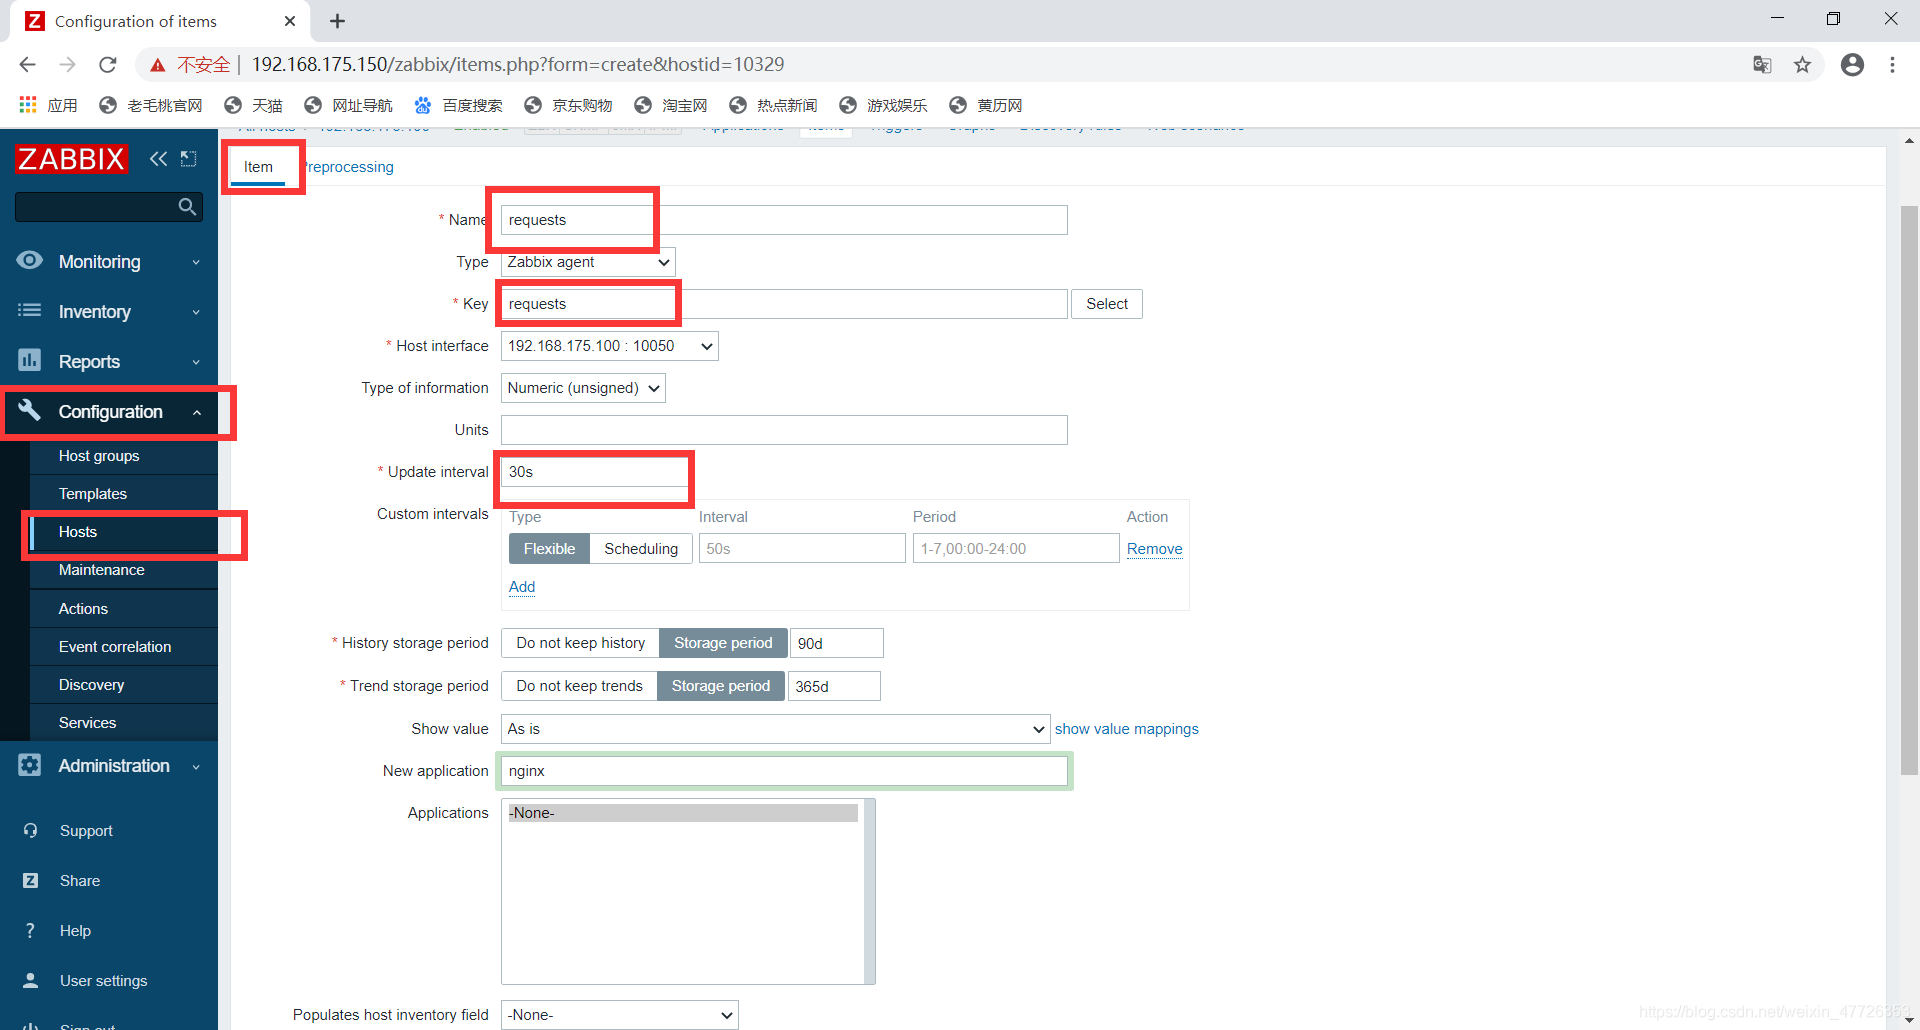
监控requests状态
[root@yangcan2 ~]# mkdir /scripts
[root@yangcan2 ~]# cd /scripts/
[root@yangcan2 scripts]# vim requests.sh
[root@yangcan2 scripts]# cat requests.sh
#!/bin/bash
requests=$(curl -s http://192.168.175.100/status | awk 'NR==3{print $3}')


if [ $requests -gt 100 ];then
    echo  $requests
else
    echo 0
fi

赋予执行权限
[root@yangcan2 scripts]# chmod +x requests.sh

修改配置文件启动功能
[root@yangcan2 ]# vim /usr/local/etc/zabbix_agentd.conf

UnsafeUserParameters=1                      //修改为1
添加下面内容
UserParameter=requests,/bin/bash  /scripts/requests.sh
UserParameter=Reading,/bin/bash  /scripts/Reading.sh
UserParameter=Writing,/bin/bash  /scripts/Writing.sh
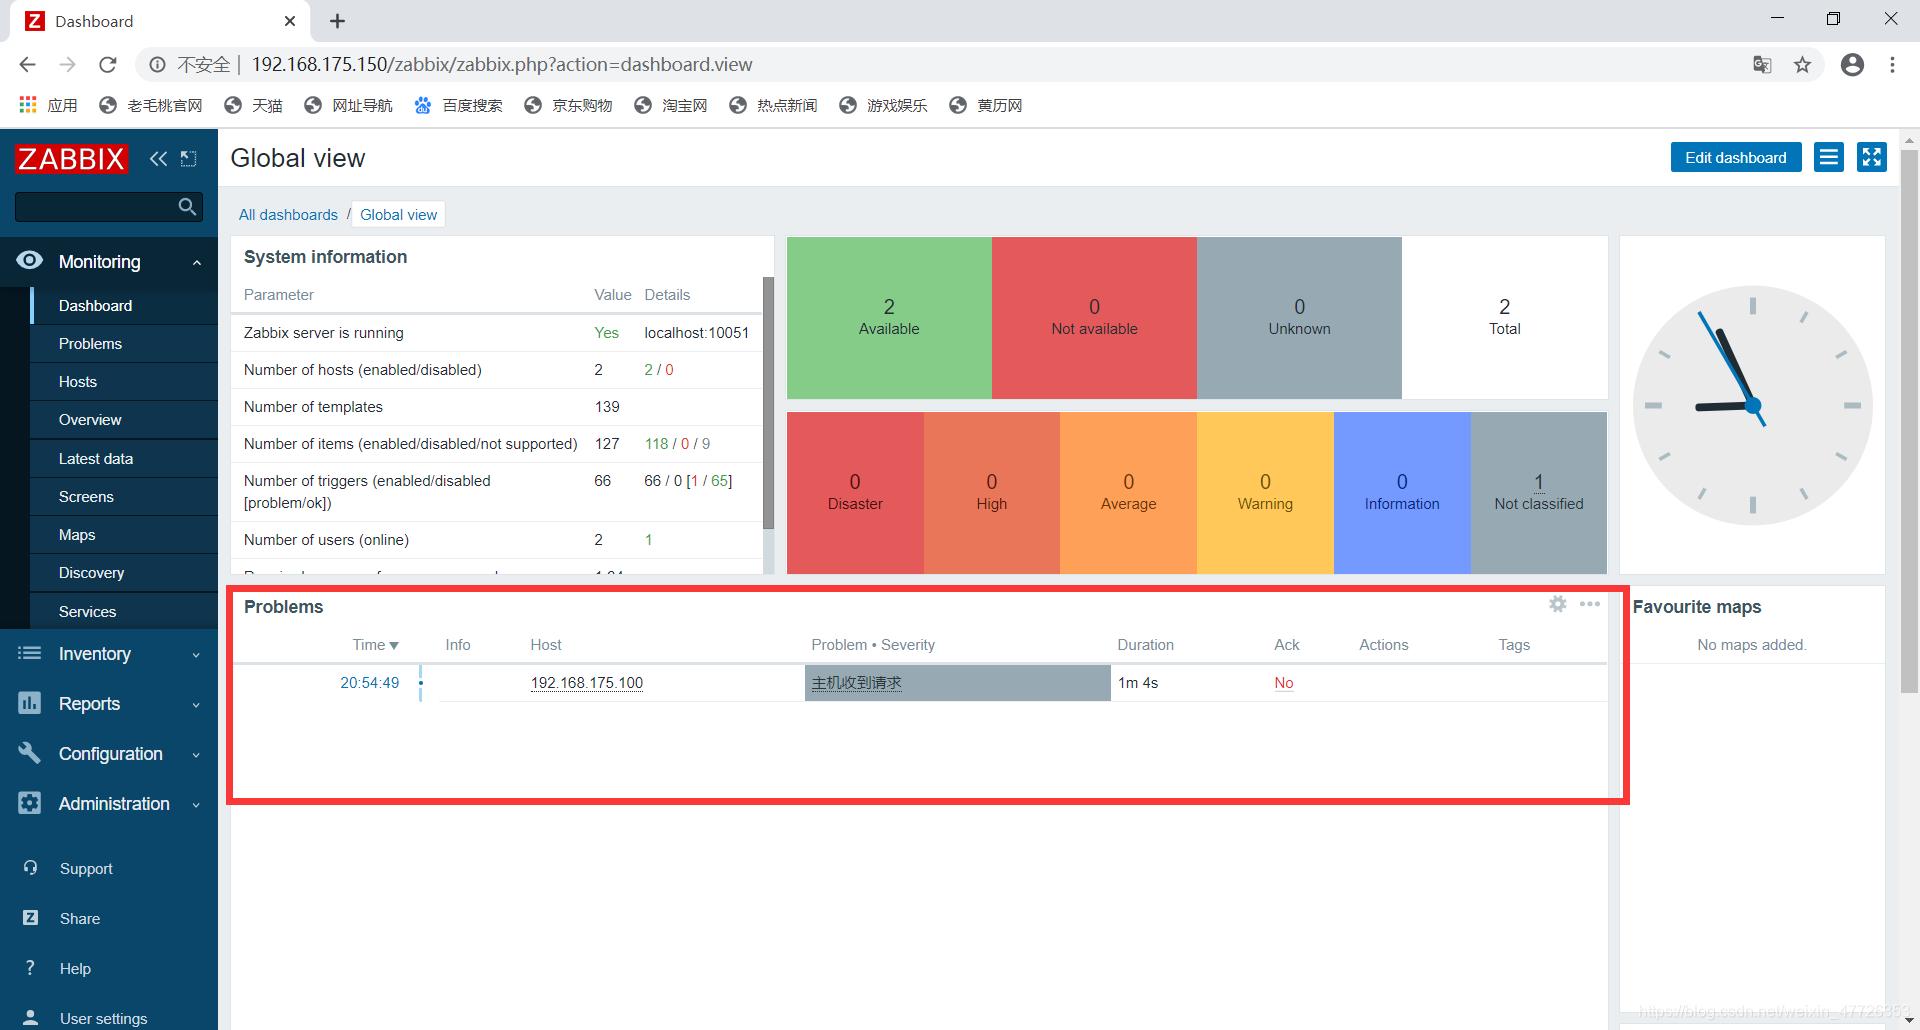
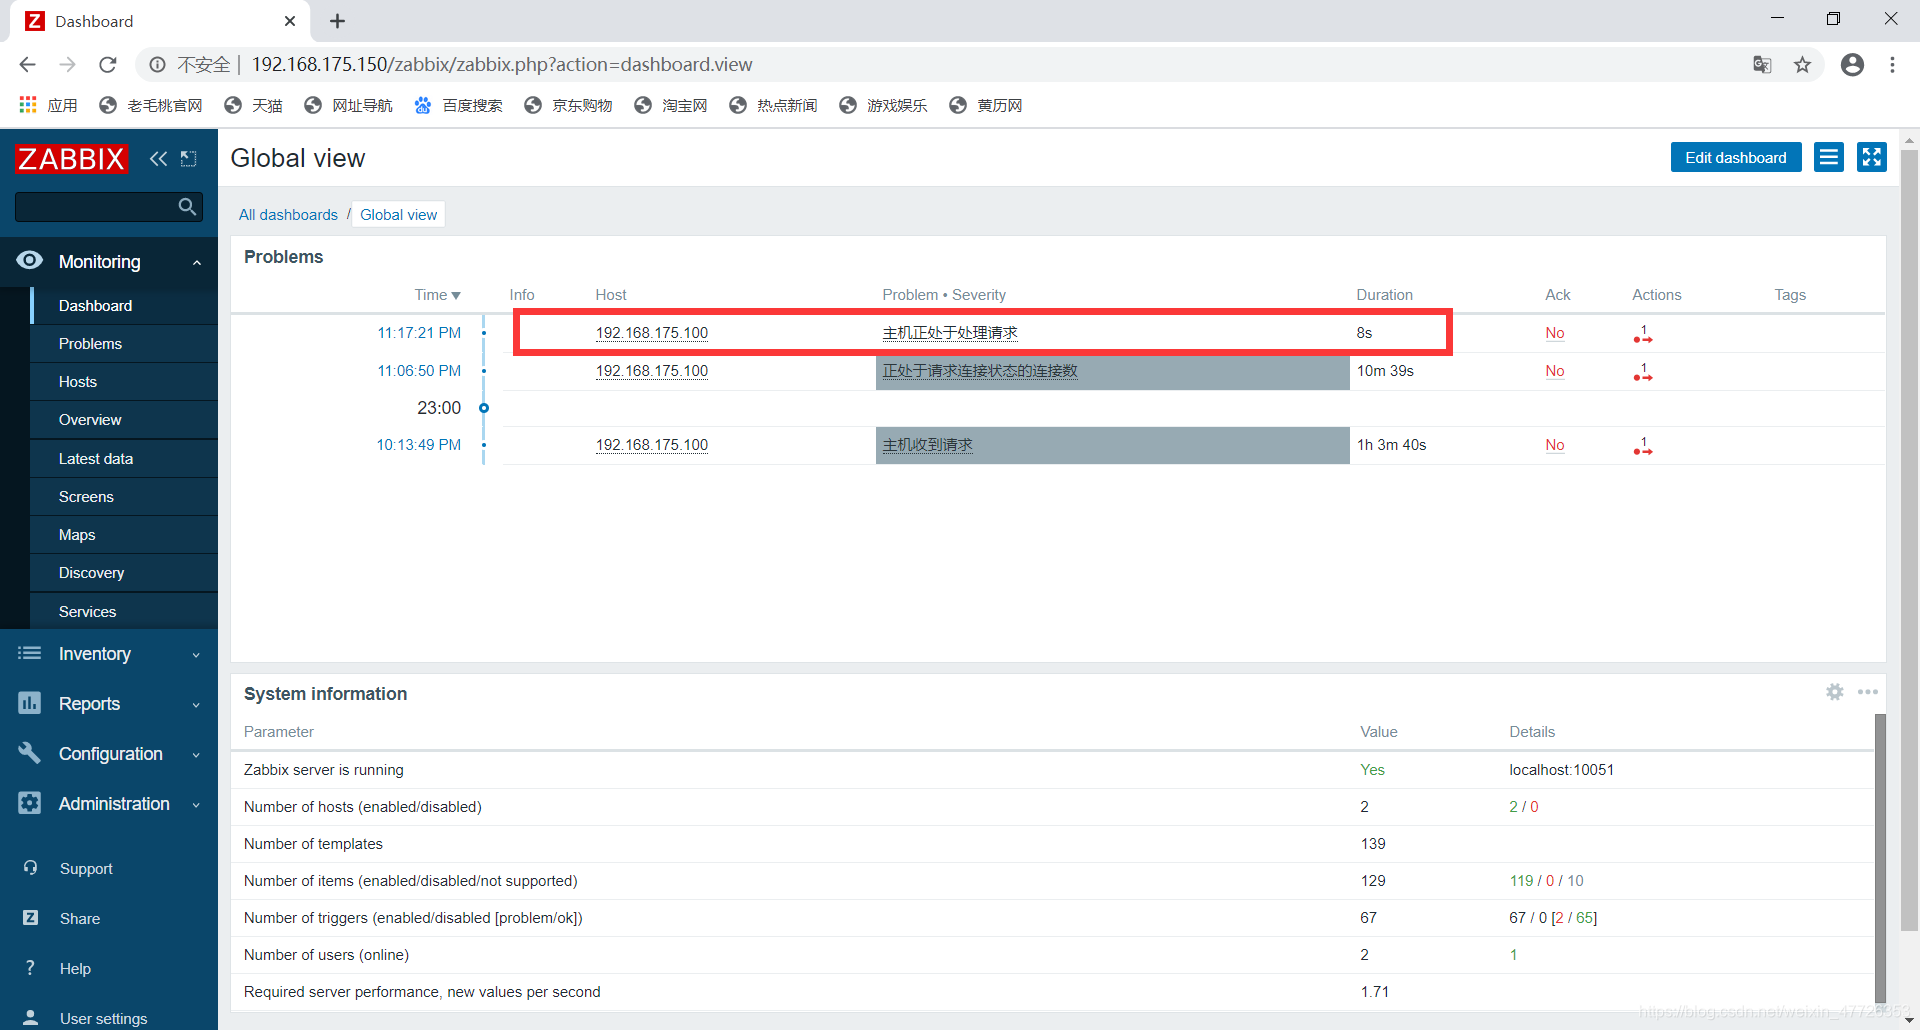
页面配置
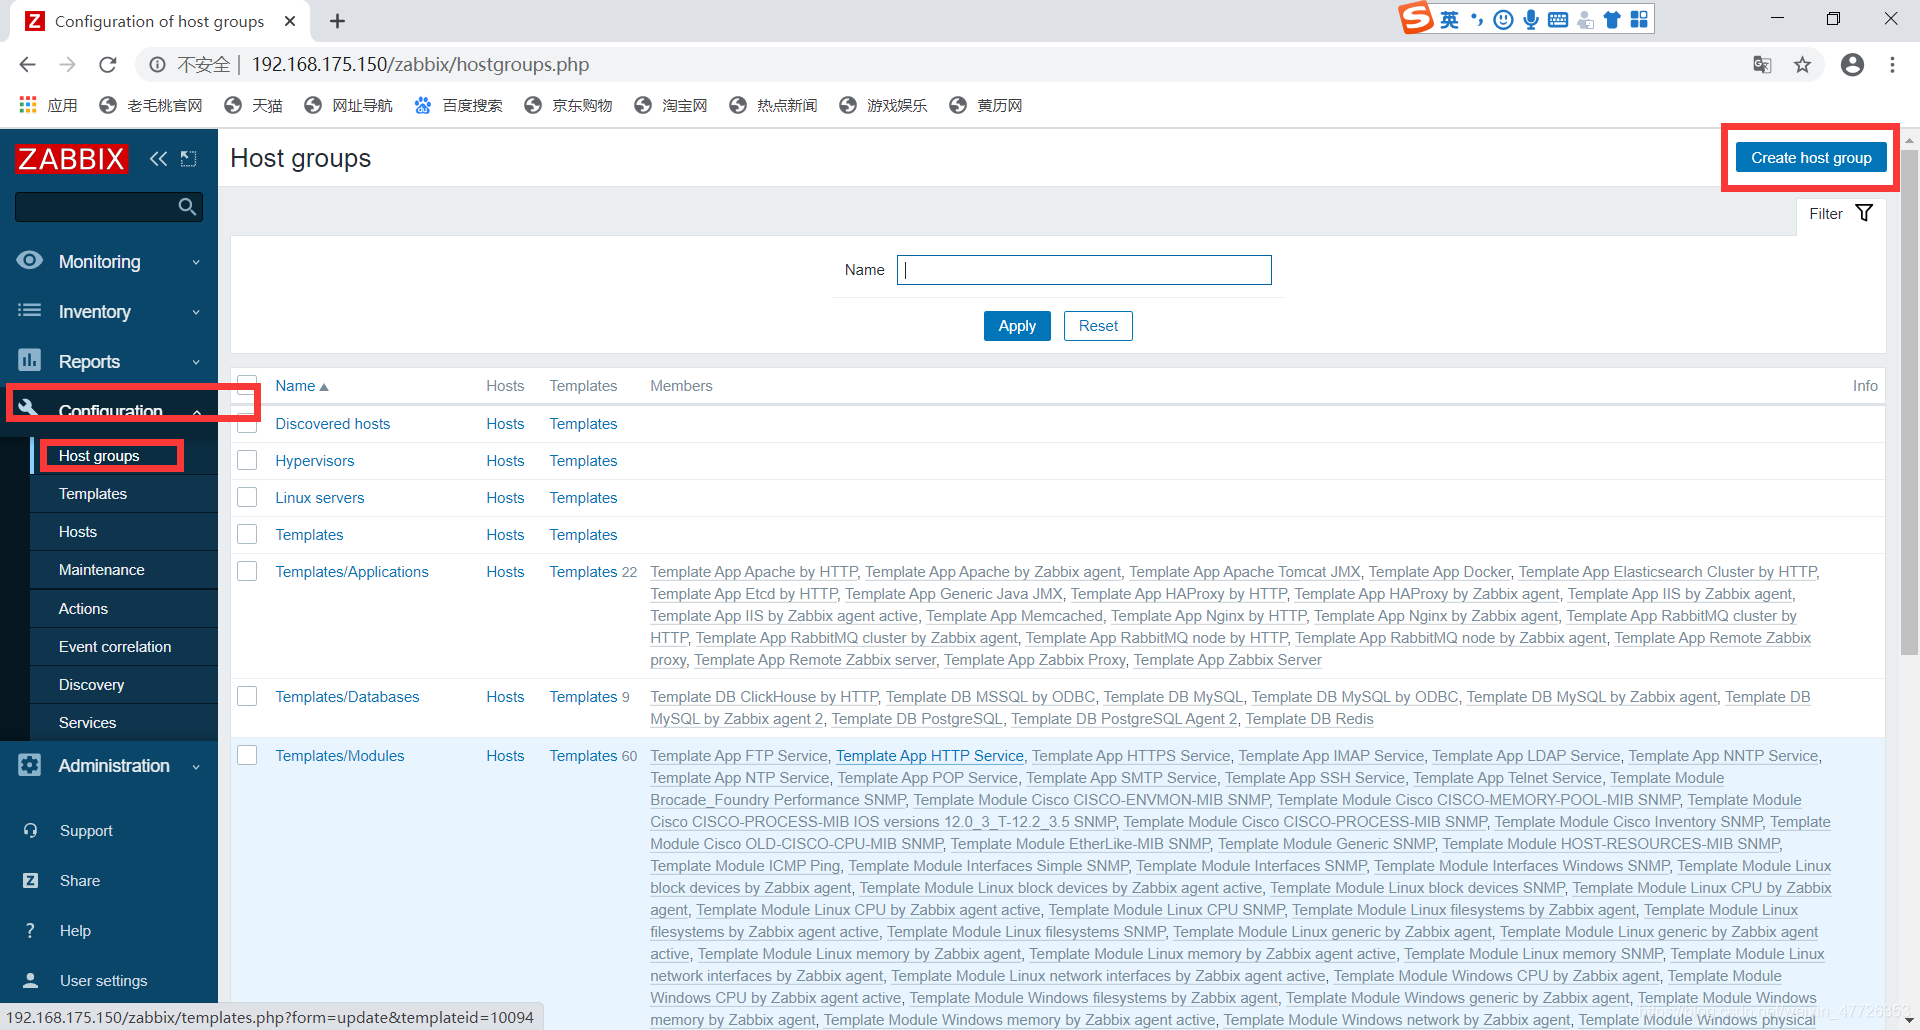
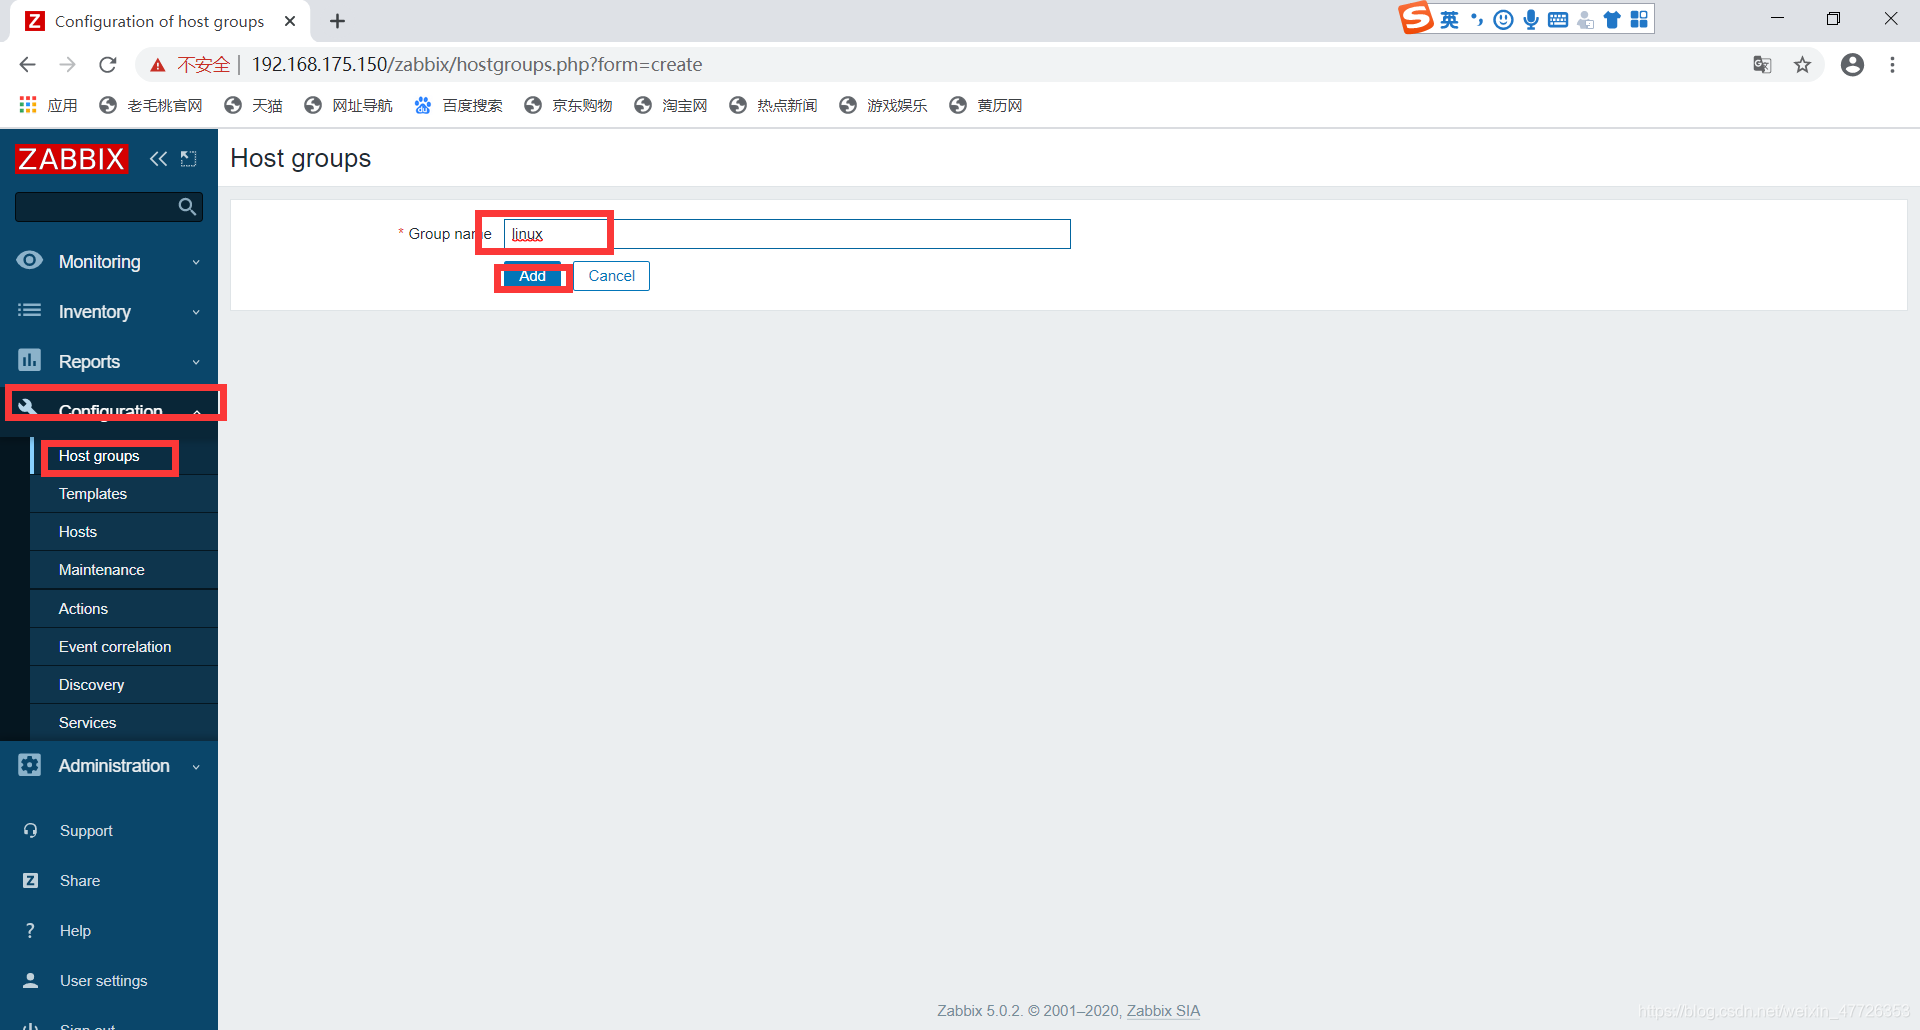
创建主机组
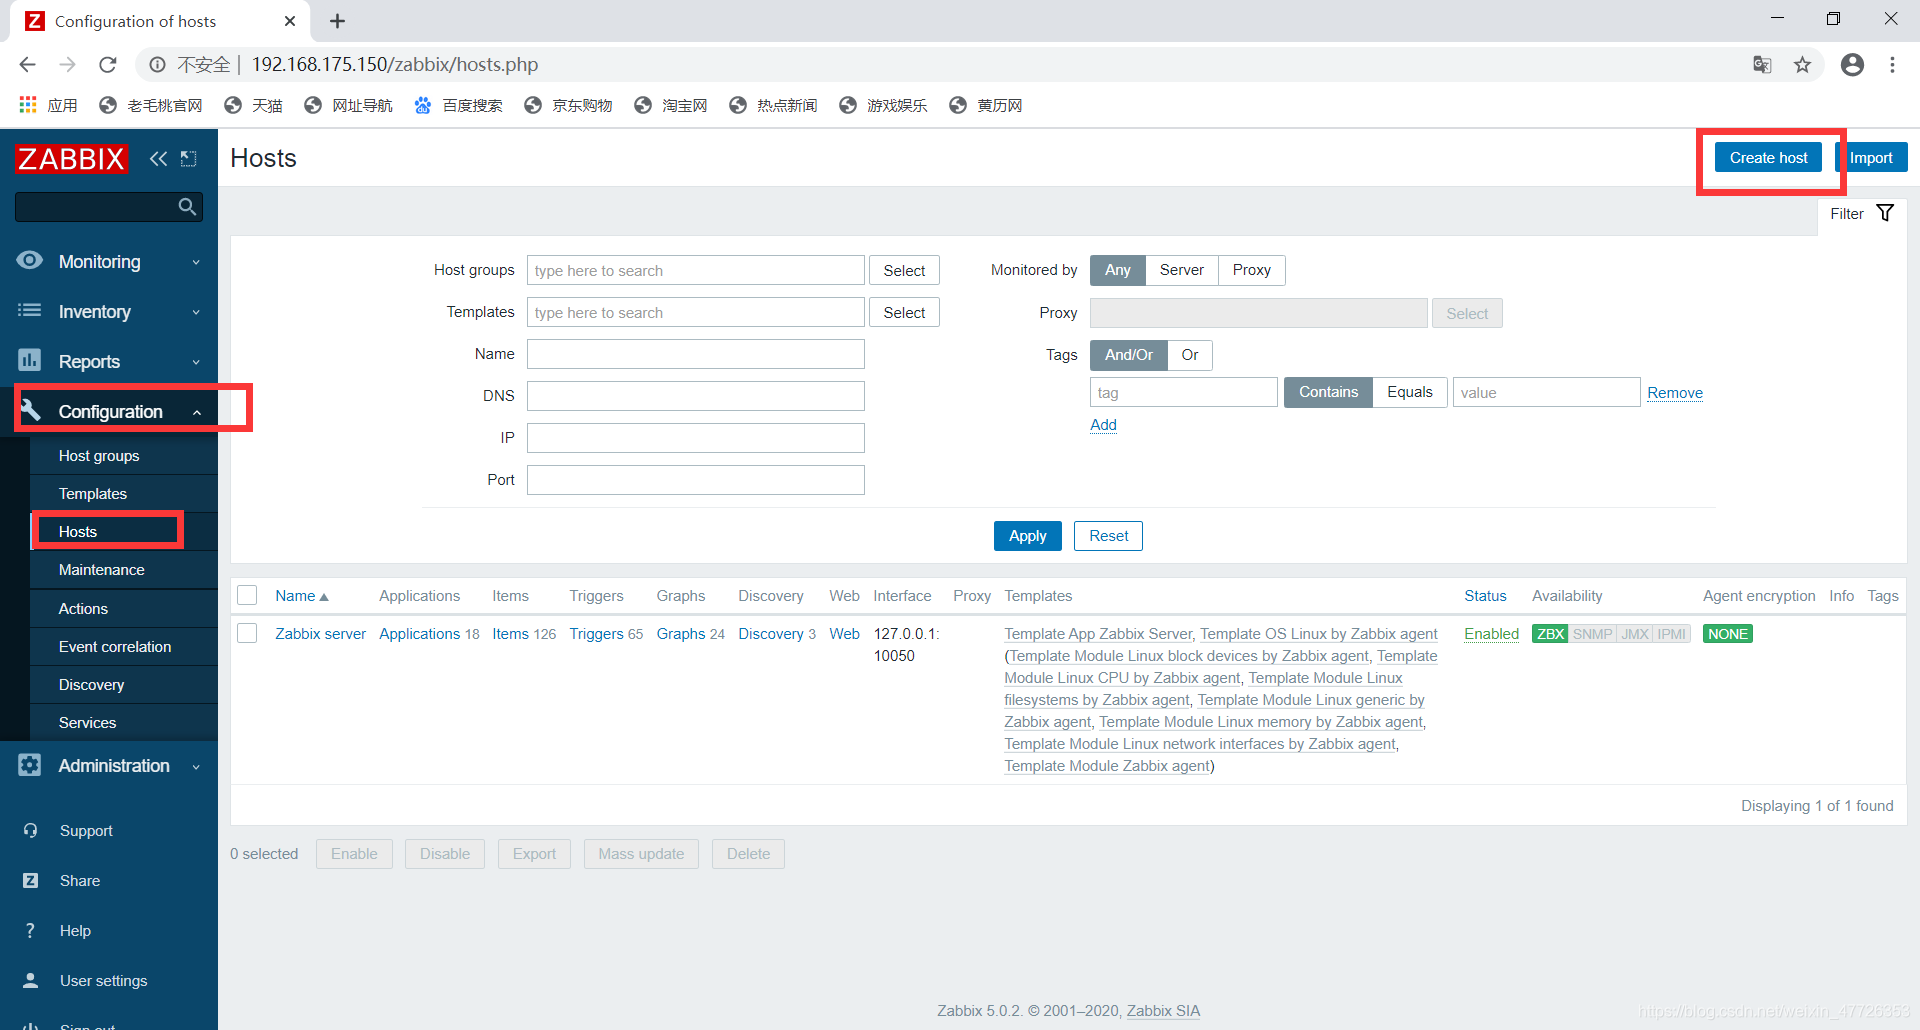
创建主机
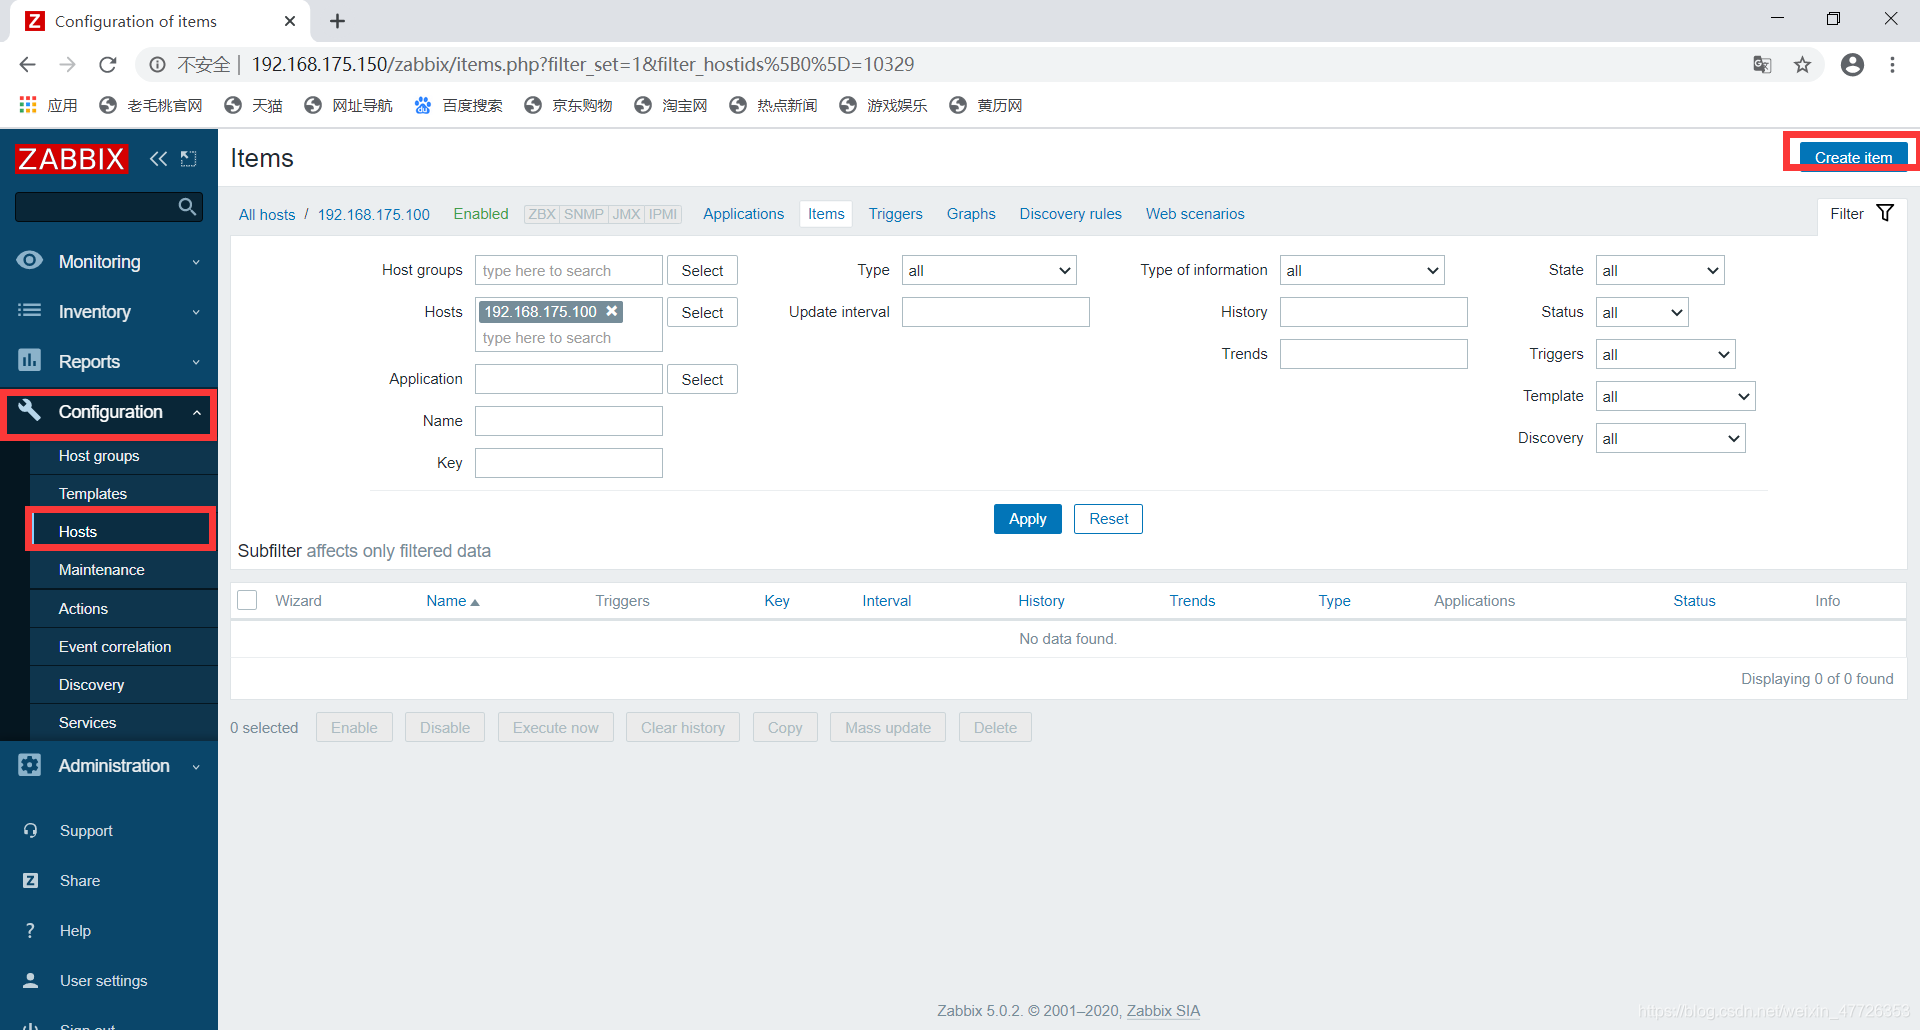
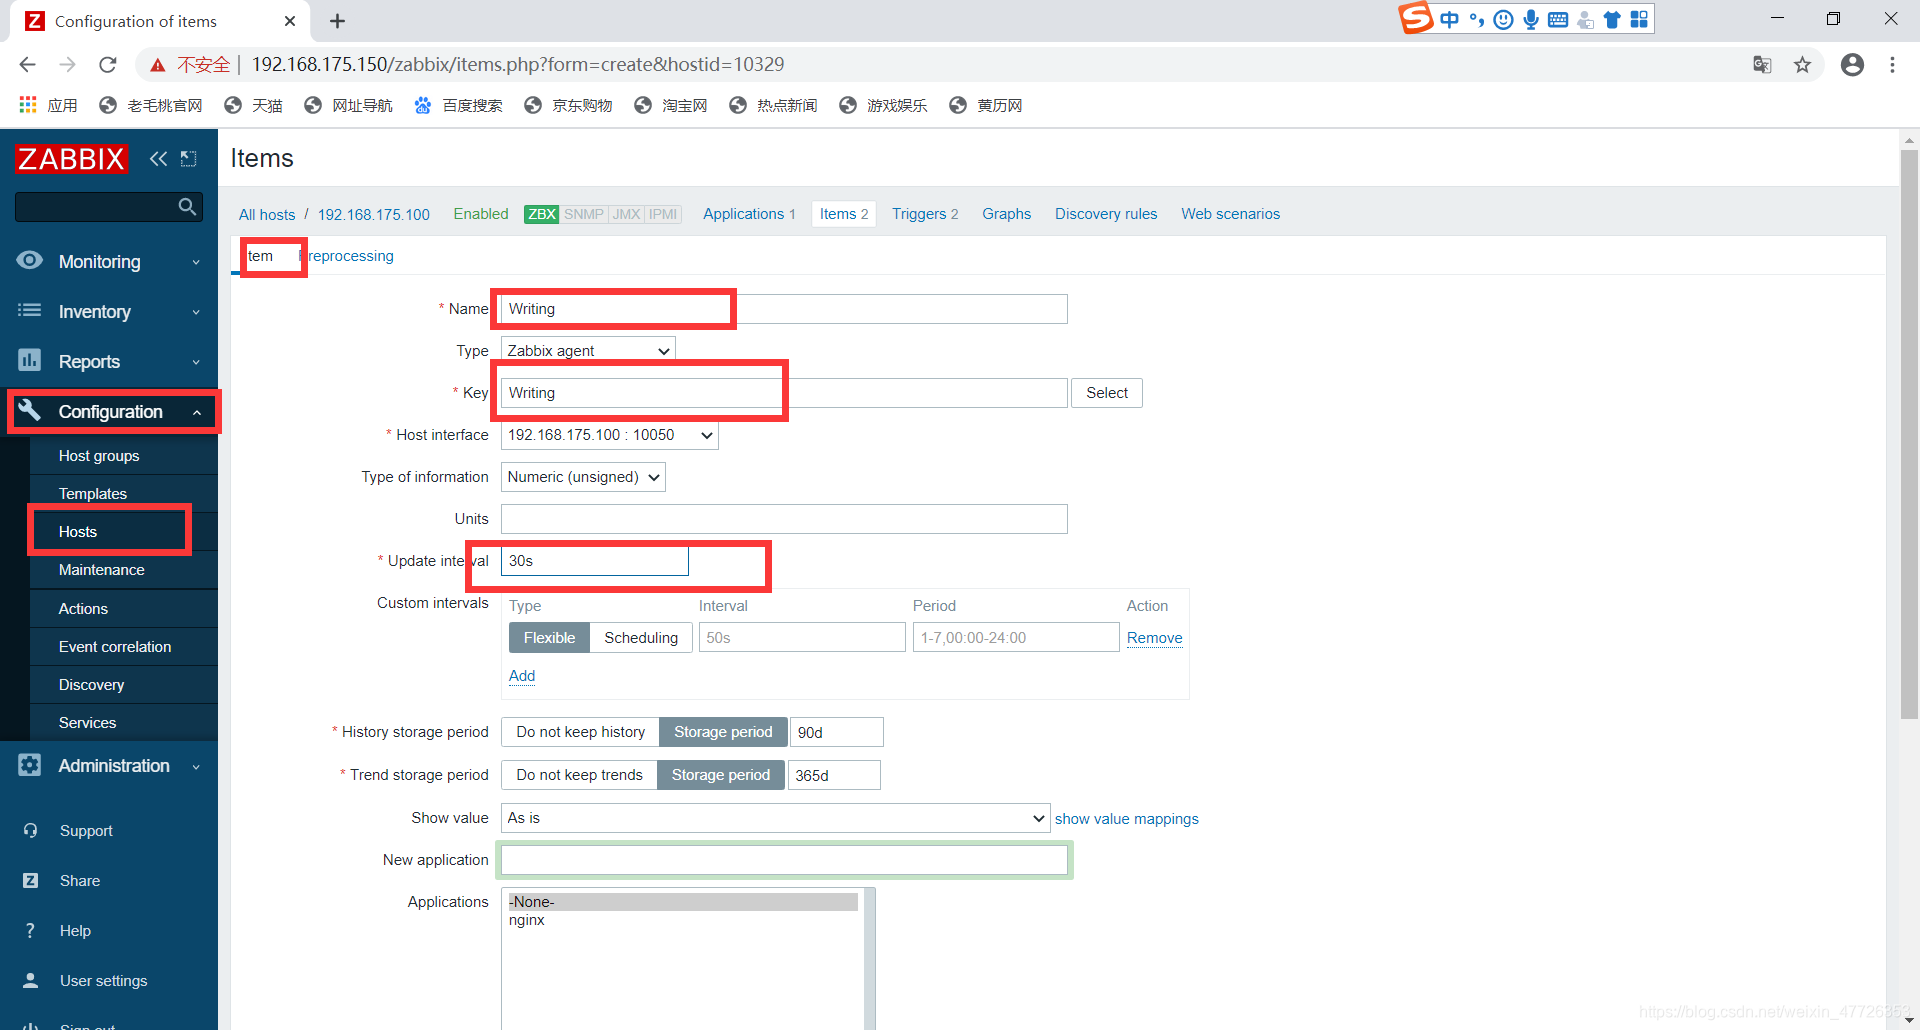
添加监控项
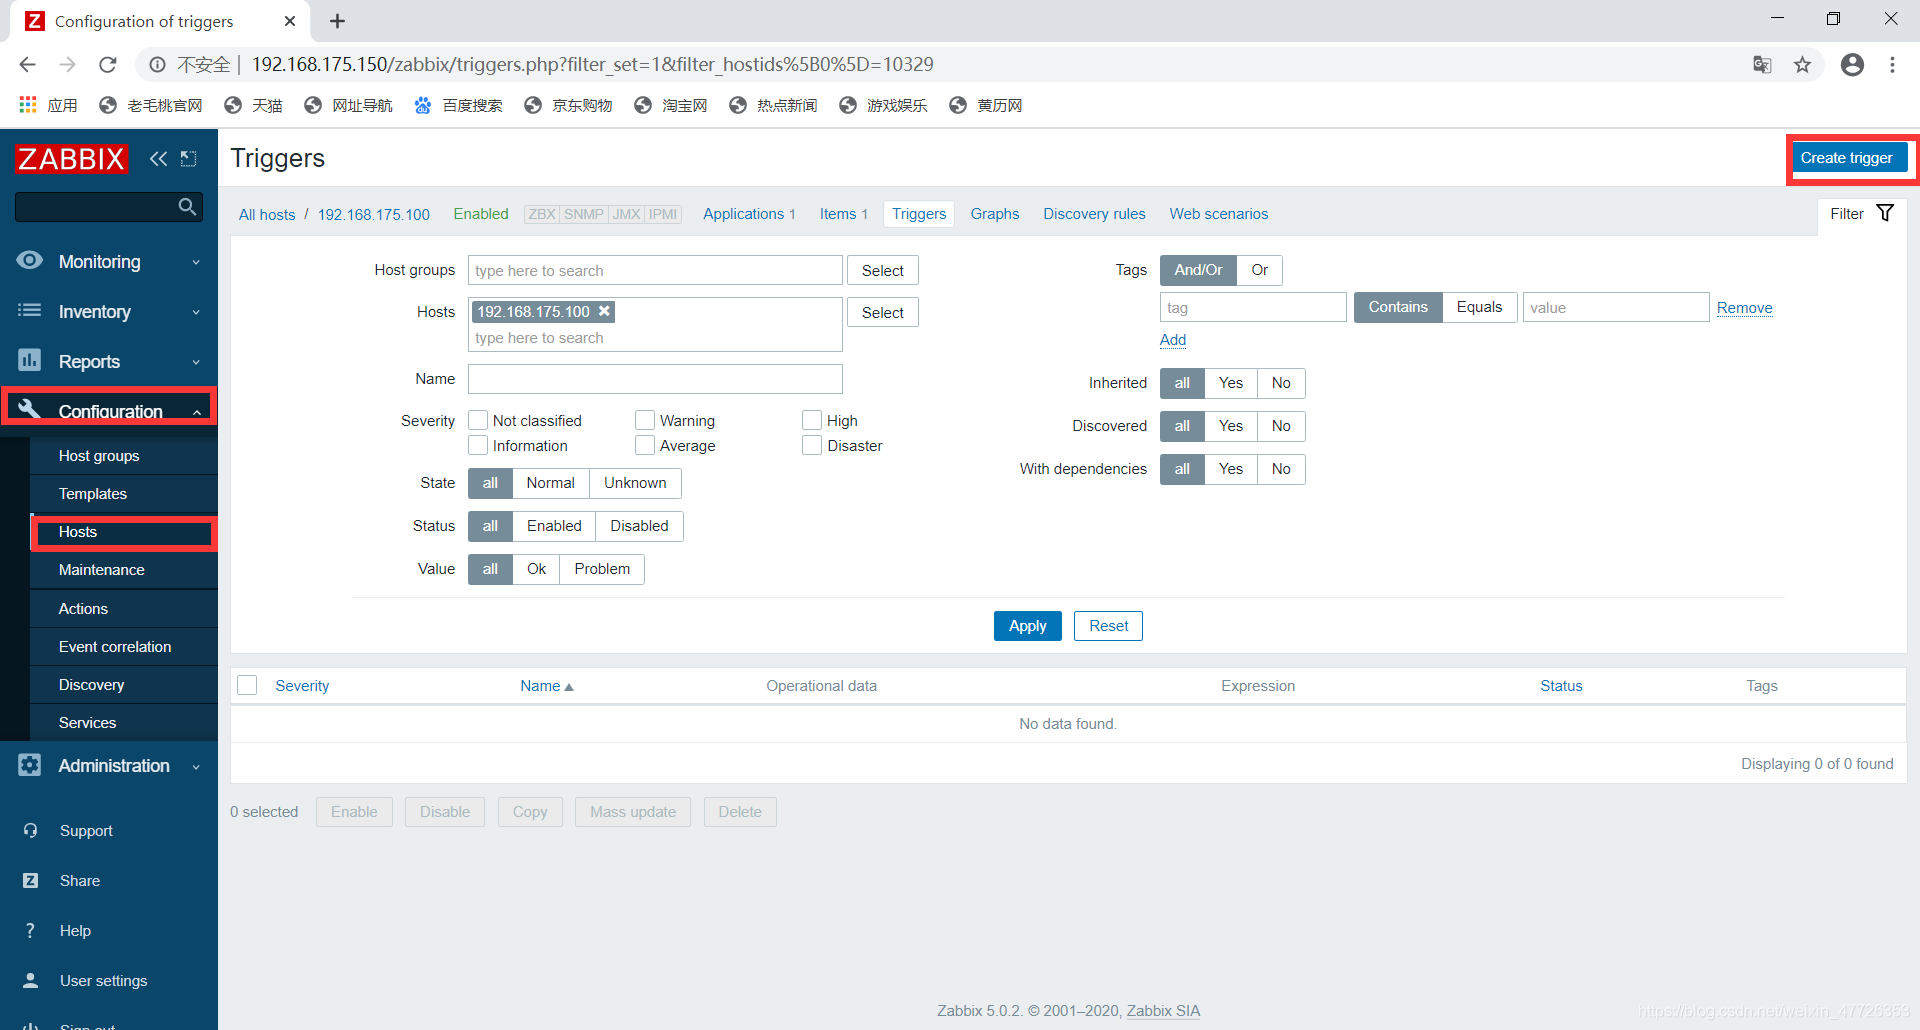
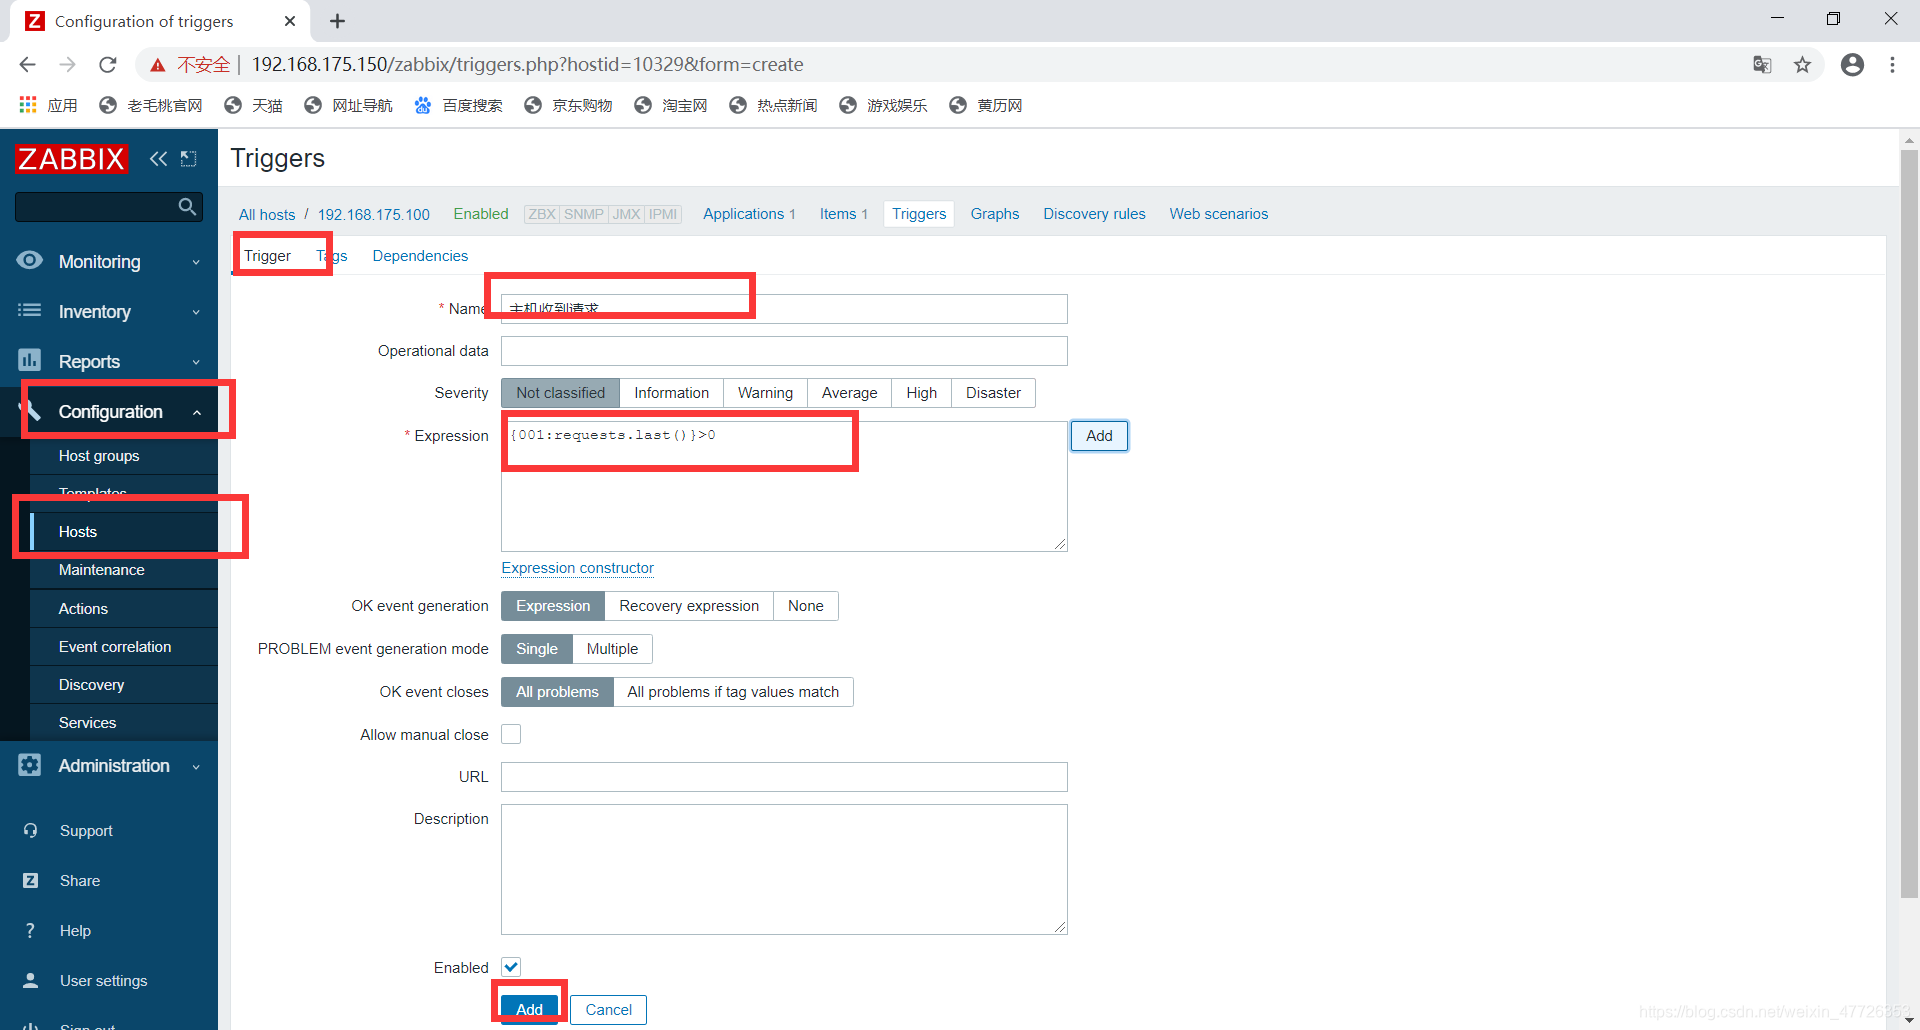
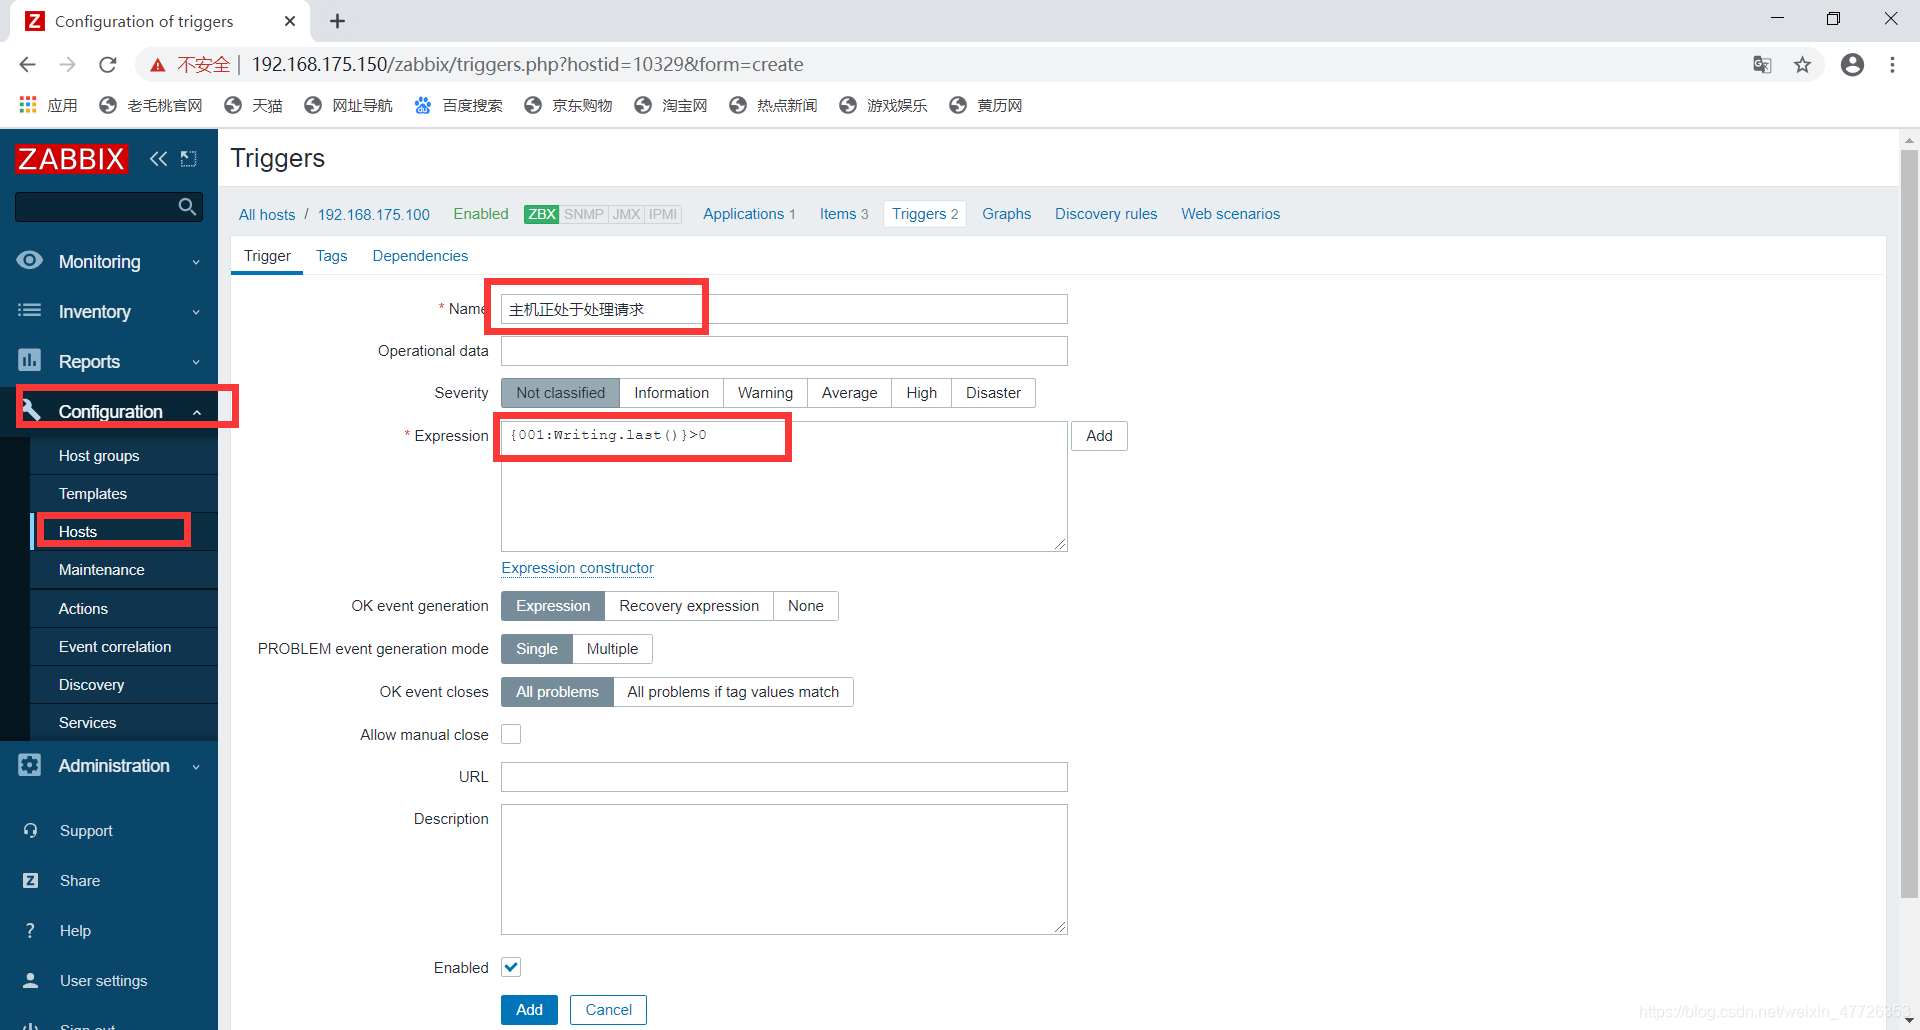
添加触发器
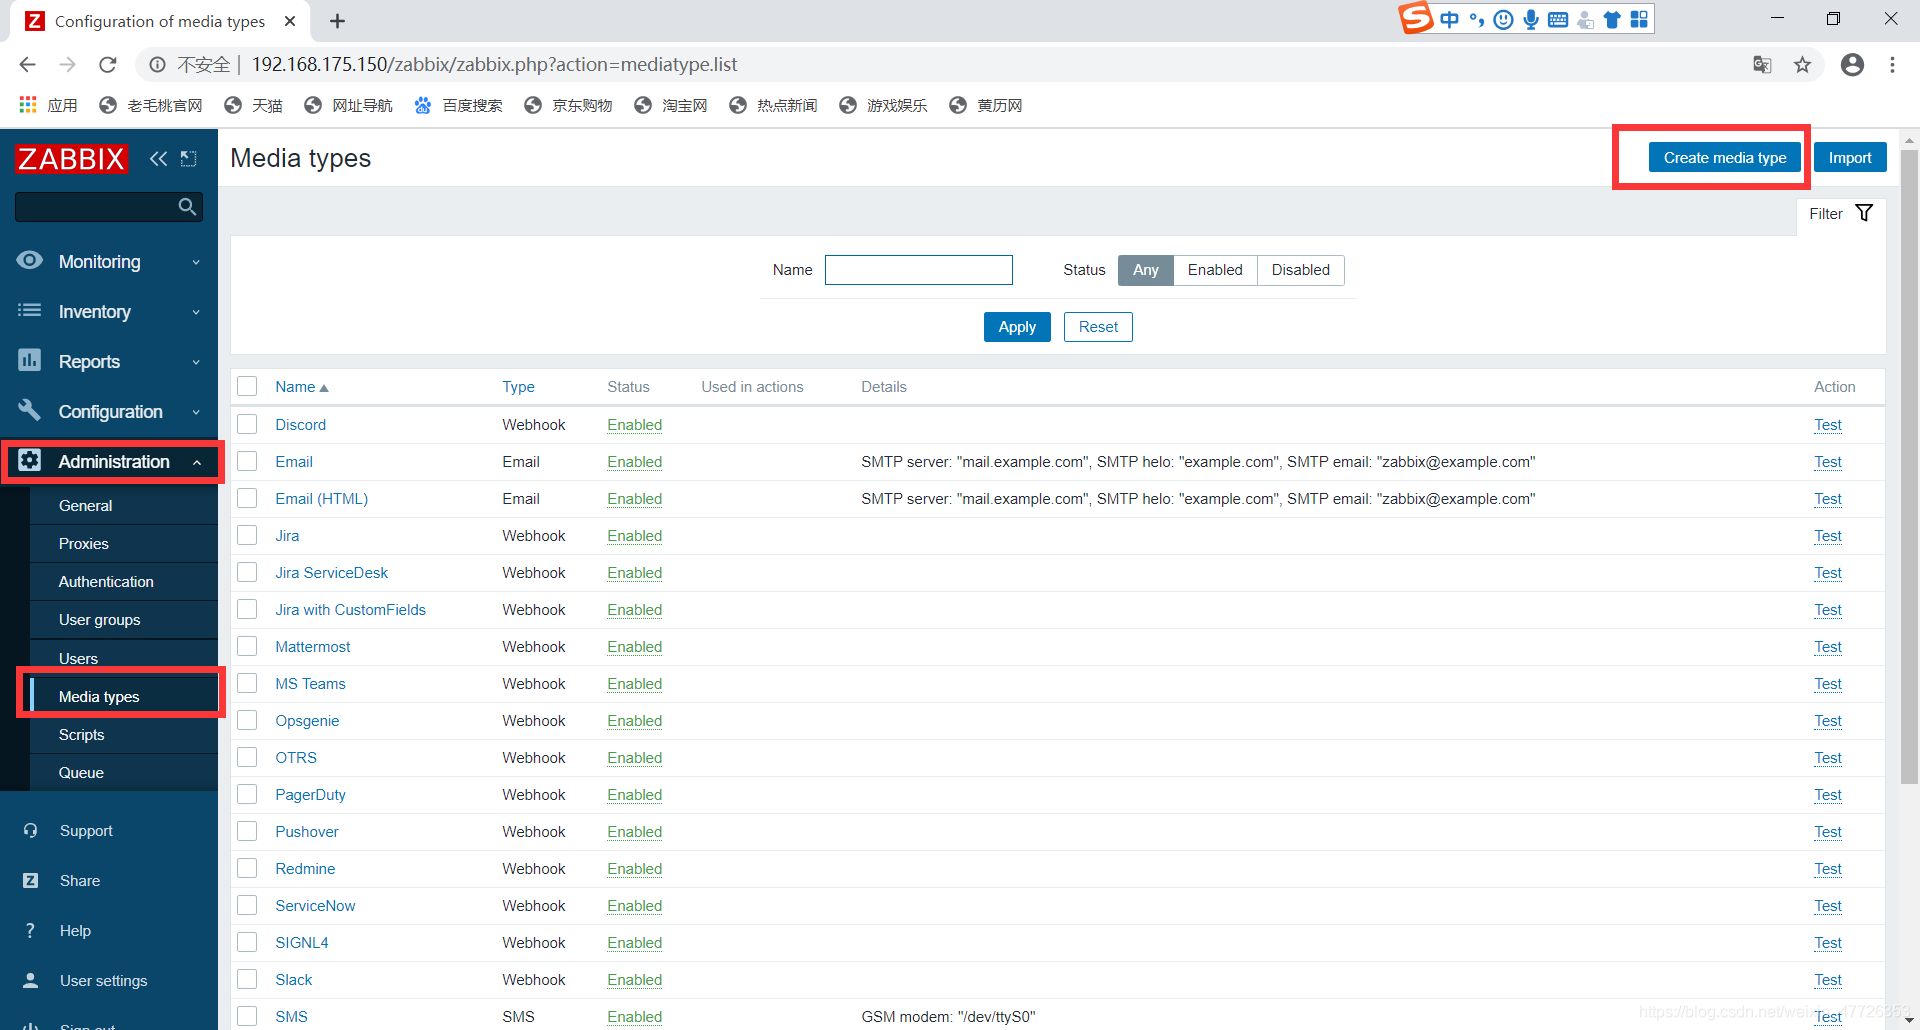
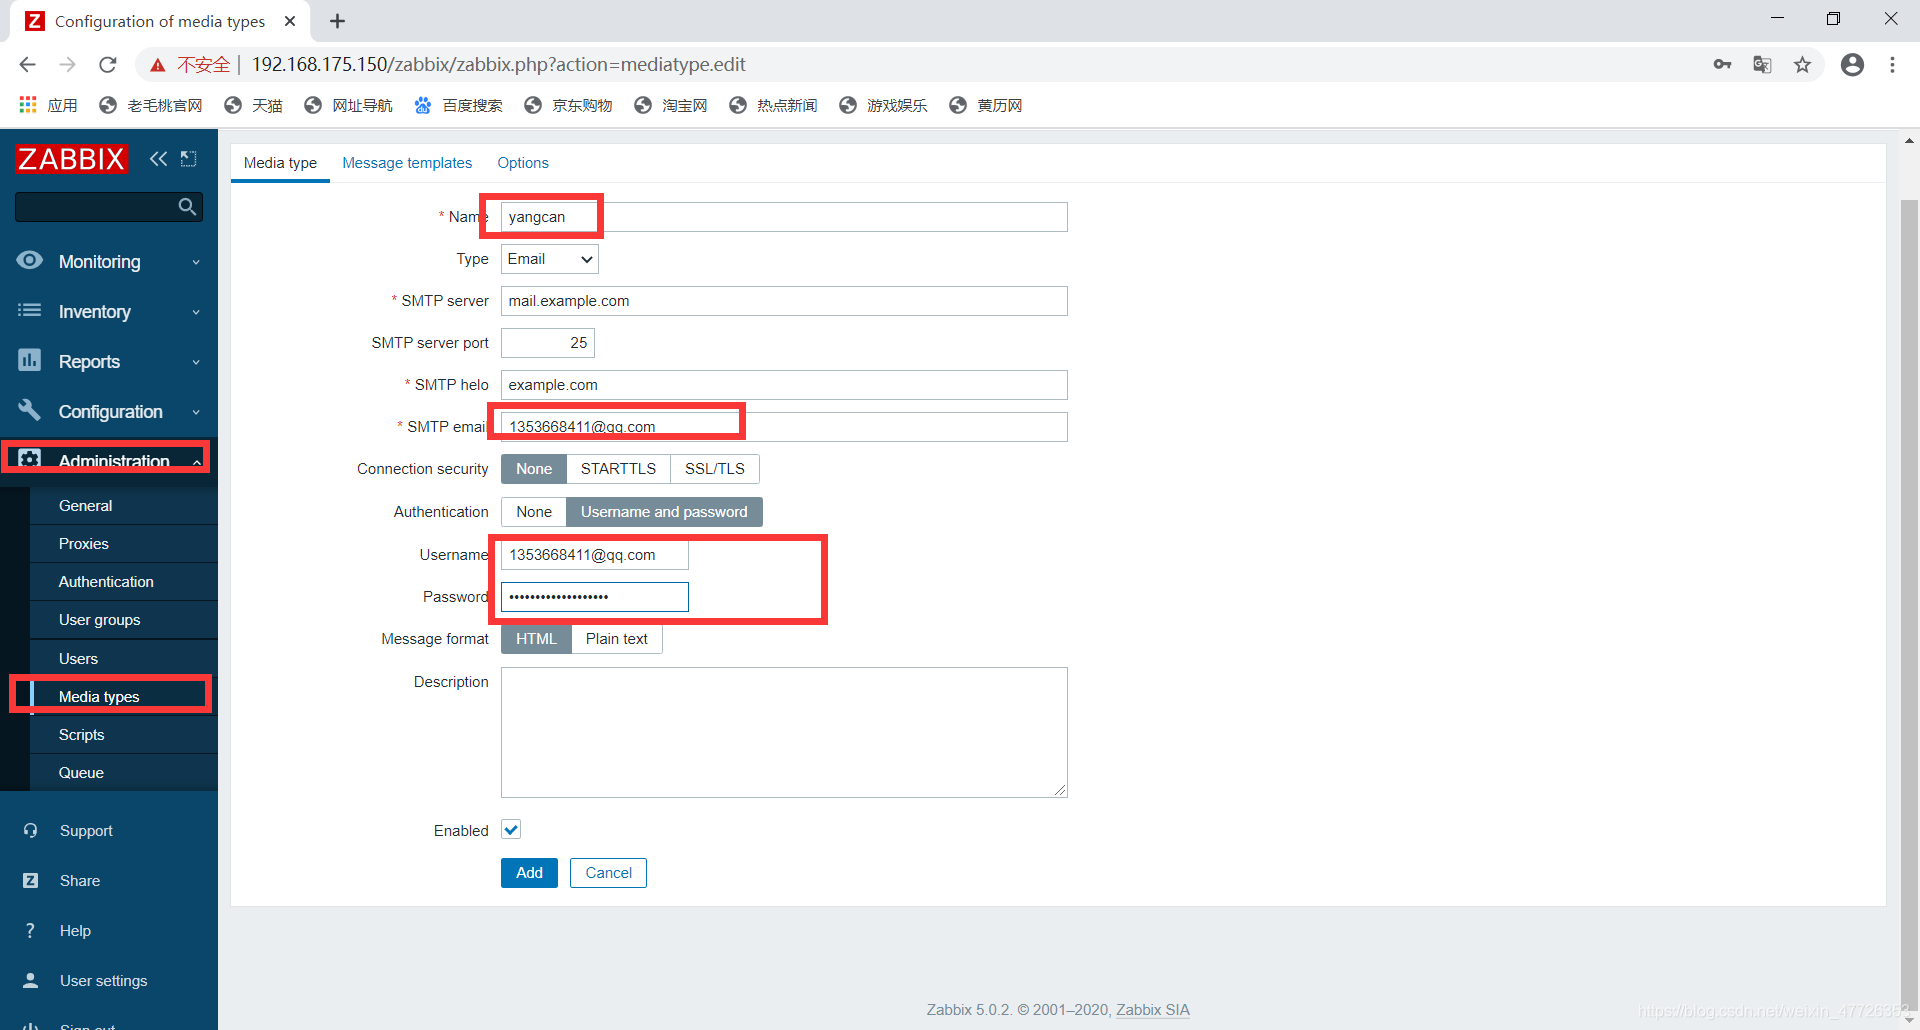
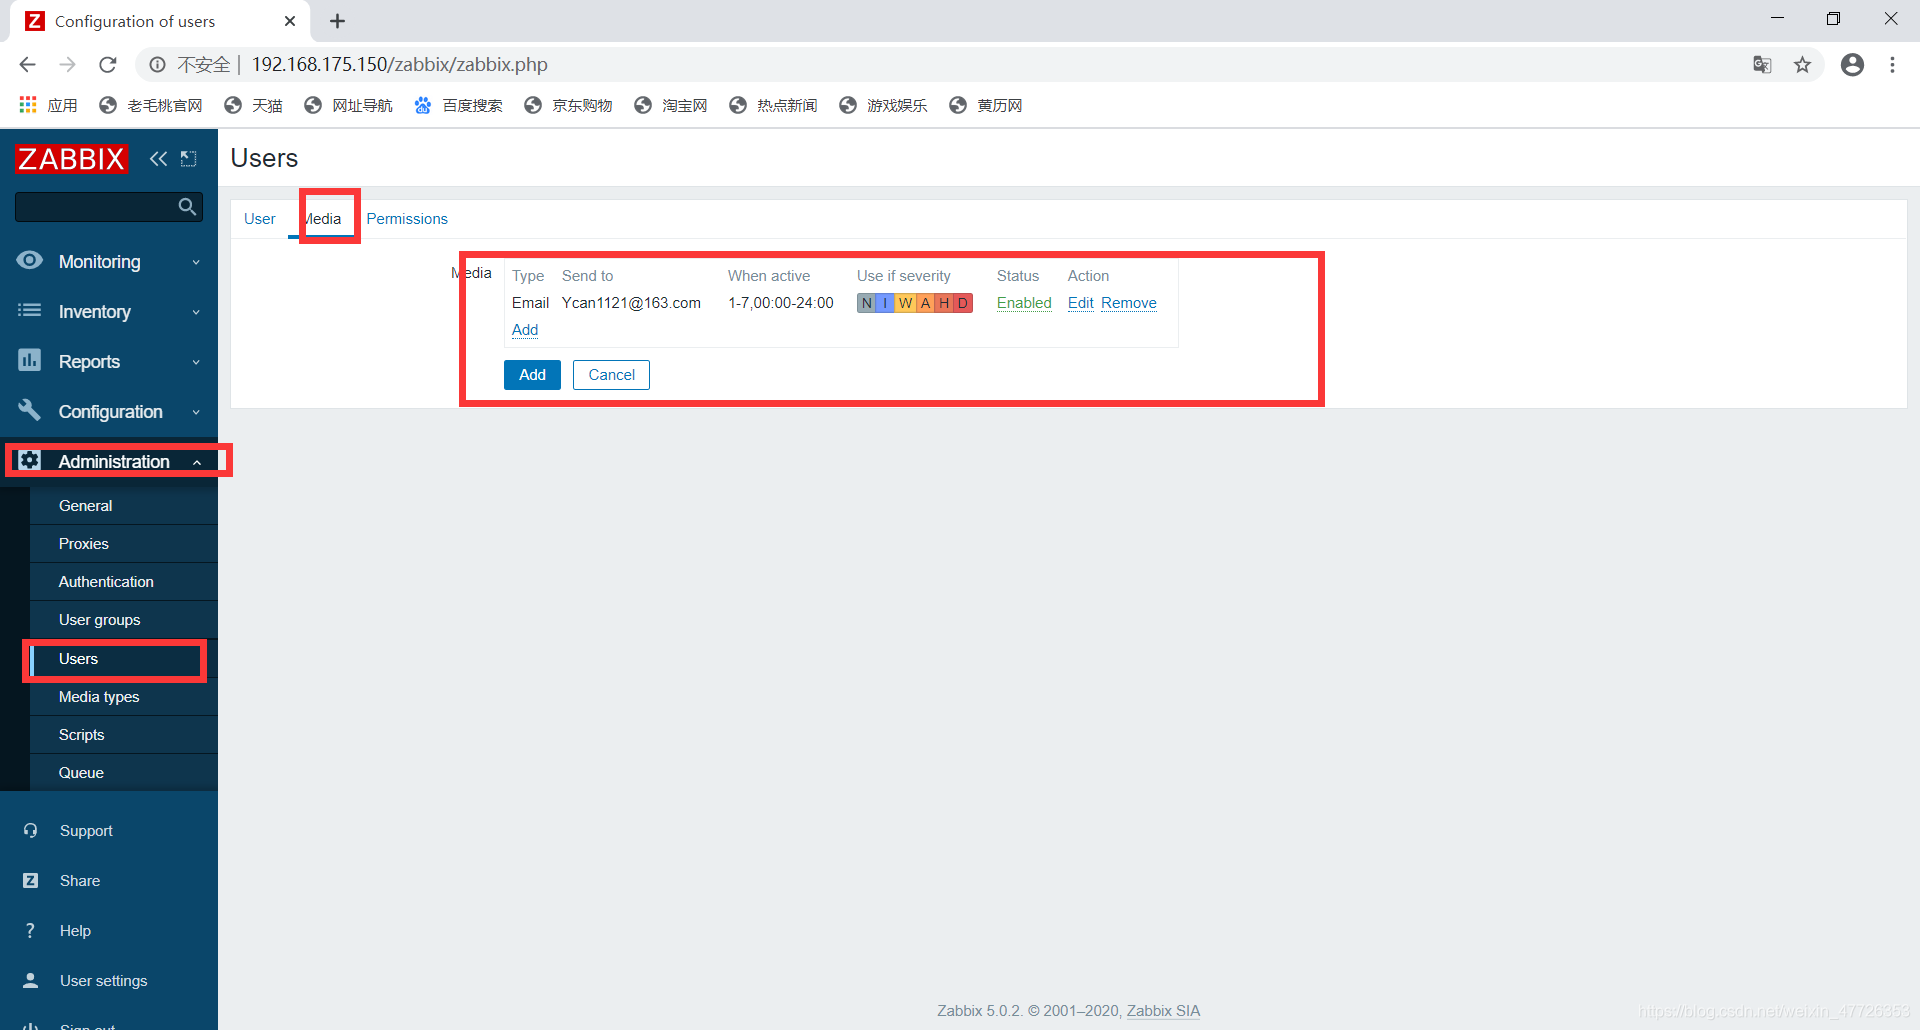
添加媒介
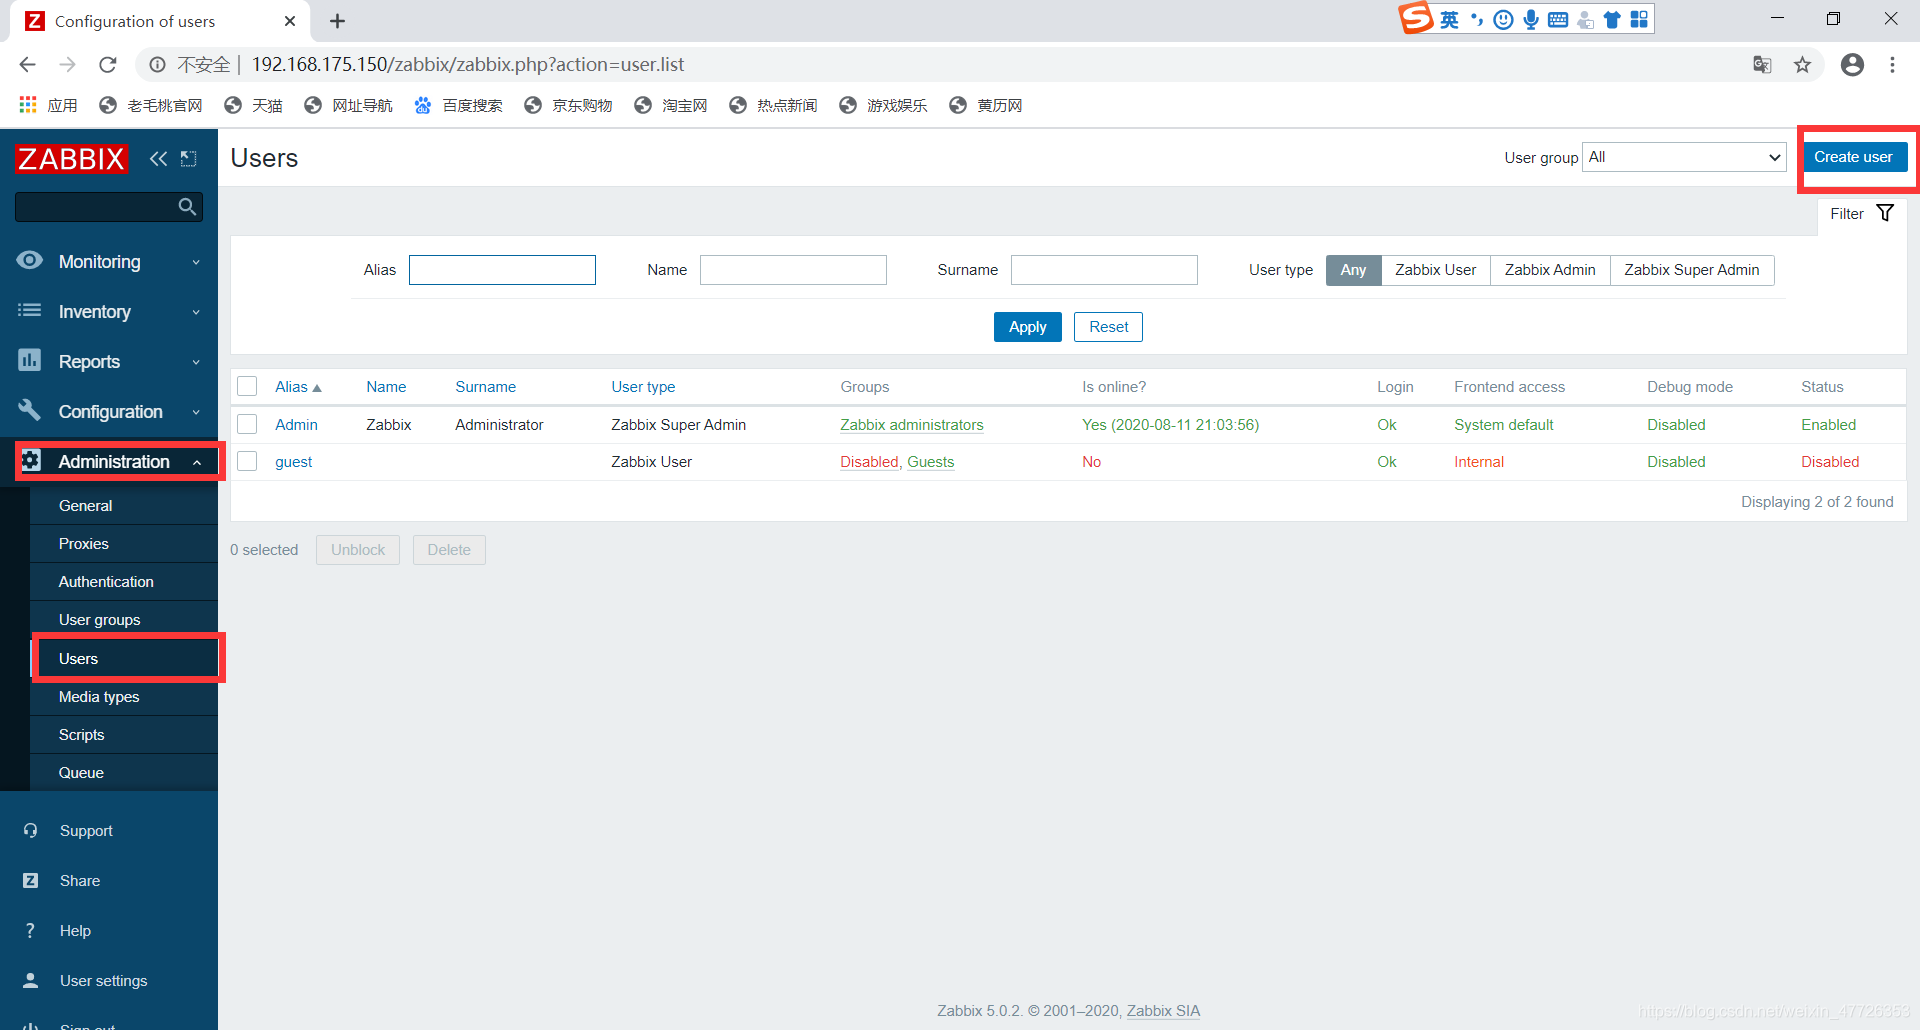
创建用户
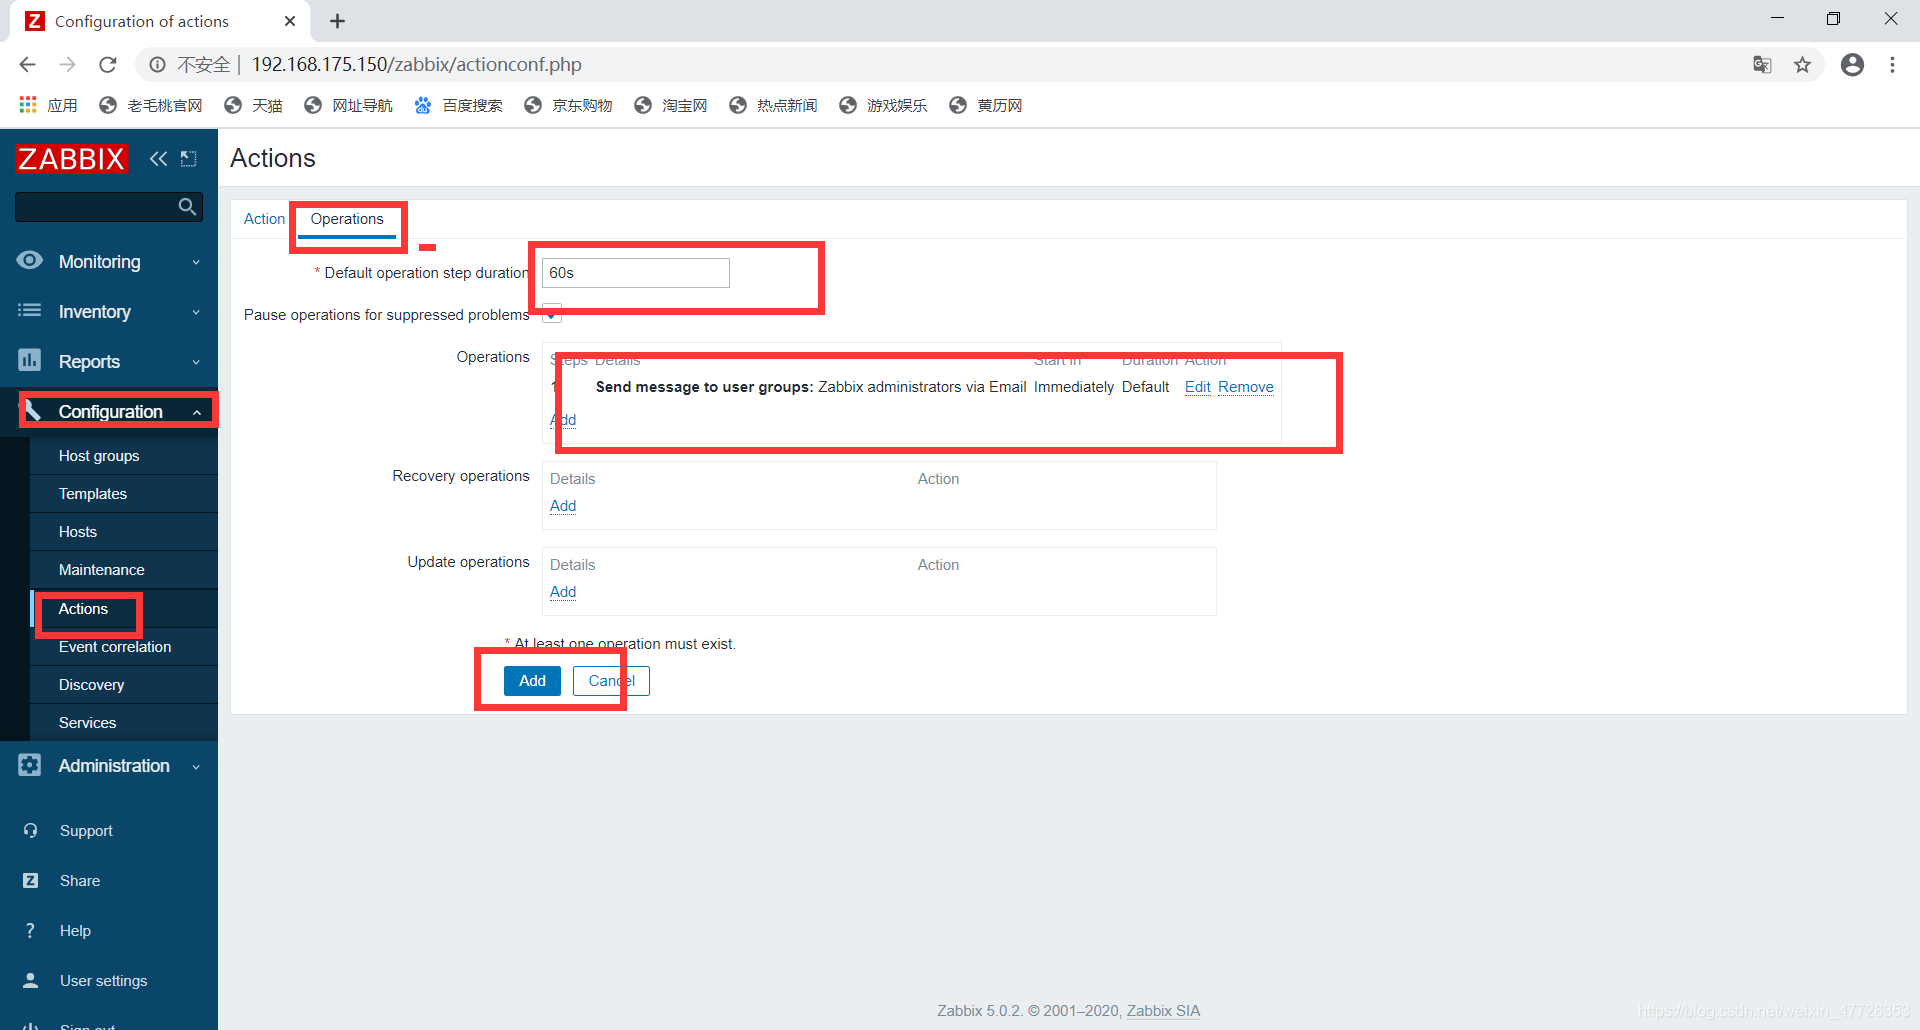
添加动作

监听基于处于接收请求状态的连接数
[root@yangcan2 scripts]# cat Reading.sh
#!/bin/bash
Reading=$(curl -s http://192.168.175.100/status | awk 'NR==4{print $2}')

if [ $Reading -gt 0 ];then
    echo $Reading
else
    echo 0
fi

[root@yangcan2 scripts]# ls
Reading.sh  requests.sh
[root@yangcan2 scripts]#chmod +x Reading.sh


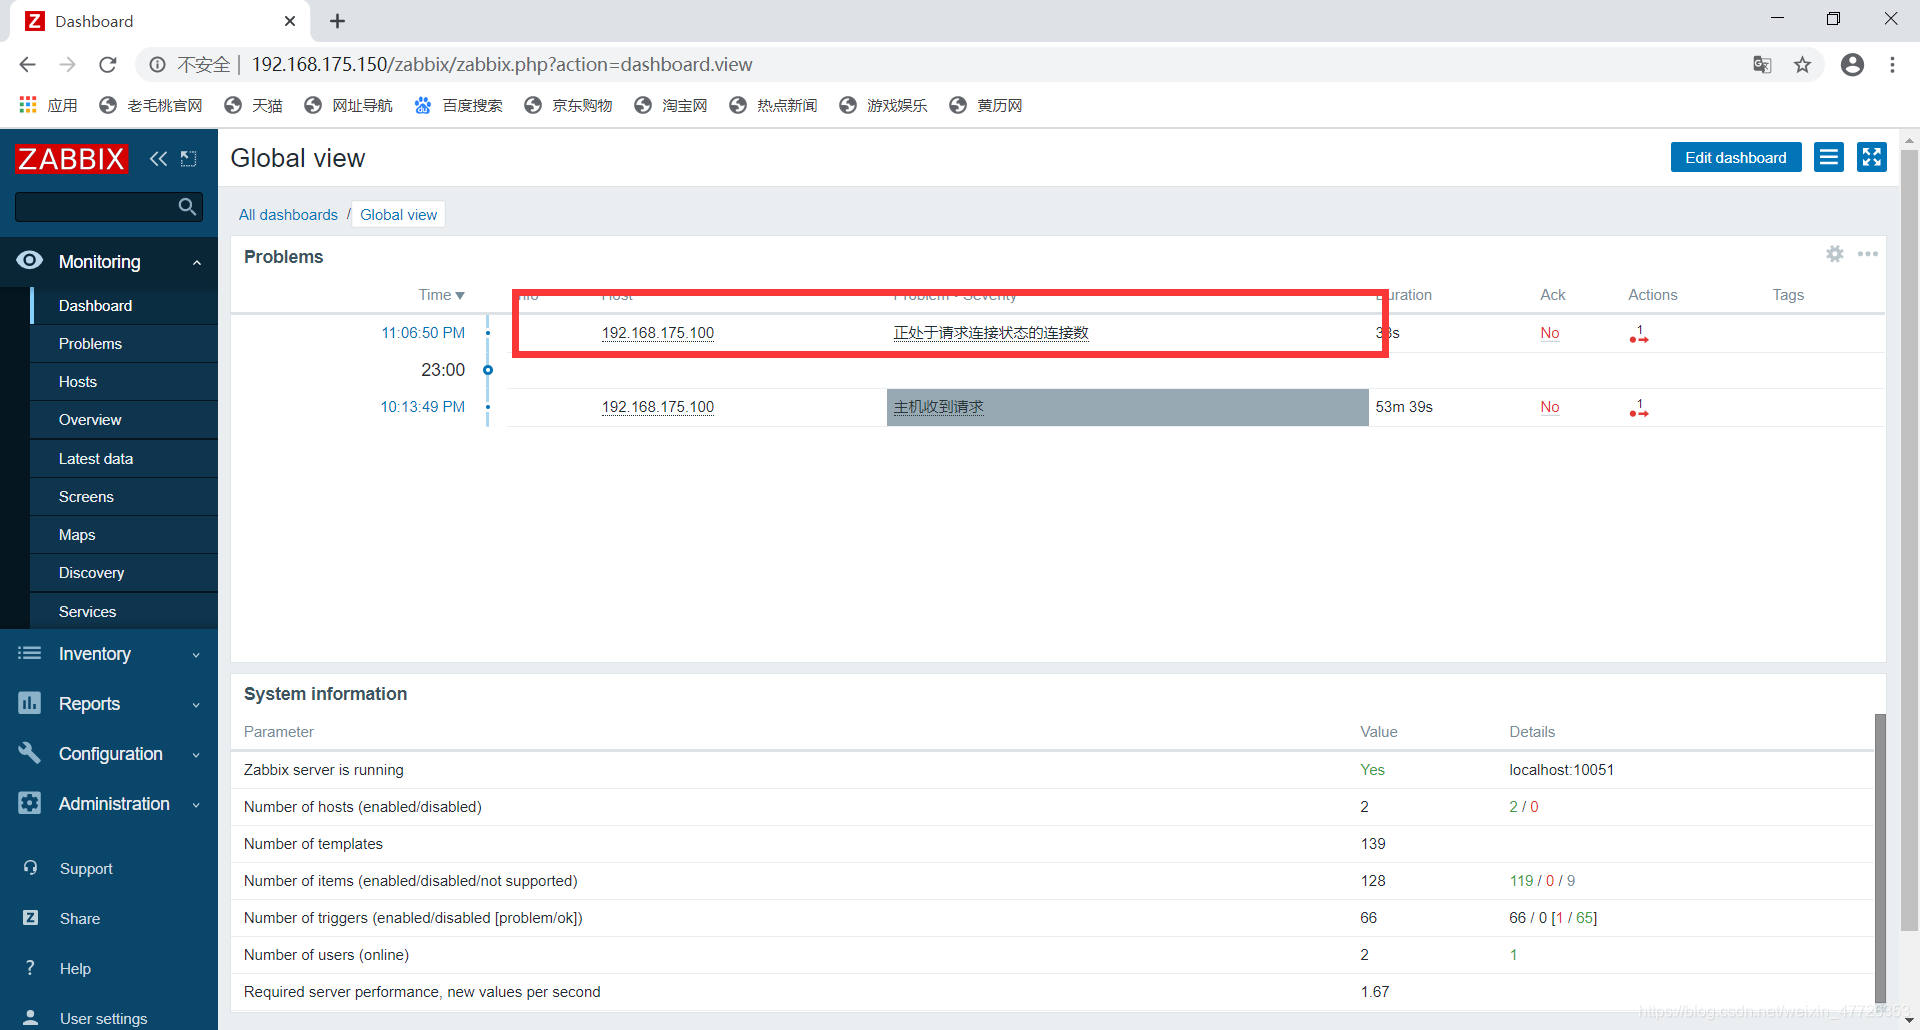
监控已经接受请求且正在处理的或发生响应过程中的连接数
[root@yangcan2 scripts]# vim Writind.sh
[root@yangcan2 scripts]# cat Writind.sh
#!/bin/bash
Writing=$(curl -s http://192.168.175.100/status | awk 'NR==4{print $4}')

if [ $Writing -gt 0 ];then
    echo $Writing
else
    echo 0
fi
[root@yangcan2 scripts]# chmod +x Writind.sh
[root@yangcan2 scripts]# ls
Reading.sh  requests.sh  Writind.sh


 被折叠的 条评论
为什么被折叠?
被折叠的 条评论
为什么被折叠?
 到【灌水乐园】发言


