


食用说明
本文介绍了 SOLIDWORKS SDK 工程图标注时用到的相关 API,是笔者在实现自动化创建工程图与标注功能时的归纳与整合。
一、人工标注流程
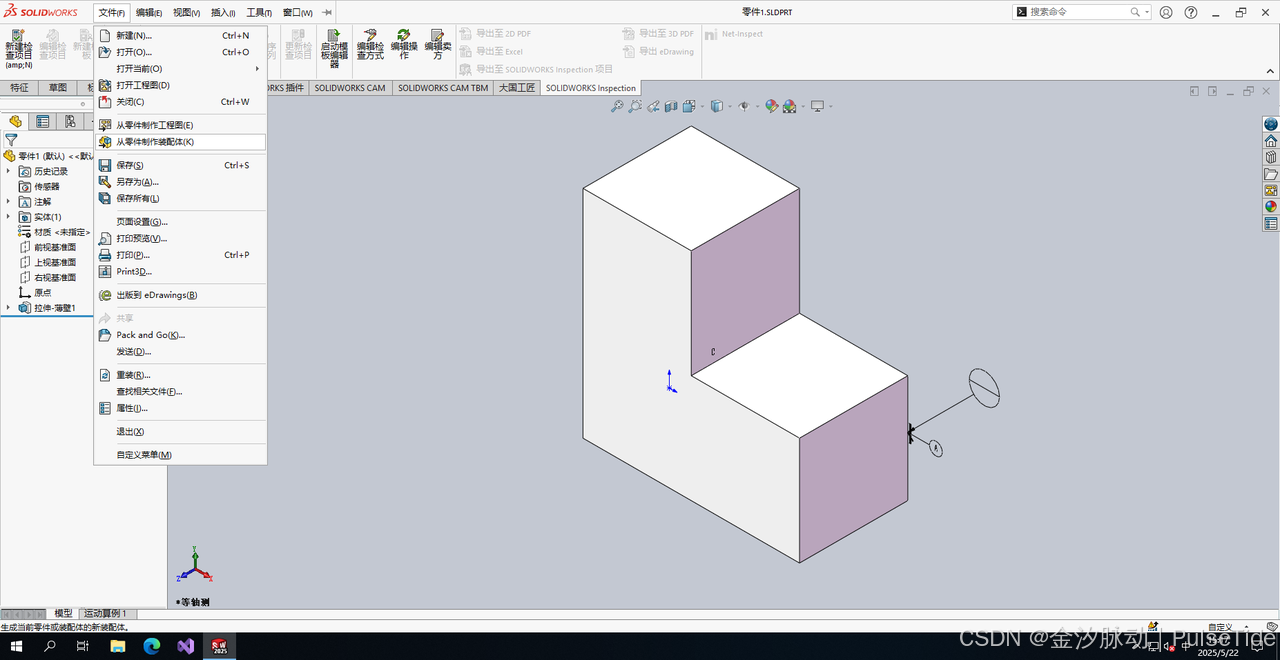
打开一个零件模型,选择文件->从零件制作工程图
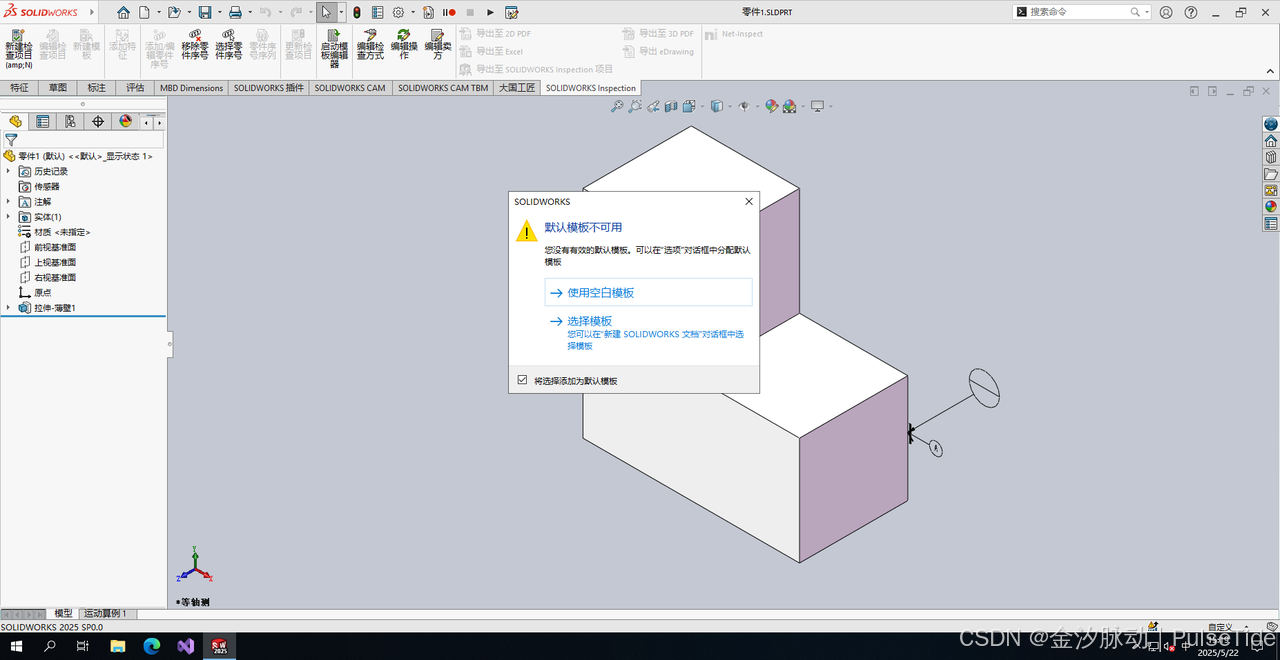
需要指定模板,SW本身提供了一些模板,路径在C:\ProgramData\SOLIDWORKS\SOLIDWORKS 2025\templates,这里选择空白模板,
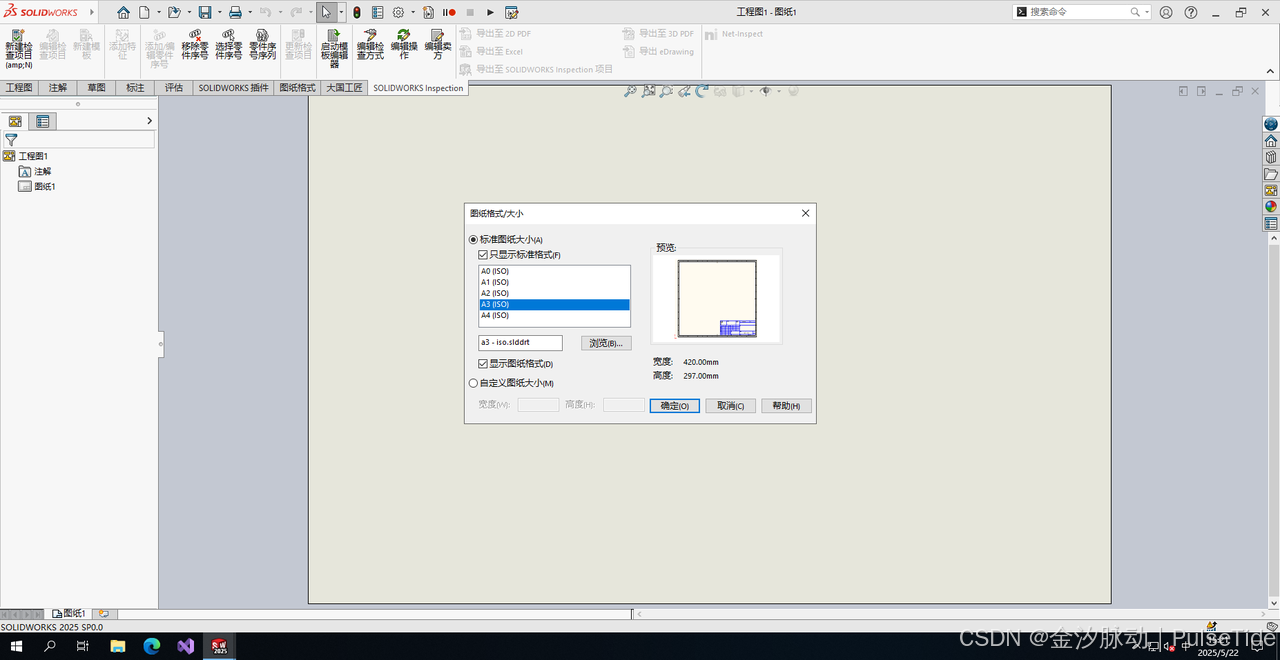
这里工程图选择 A3 大小,
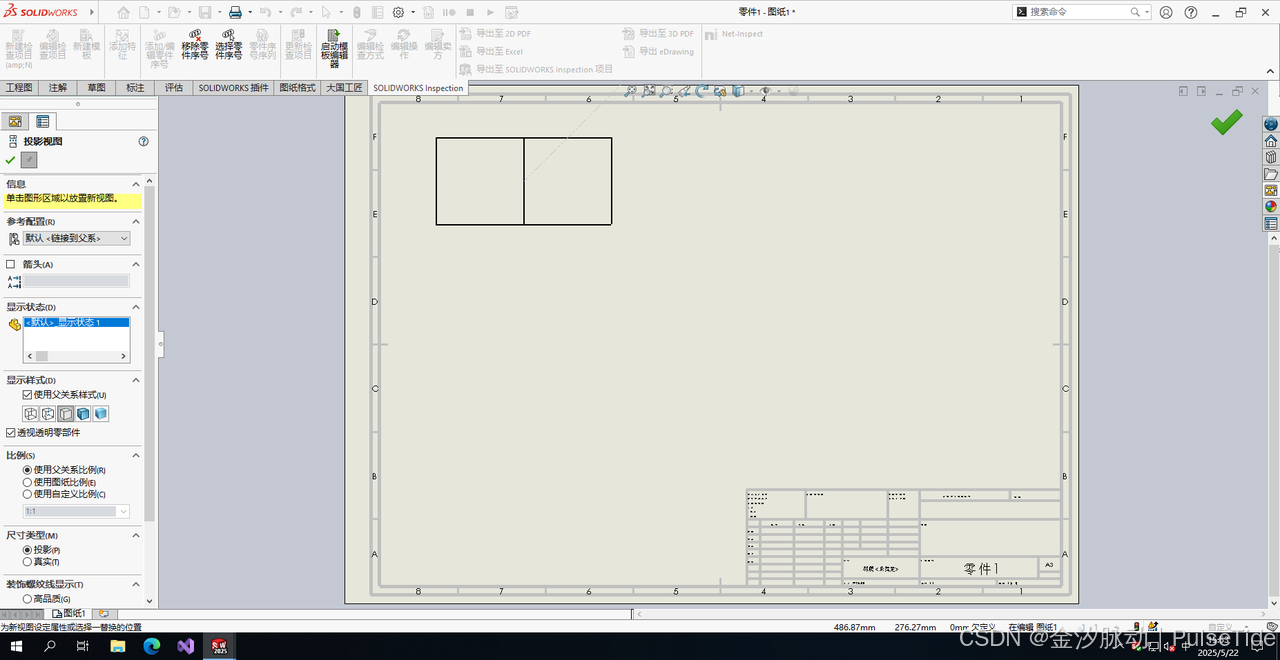
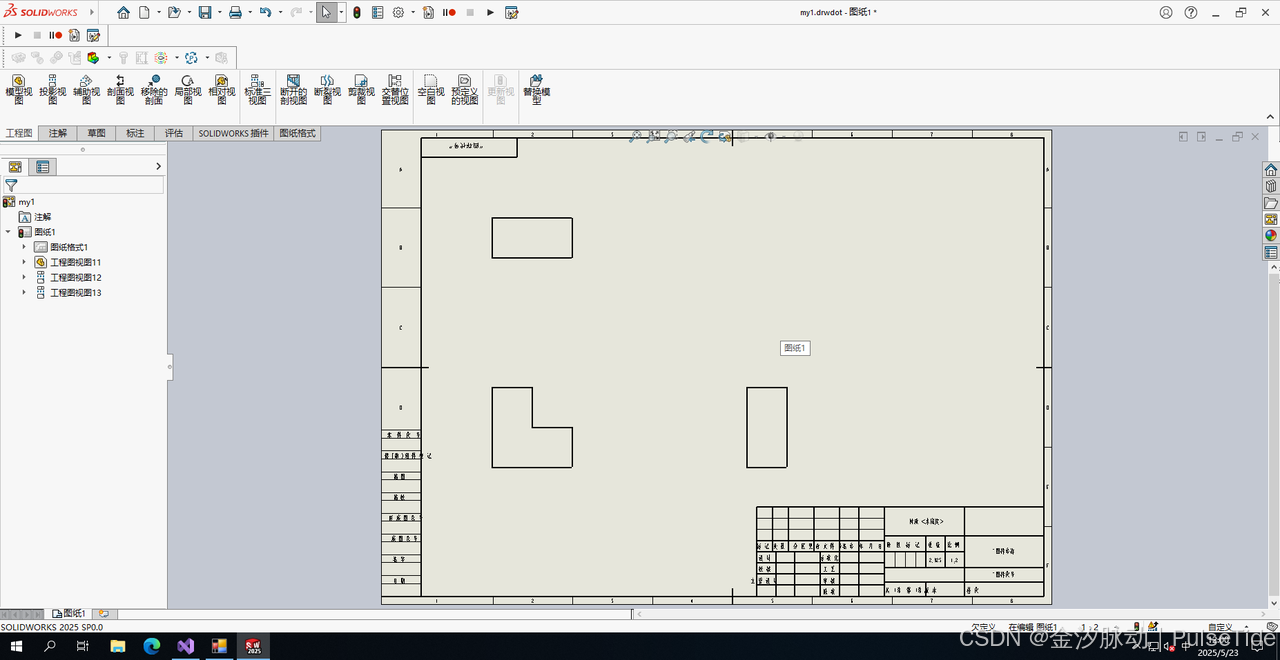
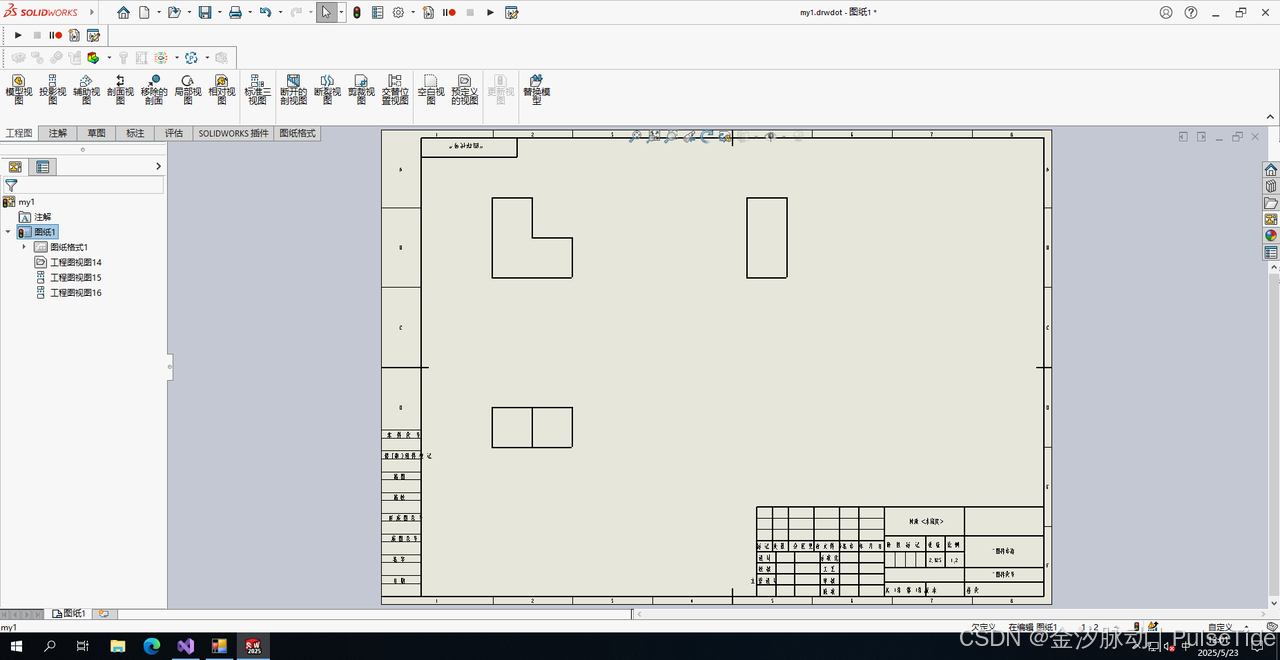
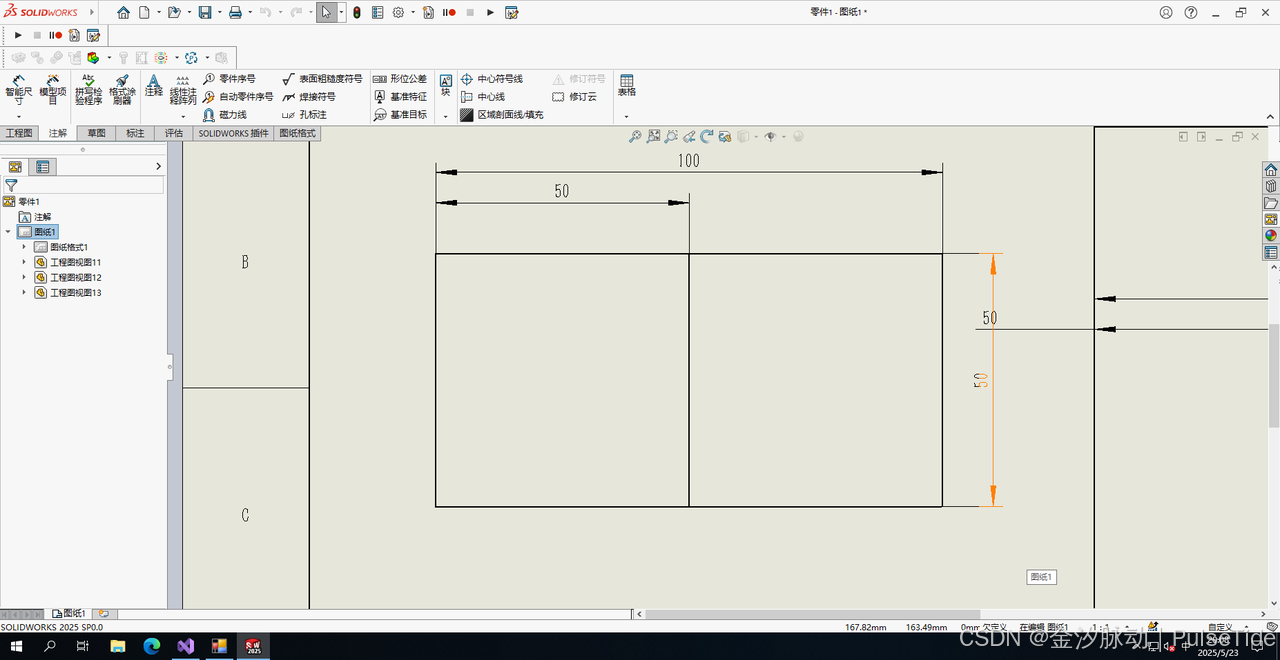
此时显示模型的各个视图,我们将需要的视图拖动到图纸上,
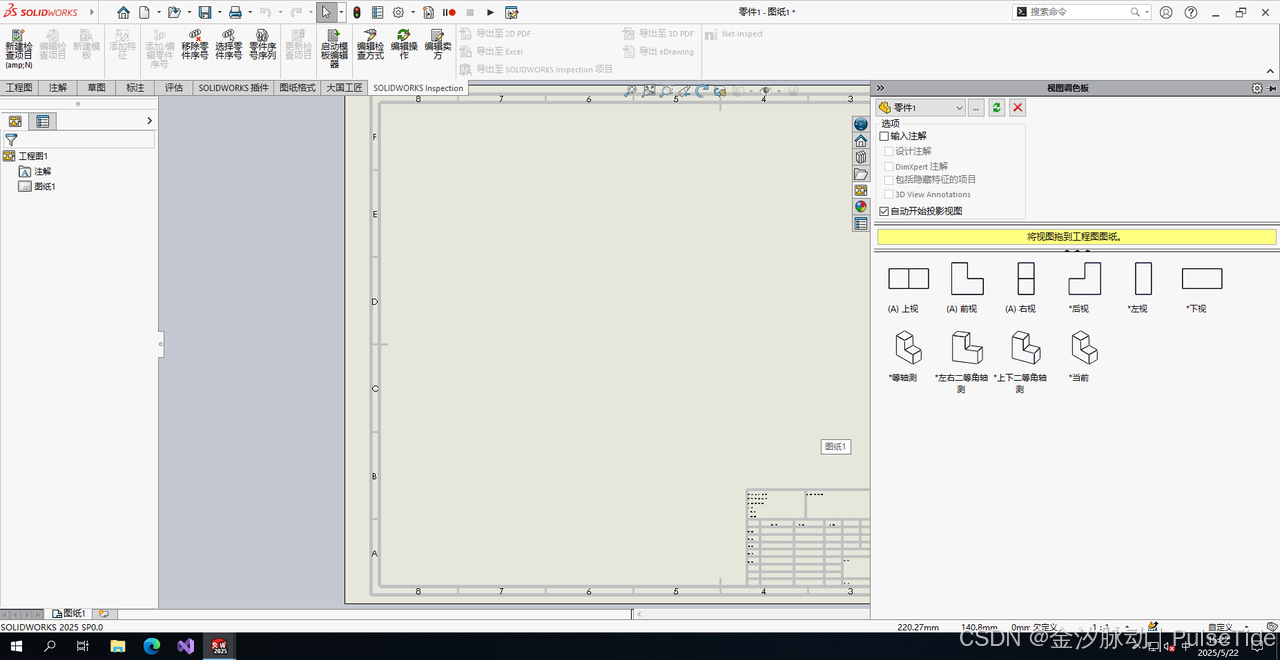
例如这里把上视图拖到图纸上,然后点击右上角绿色的勾就可以了,
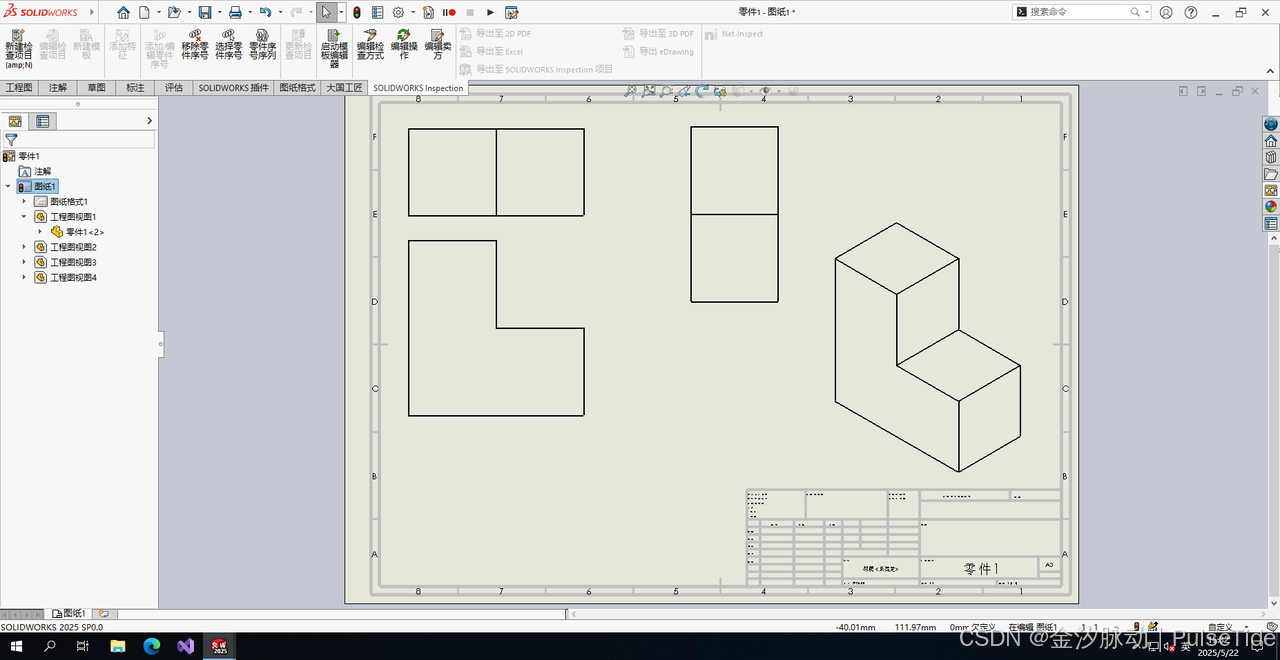
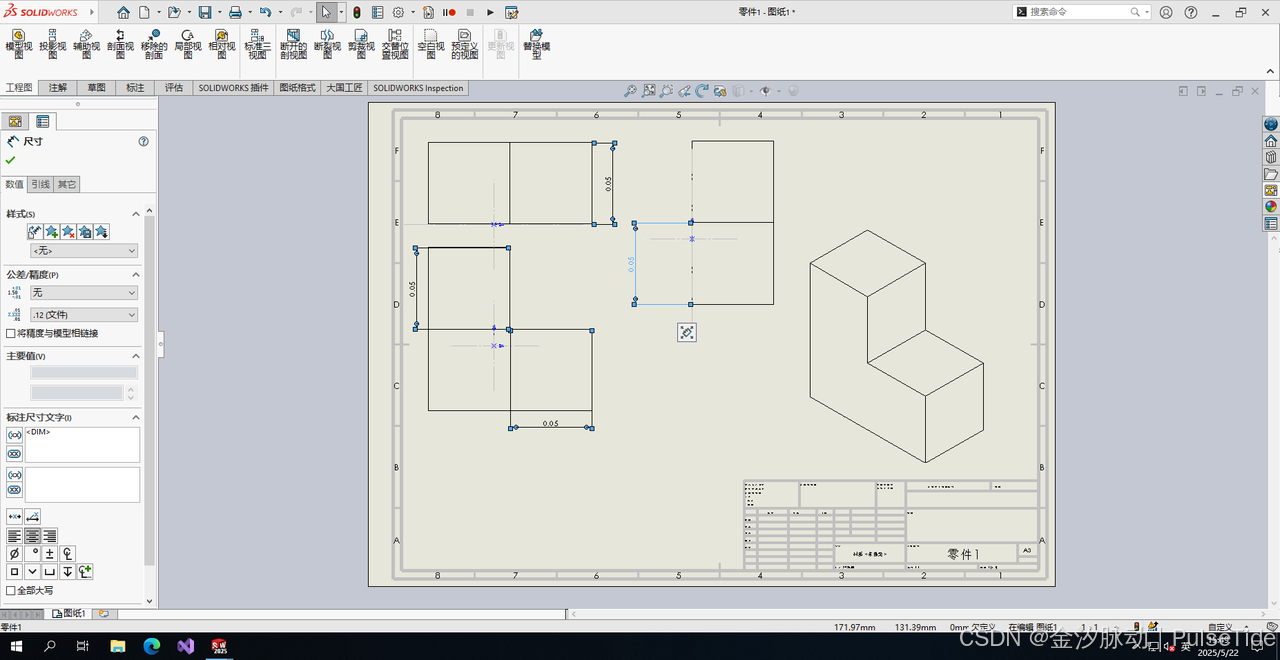
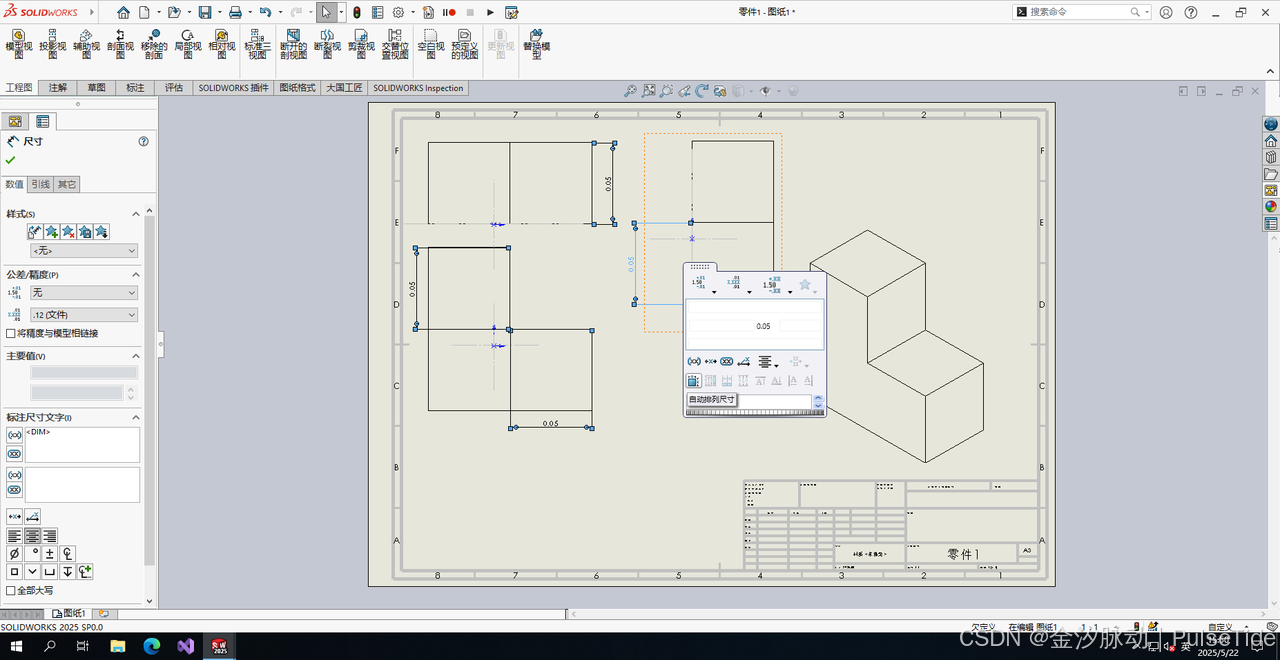
此时可以对视图进行标注,选中一个视图,点击左上角注解->智能尺寸,然后选中视图的边进行标注,这种方式需要手动逐个进行标注。
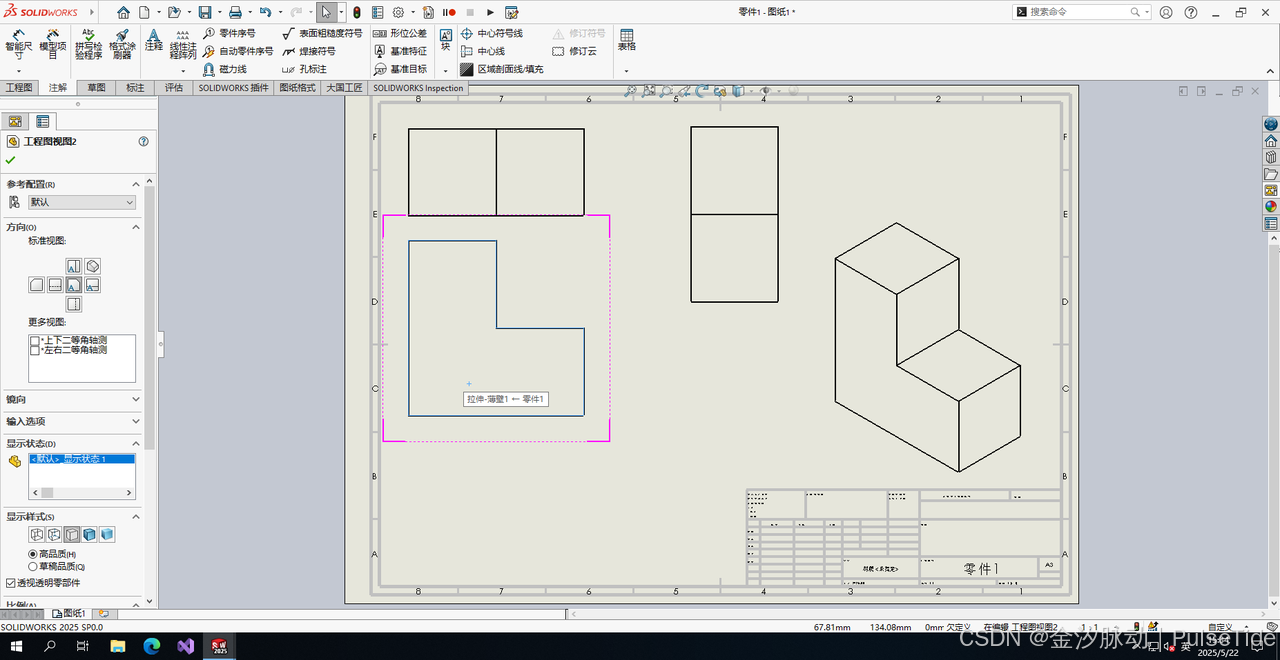
最后选中全部视图,右键菜单对齐->自动排列会重新整理标注
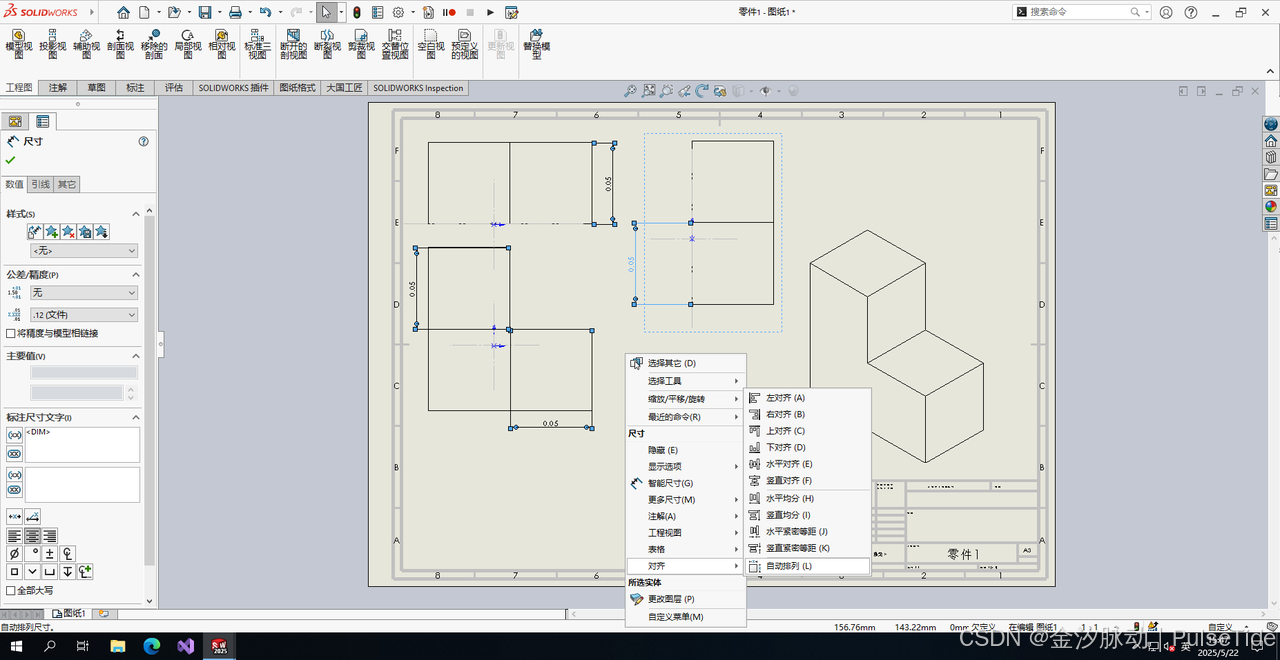
也可以通过全选时的标尺菜单进行相关参数调整,
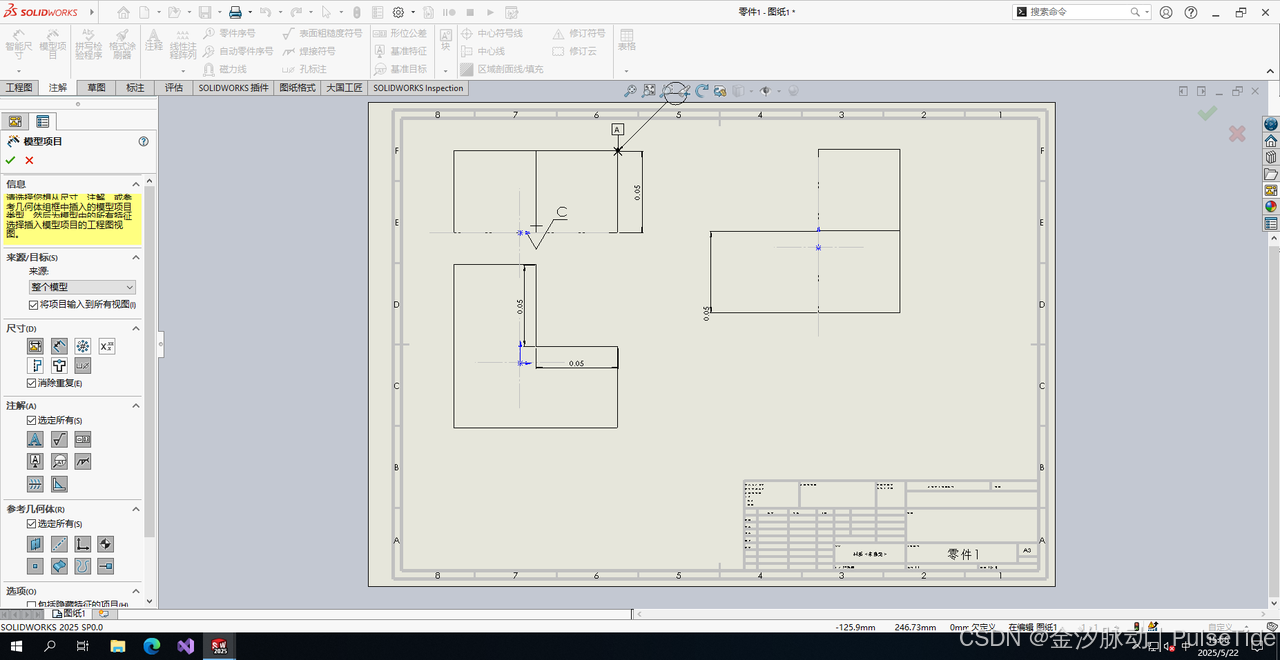
如果需要自动标注,则选择模型项目,然后勾选对应的配置即可一键生成标注,
二、相关接口文档
1、IDrawingDoc Interface Members(工程图接口)
https://help.solidworks.com/2025/english/api/sldworksapi/SolidWorks.Interop.sldworks~SolidWorks.Interop.sldworks.IDrawingDoc_members.html
InsertModelAnnotations4 Method (IDrawingDoc)
Inserts model annotations into this drawing document’s currently selected drawing view.
InsertModelDimensions Method (IDrawingDoc)
Inserts model dimensions into the selected drawing view according to the option specified.
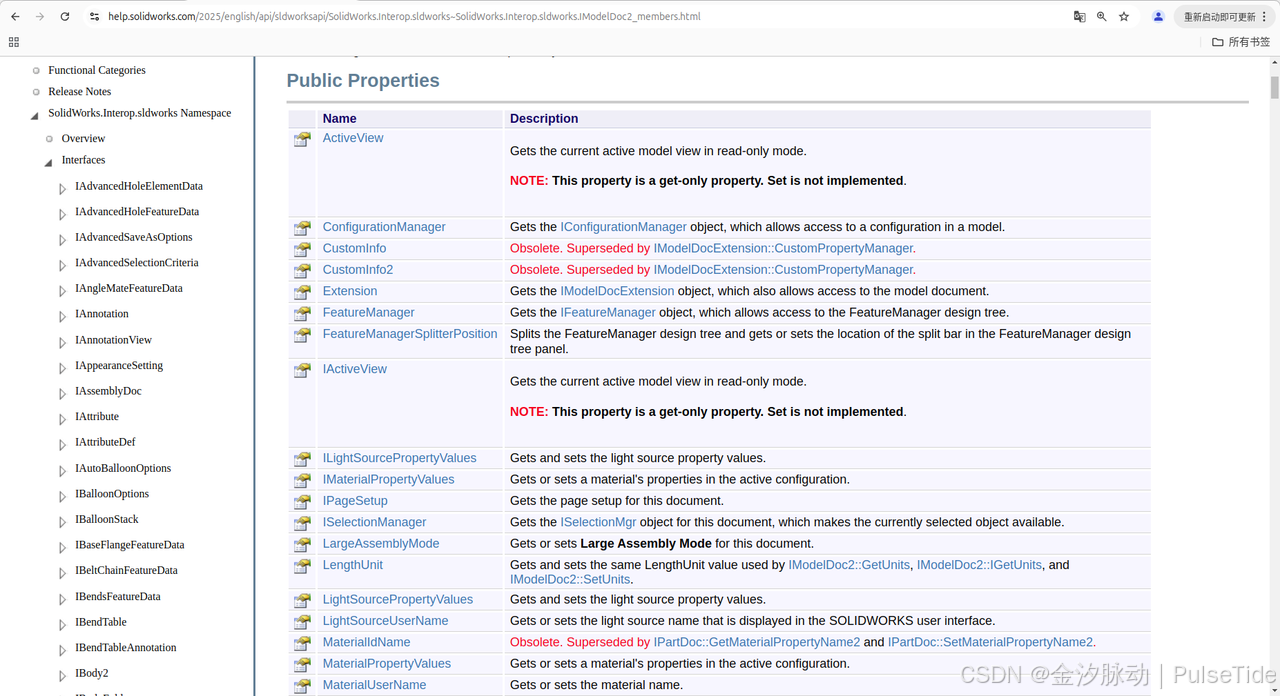
2、IModelDoc2 Interface Members(模型接口)
https://help.solidworks.com/2025/english/api/sldworksapi/SolidWorks.Interop.sldworks~SolidWorks.Interop.sldworks.IModelDoc2_members.html
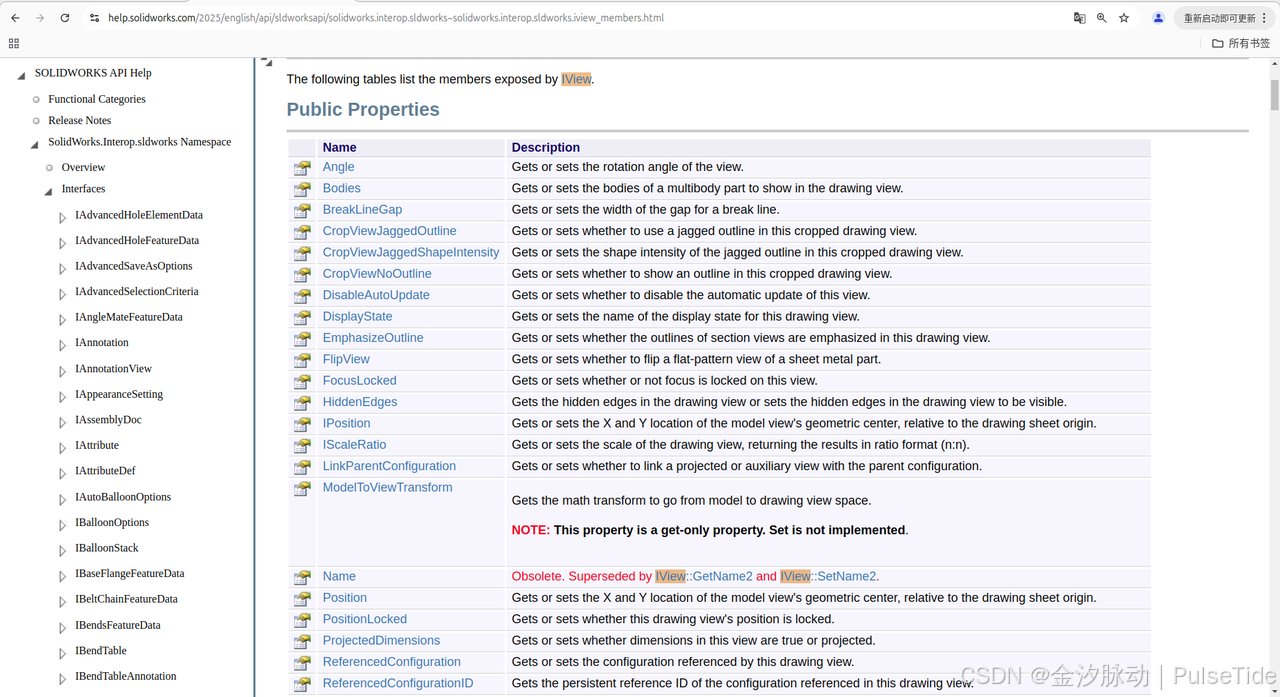
3、IView Interface Members(视图接口)
https://help.solidworks.com/2025/english/api/sldworksapi/solidworks.interop.sldworks~solidworks.interop.sldworks.iview_members.html
GetOutline Method (IView)
Gets the bounding box for a view (sheet or drawing) in meters on the drawing page.
SetDisplayMode4 Method (IView)
Sets the display mode of this drawing view.(设置视图样式,隐藏线可见)
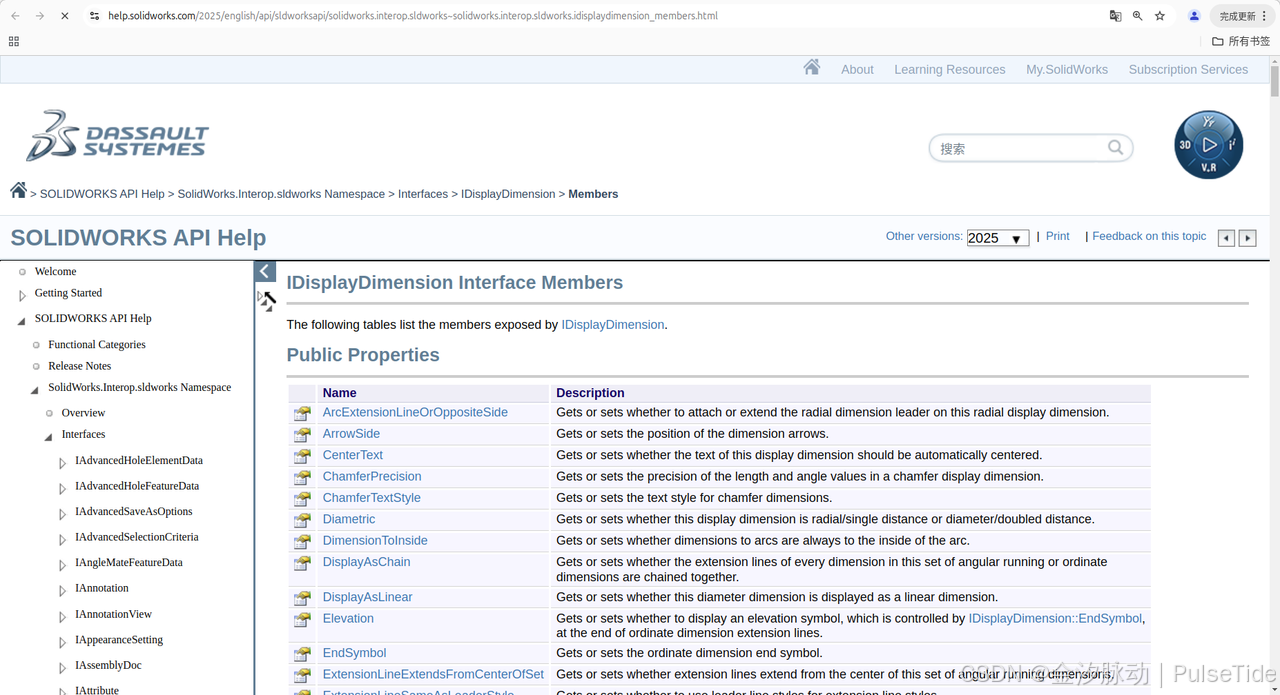
4、IDisplayDimension Interface Members(标注子接口)
https://help.solidworks.com/2025/english/api/sldworksapi/solidworks.interop.sldworks~solidworks.interop.sldworks.idisplaydimension_members.html
var swSelMgr = (SelectionMgr)swModel.SelectionManager;
var swDrView = (IView)drawingDoc.GetFirstView();
//First drawing view is the sheet, so get next drawing view
swDrView = (IView)swDrView.GetNextView();
while ((swDrView != null))
{
Debug.Print("Name of drawing view: " + swDrView.GetName2());
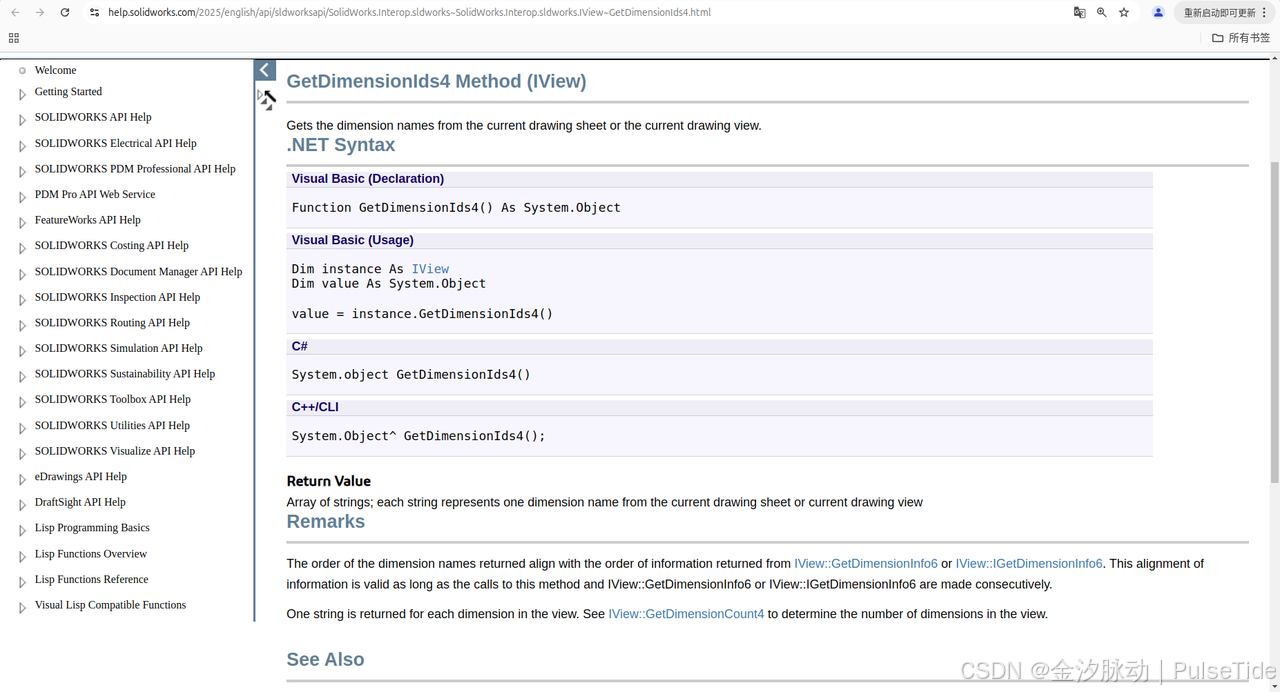
var dimensionIds = (string[])swDrView.GetDimensionIds4();
for (int i = 0; i < dimensionIds.Length; i++)
{
bool selectStatus = swModel.Extension.SelectByID2(dimensionIds[i], "DIMENSION", 0, 0, 0, false, 0, null, 0);
Debug.Print($" dimensionId:{dimensionIds[i]}");
var swDispDim = (DisplayDimension)swSelMgr.GetSelectedObject6(1, 0);
swModel.ClearSelection2(true);
Debug.Print($" Dimension type as defined in swDimensionType_e: {swDispDim.Type2}, is Radius: {(swDispDim.Type2 == (int)swDimensionType_e.swRadialDimension)}. is Jogged: {swDispDim.Jogged}");
}
swDrView = (IView)swDrView.GetNextView();
}
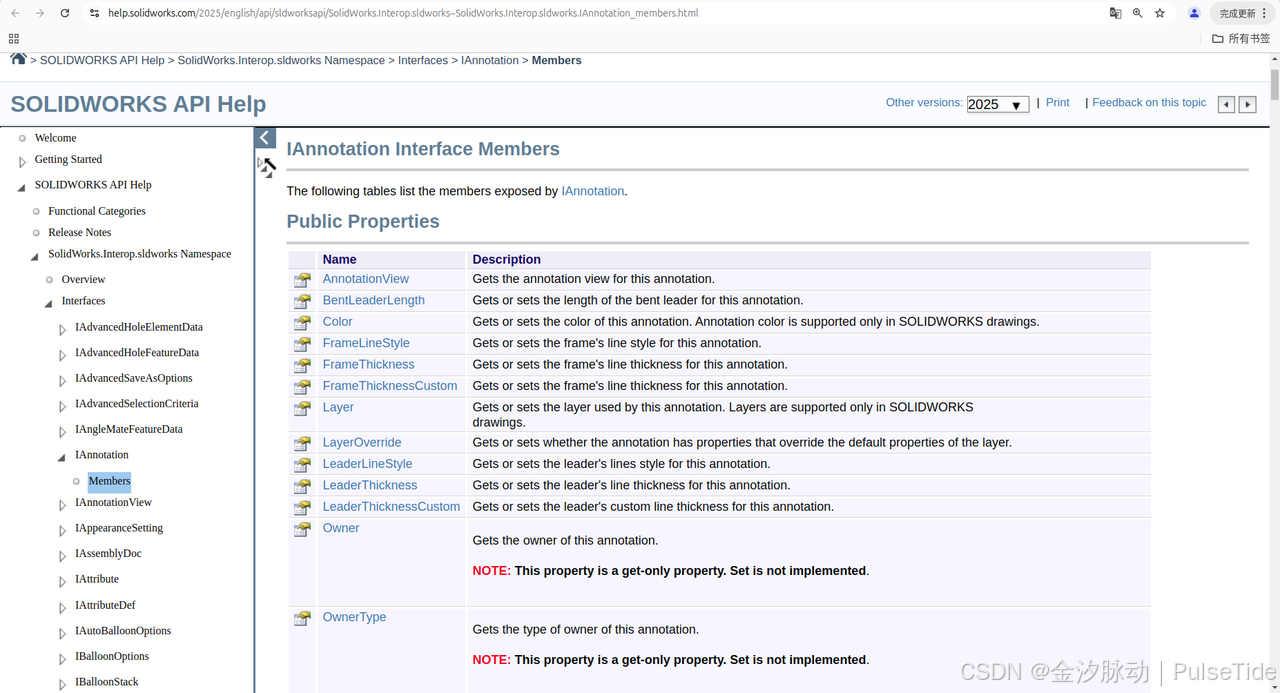
5、IAnnotation Interface Members(标注高级接口)
https://help.solidworks.com/2025/english/api/sldworksapi/SolidWorks.Interop.sldworks~SolidWorks.Interop.sldworks.IAnnotation_members.html
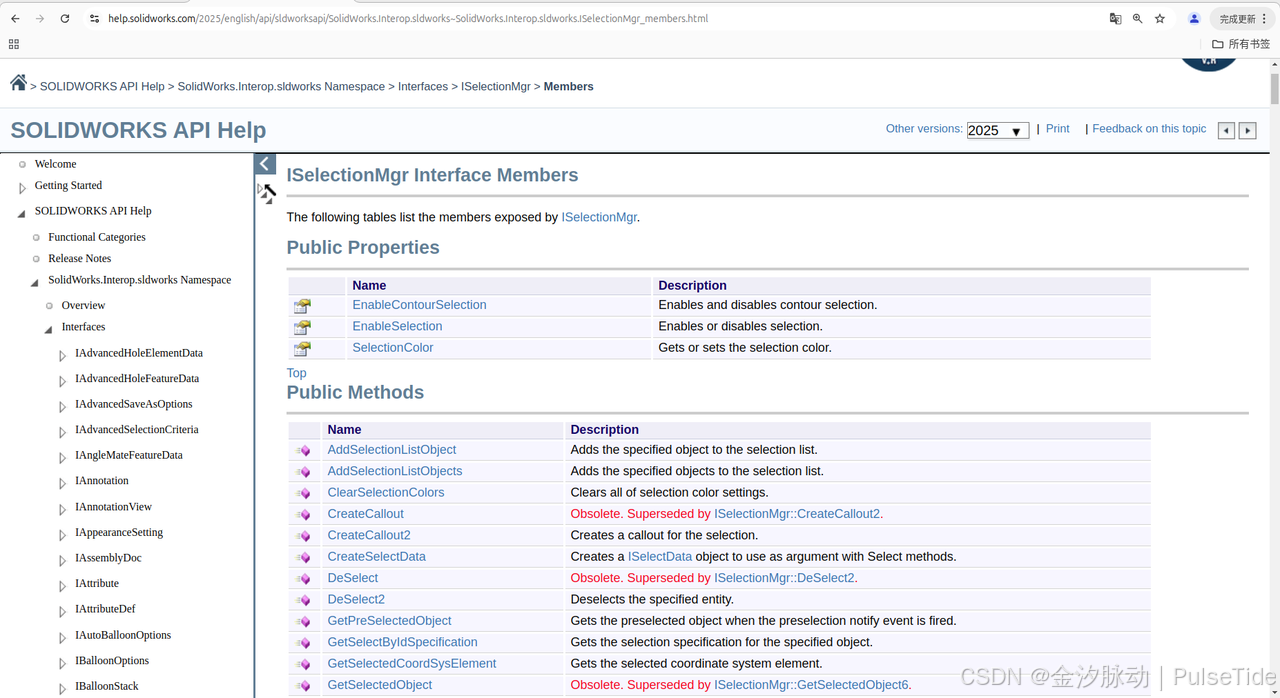
6、ISelectionMgr Interface Members(选择管理器接口)
https://help.solidworks.com/2025/english/api/sldworksapi/SolidWorks.Interop.sldworks~SolidWorks.Interop.sldworks.ISelectionMgr_members.html
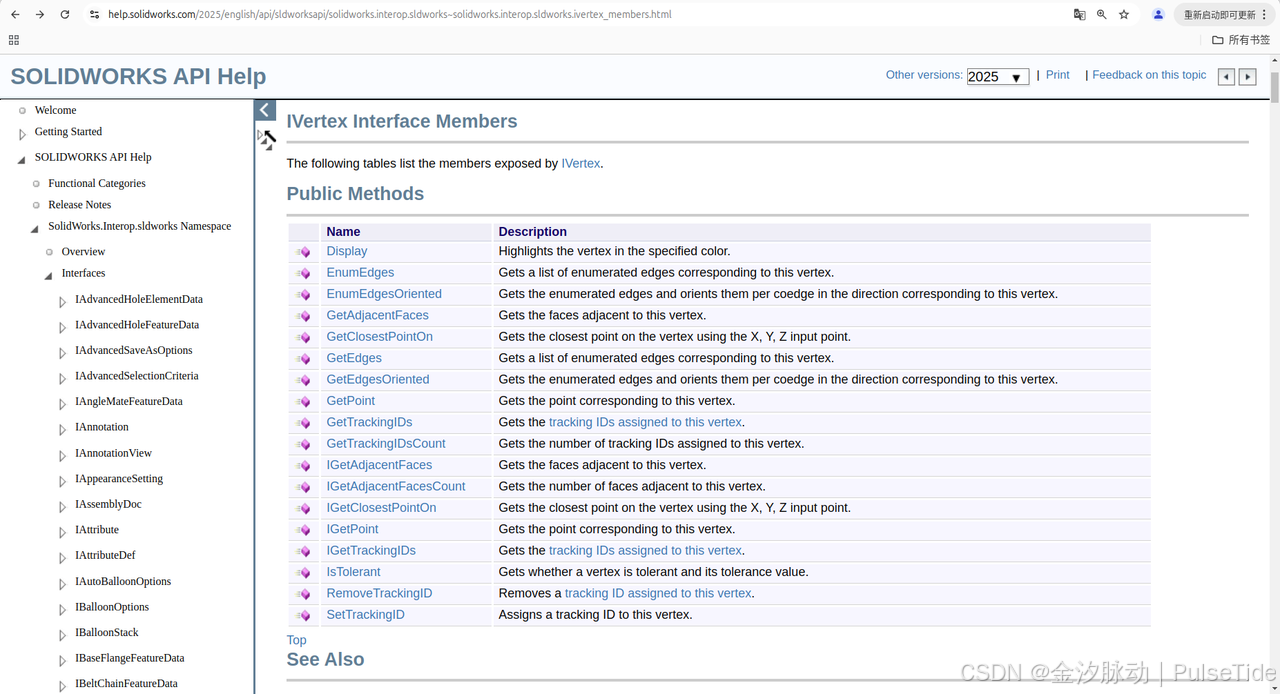
7、IVertex Interface Members(顶点接口)
https://help.solidworks.com/2025/english/api/sldworksapi/solidworks.interop.sldworks~solidworks.interop.sldworks.ivertex_members.html
Represents the start or end of an edge.
三、核心代码片段
1、创建项目文件
https://help.solidworks.com/2025/english/api/sldworksapi/solidworks.interop.sldworks~solidworks.interop.sldworks.isldworks~newdocument.html
调用 NewDocument 方法指定模板创建新项目文件
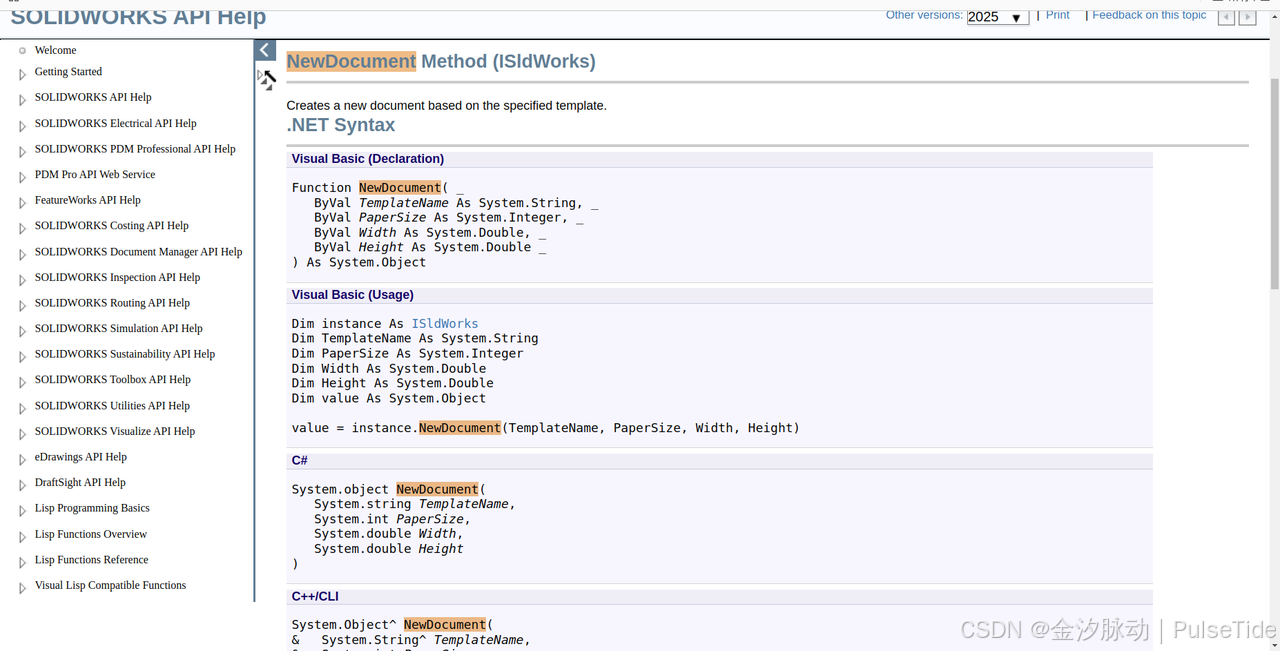
const int PaperSize = (int)swDwgPaperSizes_e.swDwgPaperBsize;
const string TemplatePath = "C:\\ProgramData\\SOLIDWORKS\\SOLIDWORKS 2025\\templates\\gb_a3.drwdot";

// 用我们的模板新建一个工程图
// IDrawingDoc Interface Allows access to functions that perform drawing operations.
var drawingDoc = (IDrawingDoc)swApp.NewDocument(TemplatePath, PaperSize, 0, 0);
2、创建标准三视图
https://help.solidworks.com/2025/english/api/sldworksapi/solidworks.interop.sldworks~solidworks.interop.sldworks.idrawingdoc~create3rdangleviews2.htmlhttps://help.solidworks.com/2025/english/api/sldworksapi/Get_Annotations_Arrays_Example_CSharp.htm
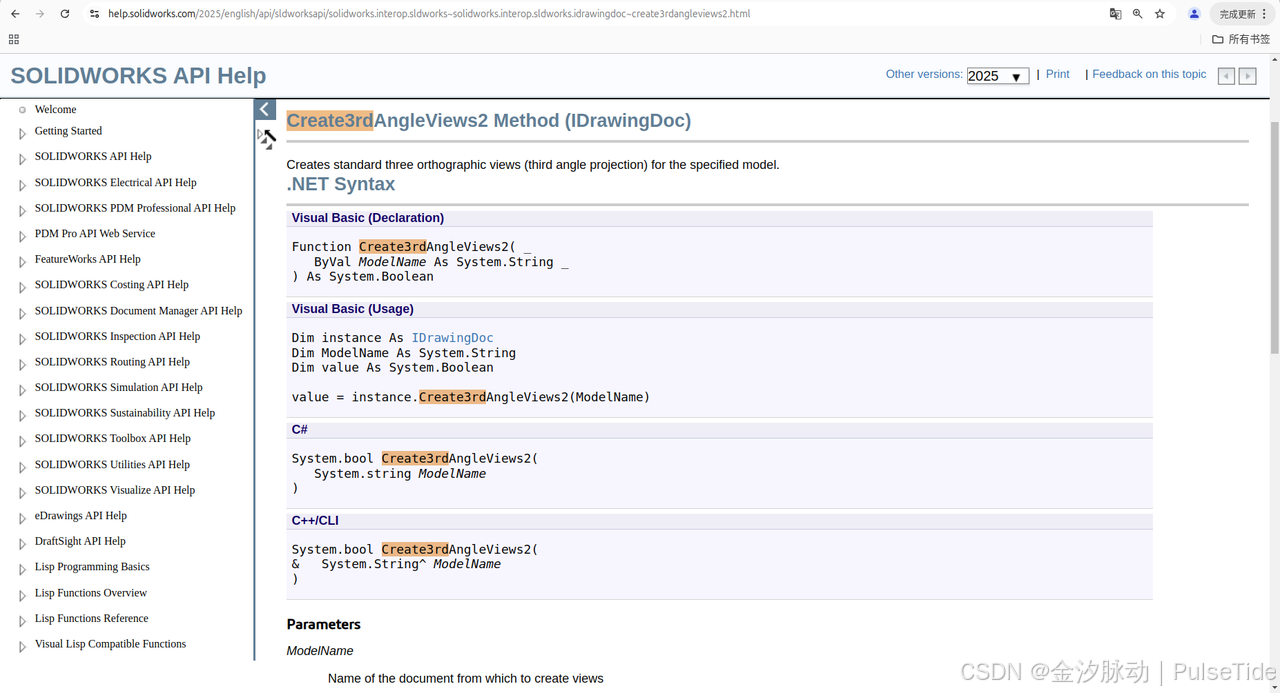
调用 Create3rdAngleViews2 方法创建标准三视图。
using SolidWorks.Interop.sldworks;
using SolidWorks.Interop.swconst;

namespace CmdWindowsFormsApp
{
    internal class CreateDrawing2
    {
        public ISldWorks swApp = SWGlobalInstance.GetSldWorksApp();
        const int TemplateSize = (int)swDwgTemplates_e.swDwgTemplateBsize;
        const int PaperSize = (int)swDwgPaperSizes_e.swDwgPaperBsize;
        const string TemplatePath = "C:\\ProgramData\\SOLIDWORKS\\SOLIDWORKS 2025\\templates\\gb_a3.drwdot";

        public void Run()
        {

            swApp.Visible = true;

            // 用我们的模板新建一个工程图
            // IDrawingDoc Interface Allows access to functions that perform drawing operations.
            var drawingDoc = (IDrawingDoc)swApp.NewDocument(TemplatePath, PaperSize, 0, 0);
            // IModelDoc2 Interface Allows access to SOLIDWORKS documents: parts, assemblies, and drawings.
            var swModel = (IModelDoc2)swApp.ActiveDoc;
            // 需要绘制工程图的零件路径
            string partPath = "C:\\app\\MyMacro\\零件1.SLDPRT";
            // Adds the specified document's predefined drawing views to the View Palette.
            drawingDoc.GenerateViewPaletteViews(partPath);
            // 创建标准三视图
            drawingDoc.Create3rdAngleViews2(partPath);

            swModel.EditRebuild3();

        }
    }
}
3、创建自定义视图
https://help.solidworks.com/2025/english/api/sldworksapi/Insert_Model_Annotations_Example_CSharp.htmhttps://help.solidworks.com/2025/english/api/sldworksapi/solidworks.interop.sldworks~solidworks.interop.sldworks.idrawingdoc~createdrawviewfrommodelview3.html
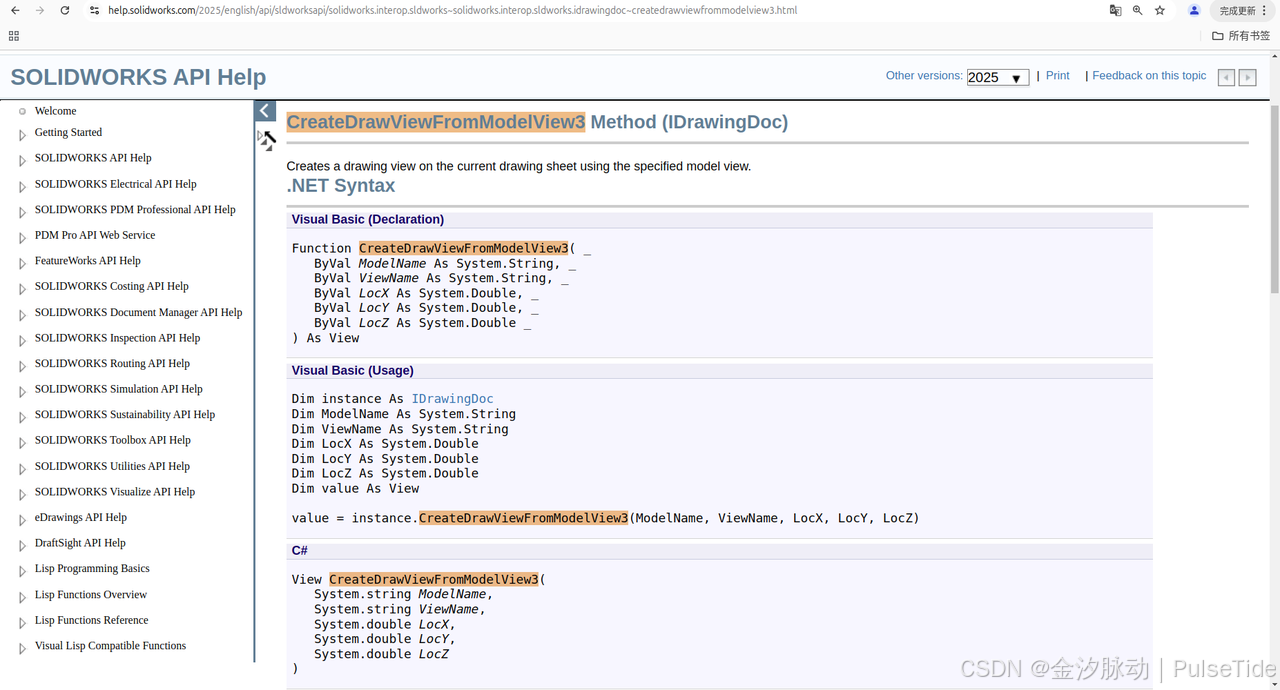
调用 CreateDrawViewFromModelView3 方法创建自定义视图,CreateUnfoldedViewAt3 创建选中视图的关联视图
using SolidWorks.Interop.sldworks;
using SolidWorks.Interop.swconst;

namespace CmdWindowsFormsApp
{
    internal class CreateDrawing1
    {
        public ISldWorks swApp = SWGlobalInstance.GetSldWorksApp();
        const int TemplateSize = (int)swDwgTemplates_e.swDwgTemplateBsize;
        const int PaperSize = (int)swDwgPaperSizes_e.swDwgPaperBsize;
        const string TemplatePath = "C:\\ProgramData\\SOLIDWORKS\\SOLIDWORKS 2025\\templates\\gb_a3.drwdot";

        public void Run()
        {
            swApp.Visible = true;

            // 用我们的模板新建一个工程图
            // IDrawingDoc Interface Allows access to functions that perform drawing operations.
            var drawingDoc = (IDrawingDoc)swApp.NewDocument(TemplatePath, PaperSize, 0, 0);
            // IModelDoc2 Interface Allows access to SOLIDWORKS documents: parts, assemblies, and drawings.
            var swModel = (IModelDoc2)swApp.ActiveDoc;
            // 需要绘制工程图的零件路径
            string partPath = "C:\\app\\MyMacro\\零件1.SLDPRT";
            // 在右侧工程图窗体刷新所有视图
            drawingDoc.GenerateViewPaletteViews(partPath);
            // Creates a drawing view on the current drawing sheet using the specified model view.
            var view1 = drawingDoc.CreateDrawViewFromModelView3(partPath, "*Front", 0.1, 0.1, 0);
            // select drawing view
            var boolstatus = swModel.Extension.SelectByID2(view1.Name, "DRAWINGVIEW", 0, 0, 0, false, 0, null, 0);
            // Creates an unfolded drawing view from the selected drawing view and places it in the drawing at the specified location.
            var view2 = drawingDoc.CreateUnfoldedViewAt3(0.25, 0.1, 0, false);
            // select drawing view
            boolstatus = swModel.Extension.SelectByID2(view1.Name, "DRAWINGVIEW", 0, 0, 0, false, 0, null, 0);
            // Creates an unfolded drawing view from the selected drawing view and places it in the drawing at the specified location.
            var view3 = drawingDoc.CreateUnfoldedViewAt3(0.1, 0.18, 0, false);
            // 设定比例
            view1.ScaleDecimal = 0.75;

            swModel.EditRebuild3();
        }

    }
}
Create3rdAngleViews2 第三角投影效果
Create1stAngleViews2 第一角投影效果
4、SW自带的自动排序指令
https://help.solidworks.com/2025/english/api/sldworksapi/auto-arrange_dimensions_example_csharp.htm
调用 AlignDimensions Method,在完成所有视图标注之后对标注线条布局的优化
swCommands_AutoArrangeDimension
valid for multi-selected annotations or dimensions; Align toolbar > Auto Arrange Dimensions
 // 选中全部
 swModel.Extension.SelectAll();

 // 获取选择管理器
 SelectionMgr swSelMgr = swModel.SelectionManager;
 var nbrSelections = swSelMgr.GetSelectedObjectCount2(-1);
 //swApp.SendMsgToUser2($"Number of entities selected in drawing = {nbrSelections}" , (int)swMessageBoxIcon_e.swMbInformation, (int)swMessageBoxBtn_e.swMbOk);

 nbrSelections = nbrSelections - 1;

 // If selection is not a dimension, then exit
 if (swSelMgr.GetSelectedObjectType3(1, -1) != (int)swSelectType_e.swSelDIMENSIONS)
 {
     swApp.SendMsgToUser2("selection is not a dimension. exit.", (int)swMessageBoxIcon_e.swMbInformation, (int)swMessageBoxBtn_e.swMbOk);
     return;
 }

 // Auto Arrange:Distance between dimensions 0.001
 swModel.Extension.AlignDimensions((int)swAlignDimensionType_e.swAlignDimensionType_AutoArrange, 0.001);
也可以通过(object[])swDrView.GetAnnotations() 实现:
 Debug.Print("Name of drawing view: " + swDrView.GetName2());
 var annArray = (object[])swDrView.GetAnnotations();
 if ((annArray != null))
 {
     foreach (object obj_loopVariable in annArray)
     {
         var obj = (object)obj_loopVariable;
         Annotation currAnn = (Annotation)obj;
         Debug.Print("  Name of annotation: " + currAnn.GetName());
         currAnn.Select3(true, null);
     }

     swModel.Extension.AlignDimensions((int)swAlignDimensionType_e.swAlignDimensionType_AutoArrange, 0.001);
 }
5、SW自带的智能标注指令
swCommands_SmartDimension
opens the Dimension PropertyManager page; Layout Tools or Dimensions/Relations toolbar > Smart Dimension
6、自动保存工程图
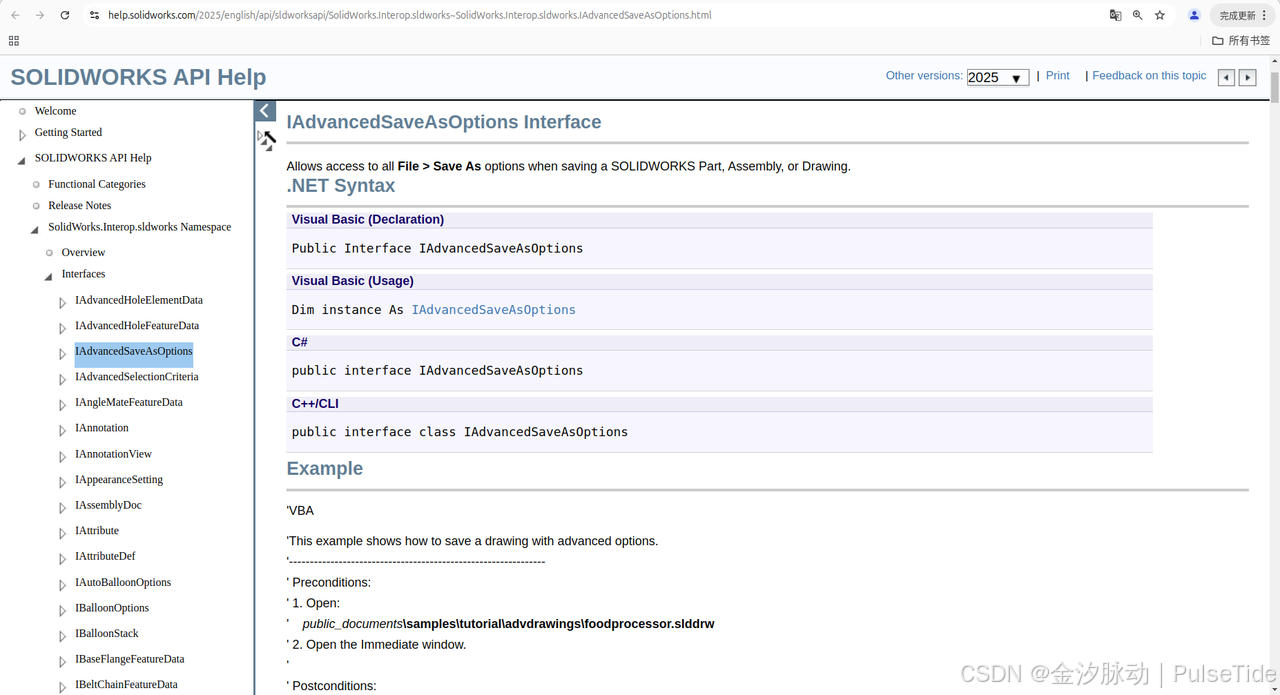
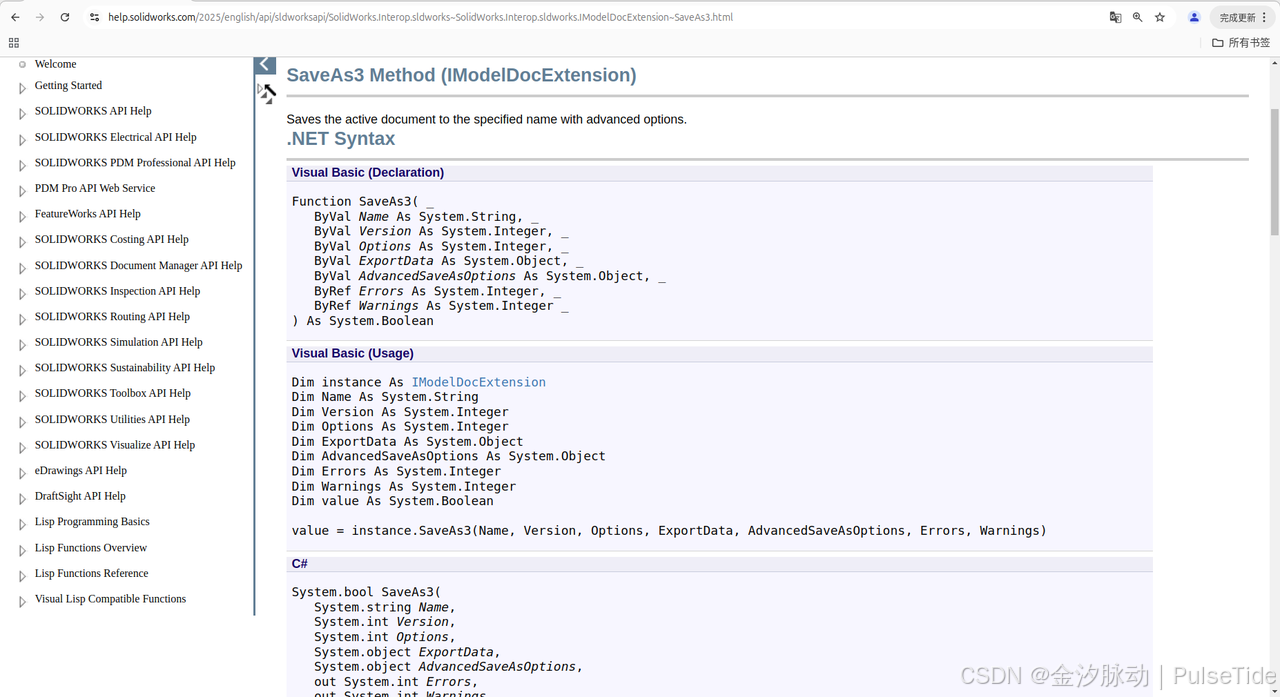
https://help.solidworks.com/2025/english/api/sldworksapi/SolidWorks.Interop.sldworks~SolidWorks.Interop.sldworks.IModelDocExtension~SaveAs3.htmlhttps://help.solidworks.com/2025/english/api/sldworksapi/SolidWorks.Interop.sldworks~SolidWorks.Interop.sldworks.IAdvancedSaveAsOptions.html
调用SaveAs3 Method
// 获取当前工程图文件
ModelDoc2 swModel2 = (ModelDoc2)swApp.ActiveDoc;
swModel2.SaveAs3("C:\\app\\MyMacro\\my.drwdot", 0, 1);

// Saves the active document to the specified name with advanced options.
swModel.Extension.SaveAs3("C:\\app\\MyMacro\\my1.drwdot", (int)swSaveAsVersion_e.swSaveAsCurrentVersion, (int)swSaveAsOptions_e.swSaveAsOptions_Silent, null, null, -1, -1);
7、自动加载工程图
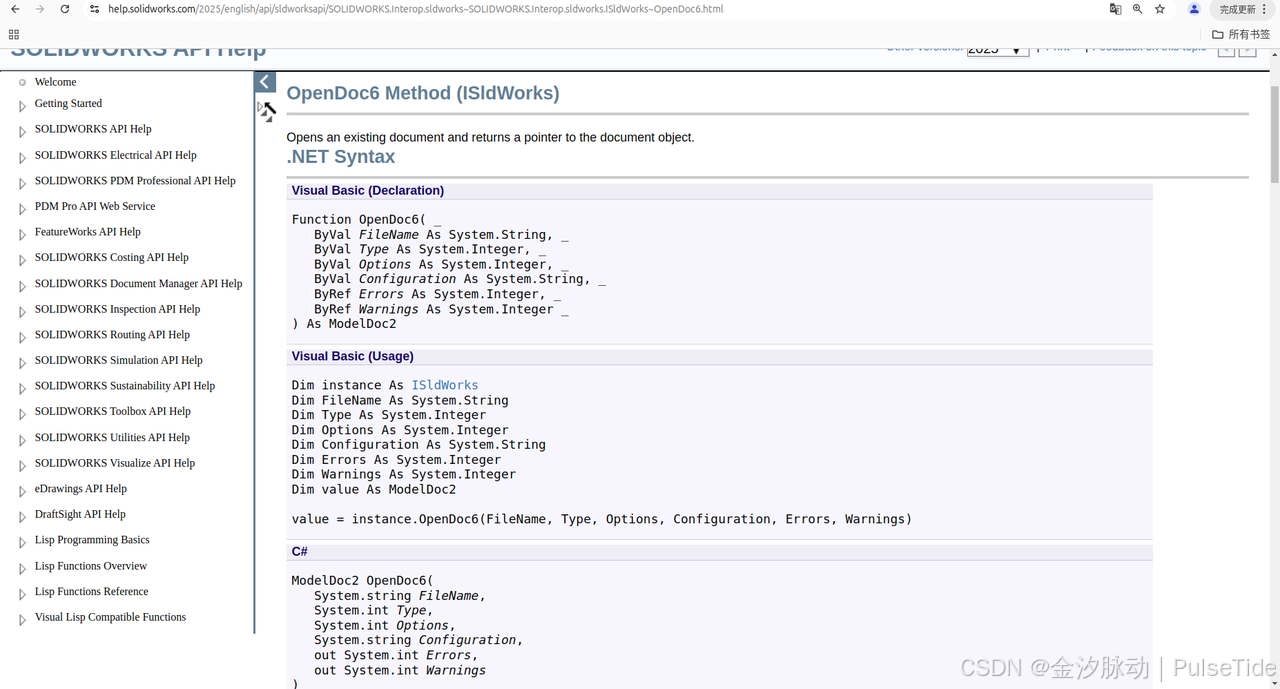
https://help.solidworks.com/2025/english/api/sldworksapi/SOLIDWORKS.Interop.sldworks~SOLIDWORKS.Interop.sldworks.ISldWorks~OpenDoc6.html
调用 OpenDoc6 方法
using SolidWorks.Interop.sldworks;
using SolidWorks.Interop.swconst;

namespace CmdWindowsFormsApp
{
    public class OpenDrawing
    {
        public ISldWorks swApp = SWGlobalInstance.GetSldWorksApp();
        public void Run()
        {

            swApp.Visible = true;

            swApp.OpenDoc6("C:\\app\\MyMacro\\my1.drwdot", (int)swDocumentTypes_e.swDocDRAWING, (int)swOpenDocOptions_e.swOpenDocOptions_Silent, "", -1, -1);

            swApp.SendMsgToUser2("OpenDoc Done.", (int)swMessageBoxIcon_e.swMbInformation, (int)swMessageBoxBtn_e.swMbOk);
        }
    }
}
8、自动标注选中的视图
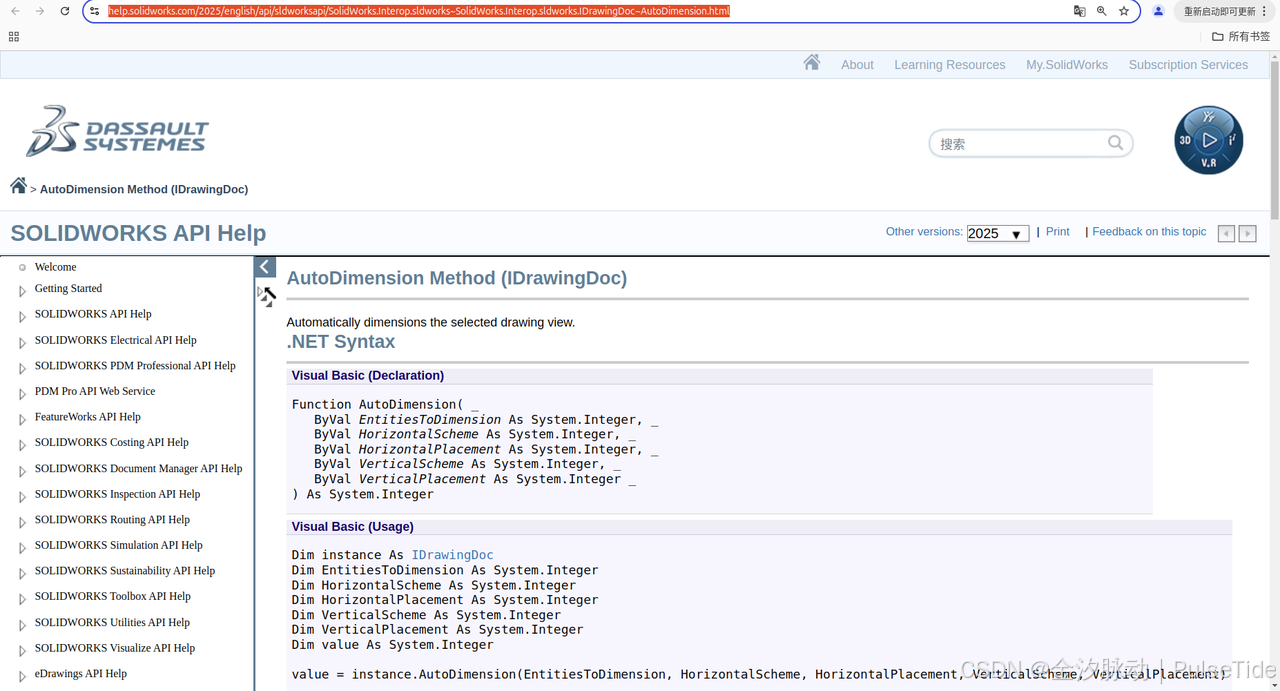
https://help.solidworks.com/2025/english/api/sldworksapi/SolidWorks.Interop.sldworks~SolidWorks.Interop.sldworks.IDrawingDoc~AutoDimension.html
调用 AutoDimension 方法
var topView = drawingDoc.CreateDrawViewFromModelView3(partPath, "*Top", 0.1, 0.2, 0.0);
_ = swModel.Extension.SelectByID2(topView.Name, "DRAWINGVIEW", 0, 0, 0, false, 0, null, 0);
drawingDoc.AutoDimension((int)swAutodimEntities_e.swAutodimEntitiesAll, (int)swAutodimScheme_e.swAutodimSchemeChain, (int)swAutodimHorizontalPlacement_e.swAutodimHorizontalPlacementBelow, (int)swAutodimScheme_e.swAutodimSchemeChain, (int)swAutodimVerticalPlacement_e.swAutodimVerticalPlacementRight);
可以控制标注位置,
// 水平上方
swAutodimHorizontalPlacement_e.swAutodimHorizontalPlacementAbove
// 水平下方
swAutodimHorizontalPlacement_e.swAutodimHorizontalPlacementAbove
// 垂直右侧
swAutodimVerticalPlacement_e.swAutodimVerticalPlacementRight
// 垂直左侧
swAutodimVerticalPlacement_e.swAutodimVerticalPlacementLeft
(swAutodimEntities_e)可以控制对哪些实体进行标注,Supported entities are lines, points, vertices, faces, sketch entities, center lines, and center marks.
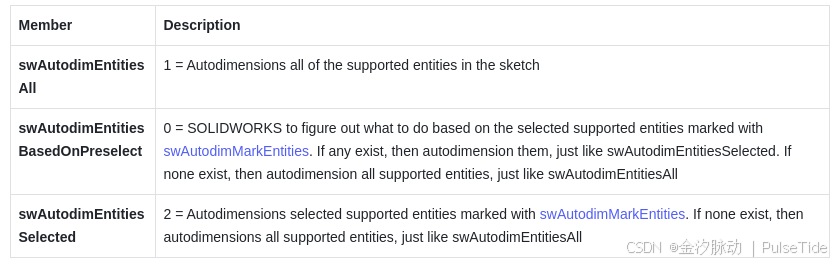
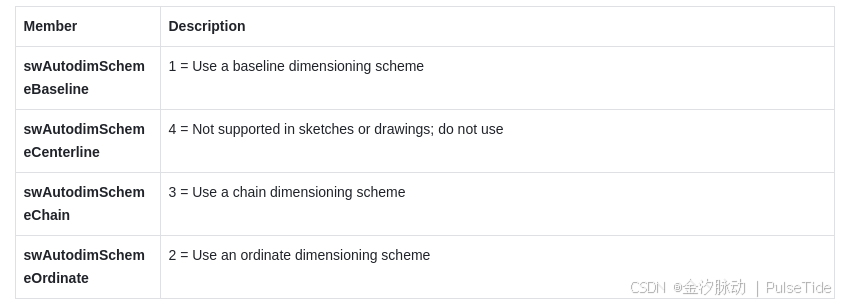
(swAutodimScheme_e)可以控制标注策略,
9、SW 系统语言对视图的影响
ViewName must exactly match the name of the model view. For example, the names of the standard views begin with an asterisk. This asterisk is part of the view name and must be included (for example, “*Front”).
bool useEnglishLanguage = swApp.GetUserPreferenceToggle((int)swUserPreferenceToggle_e.swUseEnglishLanguage);

var topView = drawingDoc.CreateDrawViewFromModelView3(partPath, useEnglishLanguage ? "*Top" : "*上视", 0.1, 0.2, 0.0);
_ = swModel.Extension.SelectByID2(topView.Name, "DRAWINGVIEW", 0, 0, 0, false, 0, null, 0);
drawingDoc.AutoDimension((int)swAutodimEntities_e.swAutodimEntitiesAll, (int)swAutodimScheme_e.swAutodimSchemeChain, (int)swAutodimHorizontalPlacement_e.swAutodimHorizontalPlacementBelow, (int)swAutodimScheme_e.swAutodimSchemeChain, (int)swAutodimVerticalPlacement_e.swAutodimVerticalPlacementRight);
10、视图自适应放缩
// If this setting is set to True, then when a new drawing view is inserted, that view automatically scales to fit nicely on the drawing sheet.
// If there are no views on the sheet, the sheet scale is changed to the appropriate scale, and the view created uses the sheet scale.
swApp.SetUserPreferenceToggle((int)swUserPreferenceToggle_e.swAutomaticScaling3ViewDrawings, true);
11、视图对齐
12、自动选中
https://help.solidworks.com/2025/english/api/sldworksapi/SOLIDWORKS.Interop.sldworks~SOLIDWORKS.Interop.sldworks.IModelDocExtension~SelectByID2.htmlhttps://help.solidworks.com/2025/english/api/swconst/SOLIDWORKS.Interop.swconst~SOLIDWORKS.Interop.swconst.swSelectType_e.htmlhttps://help.solidworks.com/2025/english/api/sldworksapi/Select_All_in_Part_Assembly_or_Drawing_Example_CSharp.htm
// 标注类型
swSelectType_e.swSelDIMENSIONS
选中部分:通过选中视图来获取视图上的所有标注
 // 选中某视图中的单个标注
 swApp.SendMsgToUser2($"GetDimensionCount: {topView.GetDimensionCount4()}", (int)swMessageBoxIcon_e.swMbInformation, (int)swMessageBoxBtn_e.swMbOk);
 var dimensionIds = (string[]) topView.GetDimensionIds4();

 bool selectStatus = swModel.Extension.SelectByID2(dimensionIds[0], "DIMENSION", 0, 0, 0, false, 0, null, 0);
 if (!selectStatus)
 {
     swApp.SendMsgToUser2($"selectStatus: {selectStatus}", (int)swMessageBoxIcon_e.swMbInformation, (int)swMessageBoxBtn_e.swMbOk);
     return;
 }

 // 获取选择管理器
 SelectionMgr swSelMgr = swModel.SelectionManager;
 var nbrSelections = swSelMgr.GetSelectedObjectCount2(-1);
 //swApp.SendMsgToUser2($"Number of entities selected in drawing = {nbrSelections}" , (int)swMessageBoxIcon_e.swMbInformation, (int)swMessageBoxBtn_e.swMbOk);

 nbrSelections = nbrSelections - 1;

 // If selection is not a dimension, then exit
 if (swSelMgr.GetSelectedObjectType3(1, -1) != (int)swSelectType_e.swSelDIMENSIONS)
 {
     swApp.SendMsgToUser2("selection is not a dimension. exit.", (int)swMessageBoxIcon_e.swMbInformation, (int)swMessageBoxBtn_e.swMbOk);
     return;
 }

 // Auto Arrange:Distance between dimensions 0.001
 swModel.Extension.AlignDimensions((int)swAlignDimensionType_e.swAlignDimensionType_AutoArrange, 0.001);
选中全部:
 // 选中全部
 swModel.Extension.SelectAll();

 // 获取选择管理器
 SelectionMgr swSelMgr = swModel.SelectionManager;
 var nbrSelections = swSelMgr.GetSelectedObjectCount2(-1);
 //swApp.SendMsgToUser2($"Number of entities selected in drawing = {nbrSelections}" , (int)swMessageBoxIcon_e.swMbInformation, (int)swMessageBoxBtn_e.swMbOk);

 nbrSelections = nbrSelections - 1;

 // If selection is not a dimension, then exit
 if (swSelMgr.GetSelectedObjectType3(1, -1) != (int)swSelectType_e.swSelDIMENSIONS)
 {
     swApp.SendMsgToUser2("selection is not a dimension. exit.", (int)swMessageBoxIcon_e.swMbInformation, (int)swMessageBoxBtn_e.swMbOk);
     return;
 }

 // Auto Arrange:Distance between dimensions 0.001
 swModel.Extension.AlignDimensions((int)swAlignDimensionType_e.swAlignDimensionType_AutoArrange, 0.001);
// 取消选中
swModel.ClearSelection2(true);
13、按单个进行标注
IModelDoc2
AddHorizontalDimension2(水平标注)
AddVerticalDimension2(垂直标注)
AddDiameterDimension2(直径标注)
AddRadialDimension2(半径标注)
AddDimension2
SetParamValue(Sets the value of selected dimension (or parameter). )
IModelDocExtension
AddDimension Method
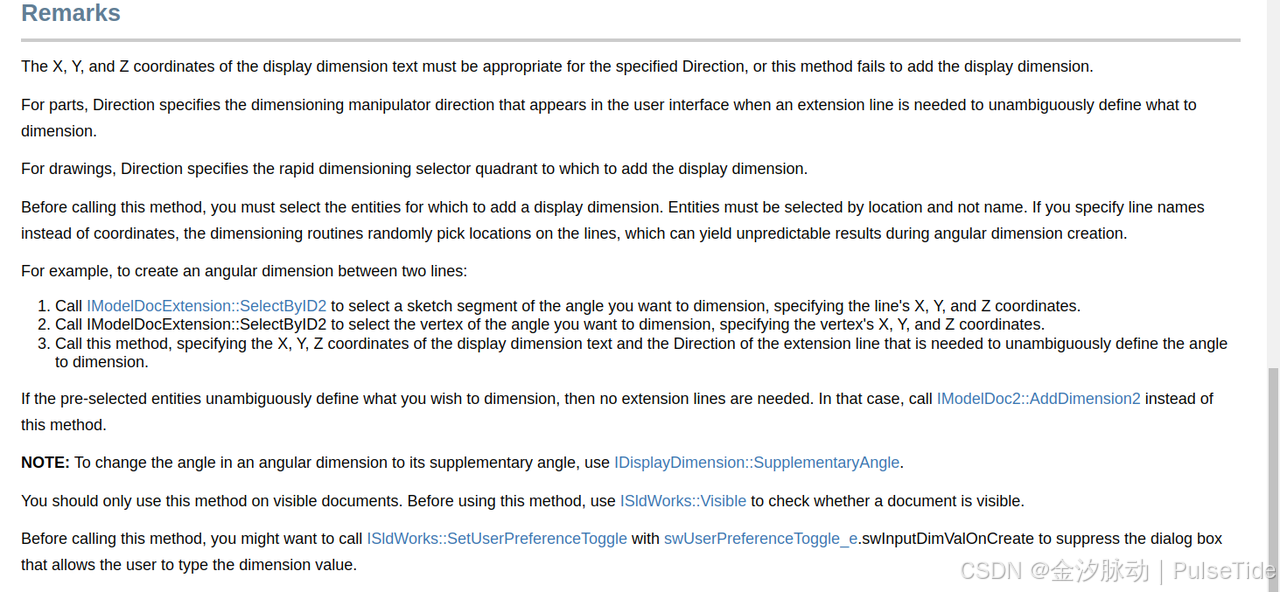
示例:为两条直线的夹角进行标注
Step1、通过(x,y,z)坐标选中两条直线
Step2、通过(x,y,z)坐标选中两条直线之间的夹角顶点
Step3、调用 AddDimension 方法进行标注
14、遍历读取工程图标注
 // 选中某视图中的单个标注
 swApp.SendMsgToUser2($"GetDimensionCount: {topView.GetDimensionCount4()}", (int)swMessageBoxIcon_e.swMbInformation, (int)swMessageBoxBtn_e.swMbOk);
 var dimensionIds = (string[]) topView.GetDimensionIds4();

 bool selectStatus = swModel.Extension.SelectByID2(dimensionIds[0], "DIMENSION", 0, 0, 0, false, 0, null, 0);
 if (!selectStatus)
 {
     swApp.SendMsgToUser2($"selectStatus: {selectStatus}", (int)swMessageBoxIcon_e.swMbInformation, (int)swMessageBoxBtn_e.swMbOk);
     return;
 }
 Debug.Print("Name of drawing view: " + swDrView.GetName2());
 var annArray = (object[])swDrView.GetAnnotations();
 if ((annArray != null))
 {
     foreach (object obj_loopVariable in annArray)
     {
         var obj = (object)obj_loopVariable;
         Annotation currAnn = (Annotation)obj;
         Debug.Print("  Name of annotation: " + currAnn.GetName());
         currAnn.Select3(true, null);
     }
 }
15、导入标注
https://help.solidworks.com/2025/english/api/swconst/solidworks.interop.swconst~solidworks.interop.swconst.swimportmodelitemssource_e.htmlhttps://help.solidworks.com/2025/english/api/sldworksapi/solidworks.interop.sldworks~solidworks.interop.sldworks.idrawingdoc~insertmodelannotations4.htmlhttps://help.solidworks.com/2025/english/api/sldworksapi/insert_model_annotations_example_csharp.htmhttps://help.solidworks.com/2025/english/api/sldworksapi/SolidWorks.Interop.sldworks~SolidWorks.Interop.sldworks.IDrawingDoc~InsertModelDimensions.html
using SolidWorks.Interop.sldworks;
using SolidWorks.Interop.swconst;
namespace CmdWindowsFormsApp
{
    internal class InsertModelAnnotations
    {
        public ISldWorks swApp = SWGlobalInstance.GetSldWorksApp();
        const int PaperSize = (int)swDwgPaperSizes_e.swDwgPaperBsize;
        const string TemplatePath = "C:\\ProgramData\\SOLIDWORKS\\SOLIDWORKS 2025\\templates\\gb_a3.drwdot";

        ModelDoc2 swModel;
        ModelDocExtension swModelDocExt;
        IDrawingDoc swDrawing;
        SelectionMgr swSelmgr;
        View swView;
        object[] annotations;
        object selAnnot;
        Annotation swAnnotation;
        SelectData swSelData;
        int mark;
        bool status;

        public void Main()
        {
           swApp.Visible = true;

            // TemplatePath = swApp.GetUserPreferenceStringValue((int)swUserPreferenceStringValue_e.swDefaultTemplateDrawing);
            swModel = (ModelDoc2)swApp.NewDocument(TemplatePath, PaperSize, 0, 0);
            swDrawing = (IDrawingDoc)swModel;
            swModelDocExt = (ModelDocExtension)swModel.Extension;
            swSelmgr = (SelectionMgr)swModel.SelectionManager;

            // Create drawing from assembly
            swView = (View)swDrawing.CreateDrawViewFromModelView3("C:\\app\\MyMacro\\CBL\\满筐检测转接件A-LV.sldprt", "*Front", 0.1314541543147, 0.1407887187817, 0);

            // Insert the annotations marked for the drawing
            //annotations = (object[])swDrawing.InsertModelAnnotations4((int)swImportModelItemsSource_e.swImportModelItemsFromEntireModel, (int)swInsertAnnotation_e.swInsertDimensionsMarkedForDrawing, true, false, false, false, false, false);
            annotations = (object[])swDrawing.InsertModelAnnotations3((int)swImportModelItemsSource_e.swImportModelItemsFromEntireModel, (int)swInsertAnnotation_e.swInsertDimensionsMarkedForDrawing, true, true, false, false);
        }
    }
}
16、调整标注位置
重排序之后排版有问题,使用SetPosition2 Method (IAnnotation)调整坐标位置
var swSelMgr = (SelectionMgr)swModel.SelectionManager;

var swDrView = (IView)drawingDoc.GetFirstView();
//First drawing view is the sheet, so get next drawing view
swDrView = (IView)swDrView.GetNextView();
while ((swDrView != null))
{
    Debug.Print("Name of drawing view: " + swDrView.GetName2());
    var dimensionIds = (string[])swDrView.GetDimensionIds4();
    for (int i = 0; i < dimensionIds.Length; i++)
    {
        bool selectStatus = swModel.Extension.SelectByID2(dimensionIds[i], "DIMENSION", 0, 0, 0, false, 0, null, 0);
        Debug.Print($"   dimensionId:{dimensionIds[i]}");

        var swDispDim = (DisplayDimension)swSelMgr.GetSelectedObject6(1, -1);

        Debug.Print($"   Dimension type as defined in swDimensionType_e: {swDispDim.Type2}, is Radius: {swDispDim.Type2 == (int)swDimensionType_e.swRadialDimension}");

        Annotation currAnn = swDispDim.GetAnnotation();
        var annotationPosition = (double[])currAnn.GetPosition();
        if (annotationPosition != null)
        {
            //Move the display dimension annotation 100mm to the right
            //currAnn.SetPosition2(annotationPosition[0] + 0.1, annotationPosition[1], annotationPosition[2]);
            Debug.Print($"--->position: {annotationPosition[0]},{annotationPosition[1]},{annotationPosition[2]}");
        }

        if ("D1@草图16@TestDrawingDoc@工程图视图14".Equals(dimensionIds[i]))
        {
            // 修改半径标注坐标(调整角度)
            //annotationPosition[0] = 0.3;
            //annotationPosition[1] = 0.4;
            currAnn.SetPosition2(0.28, 0.23, 0);
        }

        swModel.ClearSelection2(true);
        Debug.Print("==================================================");

    }

    swDrView = (IView)swDrView.GetNextView();
}
17、调整标注文字格式
 // 修改文本格式
 for (int j = 0; j < currAnn.GetTextFormatCount(); j++)
 {
     var swTextFormat = (TextFormat)currAnn.GetTextFormat(i);
     // Change text to be 10mm, bold, italic, Comic Sans MS font, and WidthFactor * 2
     swTextFormat.CharHeight = 0.01;
     swTextFormat.Bold = true;
     swTextFormat.Italic = true;
     swTextFormat.TypeFaceName = "Comic Sans MS";
     // 两倍宽度
     swTextFormat.WidthFactor = 2 * swTextFormat.WidthFactor;
     var bRet = currAnn.SetTextFormat(i, false, swTextFormat);
     // 文本居中
     swDispDim.CenterText = true;
     Debug.Print($"----SetTextFormat: {bRet}, CenterText: {swDispDim.CenterText}");
 }

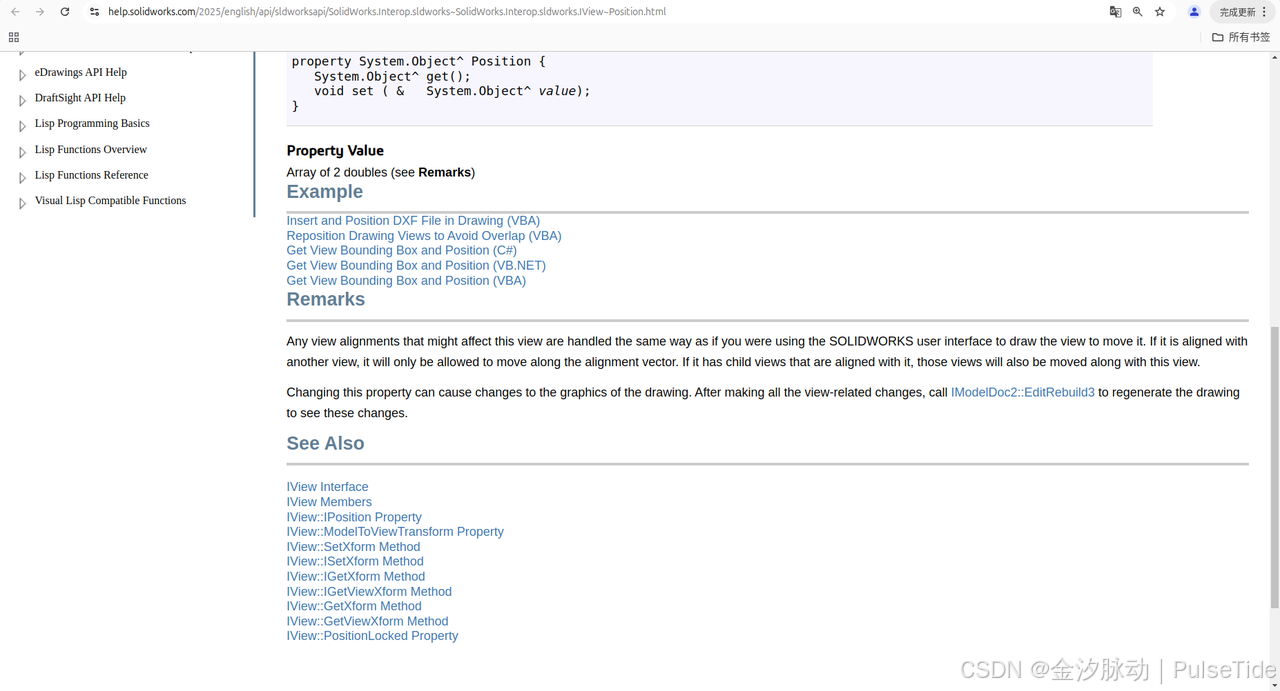
18、视图边界与中心坐标
https://help.solidworks.com/2025/english/api/sldworksapi/Get_View_Bounding_Box_and_Position_Example_CSharp.htmhttps://help.solidworks.com/2025/english/api/sldworksapi/SolidWorks.Interop.sldworks~SolidWorks.Interop.sldworks.IView~Position.html
使用视图属性Position Property (IView)获取。
Gets or sets the X and Y location of the model view’s geometric center, relative to the drawing sheet origin.
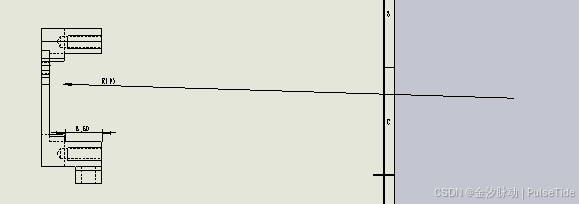
var outline = (double[])swDrView.GetOutline();
var pos = (double[])swDrView.Position;
Debug.Print("View = " + swDrView.Name);
Debug.Print("  X and Y positions = (" + pos[0] * 1000.0 + ", " + pos[1] * 1000.0 + ") mm");
Debug.Print("  X and Y bounding box minimums = (" + outline[0] * 1000.0 + ", " + outline[1] * 1000.0 + ") mm");
Debug.Print("  X and Y bounding box maximums = (" + outline[2] * 1000.0 + ", " + outline[3] * 1000.0 + ") mm");
Debug.Print("  Position locked?" + swDrView.PositionLocked);
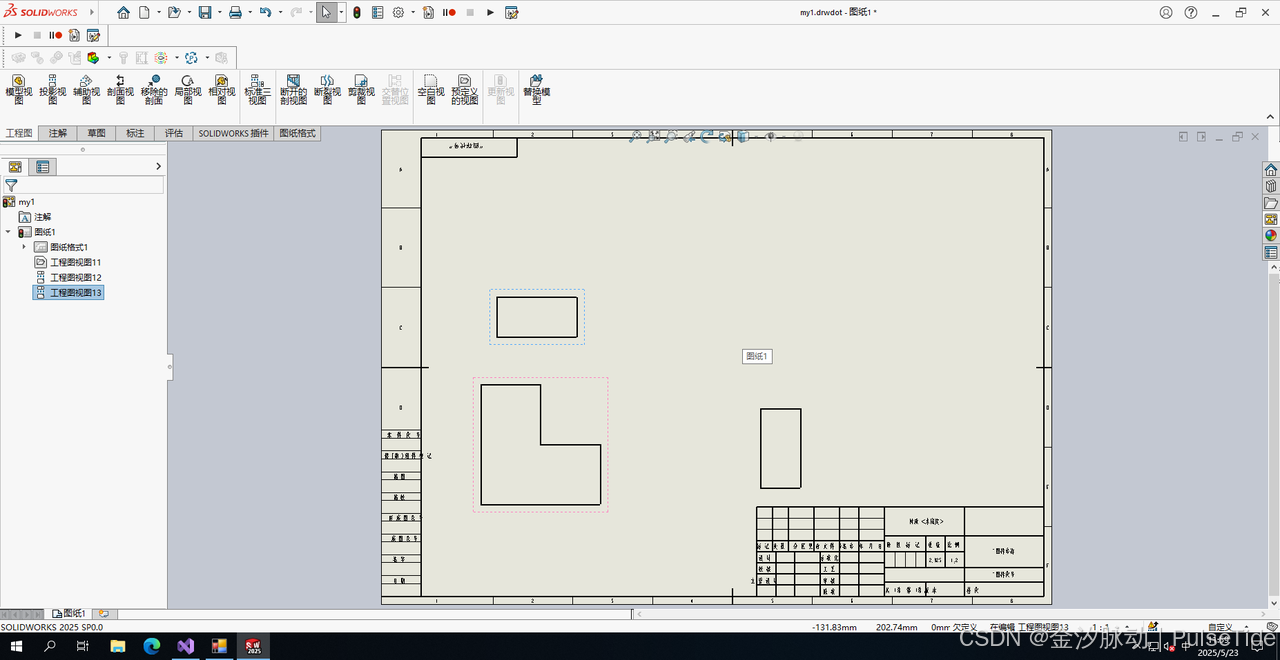
View = 工程图视图12
  X and Y positions = (120, 180) mm
  X and Y bounding box minimums = (52.06, 138.06) mm
  X and Y bounding box maximums = (187.94, 221.94) mm
  Position locked?False
View = 工程图视图13
  X and Y positions = (120, 100) mm
  X and Y bounding box minimums = (52.06, 80.06) mm
  X and Y bounding box maximums = (187.94, 119.94) mm
  Position locked?False
View = 工程图视图14
  X and Y positions = (270, 180) mm
  X and Y bounding box minimums = (250.06, 138.06) mm
  X and Y bounding box maximums = (289.94, 221.94) mm
  Position locked?False
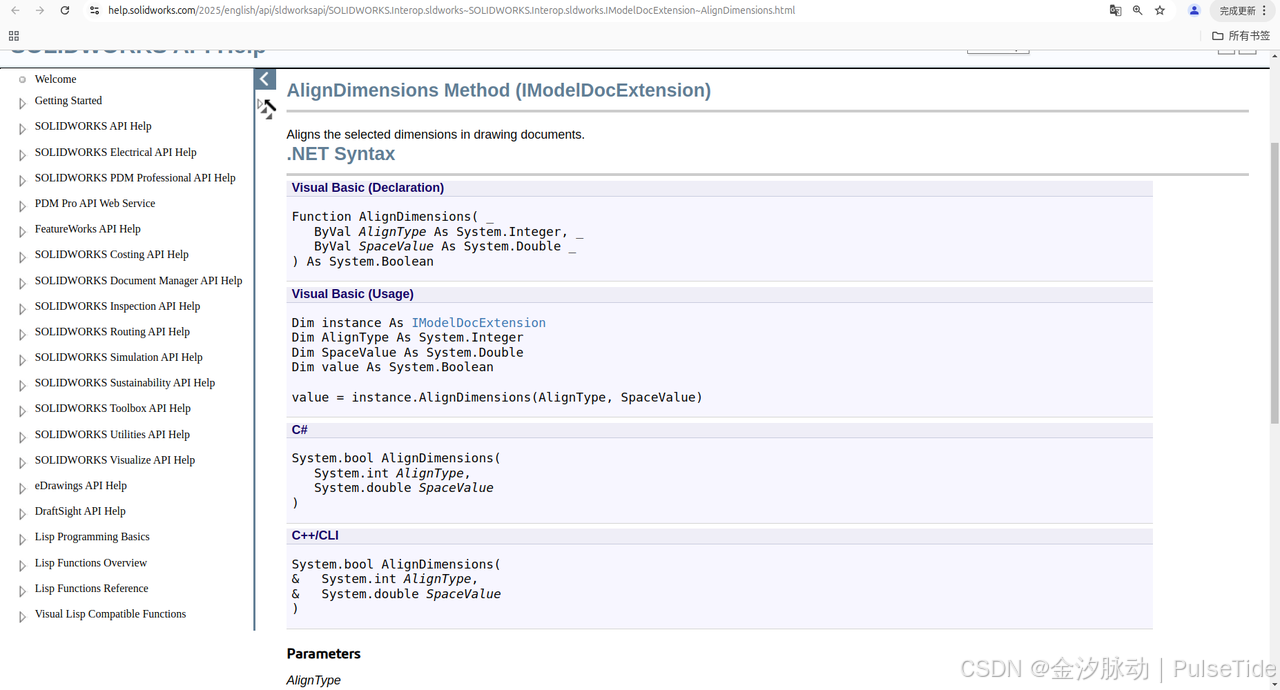
19、标注对齐
IModelDoc2
AlignOrdinate
AlignParallelDimensions
IModelDocExtension
AlignDimensions Method
20、视图中心标注
   swDrView.AutoInsertCenterMarks2(
       (int)swAutoInsertCenterMarkTypes_e.swAutoInsertCenterMarkType_Slots,
      (int)swCenterMarkConnectionLine_e.swCenterMark_ShowNoConnectLines,
       true, true, true, 0.0025, 0.0025, true, true, 0.0
       );
21、获取实体信息
获取视图的边,边的两个顶点,以及顶点的坐标
// Get all edges of this component that are visible in this drawing view
vEdges = (object[])drView.GetVisibleEntities2(Comp, (int)swViewEntityType_e.swViewEntityType_Edge);

var edge = (Edge)vEdges[itr];
// 开始顶点
var startVertex = (Vertex) edge.GetStartVertex();
// 开始顶点坐标
var startPoint = (double[]) startVertex.GetPoint();
// 结束顶点
var endVertex = (Vertex) edge.GetEndVertex();
// 结束顶点坐标
var endPoint = (double[])endVertex.GetPoint();
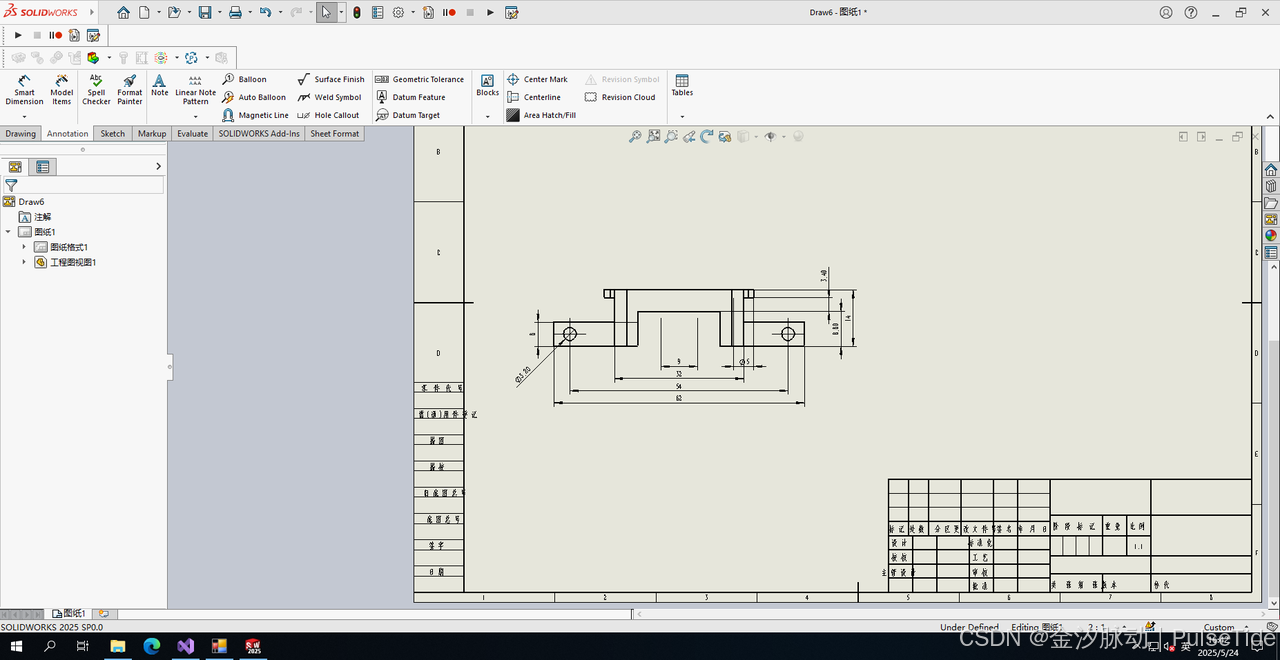
四、创建工程图并标注代码实现
var swApp = Utility.GetSwApp();
// 加速执行
swApp.CommandInProgress = true;

// 是否使用英语菜单
bool useEnglishLanguage = swApp.GetUserPreferenceToggle((int)swUserPreferenceToggle_e.swUseEnglishLanguage);

// 当前零件文档
var swModel = (IModelDoc2)swApp.ActiveDoc;

// 如果没有打开任何文档
if (swModel == null)
{
    swApp.SendMsgToUser2("请先打开一个零件文档!", (int)swMessageBoxIcon_e.swMbWarning, (int)swMessageBoxBtn_e.swMbOk);
    return;
}
// .slddrw => 工程图 .sldprt => 零件文档
var partPath = swModel.GetPathName();

// 如果是工程图
if (string.IsNullOrEmpty(partPath) || partPath.EndsWith(".slddrw") || partPath.EndsWith(".SLDDRW"))
{
    MyInsertModelAnnotations(swApp);
    return;
}

if (!partPath.EndsWith(".sldprt") && !partPath.EndsWith(".SLDDRW"))
{
    swApp.SendMsgToUser2("仅支持 sldprt 类型的文档!", (int)swMessageBoxIcon_e.swMbWarning, (int)swMessageBoxBtn_e.swMbOk);
    return;
}

// TemplatePath = swApp.GetUserPreferenceStringValue((int)swUserPreferenceStringValue_e.swDefaultTemplateDrawing);
swModel = (ModelDoc2)swApp.NewDocument(_templatePath, _paperSize, 0, 0);

// 工程图实例
var swDrawing = (IDrawingDoc)swModel;

// 在右侧工程图窗体刷新所有视图
swDrawing.GenerateViewPaletteViews(partPath);

// Create drawing from assembly
var swView1 = (View)swDrawing.CreateDrawViewFromModelView3(partPath, useEnglishLanguage ? "*Bottom" : "*下视", 0.1, 0.15, 0);
var swViewCurrent = (View)swDrawing.CreateDrawViewFromModelView3(partPath, useEnglishLanguage ? "*Isometric" : "*等轴测", 0.22, 0.1, 0);

_ = swModel.Extension.SelectByID2(swView1.Name, "DRAWINGVIEW", 0, 0, 0, false, 0, null, 0);
var swView2 = (View)swDrawing.CreateUnfoldedViewAt3(0.22, 0.15, 0, false);
// 隐藏线可见
swView2.SetDisplayMode4(false, (int)swDisplayMode_e.swHIDDEN_GREYED, false, true, true);

_ = swModel.Extension.SelectByID2(swView1.Name, "DRAWINGVIEW", 0, 0, 0, false, 0, null, 0);
var swView3 = (View)swDrawing.CreateUnfoldedViewAt3(0.1, 0.10, 0, false);

// Insert the annotations marked for the drawing
var annotations = (object[])swDrawing.InsertModelAnnotations3((int)swImportModelItemsSource_e.swImportModelItemsFromEntireModel, (int)swInsertAnnotation_e.swInsertDimensionsMarkedForDrawing | (int)swInsertAnnotation_e.swInsertDimensionsNotMarkedForDrawing | (int)swInsertAnnotation_e.swInsertholeCallout | (int)swInsertAnnotation_e.swInsertHoleWizardLocationDimensions | (int)swInsertAnnotation_e.swInsertHoleWizardProfileDimensions , true, true, true, false);

// 视图自动调整
swModel.ViewZoomtofit2();

swModel.EditRebuild3();
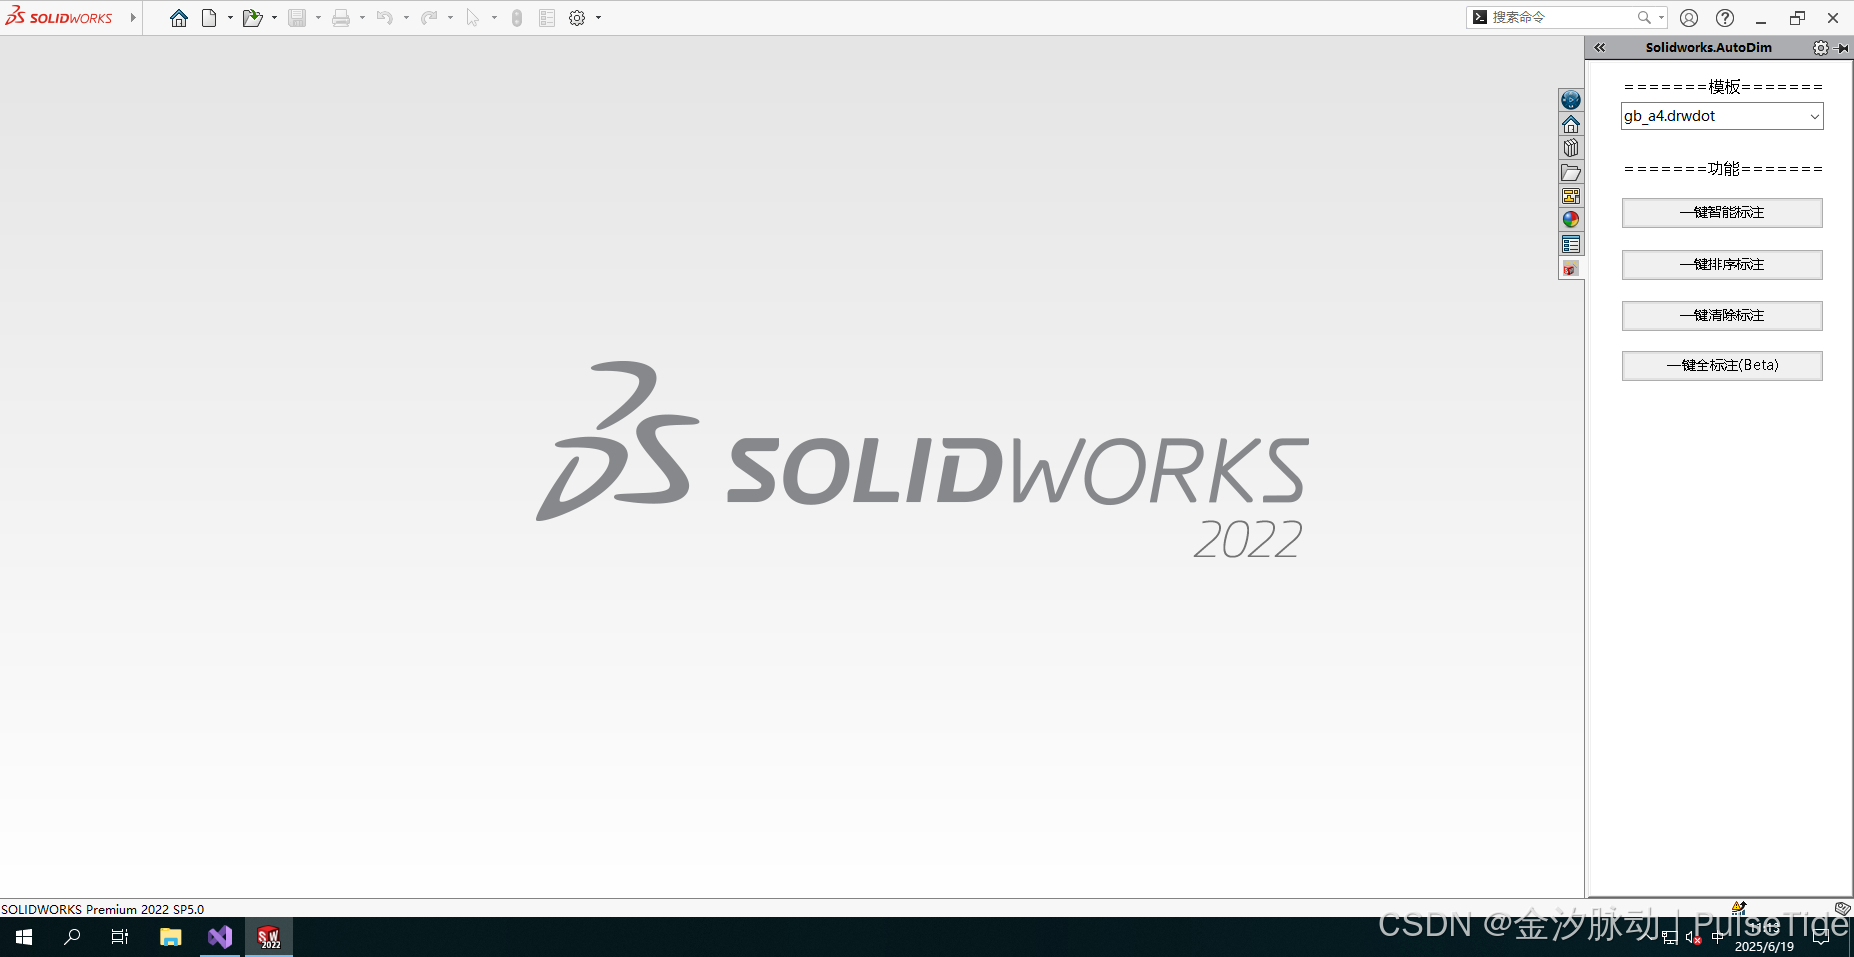
打开一个零件文档,然后使用插件的一键标注即可自动创建工程图并自动标注。
五、补充与纠正
若存在任何内容上的遗漏或错误,恳请不吝赐教。


 5577
5577

 被折叠的 条评论
为什么被折叠?
被折叠的 条评论
为什么被折叠?
 到【灌水乐园】发言


