


简介
树这种数据结构在前端日常开发中是比较常见的,诸如经常接触的DOM树、级联选择、树形控件等等,都是利用树这种数据结构实现的。
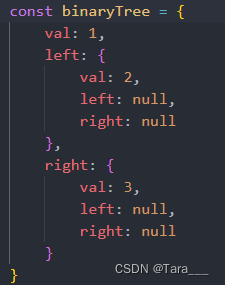
在JS中一般是通过Object和Array这两家数据类型来构建树结构的。结构如下图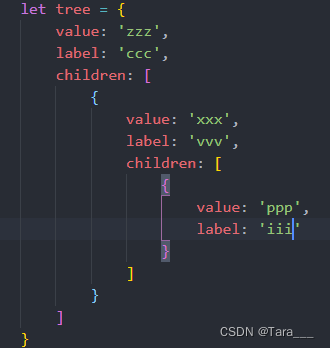
深度优先遍历
口诀:顾名思义就是尽可能深入的去搜索树的分支并且访问他们。用图看一下就比较好理解了。
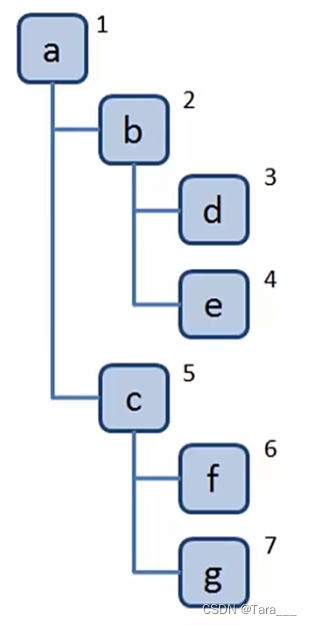
算法实现:这个算法实现也比较简单,通过forEach去递归遍历子节点就可以了,代码如下
const tree = {
        val: 'a',
        children: [
            {
                val: 'b',
                children: [
                    {
                        val: 'd',
                        children: []
                    },
                    {
                        val: 'e',
                        children: []
                    }
                ]
            },
            {
                val: 'c',
                children: [
                    {
                        val: 'f',
                        children: []
                    },
                    {
                        val: 'g',
                        children: []
                    }
                ]
            }
        ]
    }

    const dfs = (root) => {
        console.log(root.val);
        root.children.forEach(dfs)
    }

    dfs(tree)
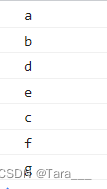
结果如下
广度优先遍历
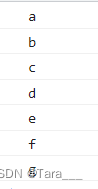
口诀:先访问离根节点最近的节点,也可以理解成先访问完自己的子节点,再去访问子节点的子节点,概念图如下。

算法实现:主要思路就是通过一个队列,1.将根节点入队,2.把队头出队并且访问,3.最后把队头的子节点依次入队,重复 2、3点直到队列为空为止。
const tree = {
        val: 'a',
        children: [
            {
                val: 'b',
                children: [
                    {
                        val: 'd',
                        children: []
                    },
                    {
                        val: 'e',
                        children: []
                    }
                ]
            },
            {
                val: 'c',
                children: [
                    {
                        val: 'f',
                        children: []
                    },
                    {
                        val: 'g',
                        children: []
                    }
                ]
            }
        ]
    }

    const bfs = (root) => {
        const q = [root]  // 创建队列
        while (q.length > 0) {
            const n = q.shift()  // 队头出队
            console.log(n.val);  // 访问队头
            n.children.forEach(child => q.push(child))  // 遍历队头子节点并依次入队
        }
    }

    bfs(tree)
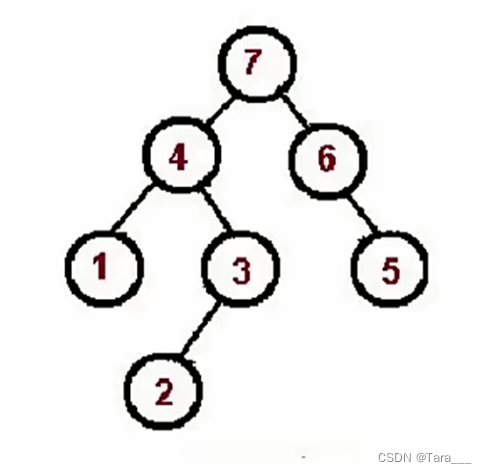
二叉树的先中后序遍历
二叉树概念:树中每个节点最多只能有两个子节点
JS中模拟二叉树可以通过Object来实现:
先序遍历
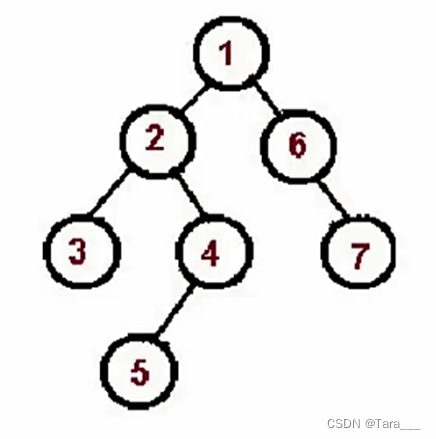
口诀:先访问根节点,再对根节点的左子树进行先序遍历,再对根节点的右子树进行先序遍历,简单来说就是 根 => 左 => 右 这么个顺序。遍历顺序如下
代码如下:
    const binaryTree = {
        val: 1,
        left: {
            val: 2,
            left: {
                val: 4,
                left: null,
                right: null
            },
            right: {
                val: 5,
                left: null,
                right: null
            }
        },
        right: {
            val: 3,
            left: {
                val: 6,
                left: null,
                right: null
            },
            right: {
                val: 7,
                left: null,
                right: null
            }
        }
    }

    const preOrder = (root) => {
        if (!root) return   // 拦截 null
        console.log(root.val);  // 访问根节点
        preOrder(root.left);  // 递归左子树
        preOrder(root.right);  // 递归右子树
    }

    preOrder(binaryTree)
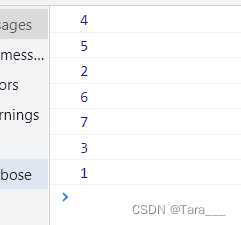
结果如下

中序遍历
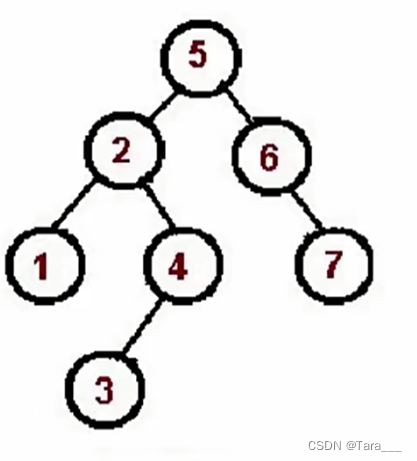
口诀:先访问根节点的左子树并对其进行中序遍历,再访问根节点,最后访问根节点的右子树并进行中序遍历,也就是 左子树 => 根 => 右子树
理解图如下:
代码如下:
    const binaryTree = {
        val: 1,
        left: {
            val: 2,
            left: {
                val: 4,
                left: null,
                right: null
            },
            right: {
                val: 5,
                left: null,
                right: null
            }
        },
        right: {
            val: 3,
            left: {
                val: 6,
                left: null,
                right: null
            },
            right: {
                val: 7,
                left: null,
                right: null
            }
        }
    }

    const inOrder = (root) => {
        if (!root) return   // 拦截 null
        inOrder(root.left);  // 递归左子树
        console.log(root.val);  // 访问根节点
        inOrder(root.right);  // 递归右子树
    }

    inOrder(binaryTree)
结果如下:
后序遍历
口诀:访问根节点左子树并进行后序遍历,再访问根节点右子树并进行后续遍历,最后访问根节点
代码:
    const binaryTree = {
        val: 1,
        left: {
            val: 2,
            left: {
                val: 4,
                left: null,
                right: null
            },
            right: {
                val: 5,
                left: null,
                right: null
            }
        },
        right: {
            val: 3,
            left: {
                val: 6,
                left: null,
                right: null
            },
            right: {
                val: 7,
                left: null,
                right: null
            }
        }
    }

    const postOrder = (root) => {
        if (!root) return   // 拦截 null
        postOrder(root.left);  // 递归左子树
        postOrder(root.right);  // 递归右子树
        console.log(root.val);  // 访问根节点
    }

    postOrder(binaryTree)
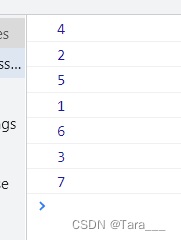
结果:
先中后序遍历 非递归版
(1)先序遍历
这里先将right入队,是因为我们用了数组的pop方法,拿到的是数组最后一个元素,先将right推入数组中再将left推入数组中,可以保证先将left出队并访问。
const preOrder = (root) => {
        if (!root) return   // 拦截 null
        let stack = [root]
        while (stack.length) {
            let n = stack.pop()
            console.log(n.val)
            if (n.right) stack.push(n.right)
            if (n.left) stack.push(n.left)
        }
    }
(2)中序遍历
    const inOrder = (root) => {
        if (!root) return   // 拦截 null
        let stack = []
        let p = root
        while (stack.length || p) {
            while(p) {
                stack.push(p)
                p = p.left
            }
            let n = stack.pop()
            console.log(n.val)
            p = n.right
        }
    }
(3)后序遍历
这里的思路就是通过两个数组来记录出队的顺序,stack数组用来遍历树的节点,按照 根 => 右 => 左的顺序将节点树推入 outputStack 数组中,这样一来在 outputStack 数组中就可以通过pop方法来实现 左 => 右 => 根 的后序遍历顺序了。
    const postOrder = (root) => {
        if (!root) return   // 拦截 null
        let stack = [root]
        let outputStack = []
        while (stack.length) {
            const n = stack.pop()
            outputStack.push(n)
            if (n.left) stack.push(n.left)
            if (n.right) stack.push(n.right)
        }
        while (outputStack.length) {
            const n = outputStack.pop()
            console.log(n.val)
        }
    }


 1243
1243

 被折叠的 条评论
为什么被折叠?
被折叠的 条评论
为什么被折叠?
 到【灌水乐园】发言


