


2021SC@SDUSC
前言
上一篇博客分析了Pipeline创建、Pipleline 初始节点:head和tail、添加一个新的节点,这次分析一下回调添加完成事件和删除一个节点操作。
Pipeline代码分析
1.回调添加完成事件
上一篇博客中分析添加一个节点时,分析了DefaultChannelPipeline中的addLast() 方法:
    public final ChannelPipeline addLast(EventExecutorGroup group, String name, ChannelHandler handler) {
        final AbstractChannelHandlerContext newCtx;
        synchronized (this) {
            checkMultiplicity(handler);
            newCtx = newContext(group, filterName(name, handler), handler);
            addLast0(newCtx);
            if (!registered) {
                newCtx.setAddPending();
                callHandlerCallbackLater(newCtx, true);
                return this;
            }
            EventExecutor executor = newCtx.executor();
            if (!executor.inEventLoop()) {
                newCtx.setAddPending();
                executor.execute(new Runnable() {
                    @Override
                    public void run() {
                        callHandlerAdded0(newCtx);
                    }
                });
                return this;
            }
        }
        callHandlerAdded0(newCtx);
        return this;
    }
上次分析到了第7行的 addLast0(newCtx),现在看一下倒数第三行的 callHandlerAdded0(newCtx),这是addLast方法的最后一个关键步骤:回调添加完成事件。追踪一下:
 private void callHandlerAdded0(final AbstractChannelHandlerContext ctx) {
        try {
            ctx.callHandlerAdded();
        } catch (Throwable t) {
            boolean removed = false;
            try {
                remove0(ctx);
                ctx.callHandlerRemoved();
                removed = true;
            } catch (Throwable t2) {
                if (logger.isWarnEnabled()) {
                    logger.warn("Failed to remove a handler: " + ctx.name(), t2);
                }
            }

            if (removed) {
                fireExceptionCaught(new ChannelPipelineException(
                        ctx.handler().getClass().getName() +
                        ".handlerAdded() has thrown an exception; removed.", t));
            } else {
                fireExceptionCaught(new ChannelPipelineException(
                        ctx.handler().getClass().getName() +
                        ".handlerAdded() has thrown an exception; also failed to remove.", t));
            }
        }
    }
跟着第3行的 ctx.callHandlerAdded() 继续追踪,落到了AbstractChannelHandlerContext类中:
final void callHandlerAdded() throws Exception {
        if (setAddComplete()) {
            handler().handlerAdded(this);
        }
    }
ctx 通过 handler() 获取到了当前的channel,再调用channel的handlerAdded()。这个handlerAdded()是定义在ChannelHandler中的回调方法,如果跟进去,会落在 ChannelHandler 接口中。那么这个函数的实现类是谁呢?是ChannelInitializer,在上一篇博客中已经说过,bootstrap 在调用 handler()时会创建一个 ChannelInitializer 对象,ChannelInitializer 是Netty提供的辅助类,用于提供针对channel的初始化工作,也就是批量初始化channel。这个类中有三个重要的方法:
1、重写的channel的 handlerAdded()
2、initChannel()
3、removeState()
看一下handlerAdded() 方法:
 public void handlerAdded(ChannelHandlerContext ctx) throws Exception {
        if (ctx.channel().isRegistered()) {
            if (initChannel(ctx)) {
                removeState(ctx);
            }
        }
    }
可以看到它调用了本类的removeState(),这个函数就是把Initializer这个初始化器删除。为什么要删除?前面说过,ChannelInitializer 是一个辅助类,目的是通过它往Channel中一次性添加多个handler, 现在handler添加完成了,就可以把它删除了。看一下它的源码:
 private void removeState(final ChannelHandlerContext ctx) {
        if (ctx.isRemoved()) {
            initMap.remove(ctx);
        } else {
            ctx.executor().execute(new Runnable() {
                @Override
                public void run() {
                    initMap.remove(ctx);
                }
            });
        }
initMap.remove(ctx) :从pipeline中移除
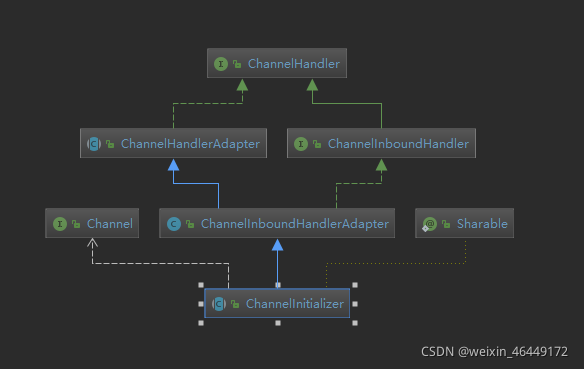
下面是ChannelInitializer 的继承体系图:
另外,可以自定义ChannelHandler实现类的handlerAdded()方法,由此实现回调。并且可以在这个回调方法中做一些相关的操作。
2.删除一个节点
删除操作可以分为:找到节点、从链表中删除、回调删除事件三个步骤。
1.首先看一下怎样找到节点:
删除节点的方法是ChannelPipeline的remove()方法,参数是当前ChannelHandler对象,看一下remove方法的实现:
    public final ChannelPipeline remove(ChannelHandler handler) {
        remove(getContextOrDie(handler));
        return this;
    }
跟进getContextOrDie() :
private AbstractChannelHandlerContext getContextOrDie(String name) {
        AbstractChannelHandlerContext ctx = (AbstractChannelHandlerContext) context(name);
        if (ctx == null) {
            throw new NoSuchElementException(name);
        } else {
            return ctx;
        }
    }
跟进 context() :
public final ChannelHandlerContext context(String name) {
        if (name == null) {
            throw new NullPointerException("name");
        }

        return context0(name);
    }
描述一下上述过程:根据传入的ChannelHandler对象去ChannelPipeline链表中找对应的节点(AbstractChannelHandlerContext),如果找不到就出异常,如果找到了要删除的节点,再调用remove()方法进行删除。
2.看一下从链表中删除节点是怎样实现的:
看一下remove() 方法的实现:
private AbstractChannelHandlerContext remove(final AbstractChannelHandlerContext ctx) {
        assert ctx != head && ctx != tail;
        synchronized (this) {
            remove0(ctx);
            if (!registered) {
                callHandlerCallbackLater(ctx, false);
                return ctx;
            }

            EventExecutor executor = ctx.executor();
            if (!executor.inEventLoop()) {
                executor.execute(new Runnable() {
                    @Override
                    public void run() {
                        callHandlerRemoved0(ctx);
                    }
                });
                return ctx;
            }
        }
        callHandlerRemoved0(ctx);
        return ctx;
    }
第一句:assert ctx != head && ctx != tail 判断要删去的节点是否是头节点或尾节点,如果是ChannelPipeline初始化的头尾两个节点,那么是不能被删除的。
实际的删除操作是由第四行的 remove0(ctx) 实现的,看一下remove0() 的实现:
 private static void remove0(AbstractChannelHandlerContext ctx) {
        AbstractChannelHandlerContext prev = ctx.prev;
        AbstractChannelHandlerContext next = ctx.next;
        prev.next = next;
        next.prev = prev;
    }
是很简单的双向链表删除节点的操作。
3.再看回调删除事件:
重新看一下 remove() 方法的实现,最后有一句:callHandlerRemoved0(ctx); 很眼熟吧,跟上面讲到的回调添加完成事件 callHandlerAdded0(newCtx); 是类似的。看一下这个函数的实现:
private void callHandlerRemoved0(final AbstractChannelHandlerContext ctx) {
        try {
            ctx.callHandlerRemoved();
        } catch (Throwable t) {
            fireExceptionCaught(new ChannelPipelineException(
                    ctx.handler().getClass().getName() + ".handlerRemoved() has thrown an exception.", t));
        }
    }
同样,我们跟进 callHandlerRemoved() :
final void callHandlerRemoved() throws Exception {
        try {
            if (handlerState == ADD_COMPLETE) {
                handler().handlerRemoved(this);
            }
        } finally {
            setRemoved();
        }
    }
和回调添加完成事件一样,ctx 通过 handler() 获取到了当前的channel,再调用channel的handlerRemoved()。handlerRemoved()也是定义在 ChannelHandler 接口中的方法,实现类也同样是 ChannelInitializer 类,看一下ChannelInitializer 类中对这个方法的重写:
public void handlerRemoved(ChannelHandlerContext ctx) throws Exception {
        initMap.remove(ctx);
    }
initMap.remove(ctx) ,在上面分析回调完成事件时已经碰到过这个操作,在 removeState() 中调用了这个操作,实现了从pipeline中移除节点。


 被折叠的 条评论
为什么被折叠?
被折叠的 条评论
为什么被折叠?
 到【灌水乐园】发言


