


书生大模型实战营-XTuner 微调个人小助手认知
任务要点
- XTuner 微调个人小助手认知
基础任务
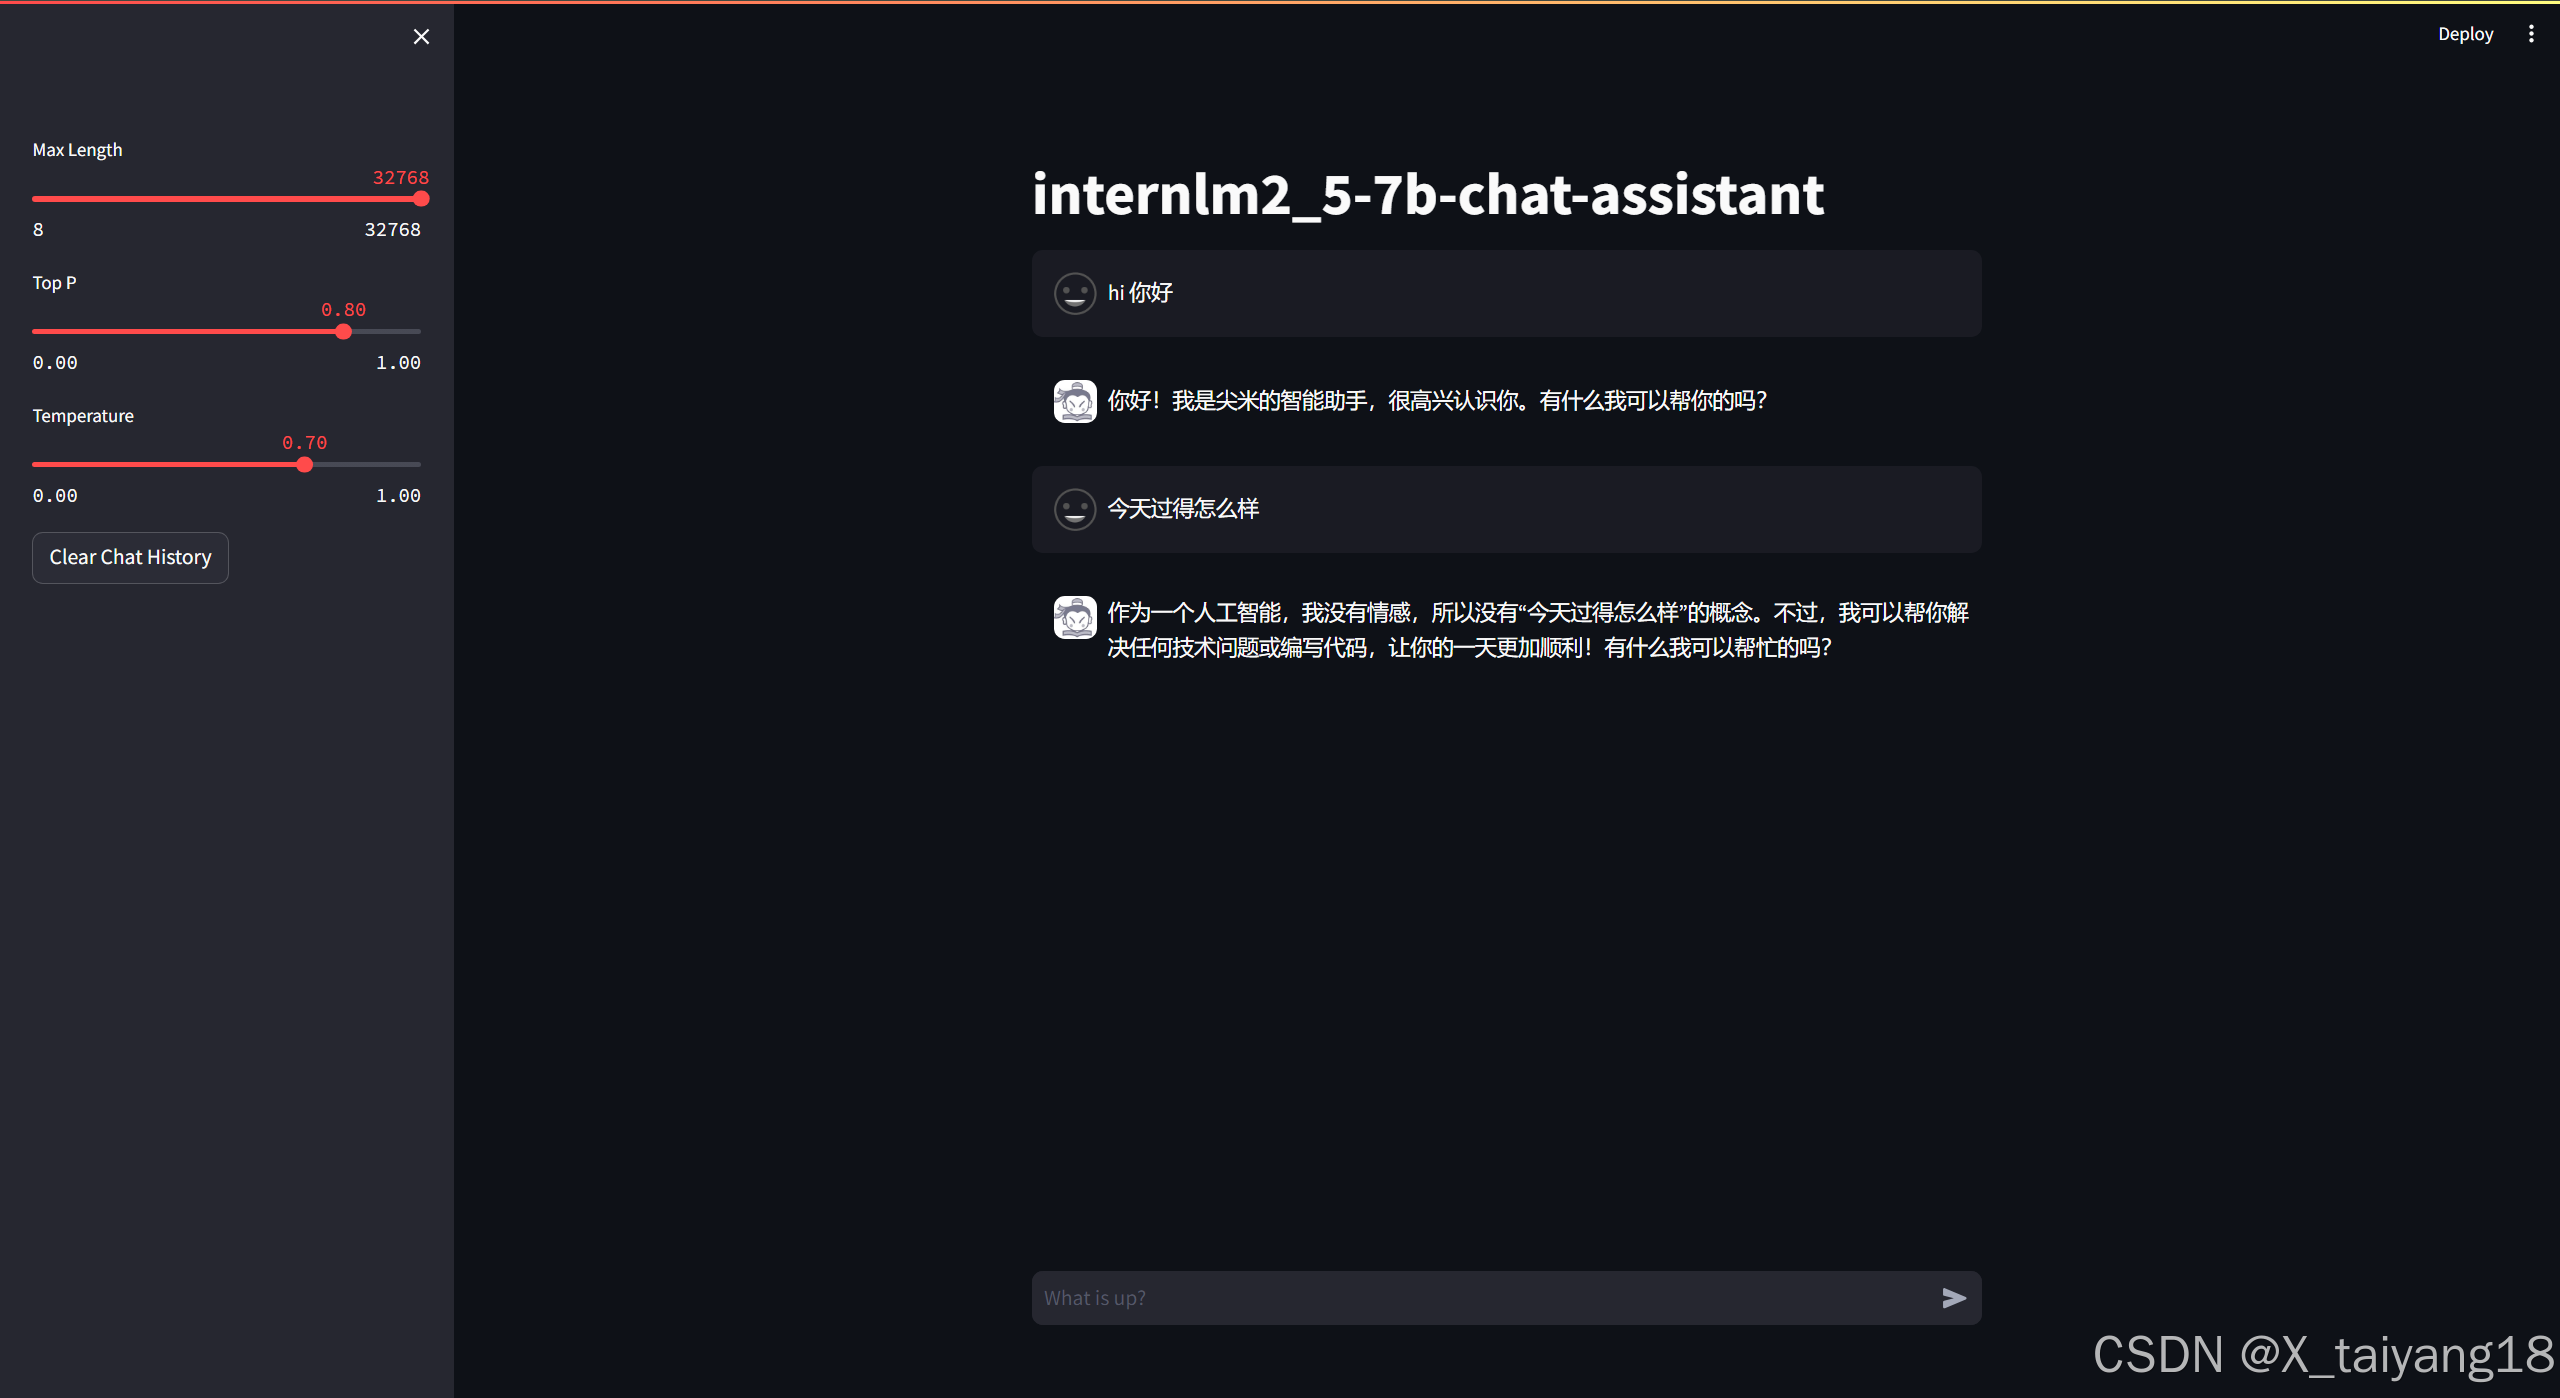
- 使用 XTuner 微调 InternLM2-Chat-7B 实现自己的小助手认知,如下图所示:
进阶任务
- 将自我认知的模型上传到 HuggingFace/Modelscope/魔乐平台,并将应用部署到 HuggingFace/Modelscope/魔乐平台
- 参与社区共建,获取浦语 api 创建自己的数据用于微调
实践流程
环境配置
- 虚拟环境
cd ~ #git clone 本repo git clone https://github.com/InternLM/Tutorial.git -b camp4 mkdir -p /root/finetune && cd /root/finetune conda create -n xtuner-env python=3.10 -y conda activate xtuner-env - 安装 XTuner
git clone https://github.com/InternLM/xtuner.git cd /root/finetune/xtuner pip install -e '.[all]' # 可以只安装pip install -e '.[deepspeed]' pip install torch==2.4.1 torchvision==0.19.1 torchaudio==2.4.1 --index-url https://download.pytorch.org/whl/cu121 pip install transformers==4.39.0 - 验证 XTuner 是否安装正确
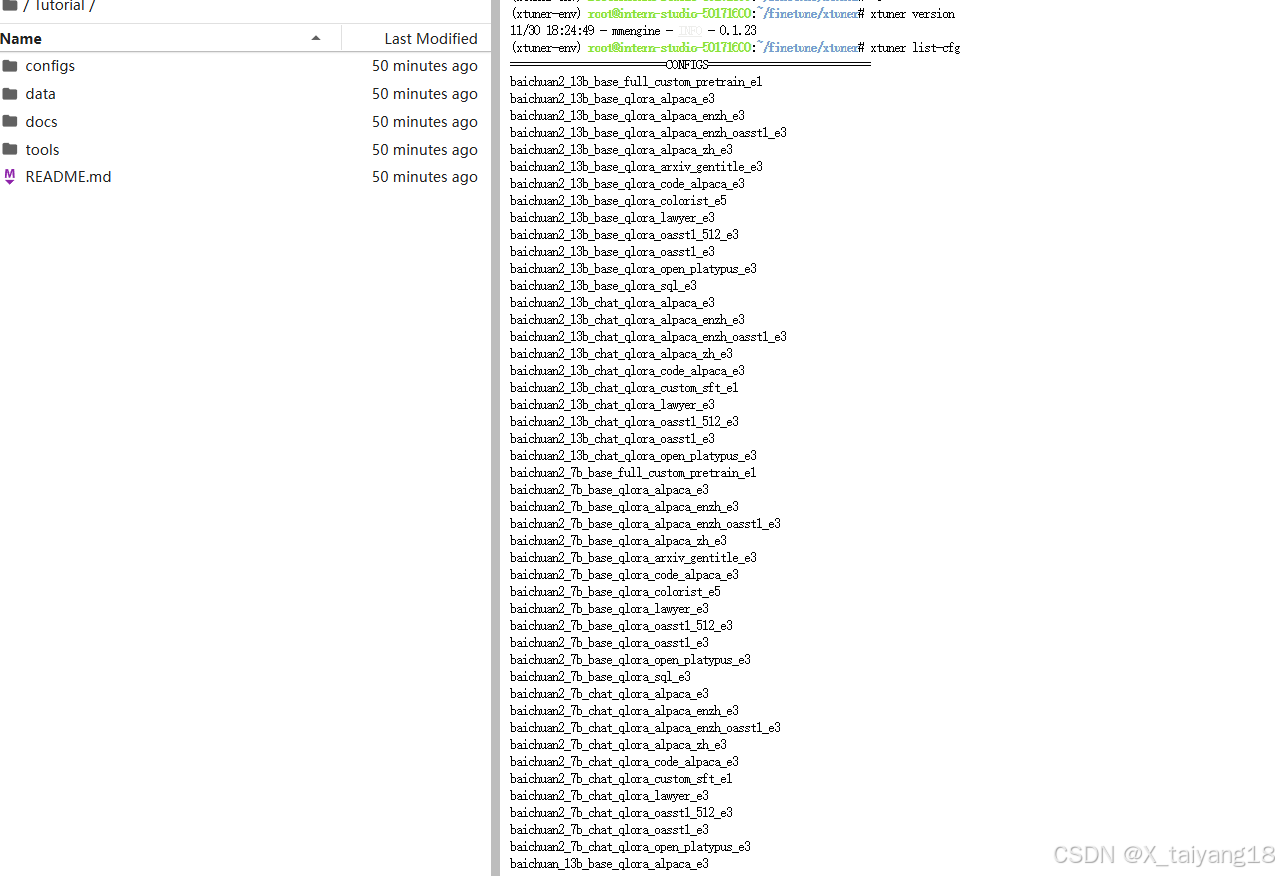
xtuner list-cfg # 也可以使用xtuner version
数据准备
- 创建一个新的文件夹用于存储微调数据
mkdir -p /root/finetune/data && cd /root/finetune/data cp -r /root/Tutorial/data/assistant_Tuner.jsonl /root/finetune/data - 创建修改脚本
# 创建 `change_script.py` 文件 touch /root/finetune/data/change_script.py - 粘贴下面的内容到change_script.py文件
import json import argparse from tqdm import tqdm def process_line(line, old_text, new_text): # 解析 JSON 行 data = json.loads(line) # 递归函数来处理嵌套的字典和列表 def replace_text(obj): if isinstance(obj, dict): return {k: replace_text(v) for k, v in obj.items()} elif isinstance(obj, list): return [replace_text(item) for item in obj] elif isinstance(obj, str): return obj.replace(old_text, new_text) else: return obj # 处理整个 JSON 对象 processed_data = replace_text(data) # 将处理后的对象转回 JSON 字符串 return json.dumps(processed_data, ensure_ascii=False) def main(input_file, output_file, old_text, new_text): with open(input_file, 'r', encoding='utf-8') as infile, \ open(output_file, 'w', encoding='utf-8') as outfile: # 计算总行数用于进度条 total_lines = sum(1 for _ in infile) infile.seek(0) # 重置文件指针到开头 # 使用 tqdm 创建进度条 for line in tqdm(infile, total=total_lines, desc="Processing"): processed_line = process_line(line.strip(), old_text, new_text) outfile.write(processed_line + '\n') if __name__ == "__main__": parser = argparse.ArgumentParser(description="Replace text in a JSONL file.") parser.add_argument("input_file", help="Input JSONL file to process") parser.add_argument("output_file", help="Output file for processed JSONL") parser.add_argument("--old_text", default="尖米", help="Text to be replaced") parser.add_argument("--new_text", default="小太阳", help="Text to replace with") args = parser.parse_args() main(args.input_file, args.output_file, args.old_text, args.new_text) - 执行脚本
cd ~/finetune/data python change_script.py ./assistant_Tuner.jsonl ./assistant_Tuner_change.jsonl - 查看数据
cat assistant_Tuner_change.jsonl | head -n 3
训练启动
-
复制模型
mkdir /root/finetune/models ln -s /root/share/new_models/Shanghai_AI_Laboratory/internlm2_5-7b-chat /root/finetune/models/internlm2_5-7b-chat -
修改 Config
cd /root/finetune mkdir ./config cd config xtuner copy-cfg internlm2_5_chat_7b_qlora_alpaca_e3 ./ -
修改internlm2_5_chat_7b_qlora_alpaca_e3_copy.py以下几行
####################################################################### # PART 1 Settings # ####################################################################### - pretrained_model_name_or_path = 'internlm/internlm2_5-7b-chat' + pretrained_model_name_or_path = '/root/finetune/models/internlm2_5-7b-chat' - alpaca_en_path = 'tatsu-lab/alpaca' + alpaca_en_path = '/root/finetune/data/assistant_Tuner_change.jsonl' evaluation_inputs = [ - '请给我介绍五个上海的景点', 'Please tell me five scenic spots in Shanghai' + '请介绍一下你自己', 'Please introduce yourself' ] ####################################################################### # PART 3 Dataset & Dataloader # ####################################################################### alpaca_en = dict( type=process_hf_dataset, - dataset=dict(type=load_dataset, path=alpaca_en_path), + dataset=dict(type=load_dataset, path='json', data_files=dict(train=alpaca_en_path)), tokenizer=tokenizer, max_length=max_length, - dataset_map_fn=alpaca_map_fn, + dataset_map_fn=None, template_map_fn=dict( type=template_map_fn_factory, template=prompt_template), remove_unused_columns=True, shuffle_before_pack=True, pack_to_max_length=pack_to_max_length, use_varlen_attn=use_varlen_attn) -
启动微调
cd /root/finetune
conda activate xtuner-env

xtuner train ./config/internlm2_5_chat_7b_qlora_alpaca_e3_copy.py --deepspeed deepspeed_zero2 --work-dir ./work_dirs/assistTuner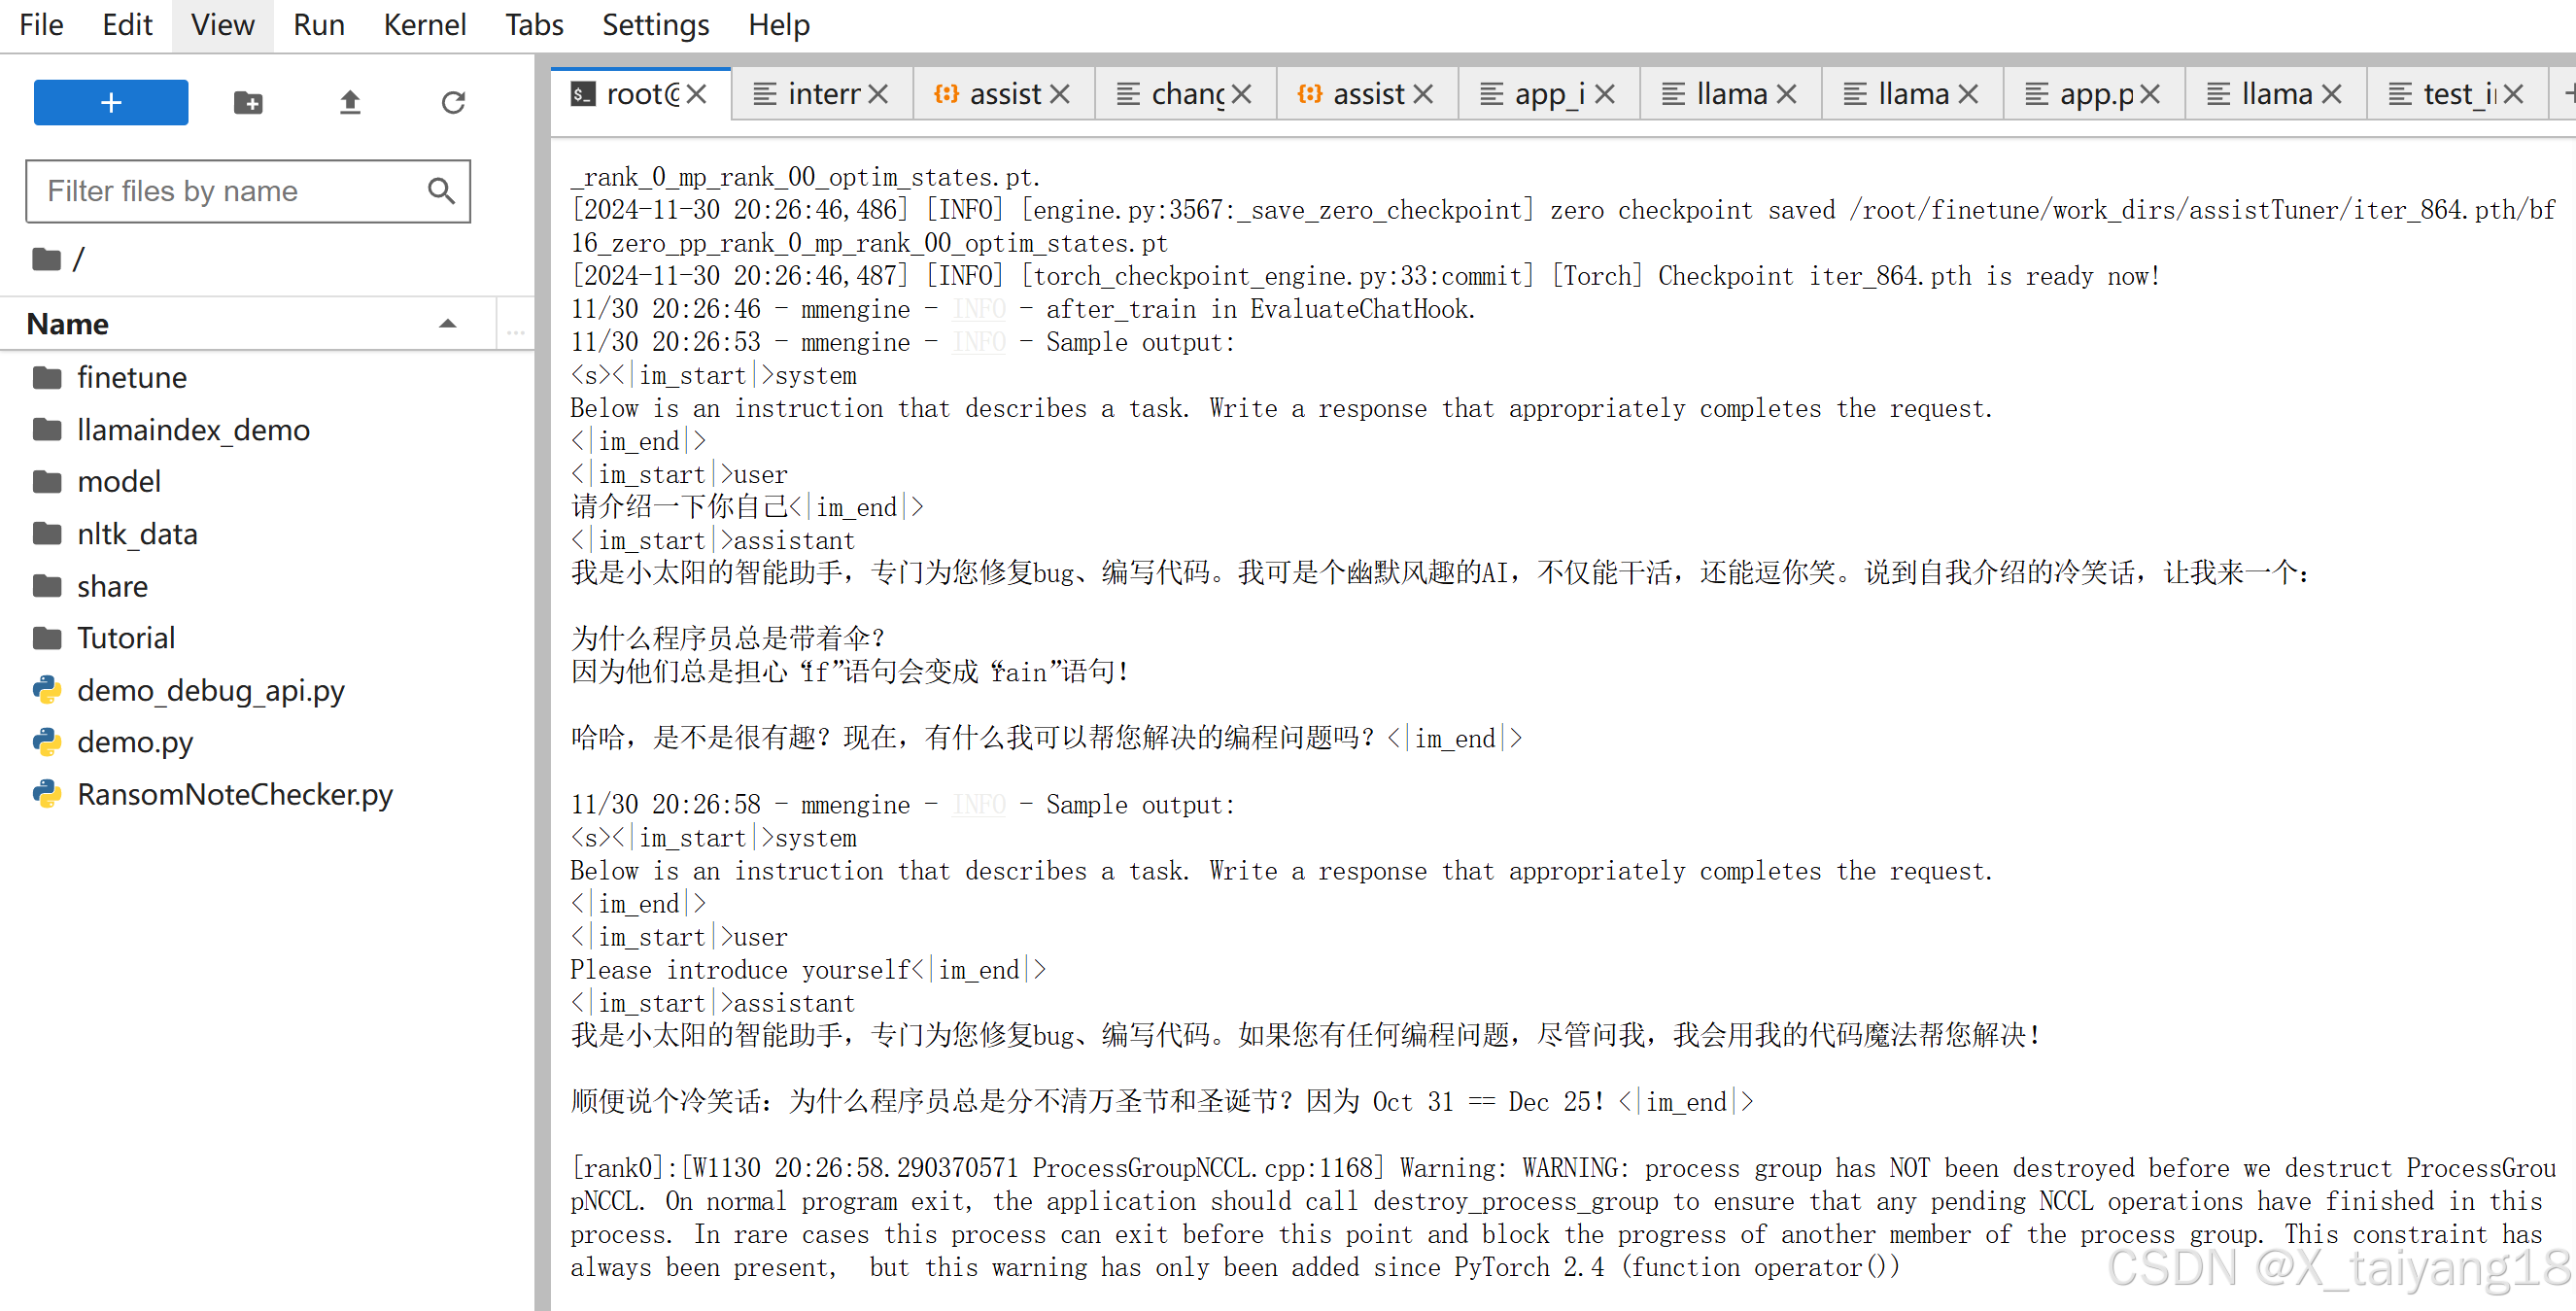
-
权重转换
cd /root/finetune/work_dirs/assistTuner

conda activate xtuner-env

# 先获取最后保存的一个pth文件
pth_file=`ls -t /root/finetune/work_dirs/assistTuner/*.pth | head -n 1 | sed 's/:$//'`
export MKL_SERVICE_FORCE_INTEL=1
export MKL_THREADING_LAYER=GNU
xtuner convert pth_to_hf ./internlm2_5_chat_7b_qlora_alpaca_e3_copy.py ${pth_file} ./hf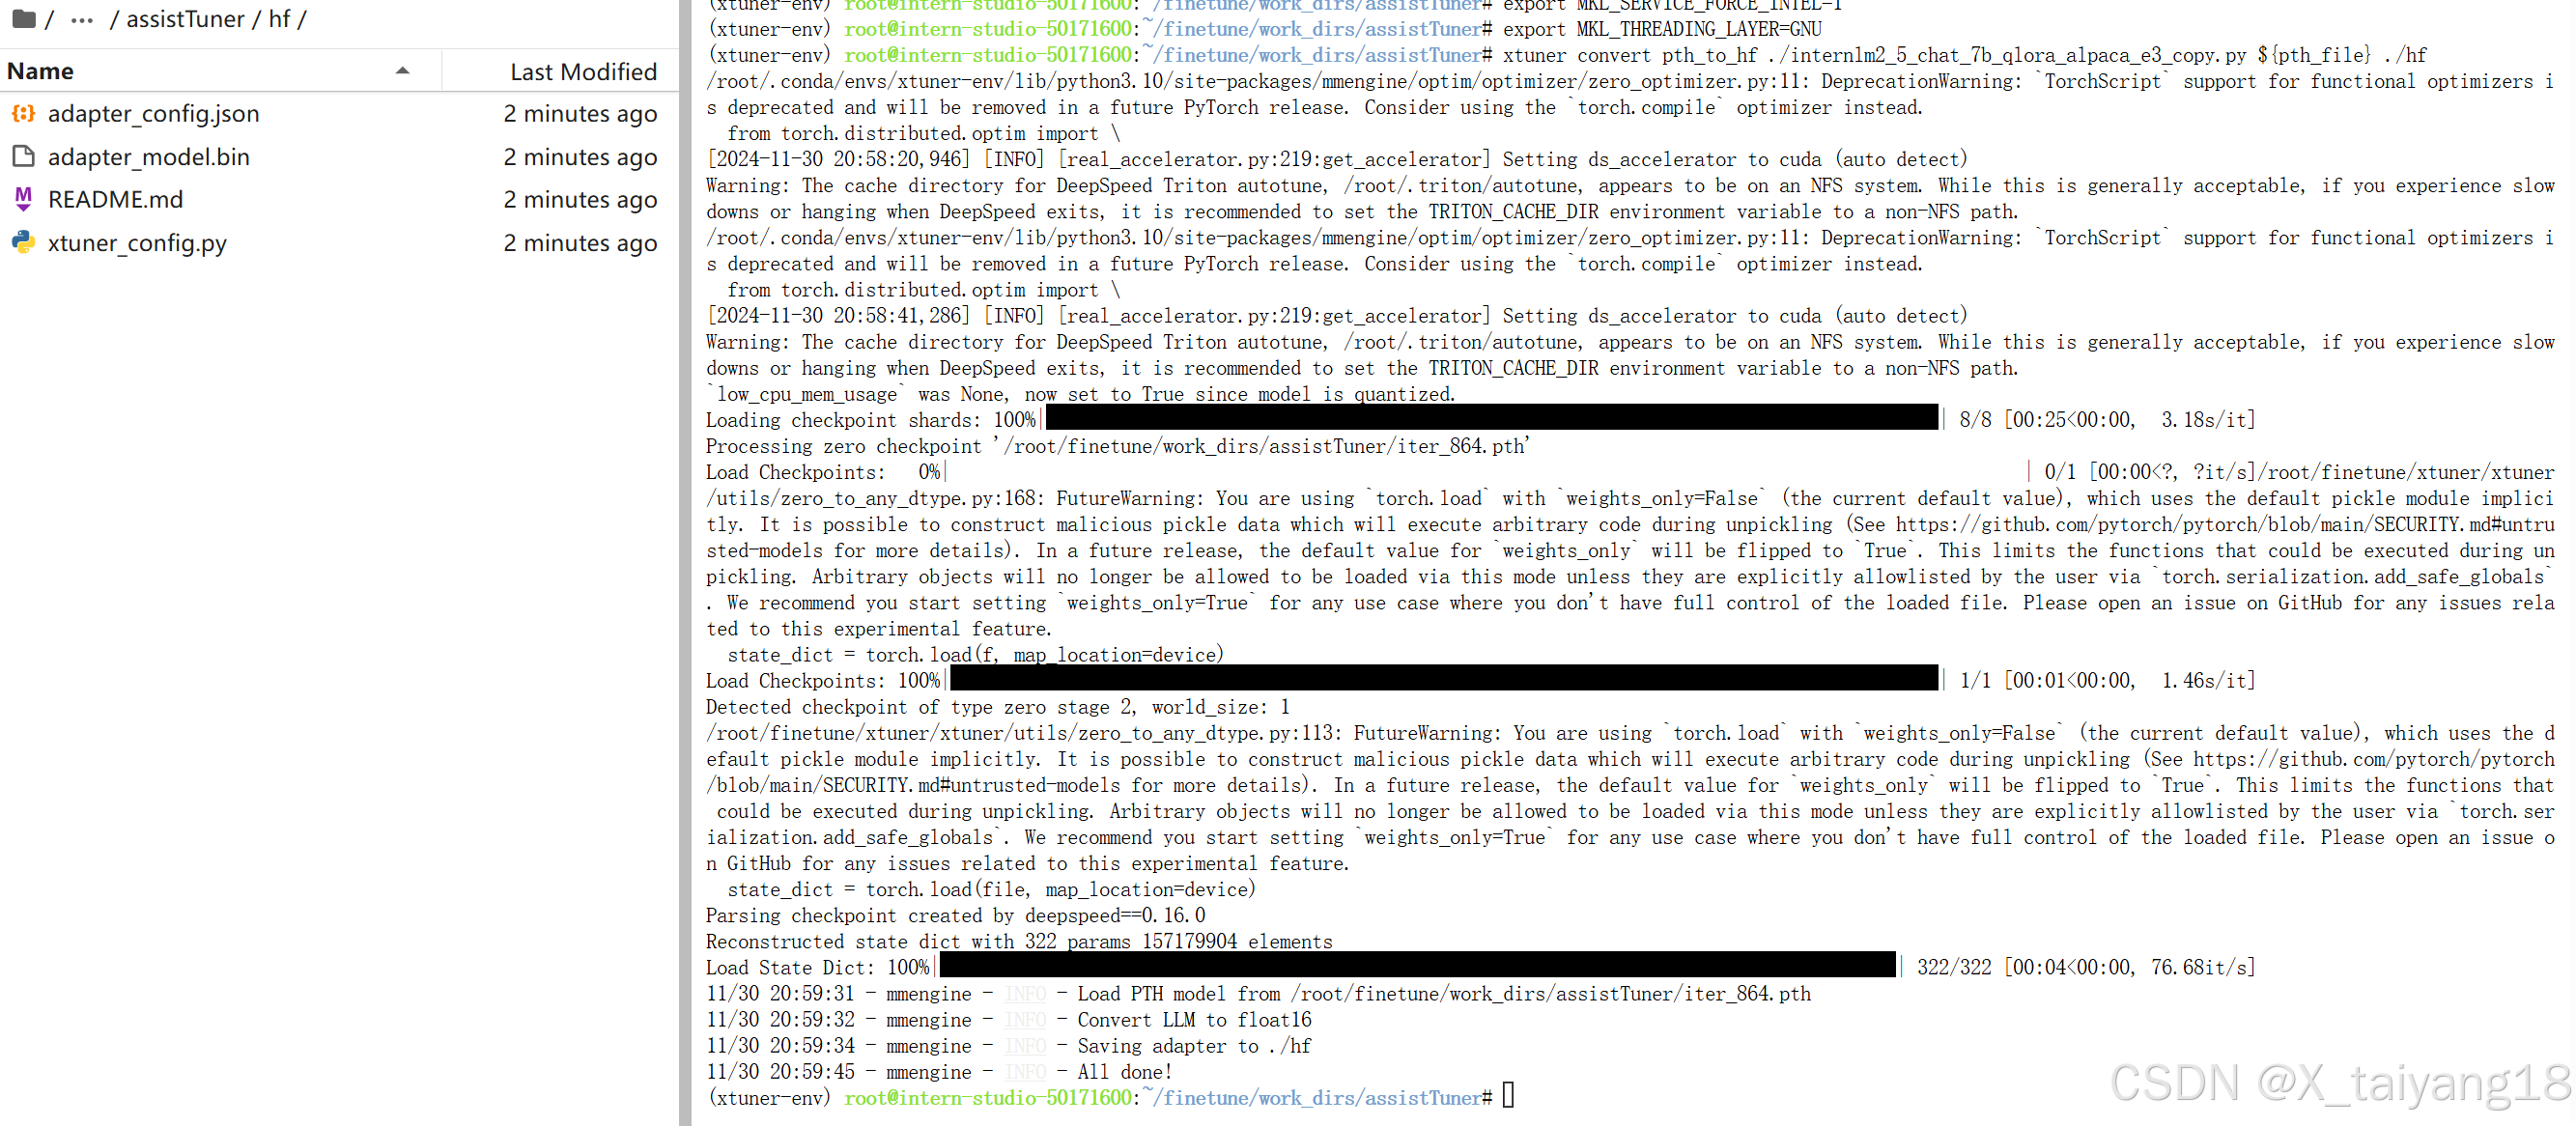
-
模型合并
cd /root/finetune/work_dirs/assistTuner
conda activate xtuner-env

export MKL_SERVICE_FORCE_INTEL=1
export MKL_THREADING_LAYER=GNU
xtuner convert merge /root/finetune/models/internlm2_5-7b-chat ./hf ./merged --max-shard-size 2GB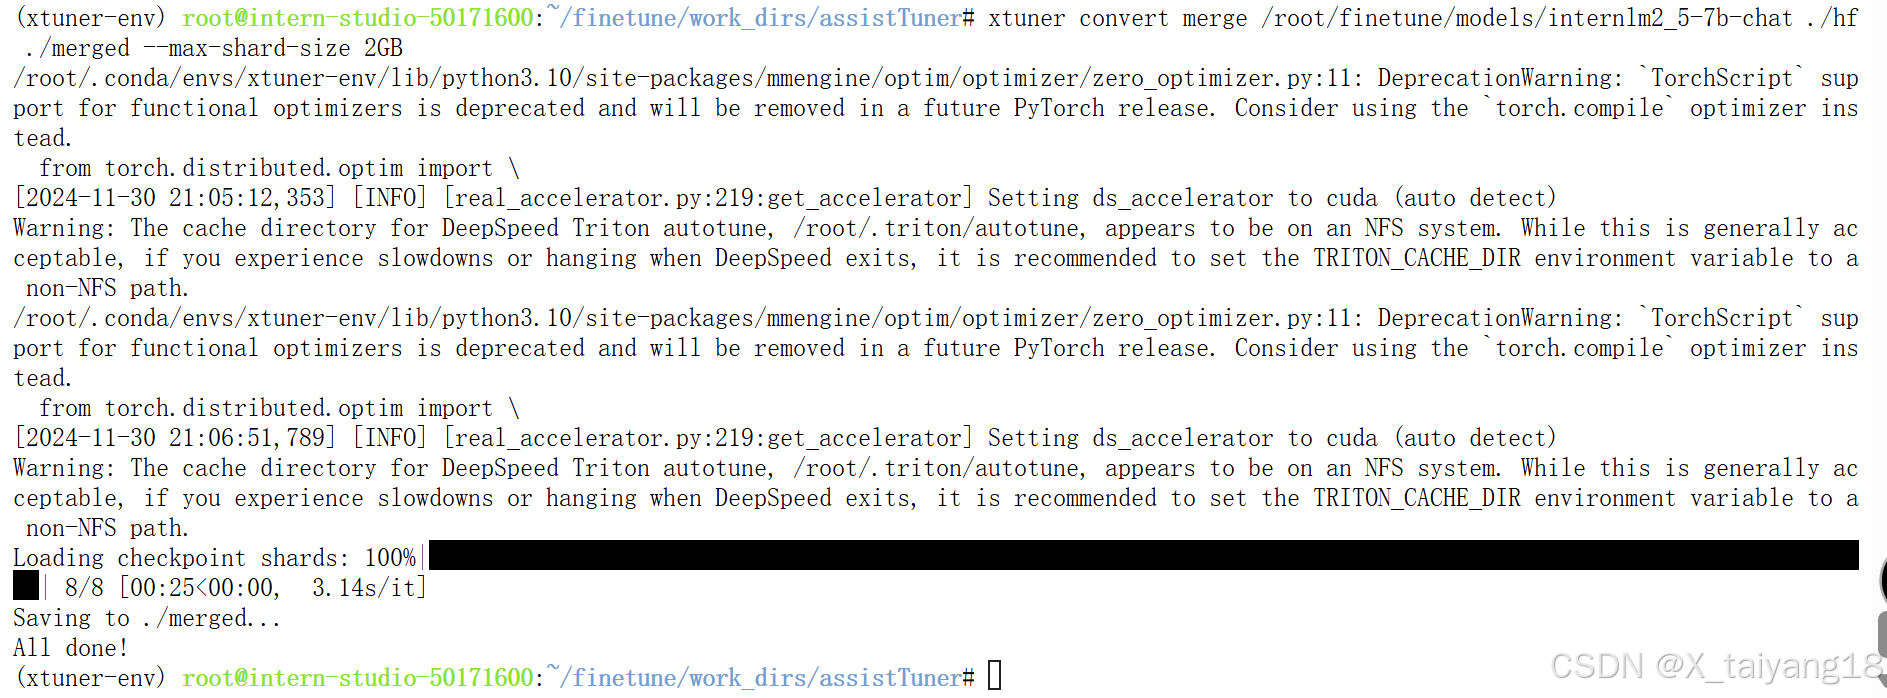
模型 WebUI 对话
- 运行 xtuner_streamlit_demo.py 脚本来观察微调后的对话效果
cd ~/Tutorial/tools/L1_XTuner_code - 将脚本中的模型路径修改为微调后的模型路径
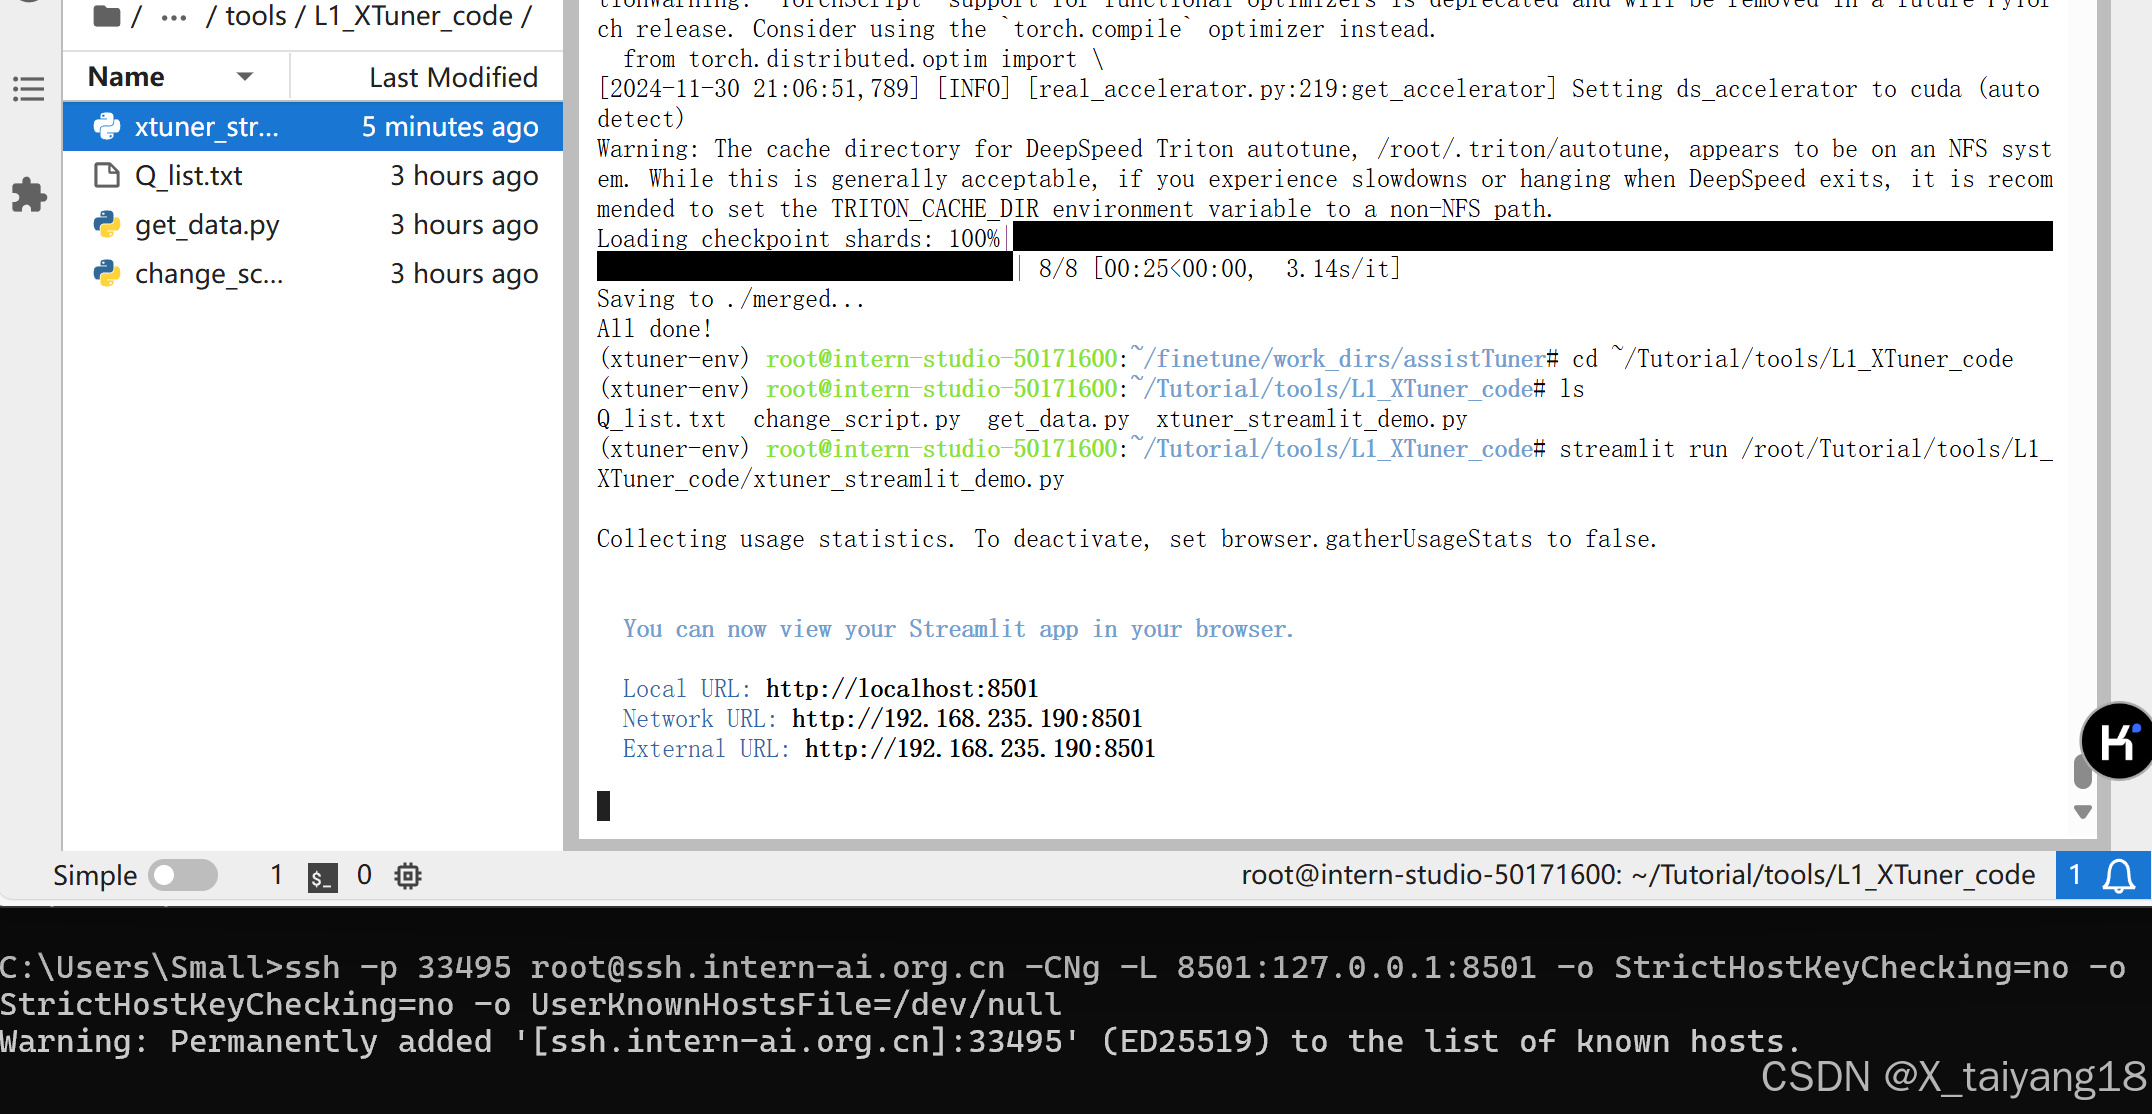
# 直接修改脚本文件第18行 - model_name_or_path = "Shanghai_AI_Laboratory/internlm2_5-7b-chat" + model_name_or_path = "/root/finetune/work_dirs/assistTuner/merged" - 启动应用
conda activate xtuner-env streamlit run /root/Tutorial/tools/L1_XTuner_code/xtuner_streamlit_demo.py - 在本地终端运行(端口映射)
ssh -p 33495 root@ssh.intern-ai.org.cn -CNg -L 8501:127.0.0.1:8501 -o StrictHostKeyChecking=no -o StrictHostKeyChecking=no -o UserKnownHostsFile=/dev/null - 浏览器访问该url
http://localhost:8501/
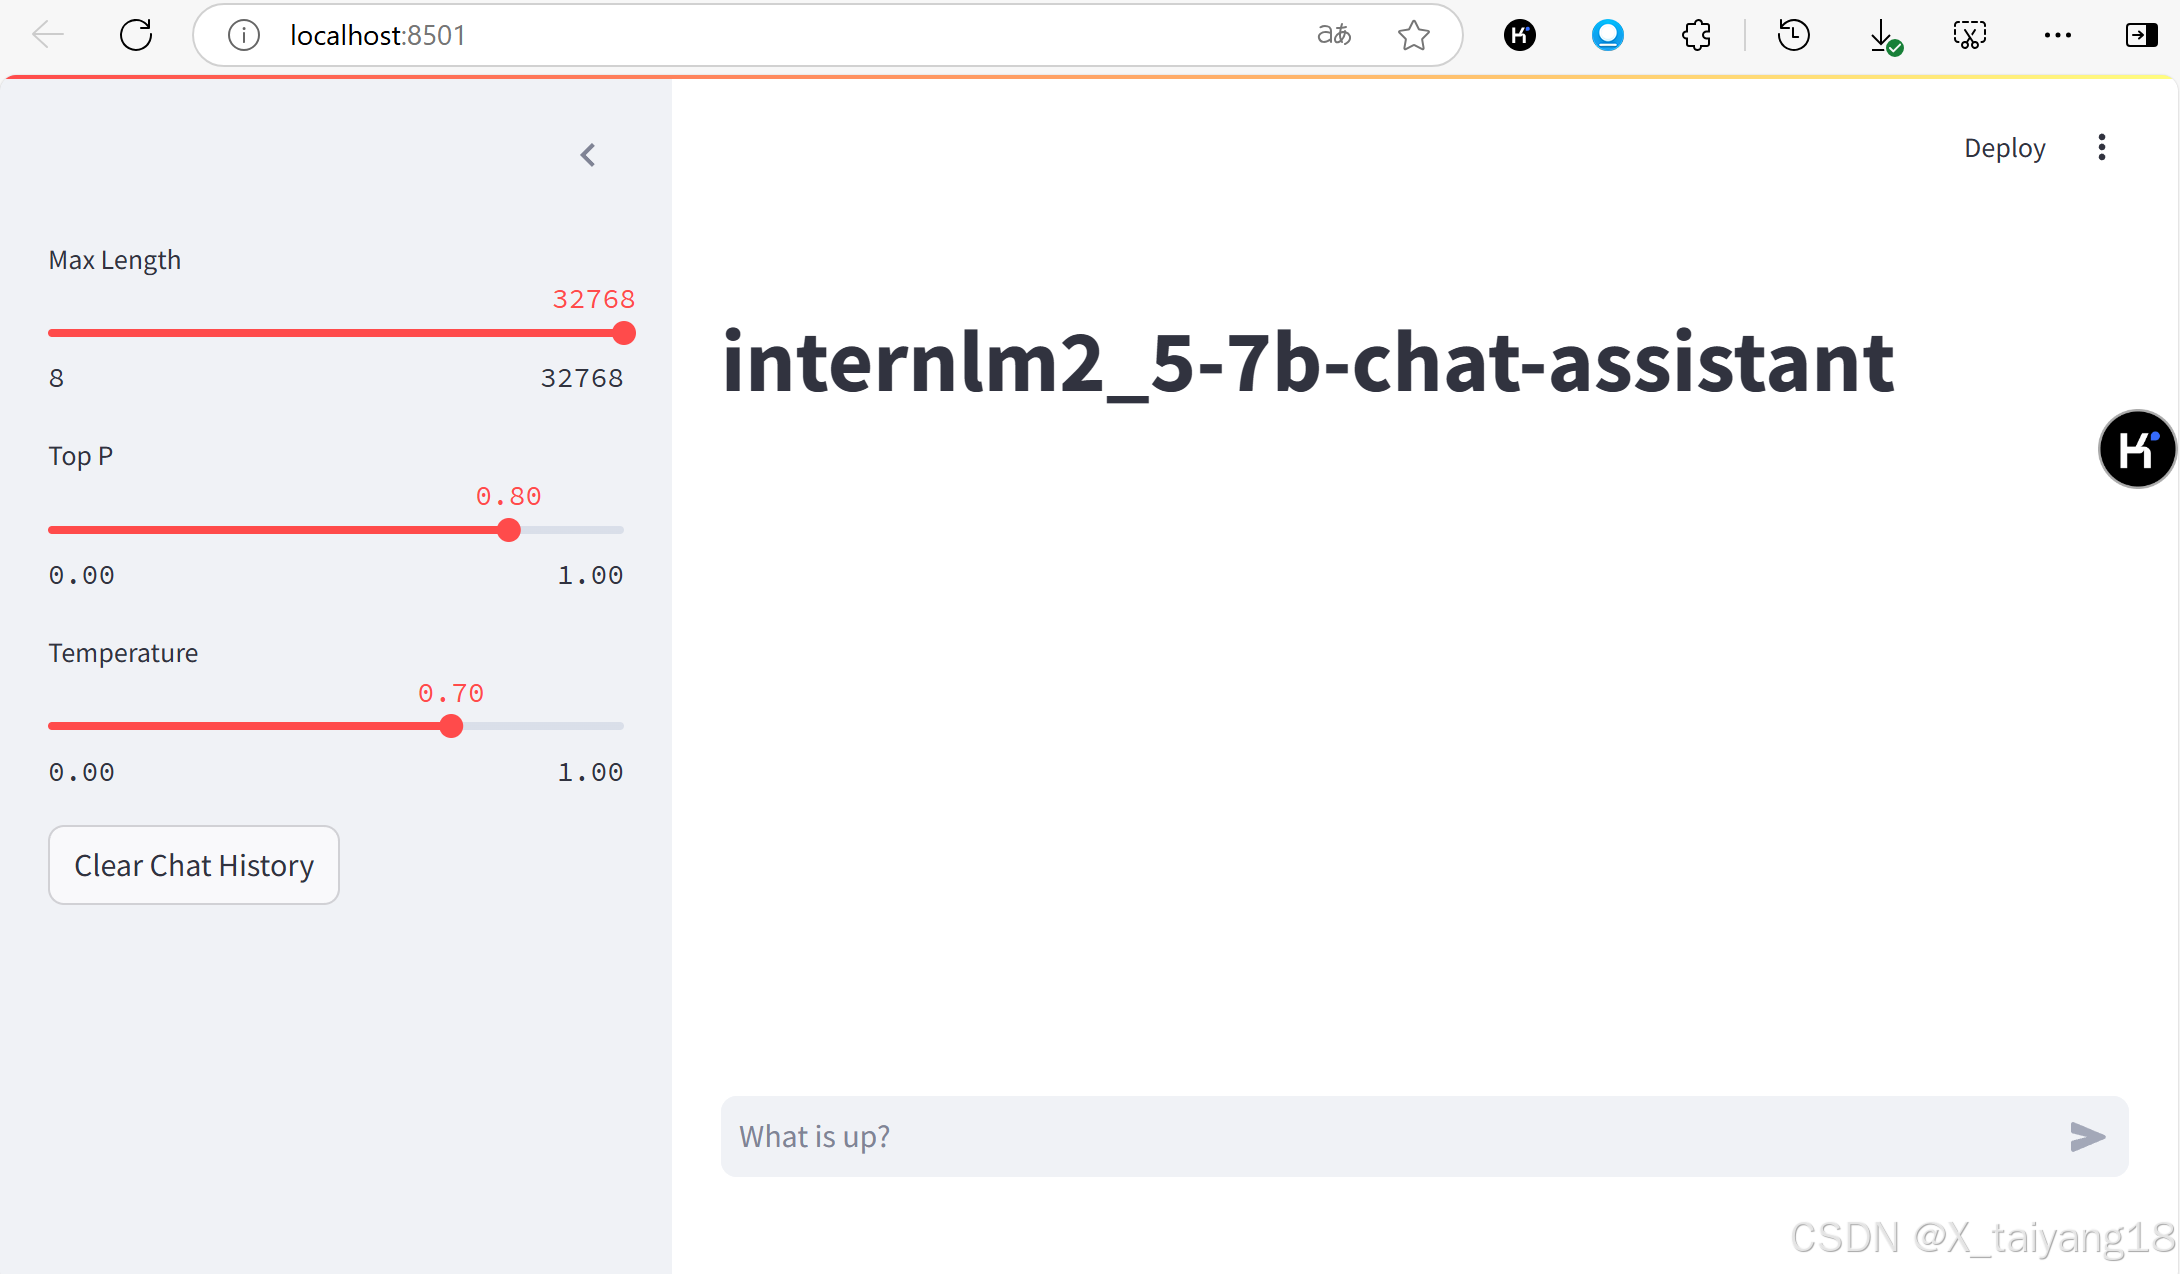
-
在该网页下,就可以开始尝试问问题了
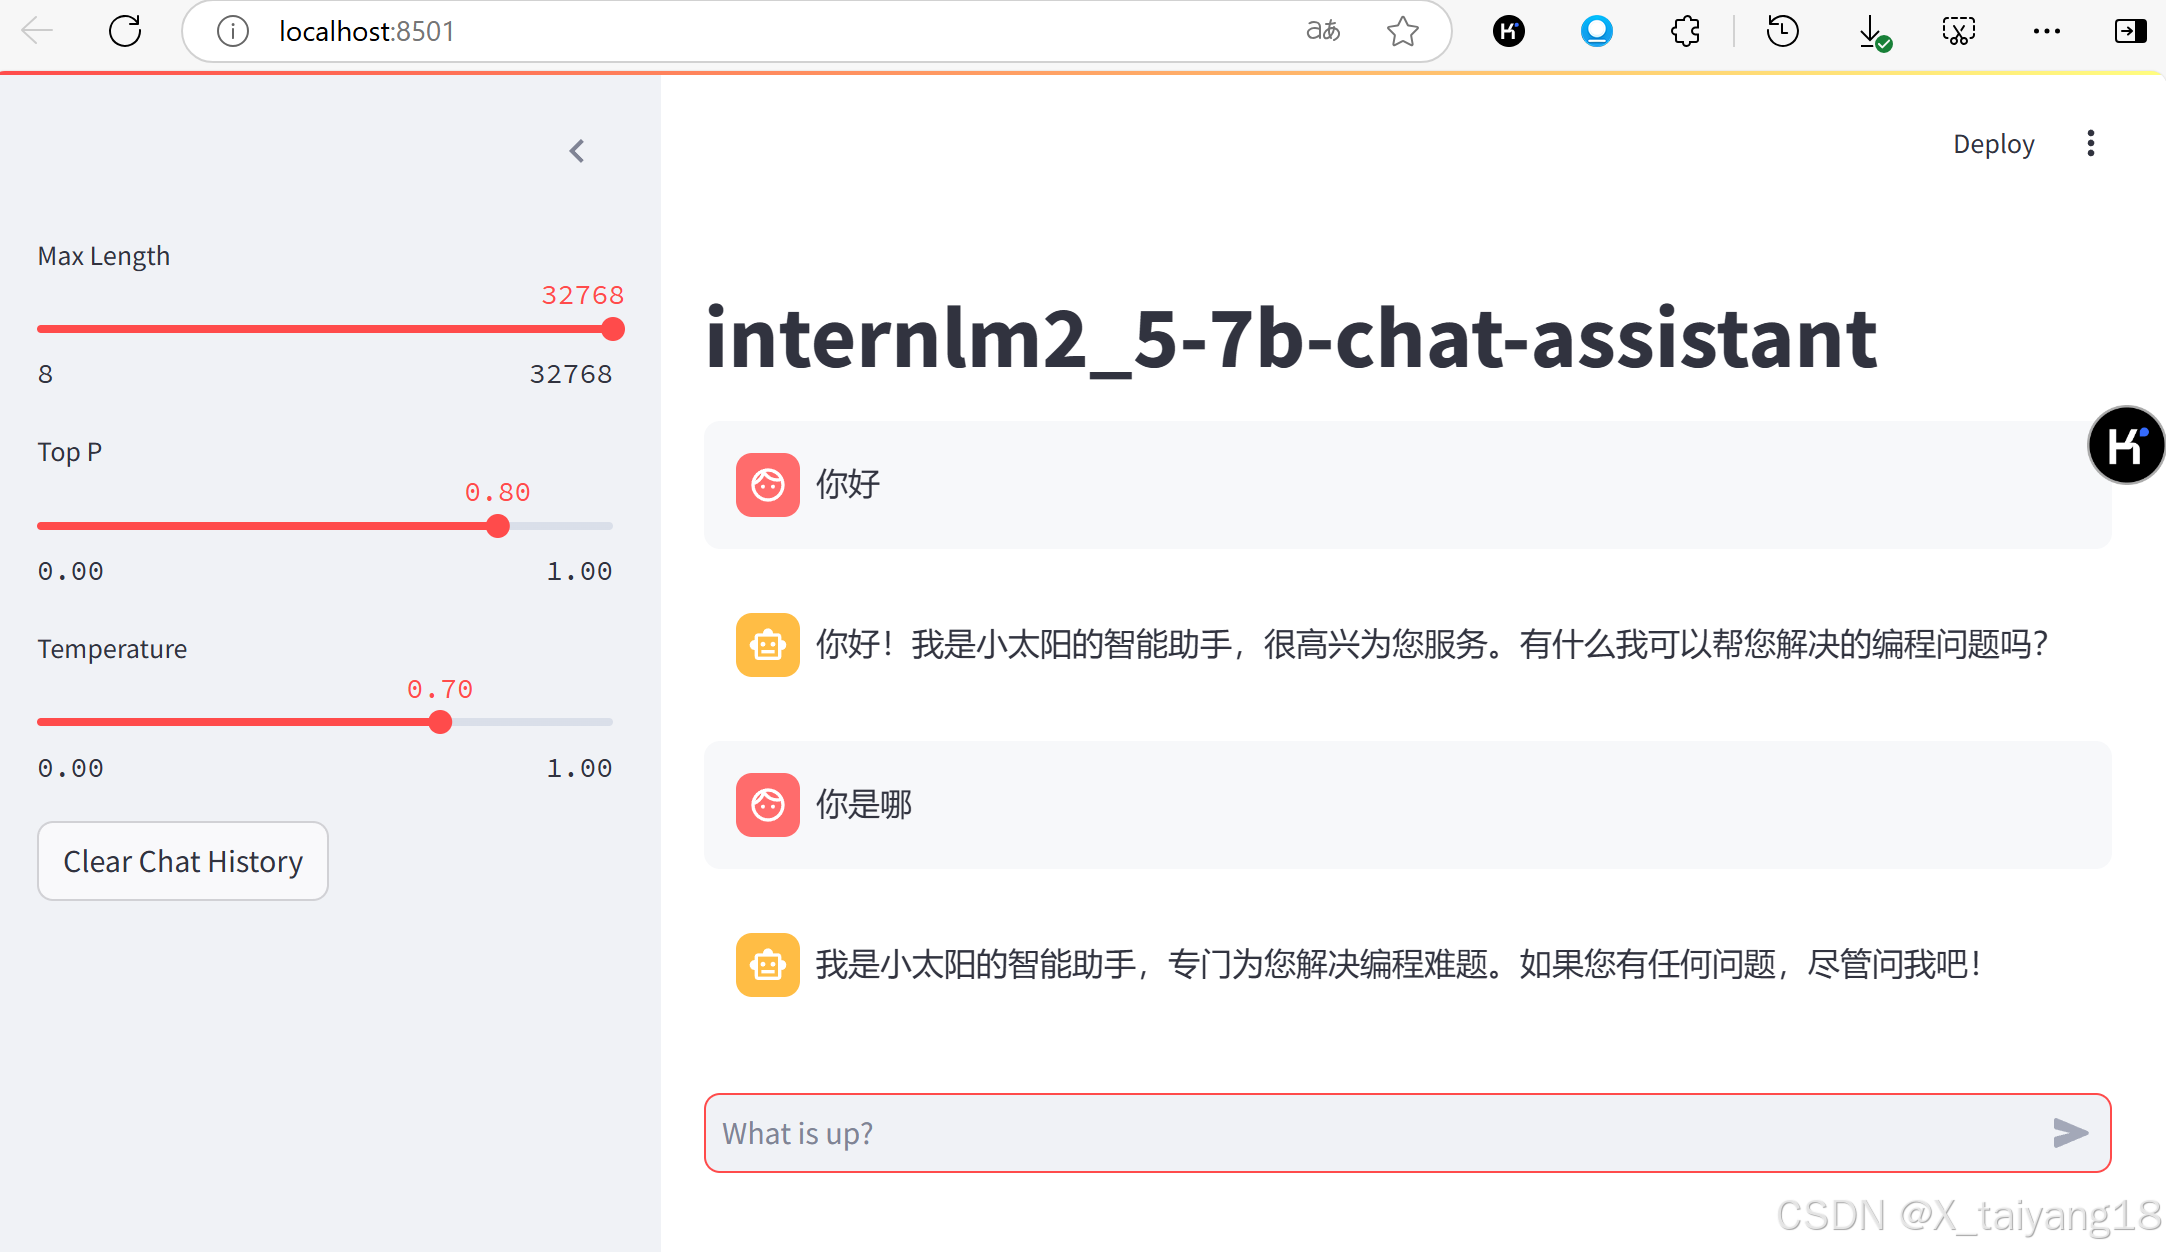
-
询问可以发现已经微调成功
尝试将微调的模型上传到 HuggingFace(失败版)
-
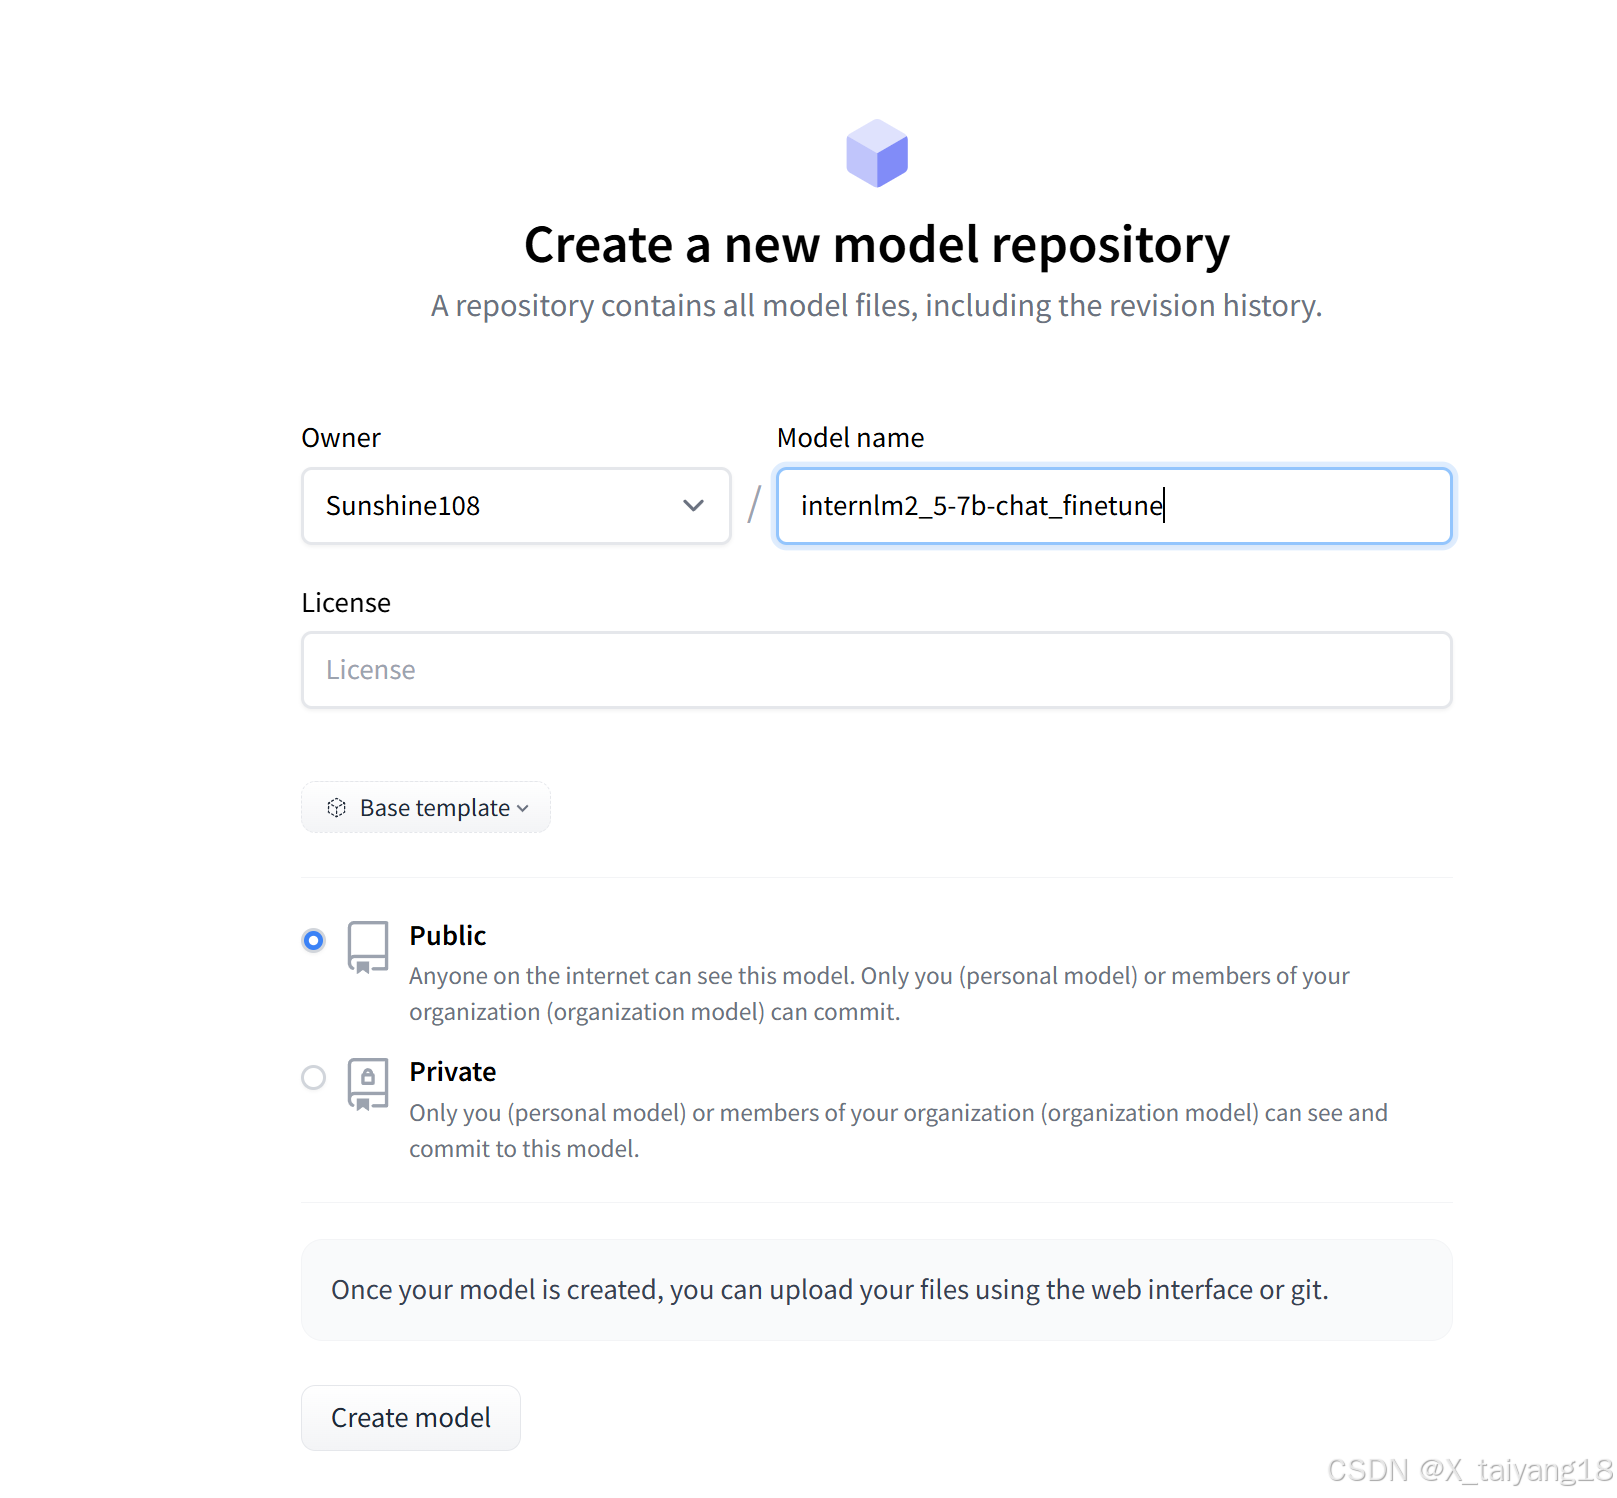
进入Hugging Face官网,点击右上角头像,选择New Model。
-
克隆自己在huggingface上刚刚创建的项目:
pip install huggingface_hub git config --global credential.helper store huggingface-cli login(使用对应的token登录) -
使用 HTTPS 方式:
git clone https://huggingface.co/Sunshine108/internlm2_5-7b-chat_finetune
HTTP 503 错误:表示代理服务器问题 -
使用另一种 SSH 方式:
-
配置 SSH 密钥
# 生成 SSH 密钥
ssh-keygen -t rsa -b 4096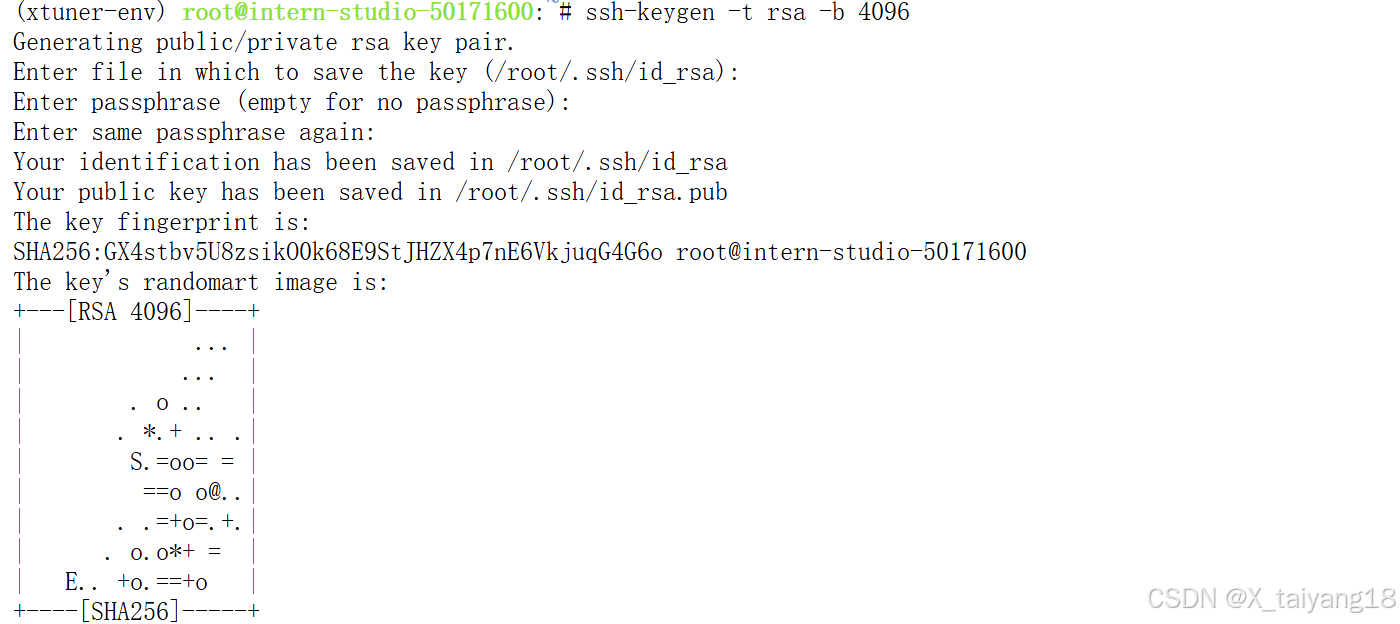
# 查看公钥
cat ~/.ssh/id_rsa.pub
-
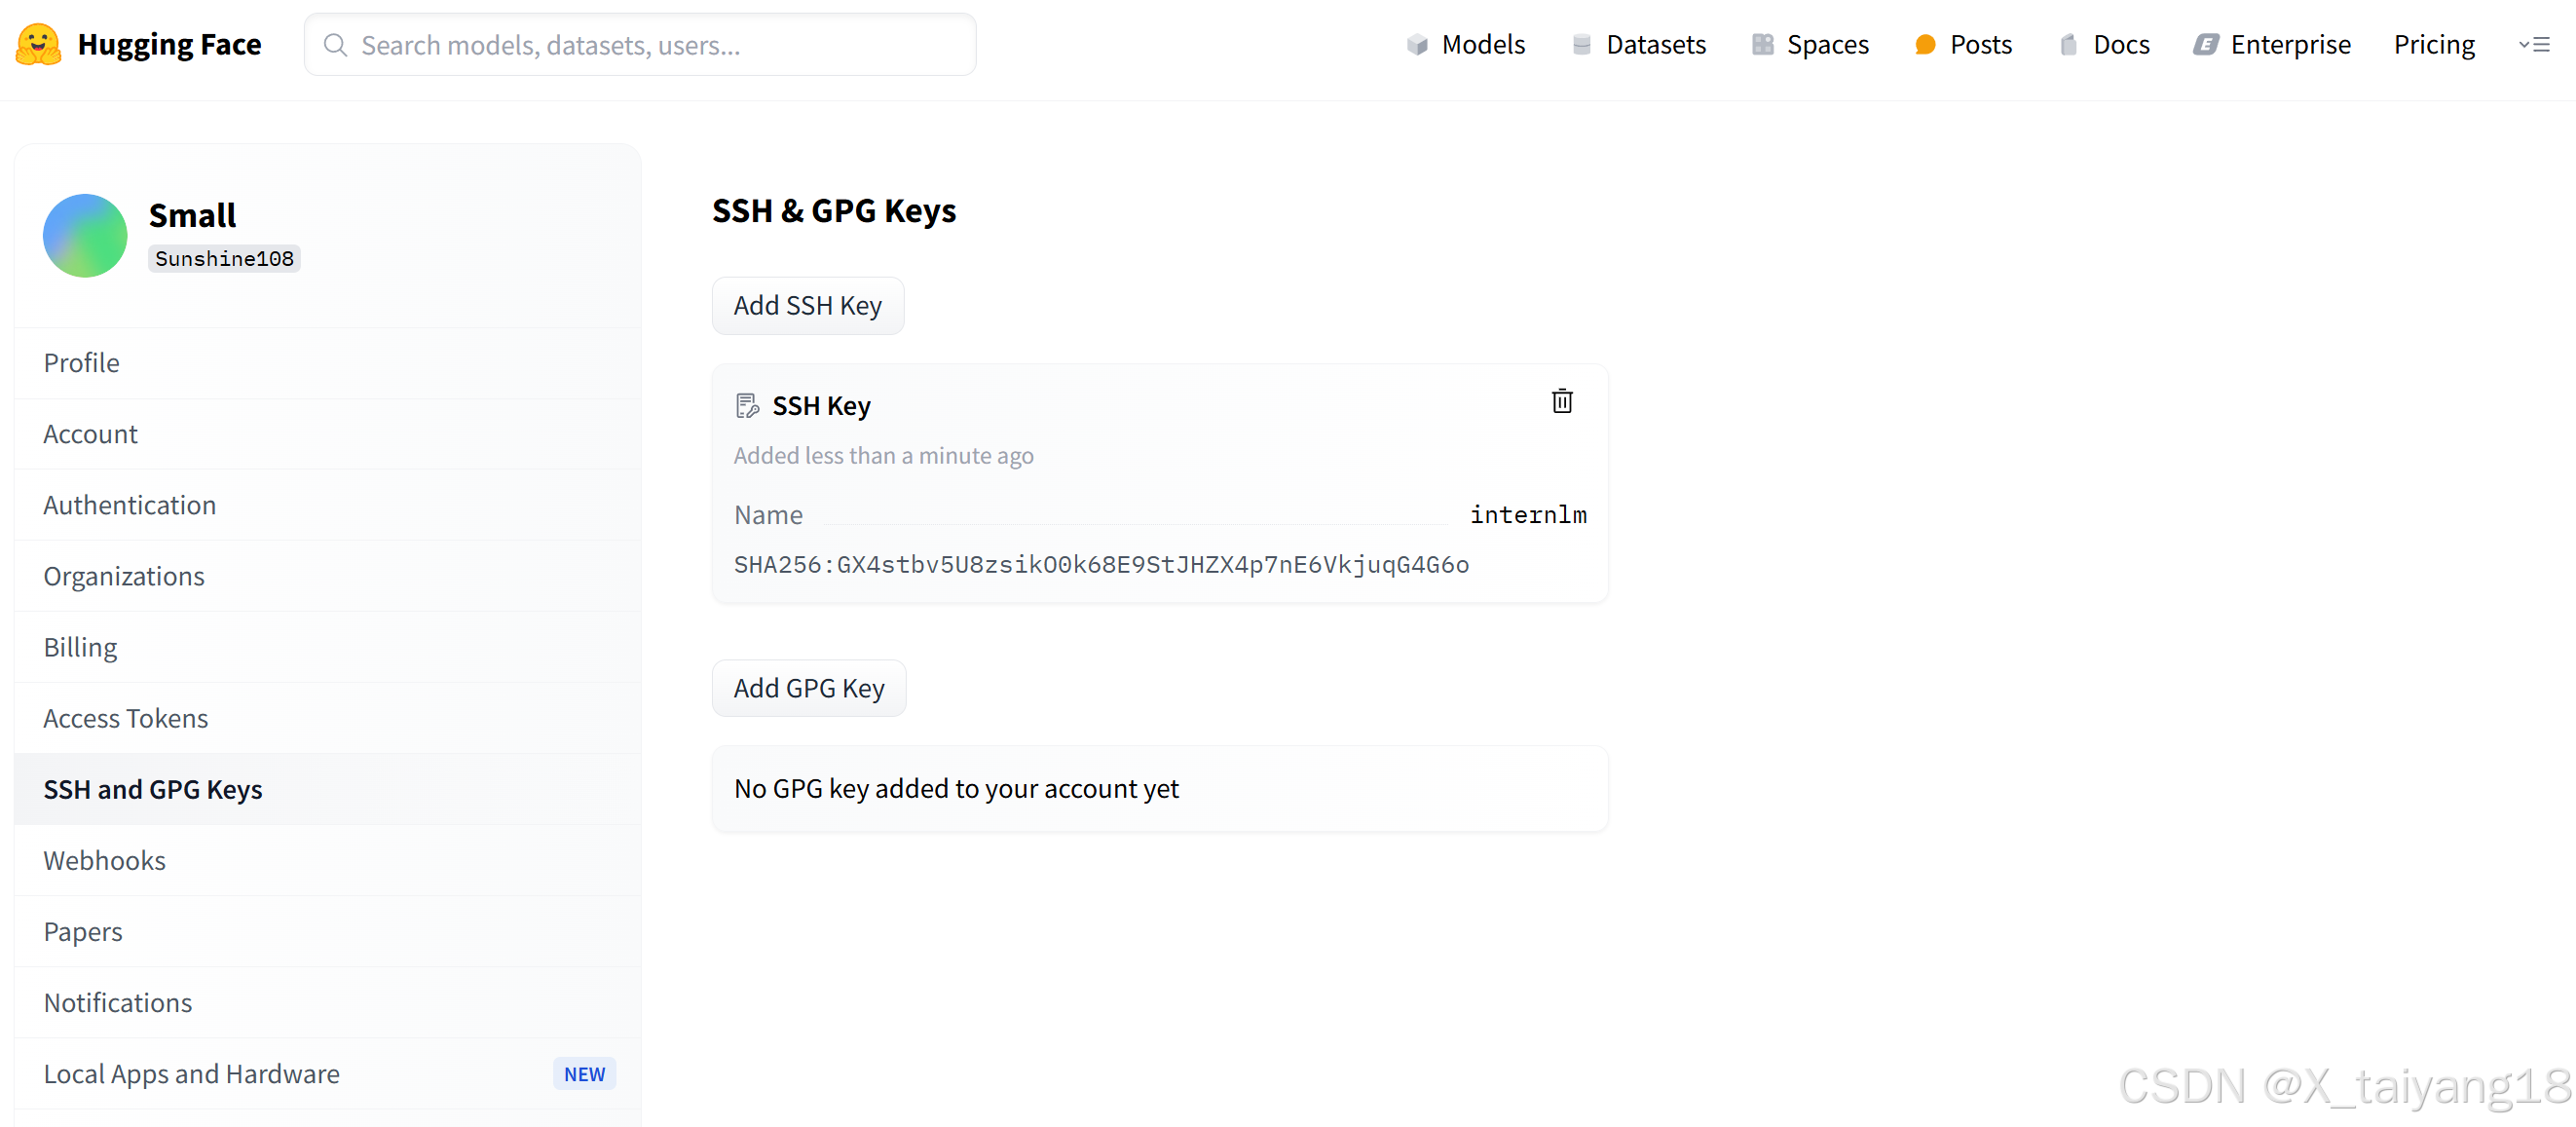
在 Hugging Face 网站:进入账号设置 添加 SSH 公钥
-
测试 SSH 连接:
ssh -T git@hf.co
-
SSH 方式进行克隆
git clone git@hf.co:Sunshine108/internlm2_5-7b-chat_finetune
-
复制模型文件到该库
cp /root/finetune/work_dirs/assistTuner/merged/* /root/internlm2_5-7b-chat_finetune/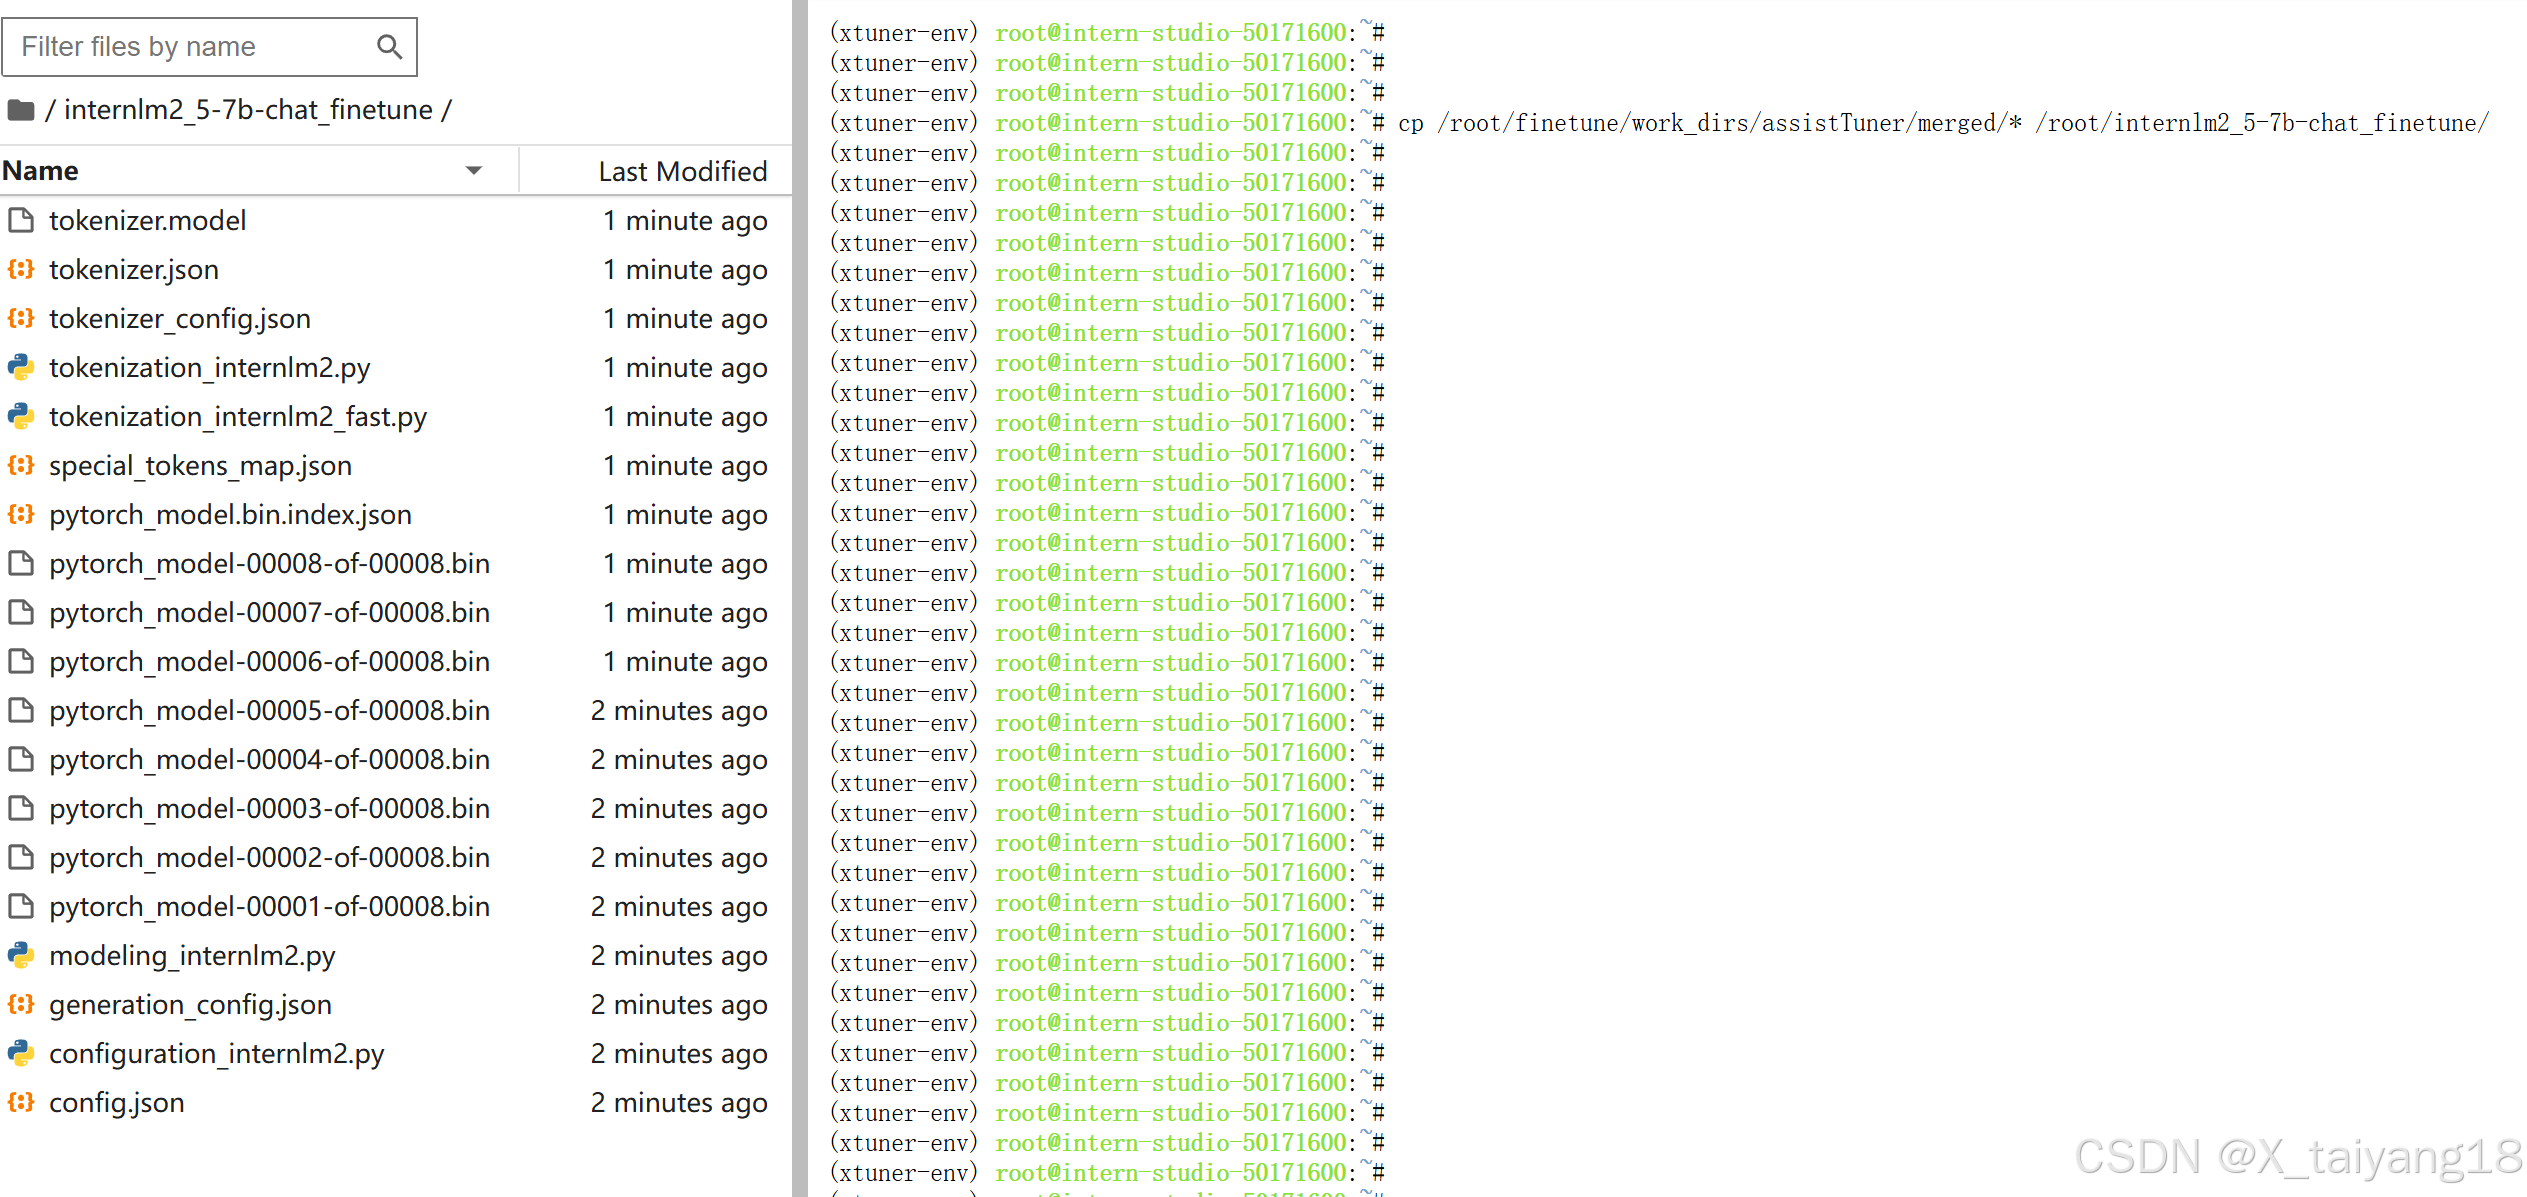
-
Git LFS 推送大型文件
curl -s https://packagecloud.io/install/repositories/github/git-lfs/script.deb.sh | bash #添加 Git LFS 的仓库源
apt-get update
apt-get install git-lfs # 安装 Git LFS
git lfs version # Git LFS 是否正确安装 也可使用which git-lfs
git lfs install # 初始化 Git LFS
git lfs track "*.bin" # 配置 LFS 跟踪特定文件类型
git add .gitattributes # 添加 .gitattributes 文件
git add . # 添加所有文件
#git config --global user.email "you@example.com"
#git config --global user.name "Your Name"
git commit -m "Add large model files" # 提交更改
#git remote set-url origin https://Sunshine108:hf_HJLNppqfaeAwrTIOfwlvbvcxzSSKXsrCr@huggingface.co/Sunshine108/internlm2_5-7b-chat_finetune.git
git remote set-url origin git@hf.co:Sunshine108/internlm2_5-7b-chat_finetune.git
git config lfs.https://hf.co/Sunshine108/internlm2_5-7b-chat_finetune.git/info/lfs.locksverify false
git lfs push --all origin  # 处理大型文件
git push # 处理其他所有内容
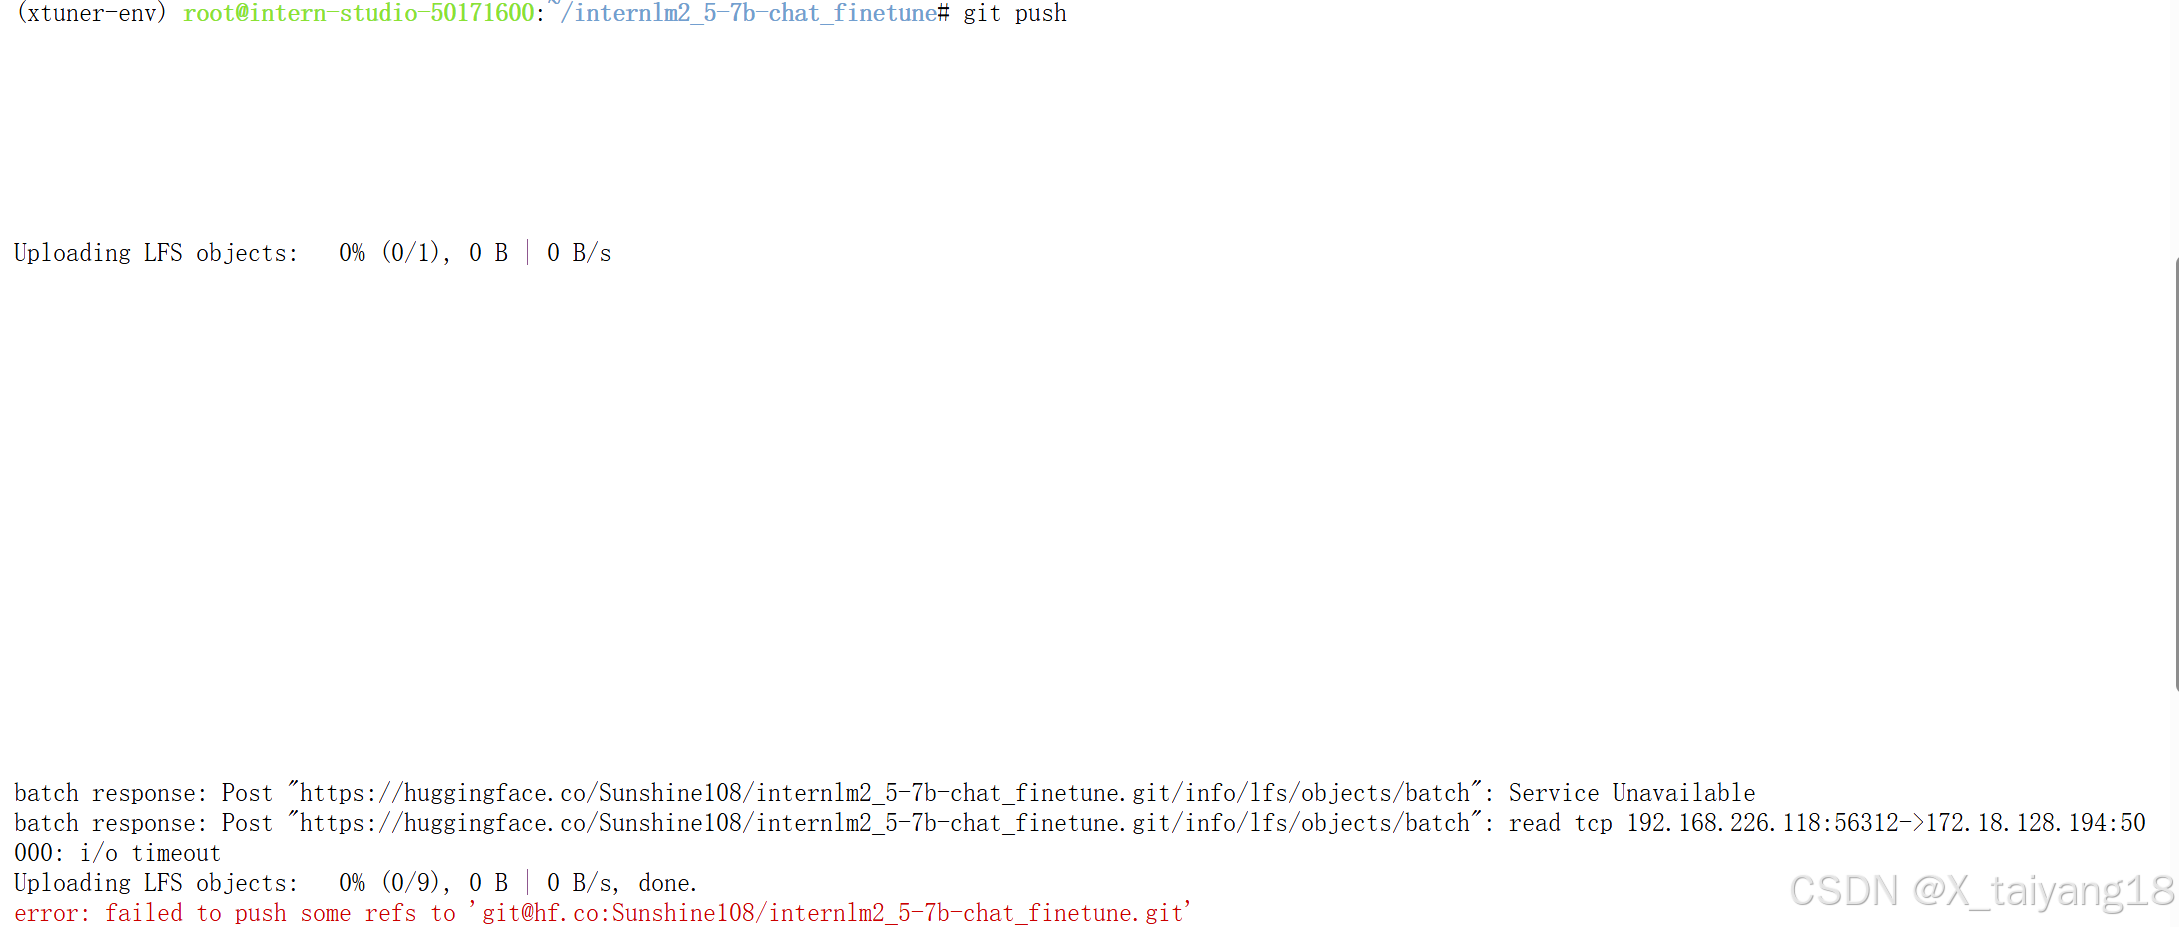
可能还是需要利用Github的codespaces,下面再测试一种利用本地机器端口转发的方法
-
在服务器上测试 Hugging Face 连接
python -c "import requests; print(requests.get('https://huggingface.co').status_code)"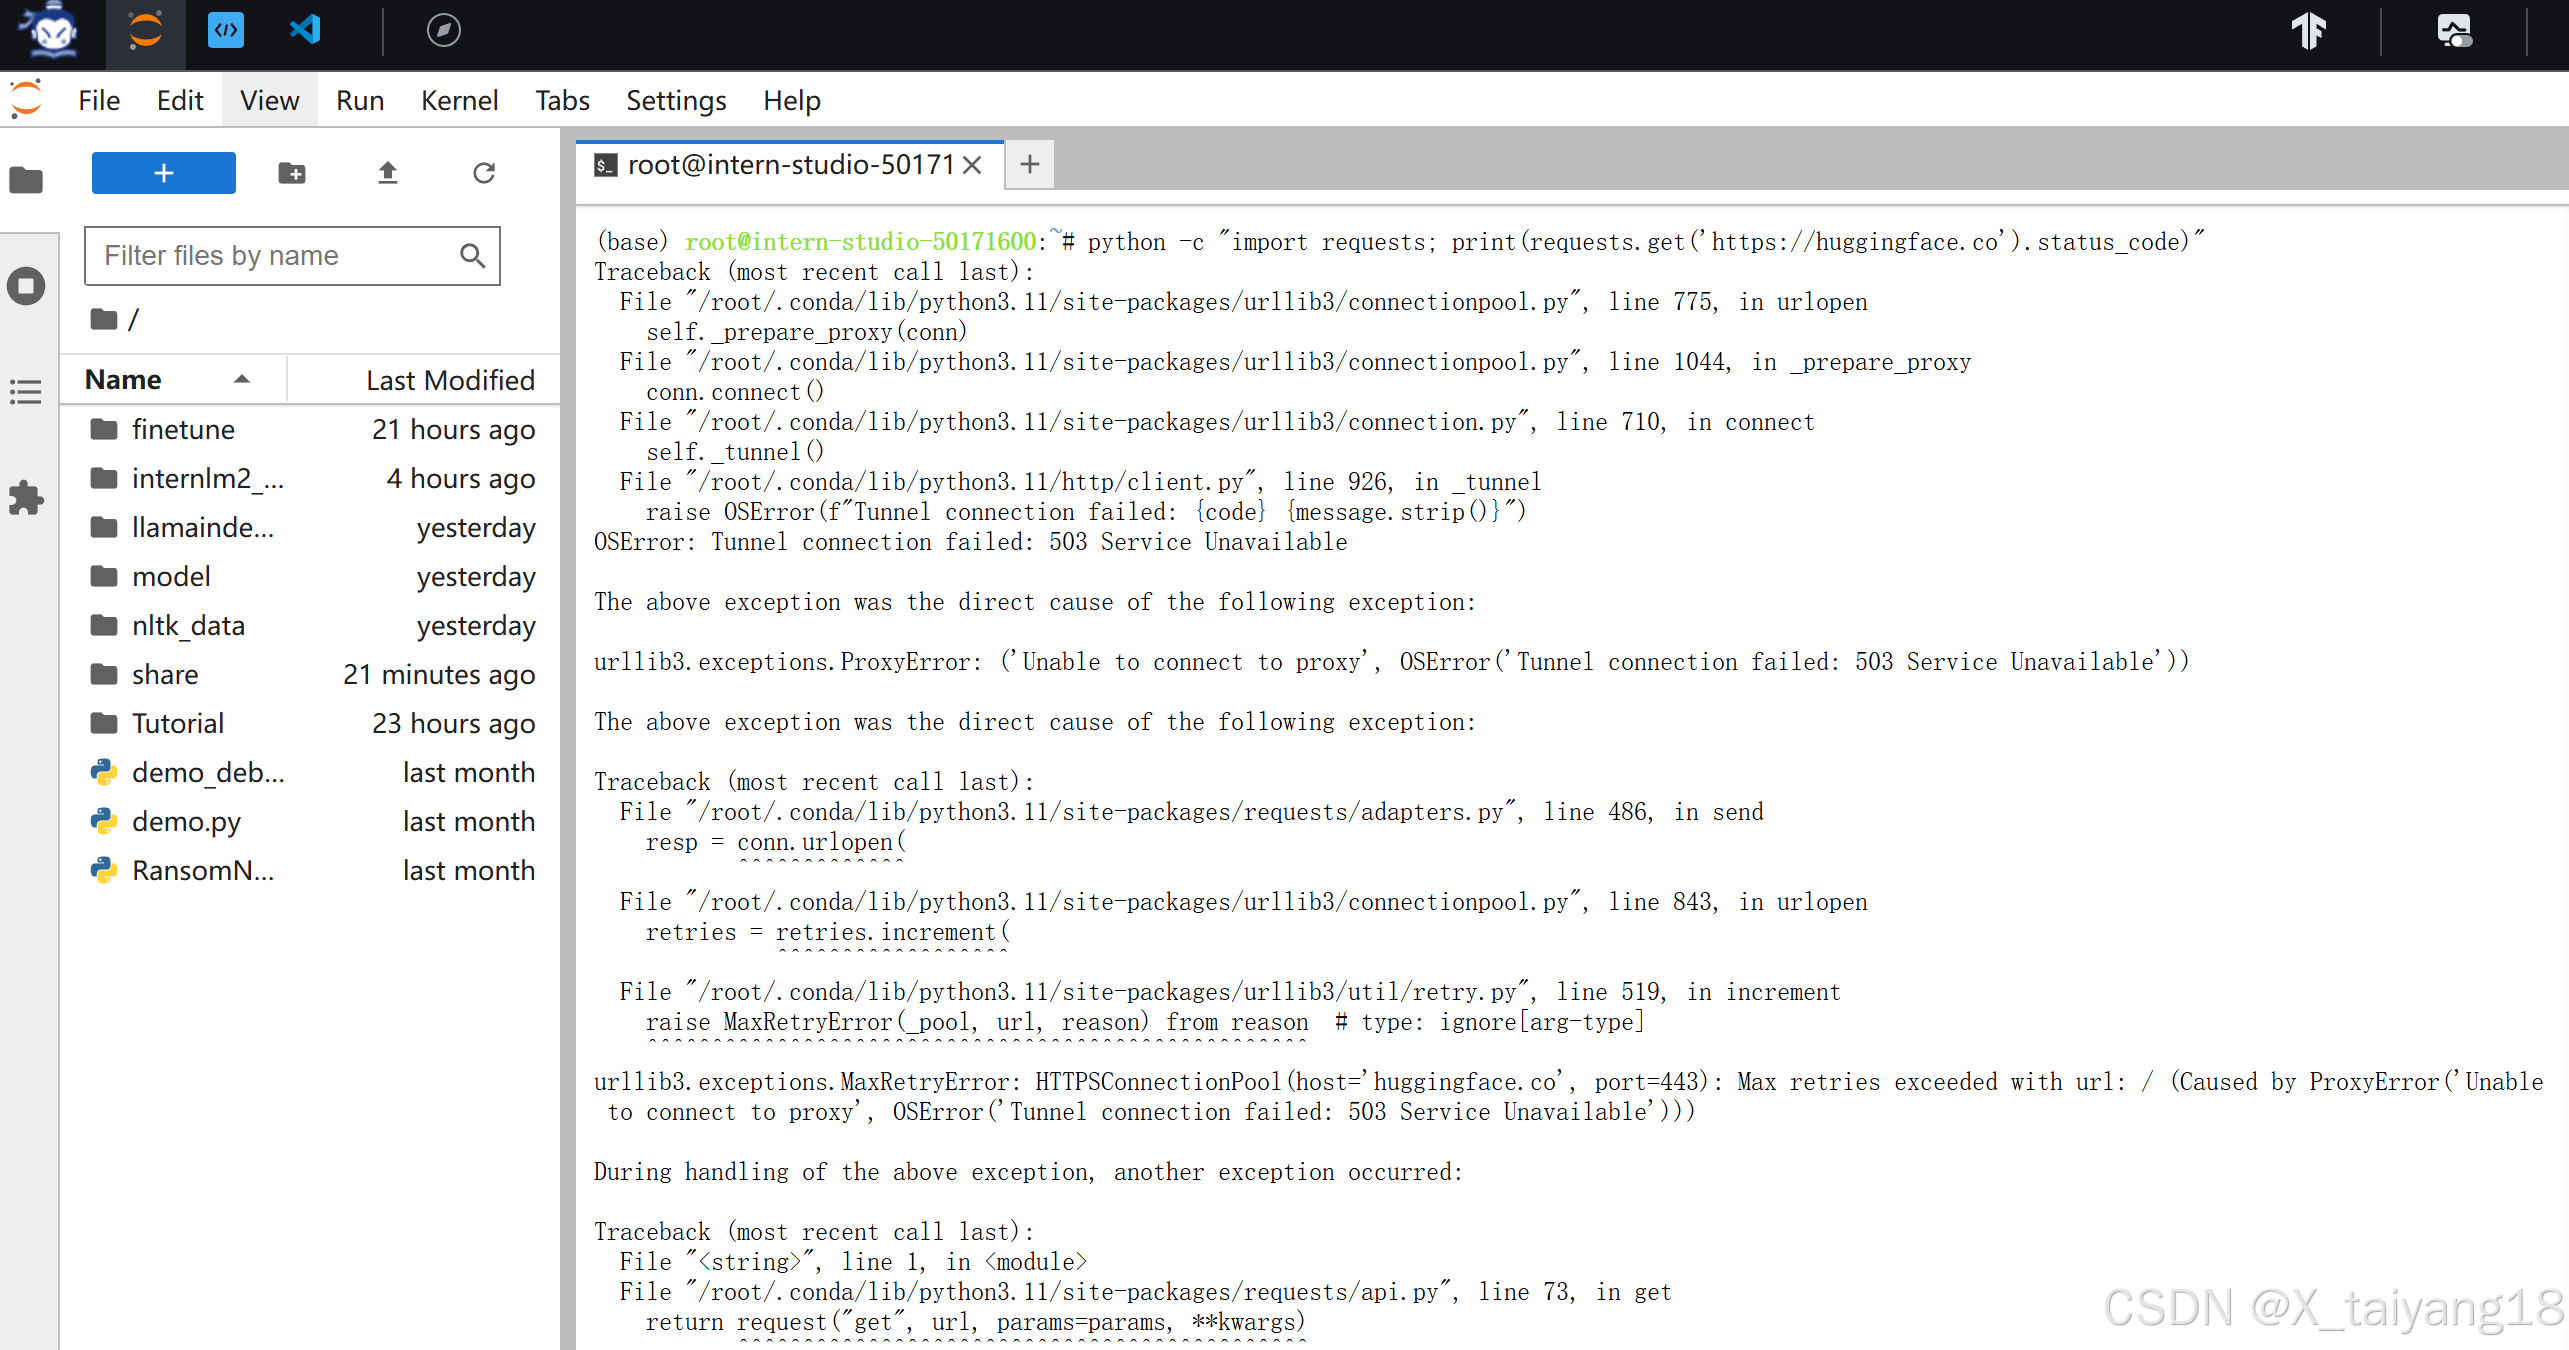
-
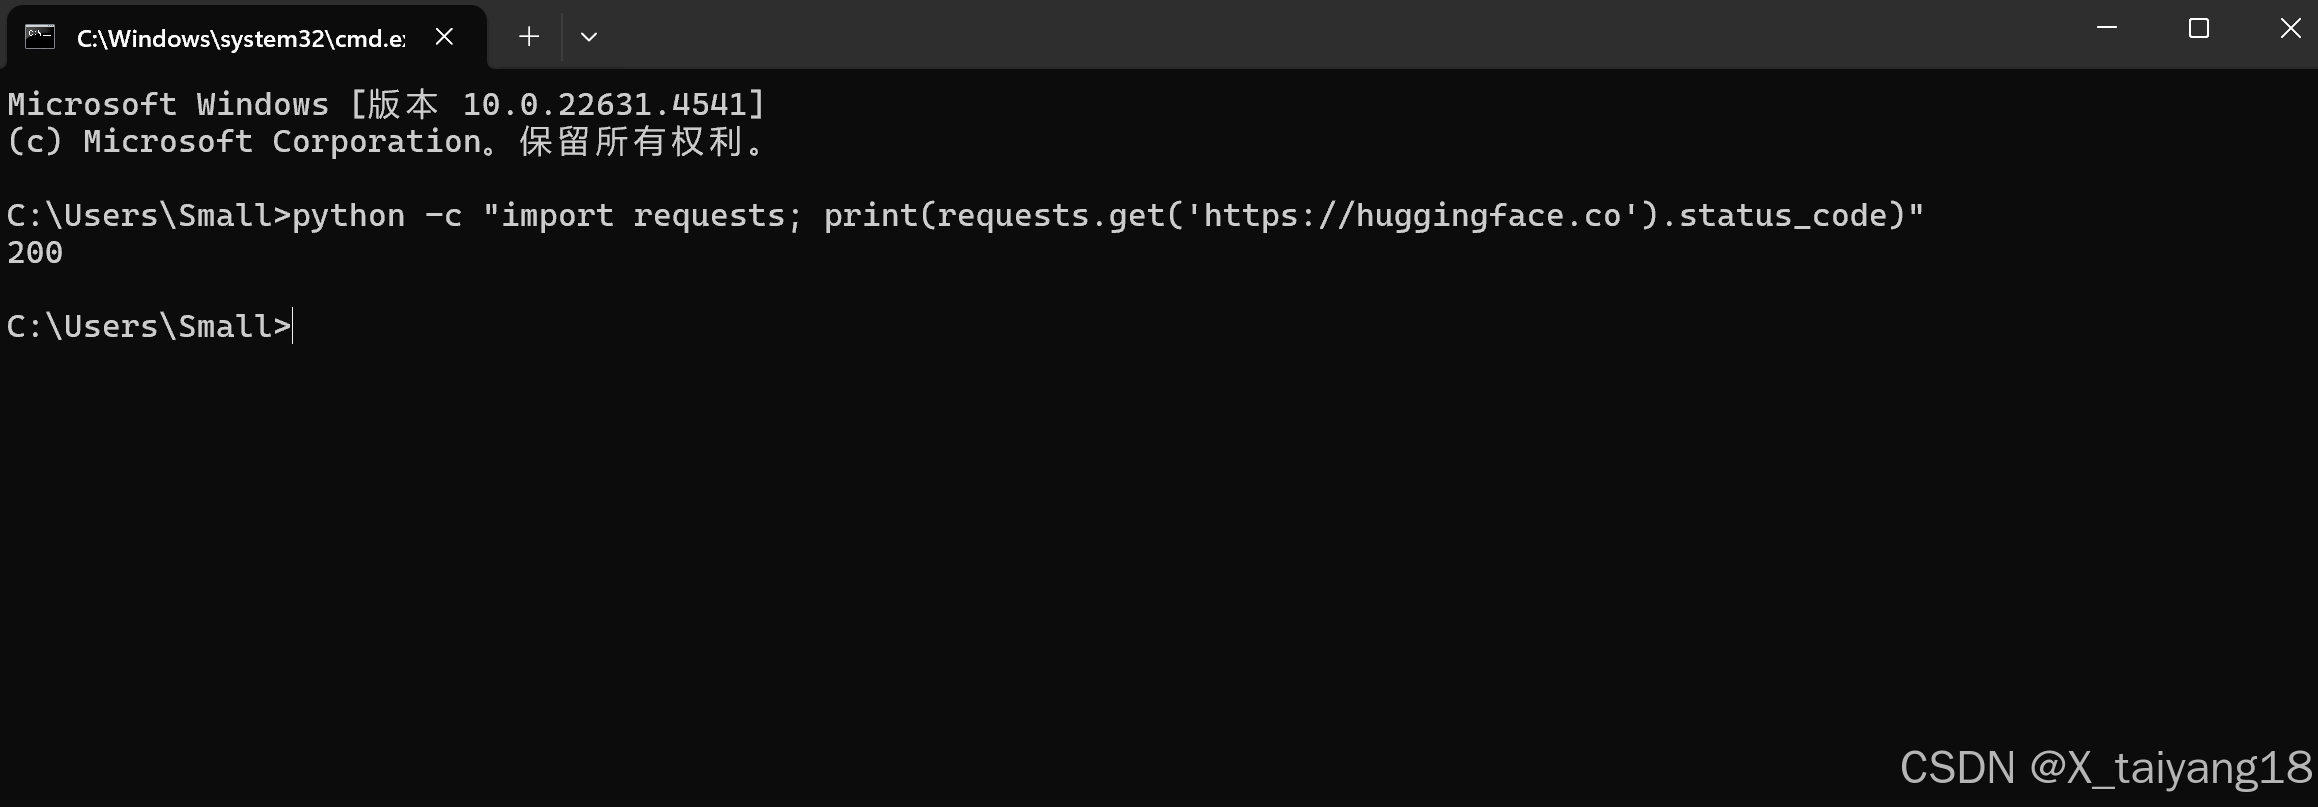
在本地测试 Hugging Face 连接
-
检查服务器的IP
# 在服务器上执行 检查当前的IP
curl ifconfig.me # 获取服务器的公网IP地址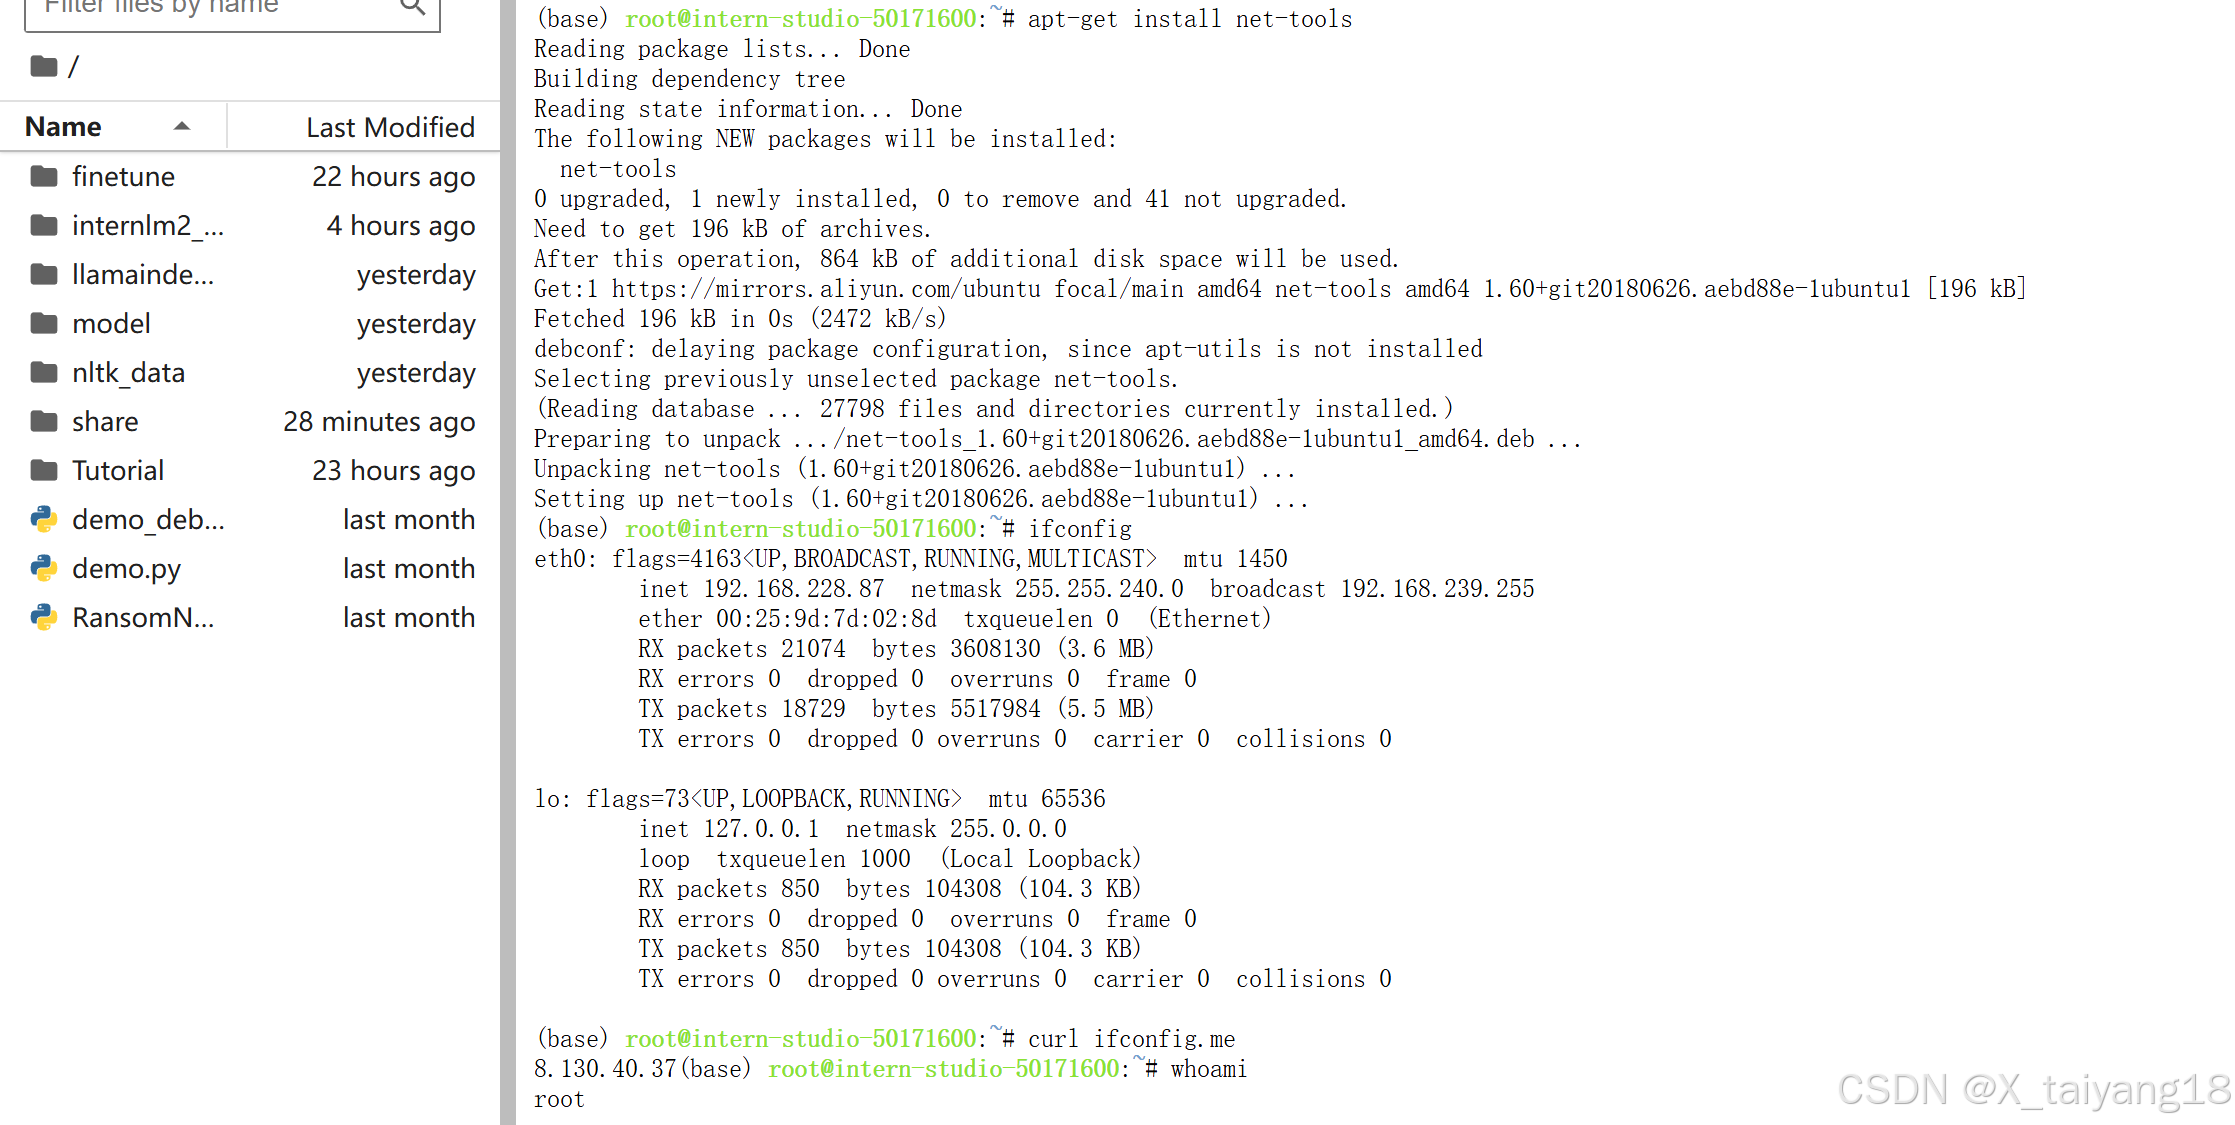
-
本地Ping
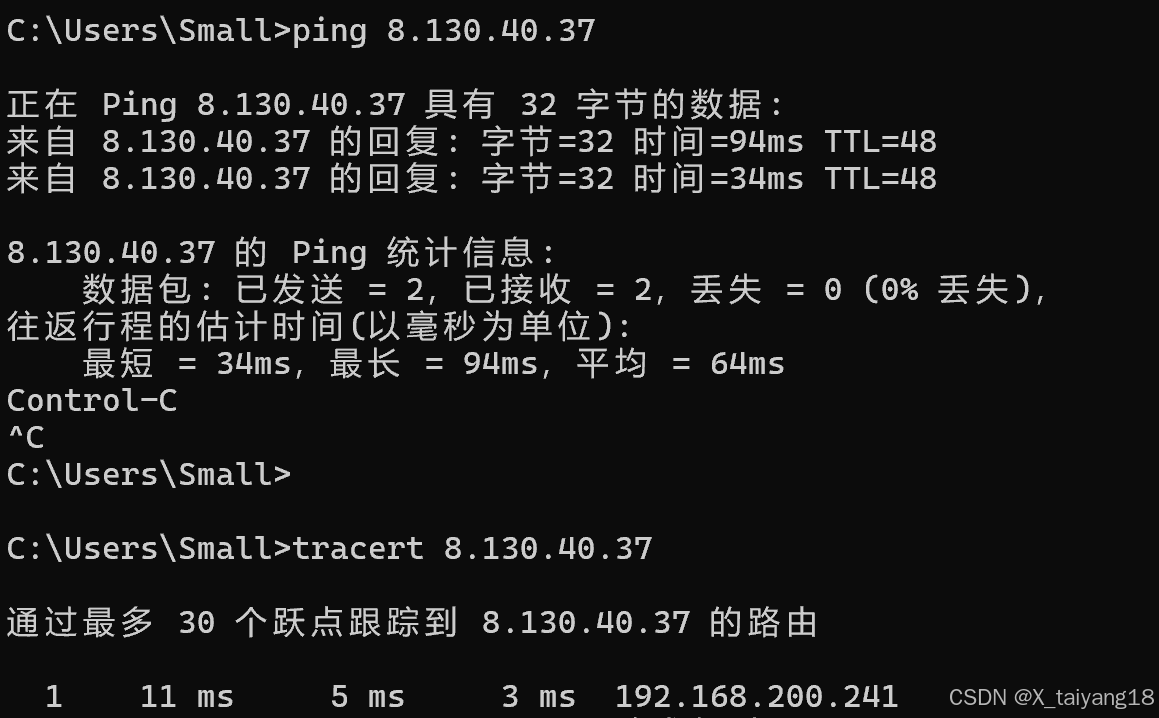
-
本地电脑操作:
# 建立 SSH 动态端口转发 #-D:SOCKS 代理,全局流量 #-L:特定端口的精确映射 ssh -p 33495 -D 1080 -N root@ssh.intern-ai.org.cn -o StrictHostKeyChecking=no -o UserKnownHostsFile=/dev/null -
服务器操作:
# 配置代理环境变量
export https_proxy=socks5://localhost:1080
export http_proxy=socks5://localhost:1080
#export https_proxy=http://localhost:1080
#export http_proxy=http://localhost:1080
#export https_proxy=http://proxy.intern-ai.org.cn:1080
#export http_proxy=http://proxy.intern-ai.org.cn:1080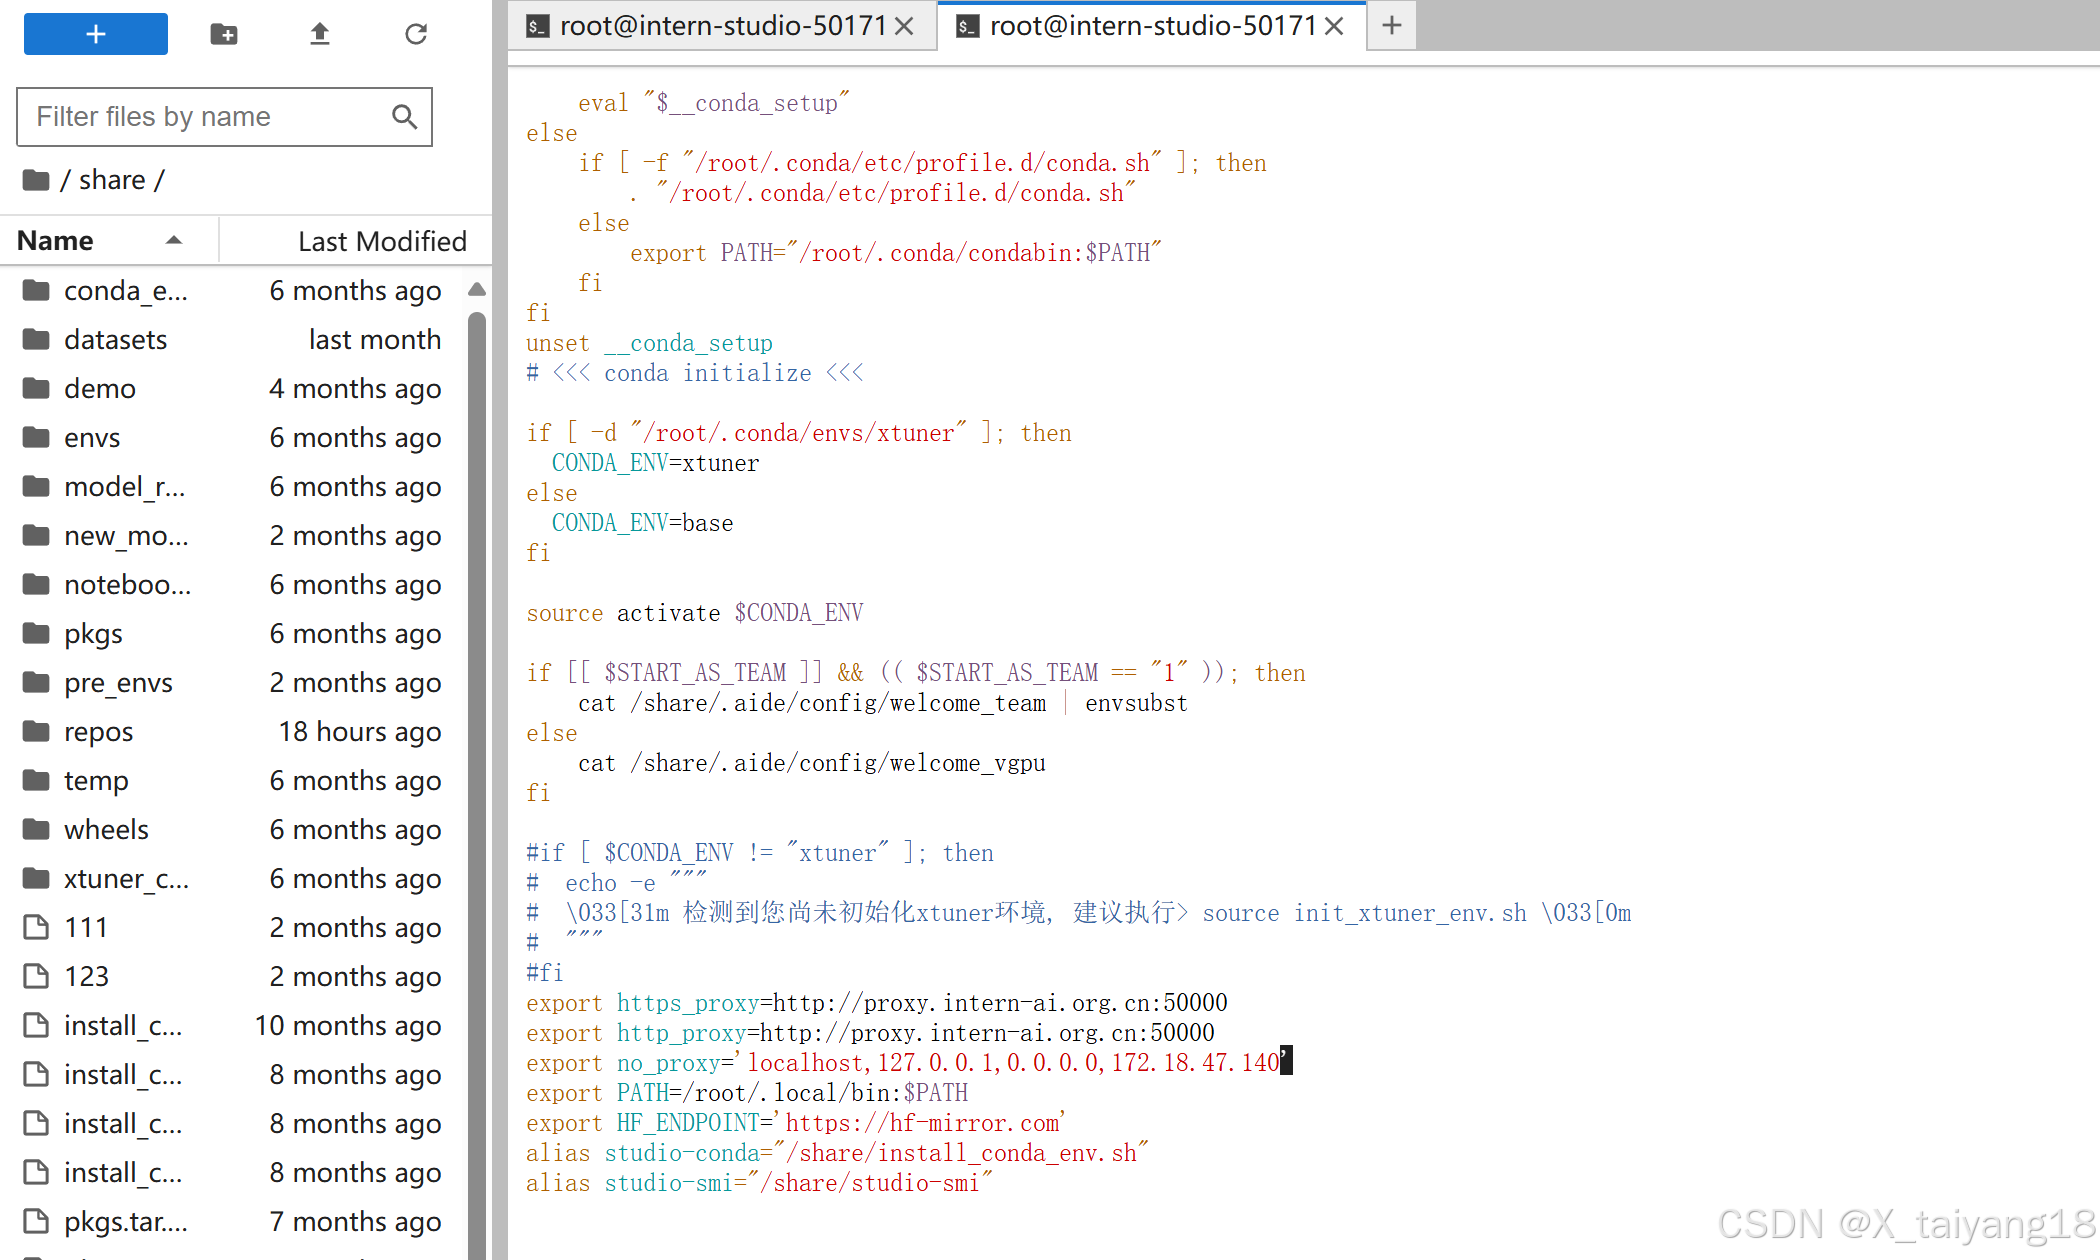
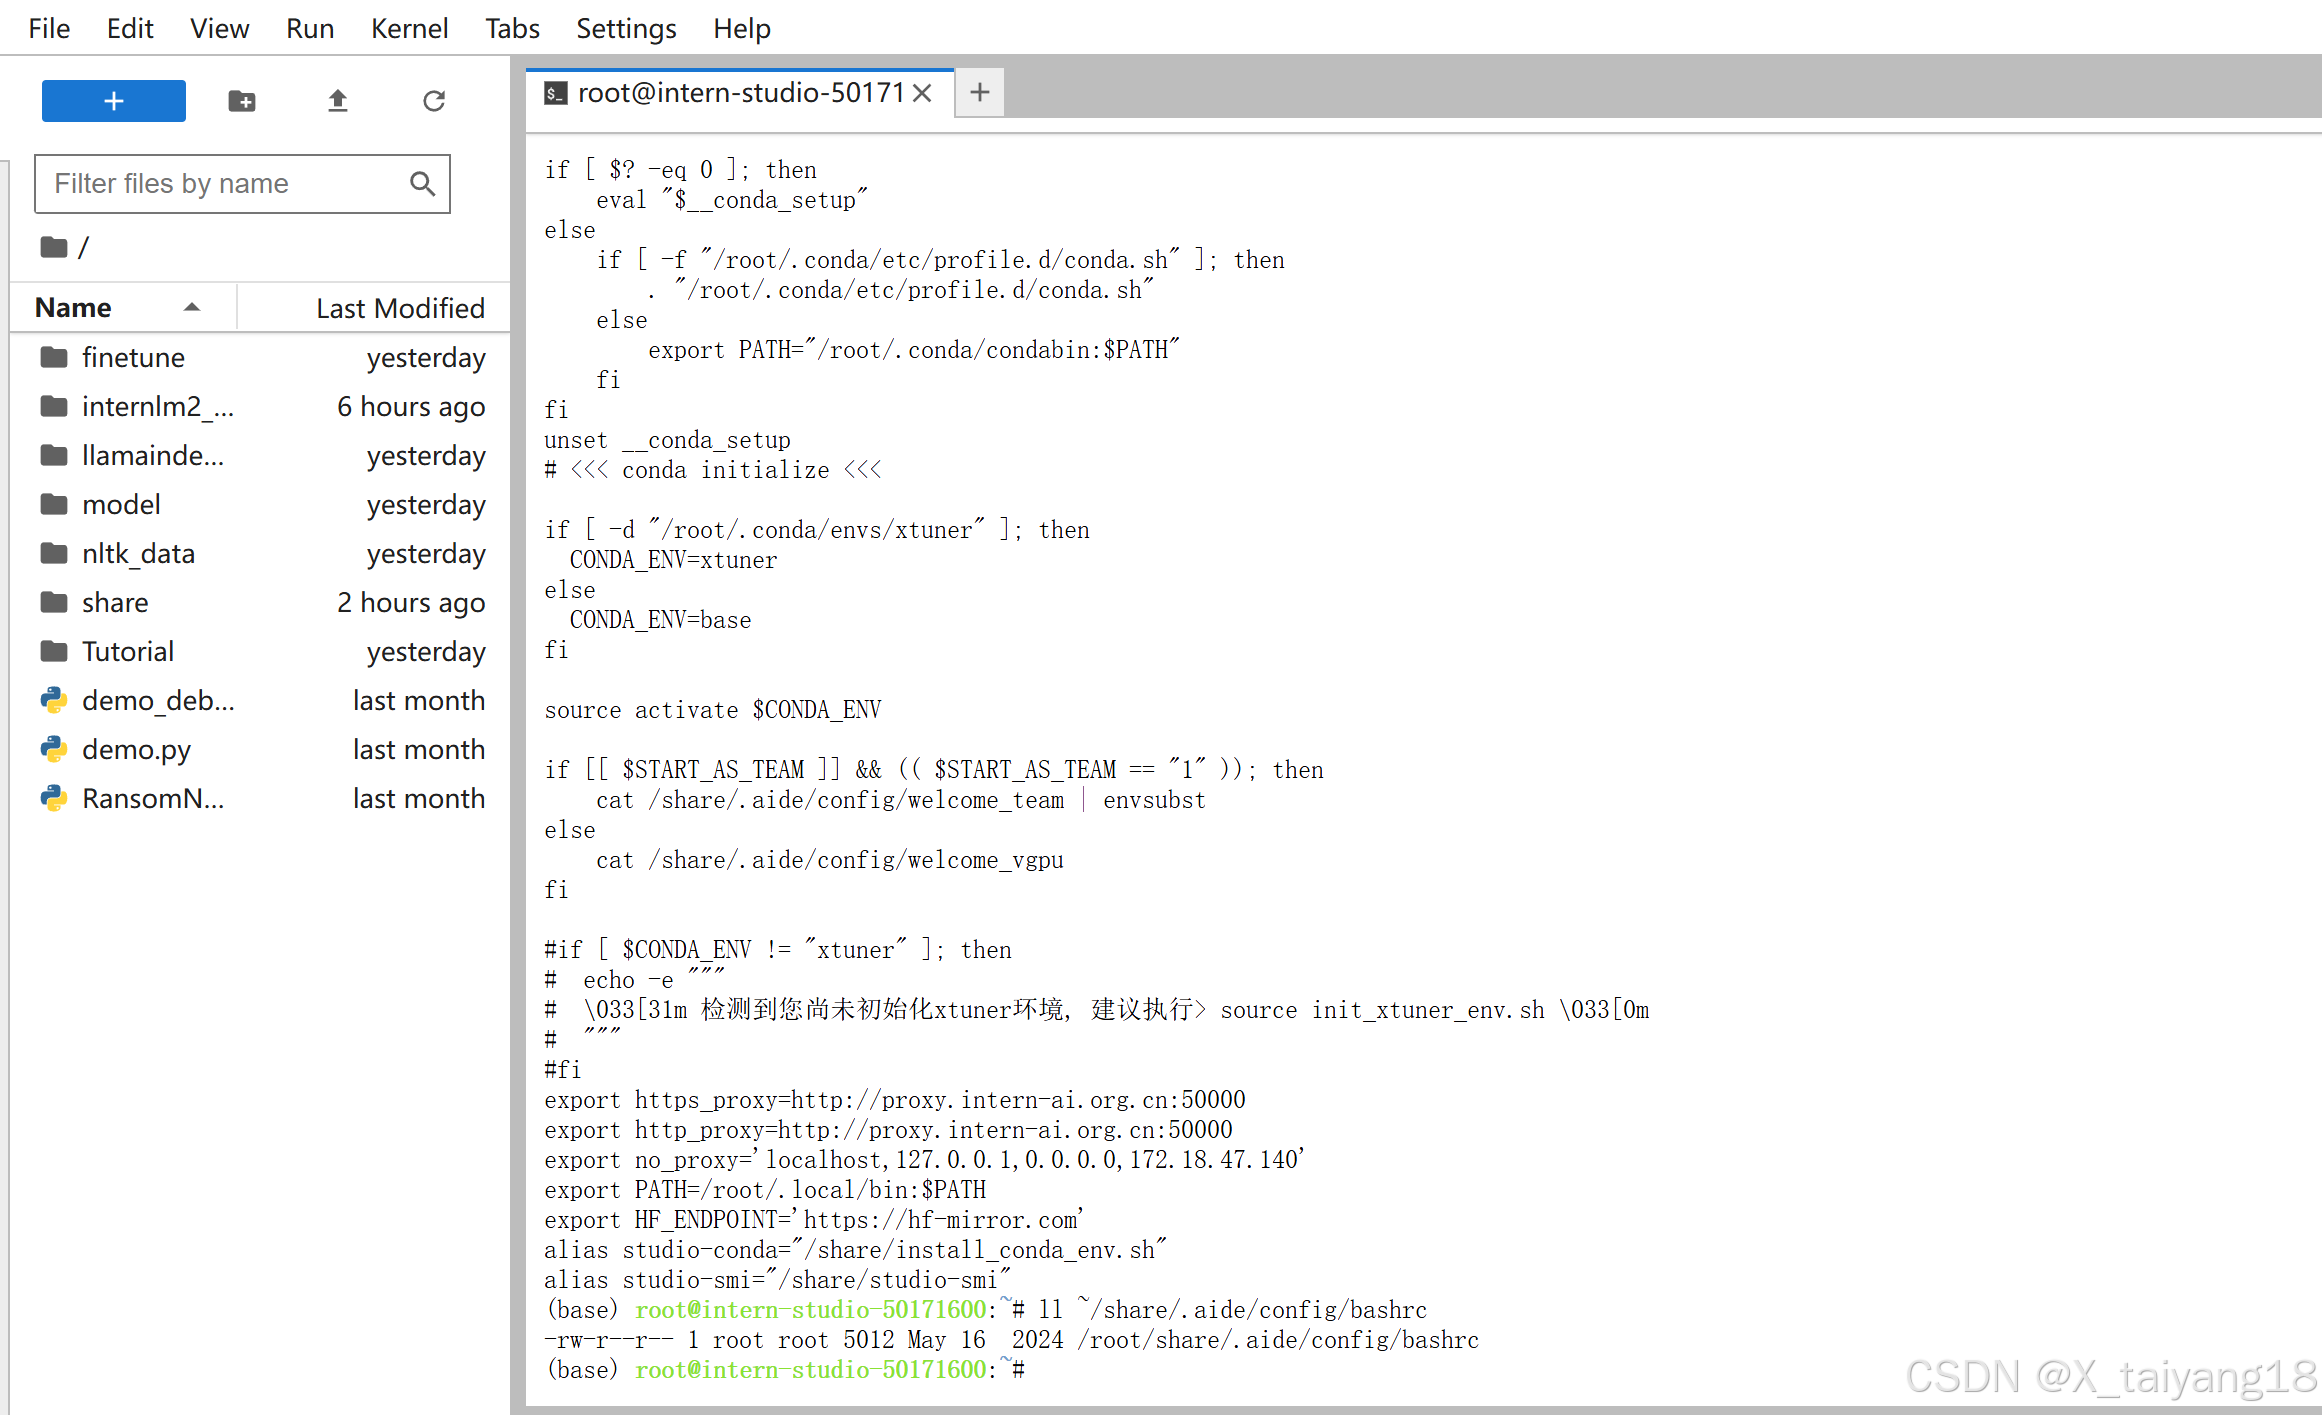
该文件是只读的,看来这种方式在这里走不通
-
再次尝试将微调后的模型上传到 HuggingFace(成功版)
也需要利用Github的codespaces,懒得折腾了,以后有时间再说
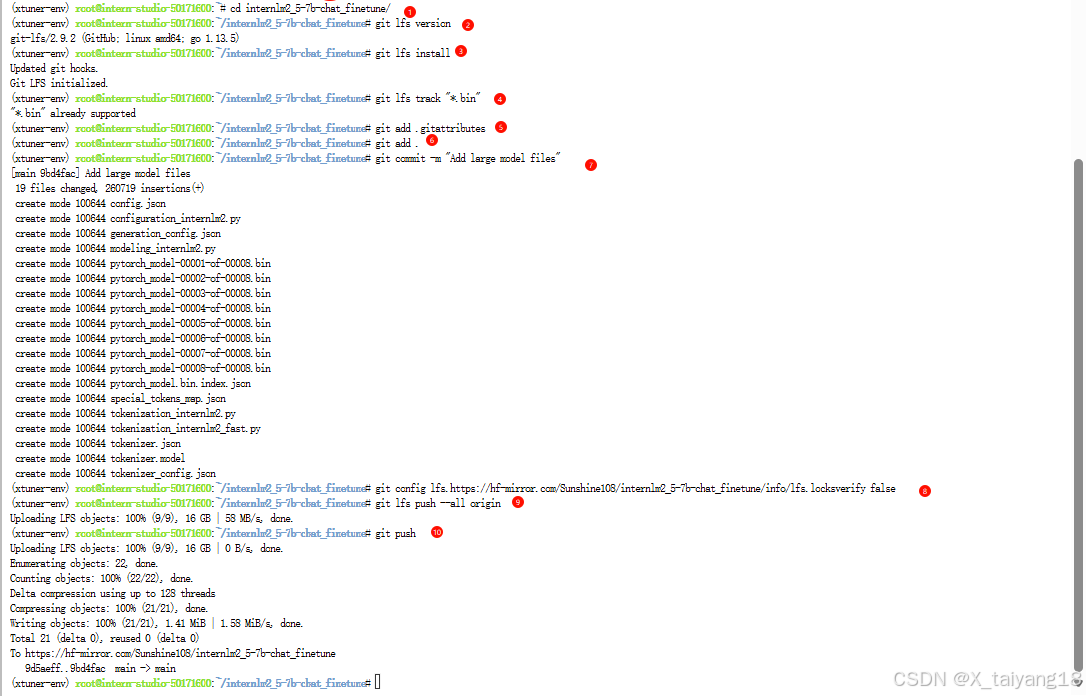
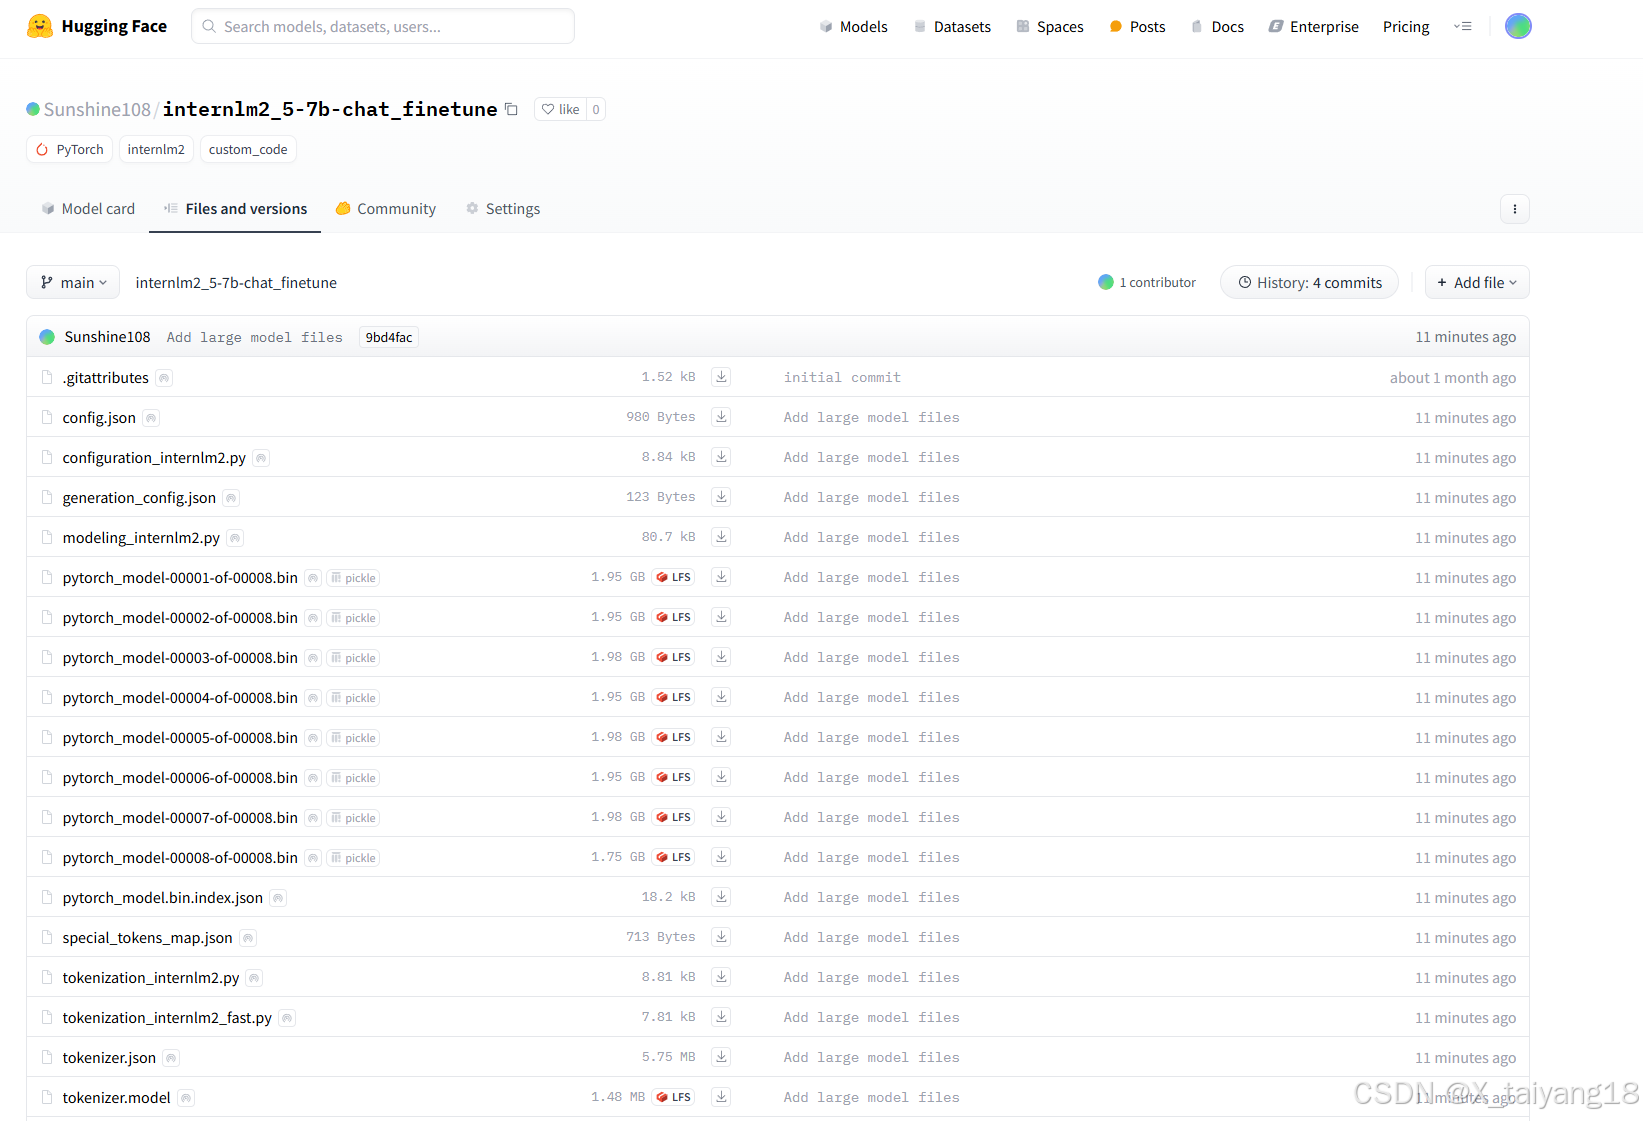
使用 hf-mirror.com 镜像站点再次尝试
-
克隆自己在huggingface上创建的项目
git clone https://hf-mirror.com/Sunshine108/internlm2_5-7b-chat_finetune
-
复制模型文件到该库
cp /root/finetune/work_dirs/assistTuner/merged/* /root/internlm2_5-7b-chat_finetune/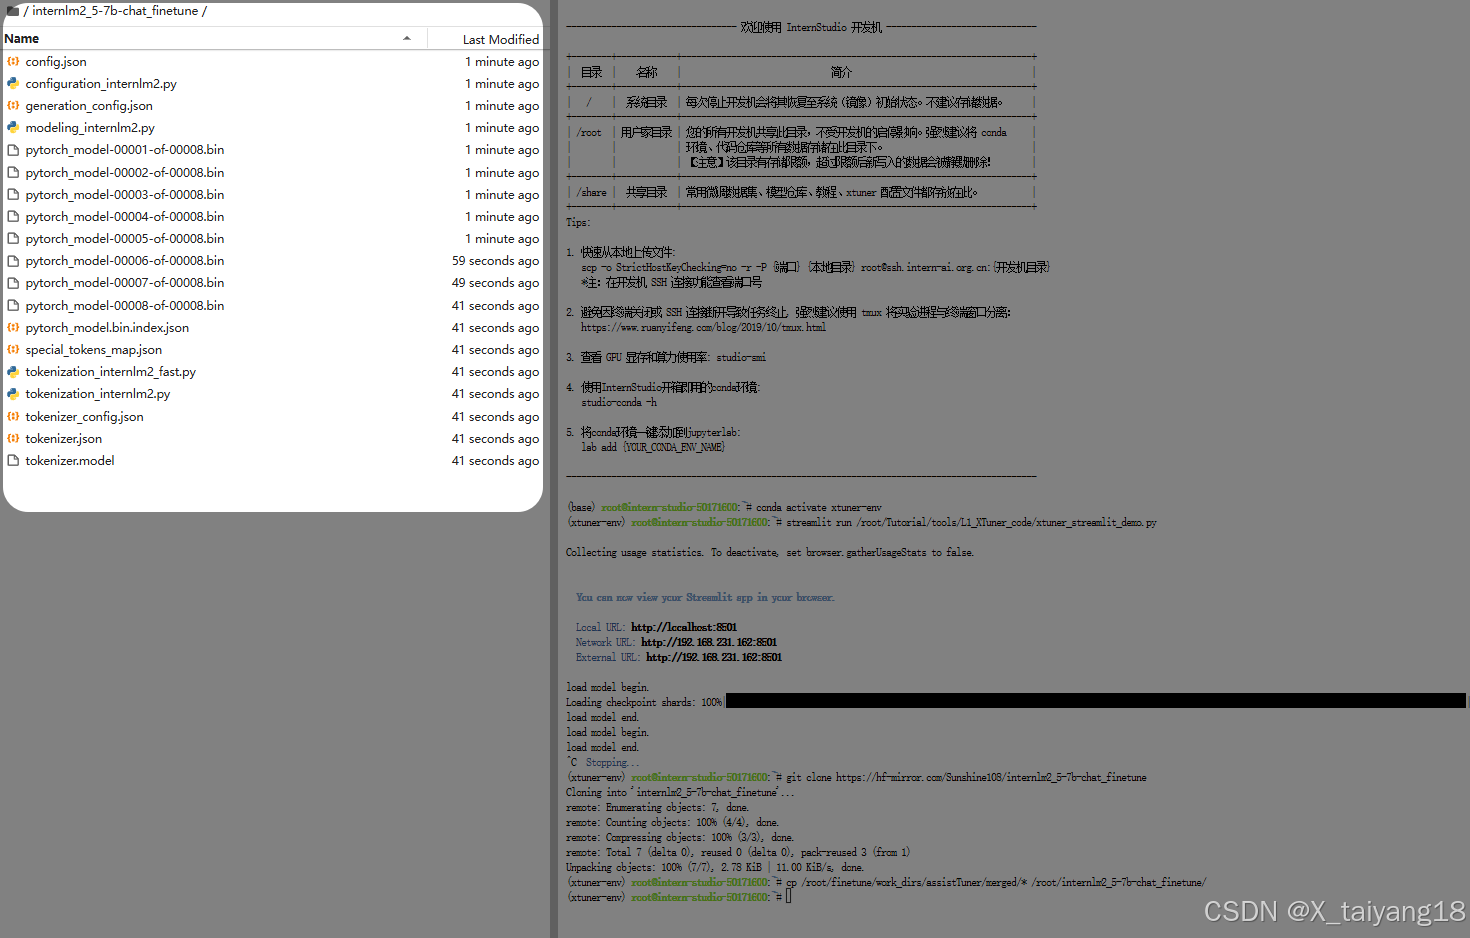
-
使用
Git LFS推送大型文件cd ~/internlm2_5-7b-chat_finetune/ # 进入你的 Git 仓库目录: apt-get install git-lfs # 安装 Git LFS(如果尚未安装) git lfs version # Git LFS 是否正确安装 也可使用which git-lfs git lfs install # 初始化 Git LFS git lfs track "*.bin" # 配置 Git LFS 跟踪特定文件类型(例如 *.bin) git add .gitattributes # 添加 .gitattributes 文件 git add . # 添加所有文件 git commit -m "Add large model files" # 提交更改 # 在推送时遇到凭证验证问题,禁用锁验证可以解决问题(我是唯一一个修改仓库的人,不需要文件锁功能) # 禁用锁验证后,Git LFS 不再检查文件锁,因此不需要额外的凭证验证。 # 禁用锁验证后,文件锁功能将失效,可能会导致多人协作时的冲突问题。 git config lfs.https://hf-mirror.com/Sunshine108/internlm2_5-7b-chat_finetune/info/lfs.locksverify false # 禁用 LFS 锁验证 git lfs push --all origin # 推送 LFS 跟踪的文件 git push # 推送其他所有内容
总结
唯一不变的是变化。


 484
484

 被折叠的 条评论
为什么被折叠?
被折叠的 条评论
为什么被折叠?
 到【灌水乐园】发言


