


OpenWrt on VirtualBox
环境配置
+在windows上配置 VirtualBox的环境变量;
- 下载
wget.exe并将其放到git的bin目录下; - 下载
dd工具包。
脚本执行
环境:windows10 + git bash + virtualBox
脚本分析
注意:在配置好上述环境的情况下,可在windows环境中一键安装openwrt
#!/usr/bin/env bash
VER="19.07.5" # openwrt version
VDI_BASE="openwrt-x86-64-combined-squashfs.vdi"
shasum -c img.sha256.sum
#kate:
# -c 从文件中读取SHA1 的校验值并予以检查
# -q don't print OK for each successfully verified file (kali里有该参数,ubuntu16.4里无改参数)
# 在ubuntu里,如果加上-q,则每次该命令会执行出错,从而无论本地是否已经下载过下面的镜像,都会重新下载。
# 标准输出重定向到 /dev/null , 2表示标准错误输出,重定向到 &1 ,1表示标准输出。即:标准错误输出也重定向到 /dev/null
if [[ $? -ne 0 ]];then
# kate:
# $? 最后运行的命令执行代码的返回值。即shasum的返回值。
# -ne : 不等于
# shasum执行成功返回0
# 下载固件
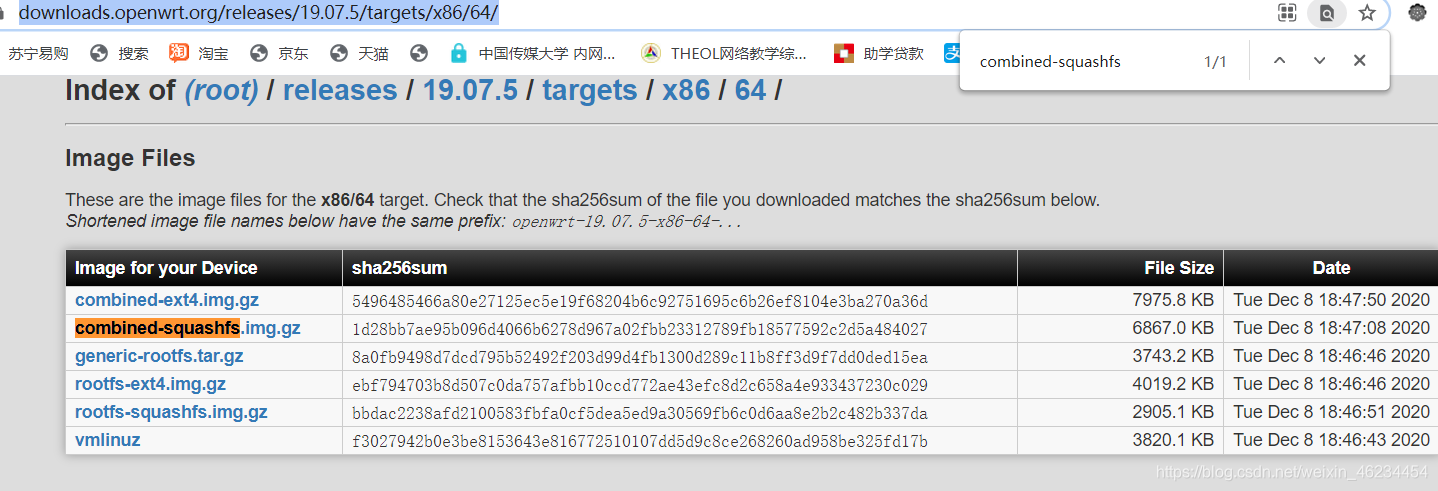
wget https://downloads.openwrt.org/releases/$VER/targets/x86/64/openwrt-$VER-x86-64-combined-squashfs.img.gz -O openwrt-x86-64-combined-squashfs.img.gz
# kate:
# wget : 非交互式的网络文件下载工具
# -O : 将文档写入 FILE/重命名
# 若官方网站链接发生变化,可以在google搜索文件名。
# 解压缩
gzip -d openwrt-x86-64-combined-squashfs.img.gz
# kate:
# gzip : Compress or uncompress FILEs
fi
shasum -c vdi.sha256.sum
if [[ $? -ne 0 ]];then
# img 格式转换为 Virtualbox 虚拟硬盘格式 vdi
VBoxManage convertfromraw --format VDI openwrt-x86-64-combined-squashfs.img "$VDI_BASE"
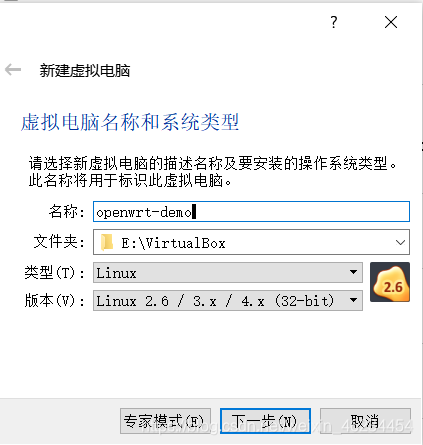
# 新建虚拟机选择「类型」 Linux / 「版本」Linux 2.6 / 3.x / 4.x (64-bit),填写有意义的虚拟机「名称」
# 内存设置为 256 MB
# 使用已有的虚拟硬盘文件 - 「注册」新虚拟硬盘文件选择刚才转换生成的 .vdi 文件
if [[ $? -eq 1 ]];then
# 上述代码执行失败,则执行下述代码:将源img镜像拷贝一份,并给其一个新的名字。
# ref: https://openwrt.org/docs/guide-user/virtualization/virtualbox-vm#convert_openwrtimg_to_vbox_drive
dd if=openwrt-x86-64-combined-squashfs.img of=openwrt-x86-64-combined-squashfs-padded.img bs=128000 conv=sync
# dd :用指定大小的块拷贝一个文件,并在拷贝的同时进行指定的转换
# if=文件名:输入文件名
# of=文件名:输出文件名
# bs=bytes:同时设置读入/输出的块大小为bytes个字节。
# conv=conversion:用指定的参数转换文件。
# sync:将每个输入块填充到ibs个字节,不足部分用空(NUL)字符补齐。
VBoxManage convertfromraw --format VDI openwrt-x86-64-combined-squashfs-padded.img "$VDI_BASE"
# This command converts a raw disk image to an Oracle VM VirtualBox Disk Image (VDI) file.
fi
fi
# 创建虚拟机
VM="openwrt-demo"
# VBoxManage list ostypes
if [[ $(VBoxManage list vms | cut -d ' ' -f 1 | grep -w "\"$VM\"" -c) -eq 0 ]];then
# kate :
# VBoxManage list vms : 列出所有的虚拟机
# cut : Print selected parts of lines from each FILE to standard output.
# -d : 指定分隔符
# -f : 选取分割后的第一个
# grep : 在每个 FILE 或是标准输入中查找 PATTERN。默认的 PATTERN 是一个基本正则表达式(缩写为 BRE)
# -w : 强制匹配
# -c : 只打印匹配的行数
# 本行含义:如果版本为“openwrt-19.07.5”的虚拟机的个数为0,则继续往下执行:
echo "vm $VM not exsits, create it ..."
VBoxManage createvm --name $VM --ostype "Linux26_64" --register
# VBoxManage createvm --name $VM --ostype "Linux26_64" --register --groups "/IoT"
# VBoxManage createvm : 创建并注册一个虚拟机。
# --name : 指定虚拟机的名称为:openwrt-19.07.5
# --ostype : 指定虚拟机的系统类型为:Linux26_64
# 创建一个 SATA 控制器
VBoxManage storagectl "$VM" --name "SATA" --add sata --controller IntelAHCI
# 向该控制器安装一个「硬盘」
## --medium 指定本地的一个「多重加载」虚拟硬盘文件
VBoxManage storageattach "$VM" --storagectl "SATA" --port 0 \
--device 0 --type hdd --medium "$VDI_BASE"
VBoxManage storagectl "$VM" --name "SATA" --remove
# 将目标 vdi 修改为「多重加载」
VBoxManage modifymedium disk --type multiattach "$VDI_BASE"
# 虚拟磁盘扩容
VBoxManage modifymedium disk --resize 10240 "$VDI_BASE"
VBoxManage storagectl "$VM" --name "SATA" --add sata --controller IntelAHCI
VBoxManage storageattach "$VM" --storagectl "SATA" --port 0 \
--device 0 --type hdd --medium "$VDI_BASE"
# 启用 USB 3.0 接口
VBoxManage modifyvm "$VM" --usbxhci on
# 修改虚拟机配置
## --memory 内存设置为 256MB
## --vram 显存设置为 16MB
VBoxManage modifyvm "$VM" --memory 256 --vram 16
# ref: https://docs.oracle.com/en/virtualization/virtualbox/6.1/user/settings-display.html
# VMSVGA: Use this graphics controller to emulate a VMware SVGA graphics device. This is the default graphics controller for Linux guests.
VBoxManage modifyvm "$VM" --graphicscontroller vmsvga
# CAUTION: 虚拟机的 WAN 网卡对应的虚拟网络类型必须设置为 NAT 而不能使用 NatNetwork ,无线客户端连入无线网络后才可以正常上网
## 检查 NATNetwork 网络是否存在
# natnetwork_name="NatNetwork"
# natnetwork_count=$(VBoxManage natnetwork list | grep -c "$natnetwork_name")
# if [[ $natnetwork_count -eq 0 ]];then
# VBoxManage natnetwork add --netname "$natnetwork_name" --network "10.0.2.0/24" --enable --dhcp on
# fi
## 添加 Host-Only 网卡为第 1 块虚拟网卡
## --hostonlyadapter1 第 1 块网卡的界面名称为 vboxnet0
## --nictype1 第 1 块网卡的控制芯片为 Intel PRO/1000 MT 桌面 (82540EM)
## --nic2 nat 第 2 块网卡配置为 NAT 模式
VBoxManage modifyvm "$VM" --nic1 "hostonly" --nictype1 "82540EM" --hostonlyadapter1 "vboxnet0"
VBoxManage modifyvm "$VM" --nic2 nat
fi
也可以手动安装,用到部分上述命令,可在上面粘贴。
手动安装openwrt
-
在
https://downloads.openwrt.org/releases/19.07.5/targets/x86/64/中下载openwrt-19.07.5-x86-64-combined-squashfs.img.gz。
-
使用
gzip -d在git bash中解压缩刚下载的文件。

- 使用下述命令将
img文件转换成vdi文件。

- 磁盘扩容

-
在
virtualBox中新建虚拟机,并选择[使用已有虚拟硬盘],并注册刚才生成的vdi。得到新的虚拟机openwrt-demo。
-
进行一些配置,如:设置多重加载、NAT+Host only双网卡、修改内存大小、显存大小、USB设备配置等。
无线网卡配置(补充)
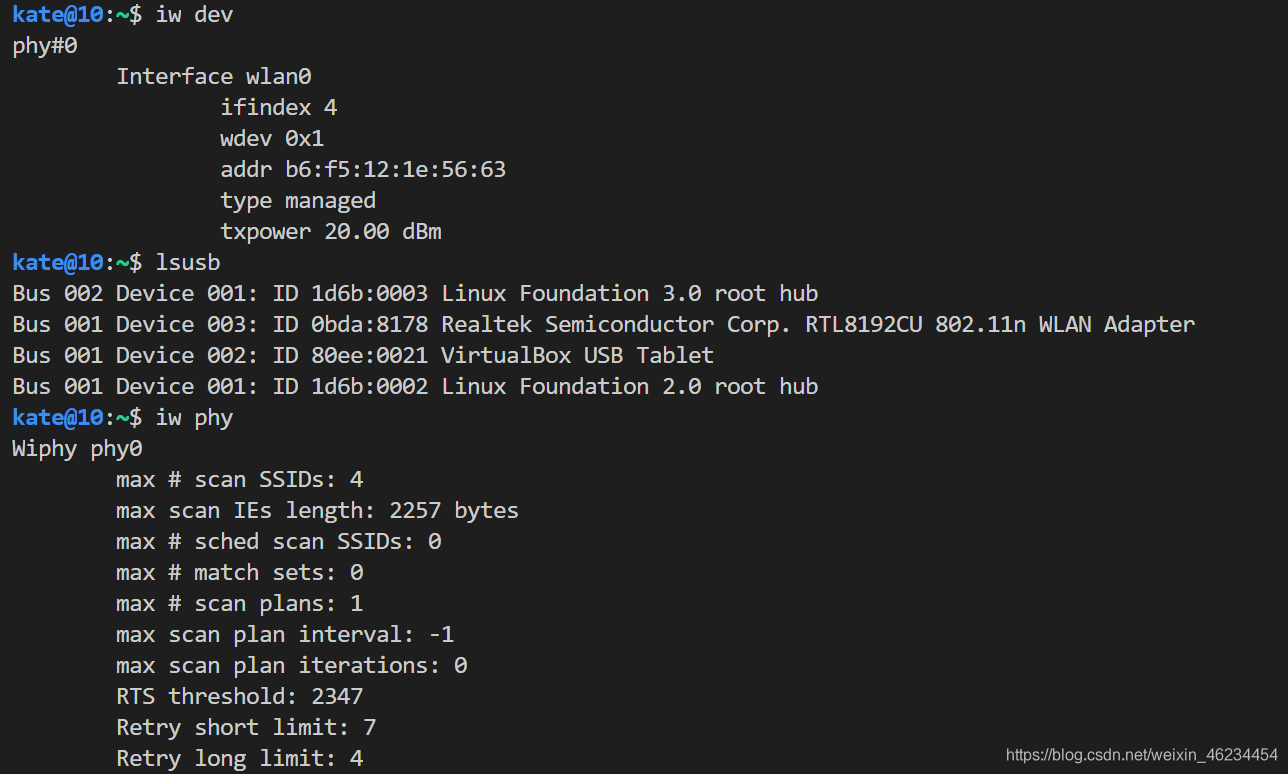
插入USB无线网卡,检测下述命令:iw dev,iw phy,lsusb
usb端口设置:
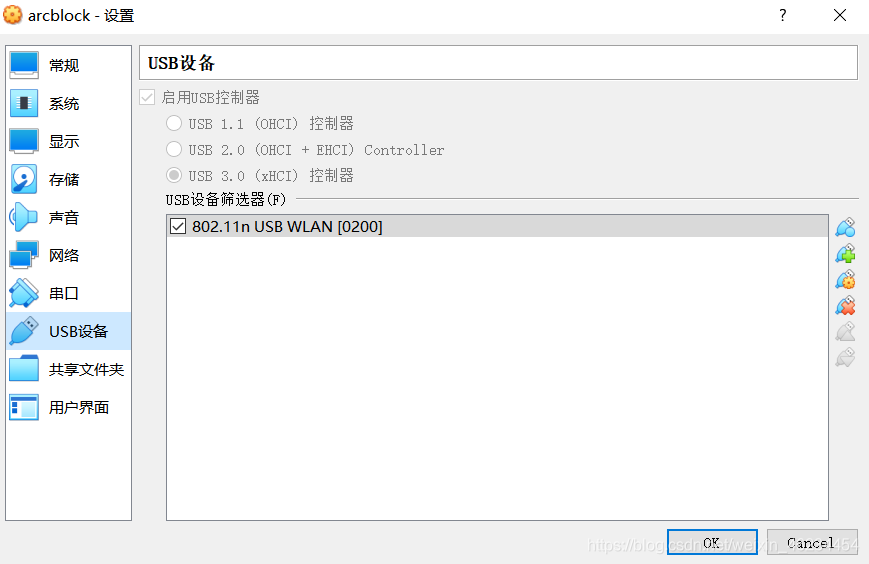
注意:重装virtualbox 需要安装 extension pack,才能更改上面的USB控制器。
- 可以采用下面的三条指令检测虚拟机是否可以正常的识别网卡。
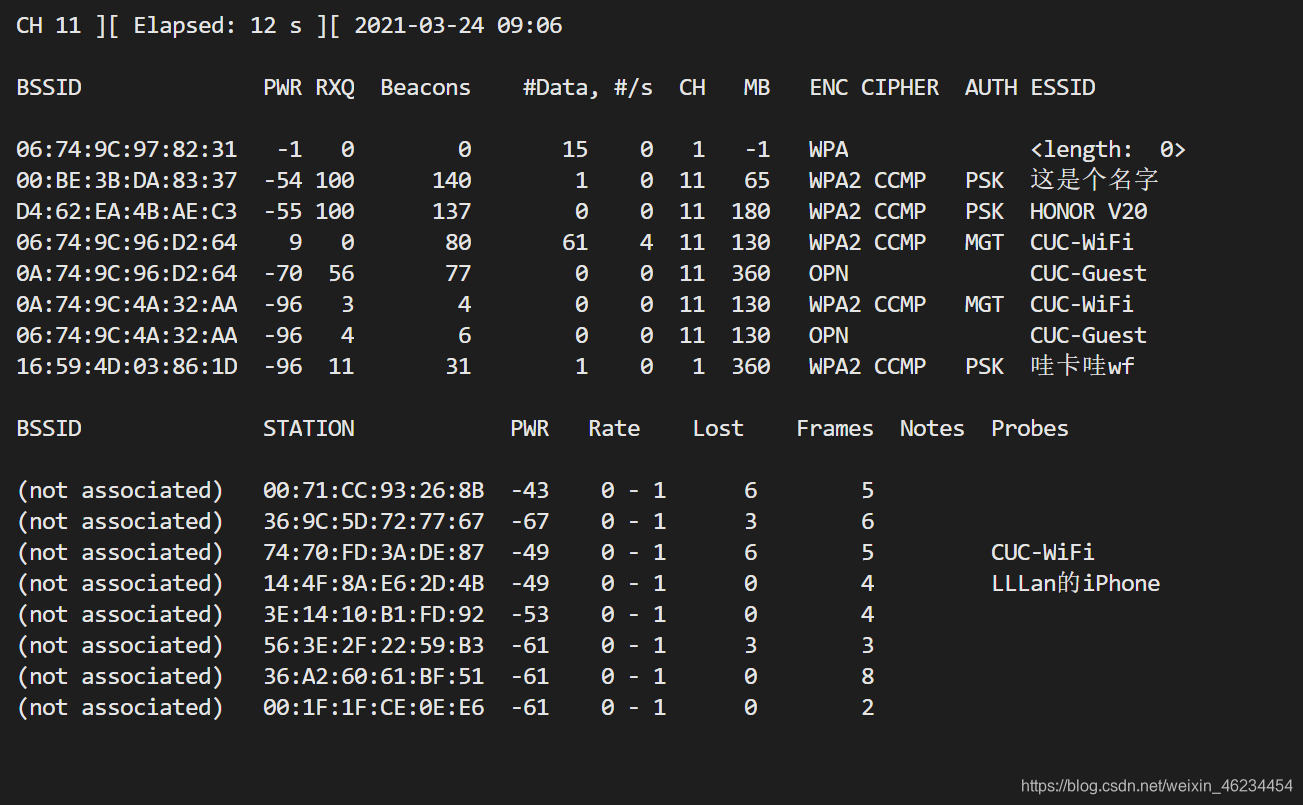
- 可以使用
sudo airodump-ng wlan0 -c 11 -w demo-20210324 --beacons: 抓包。
OpenWrt配置
-
网络配置:通过
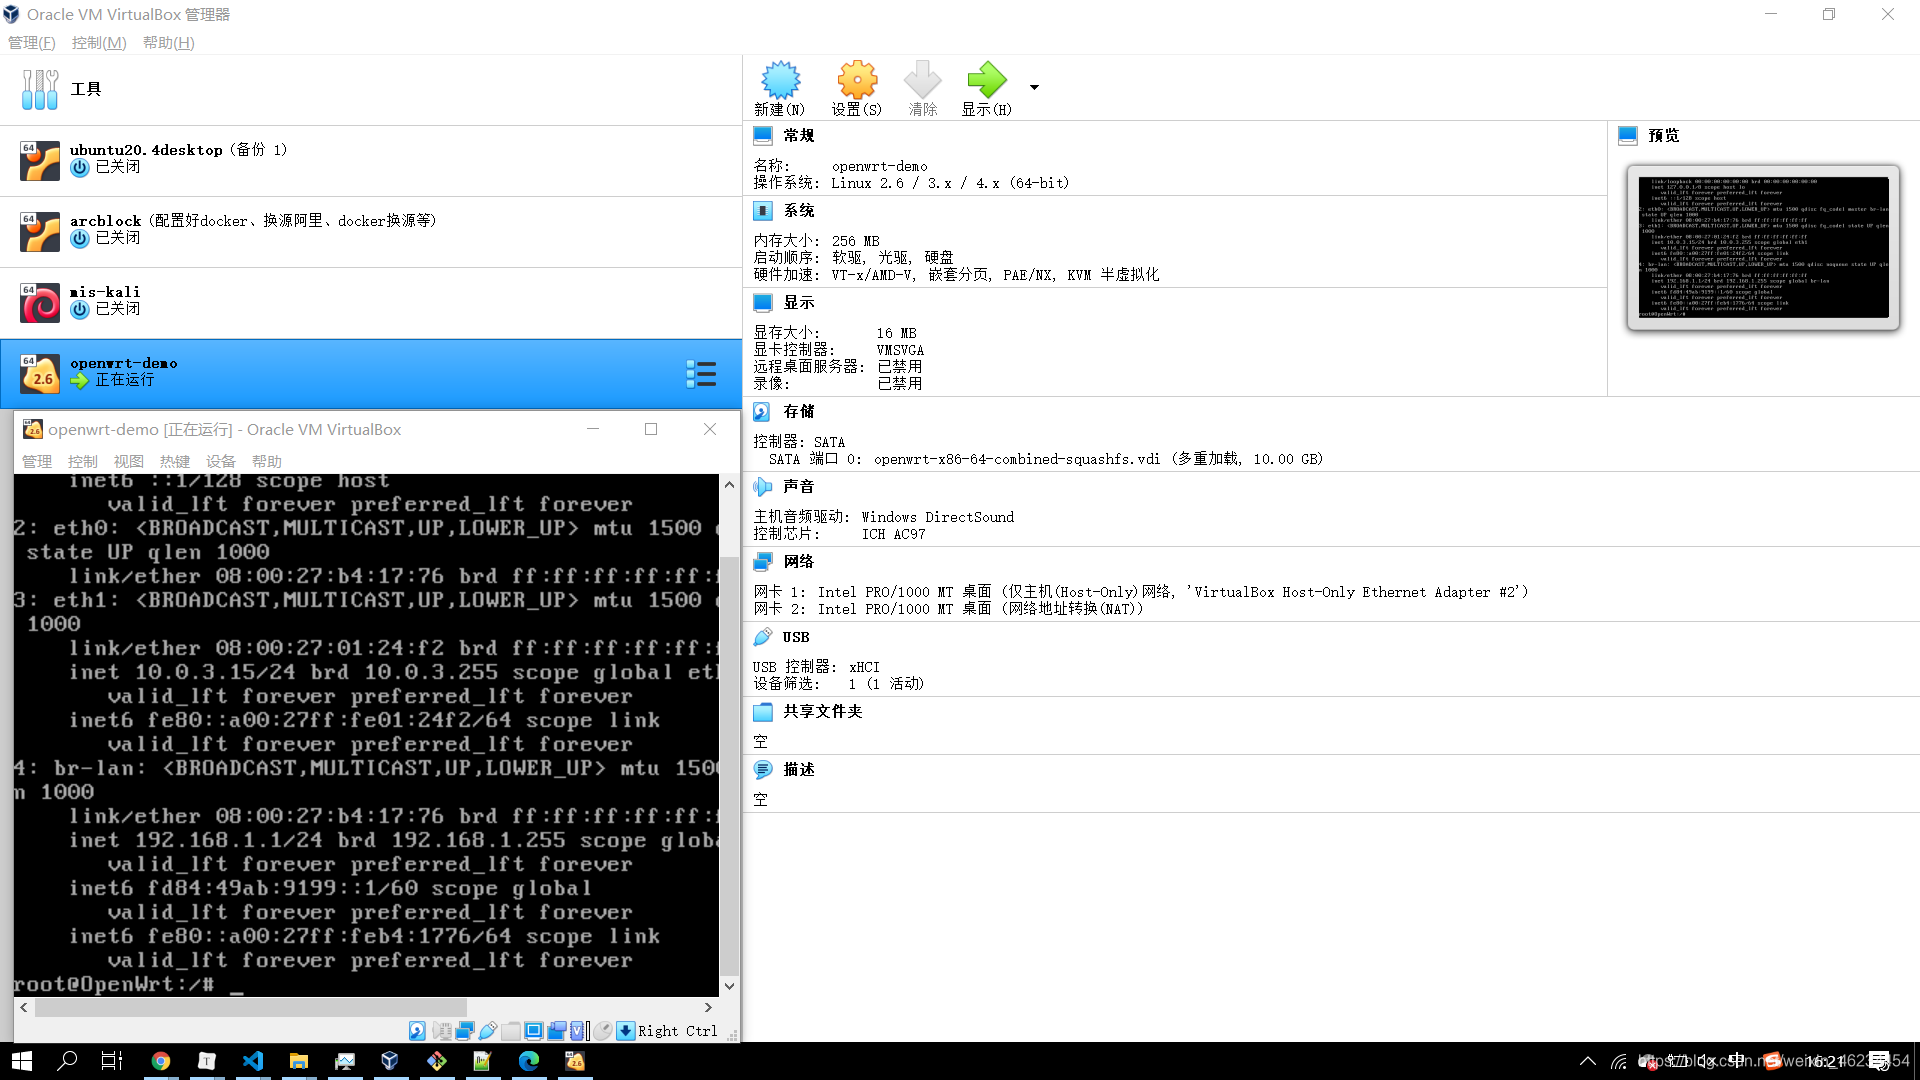
vi直接编辑/etc/config/network配置文件来设置好远程管理专用网卡的 IP 地址。修改OpenWrt局域网地址为当前 Host-only 网段内可用地址,只需要修改option ipaddr的值即可。config interface 'lan' option type 'bridge' option ifname 'eth0' option proto 'static' option ipaddr '192.168.56.11' option netmask '255.255.255.0' option ip6assign '60'然后可以通过重启系统使之重新加载配置。
-
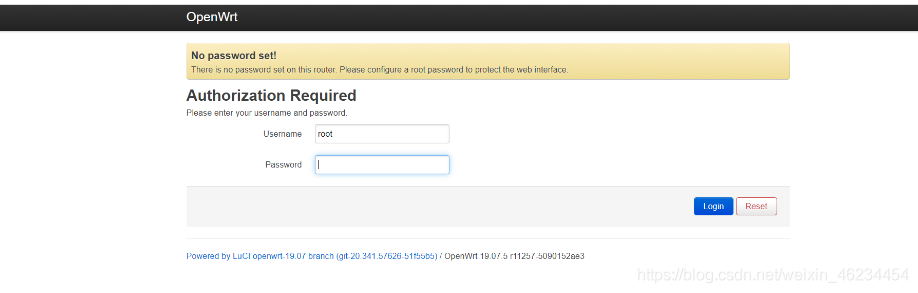
安装
LuCi# 更新 opkg 本地缓存 opkg update # 检索指定软件包 opkg find luci # luci - git-19.223.33685-f929298-1 # 查看 luci 依赖的软件包有哪些 opkg depends luci # luci depends on: # libc # uhttpd # uhttpd-mod-ubus # luci-mod-admin-full # luci-theme-bootstrap # luci-app-firewall # luci-proto-ppp # libiwinfo-lua # luci-proto-ipv6 # 查看系统中已安装软件包 opkg list-installed # 安装 luci opkg install luci # 查看 luci-mod-admin-full 在系统上释放的文件有哪些 opkg files luci-mod-admin-full # Package luci-mod-admin-full (git-16.018.33482-3201903-1) is installed on root and has the following files: # /usr/lib/lua/luci/view/admin_network/wifi_status.htm # /usr/lib/lua/luci/view/admin_system/packages.htm # /usr/lib/lua/luci/model/cbi/admin_status/processes.lua # /www/luci-static/resources/wireless.svg # /usr/lib/lua/luci/model/cbi/admin_system/system. # ... # /usr/lib/lua/luci/view/admin_network/iface_status.htm # /usr/lib/lua/luci/view/admin_uci/revert.htm # /usr/lib/lua/luci/model/cbi/admin_network/proto_ahcp.lua # /usr/lib/lua/luci/view/admin_uci/changelog.htm -
安装完
LuCi后浏览器访问的结果
-
检测网卡驱动
root@OpenWrt:~# lsusb
Bus 002 Device 001: ID 1d6b:0003 Linux Foundation 3.0 root hub
Bus 001 Device 002: ID 0bda:8178 Realtek Semiconductor Corp. RTL8192CU 802.11n WLAN Adapter
Bus 001 Device 001: ID 1d6b:0002 Linux Foundation 2.0 root hub
root@OpenWrt:~# lsusb -t
/:  Bus 02.Port 1: Dev 1, Class=root_hub, Driver=xhci_hcd/6p, 5000M
/:  Bus 01.Port 1: Dev 1, Class=root_hub, Driver=xhci_hcd/8p, 480M
    |__ Port 1: Dev 2, If 0, Class=Vendor Specific Class, Driver=, 480M
发现
RTL8192CU无线网卡无驱动。 -
安装驱动
#快速查找可能包含指定芯片名称的驱动程序包 root@OpenWrt:~# opkg find kmod-* | grep rtl8192cu kmod-rtl8192cu - 4.14.209+4.19.137-1-2 - Realtek RTL8192CU/RTL8188CU support #安装上述查询出的驱动 opkg install kmod-rtl8192cu #安装完成后检查: root@OpenWrt:~# lsusb -t /: Bus 02.Port 1: Dev 1, Class=root_hub, Driver=xhci_hcd/6p, 5000M /: Bus 01.Port 1: Dev 1, Class=root_hub, Driver=xhci_hcd/8p, 480M |__ Port 1: Dev 2, If 0, Class=Vendor Specific Class, Driver=rtl8192cu, 480M root@OpenWrt:~# -
安装
wpa-supplicant和hostapd。#wpa-supplicant 和 hostapd 。其中 wpa-supplicant 提供 WPA 客户端认证,hostapd 提供 AP 或 ad-hoc 模式的 WPA 认证。 opkg install hostapd wpa-supplicant -
重启系统,使得上述安装的配置生效。以便能够在
LuCi的网页版中管理无线网卡设置。能在网页版的Network下拉菜单中看见Wireless为上述操作成功的标识。 -
进行下述的配置
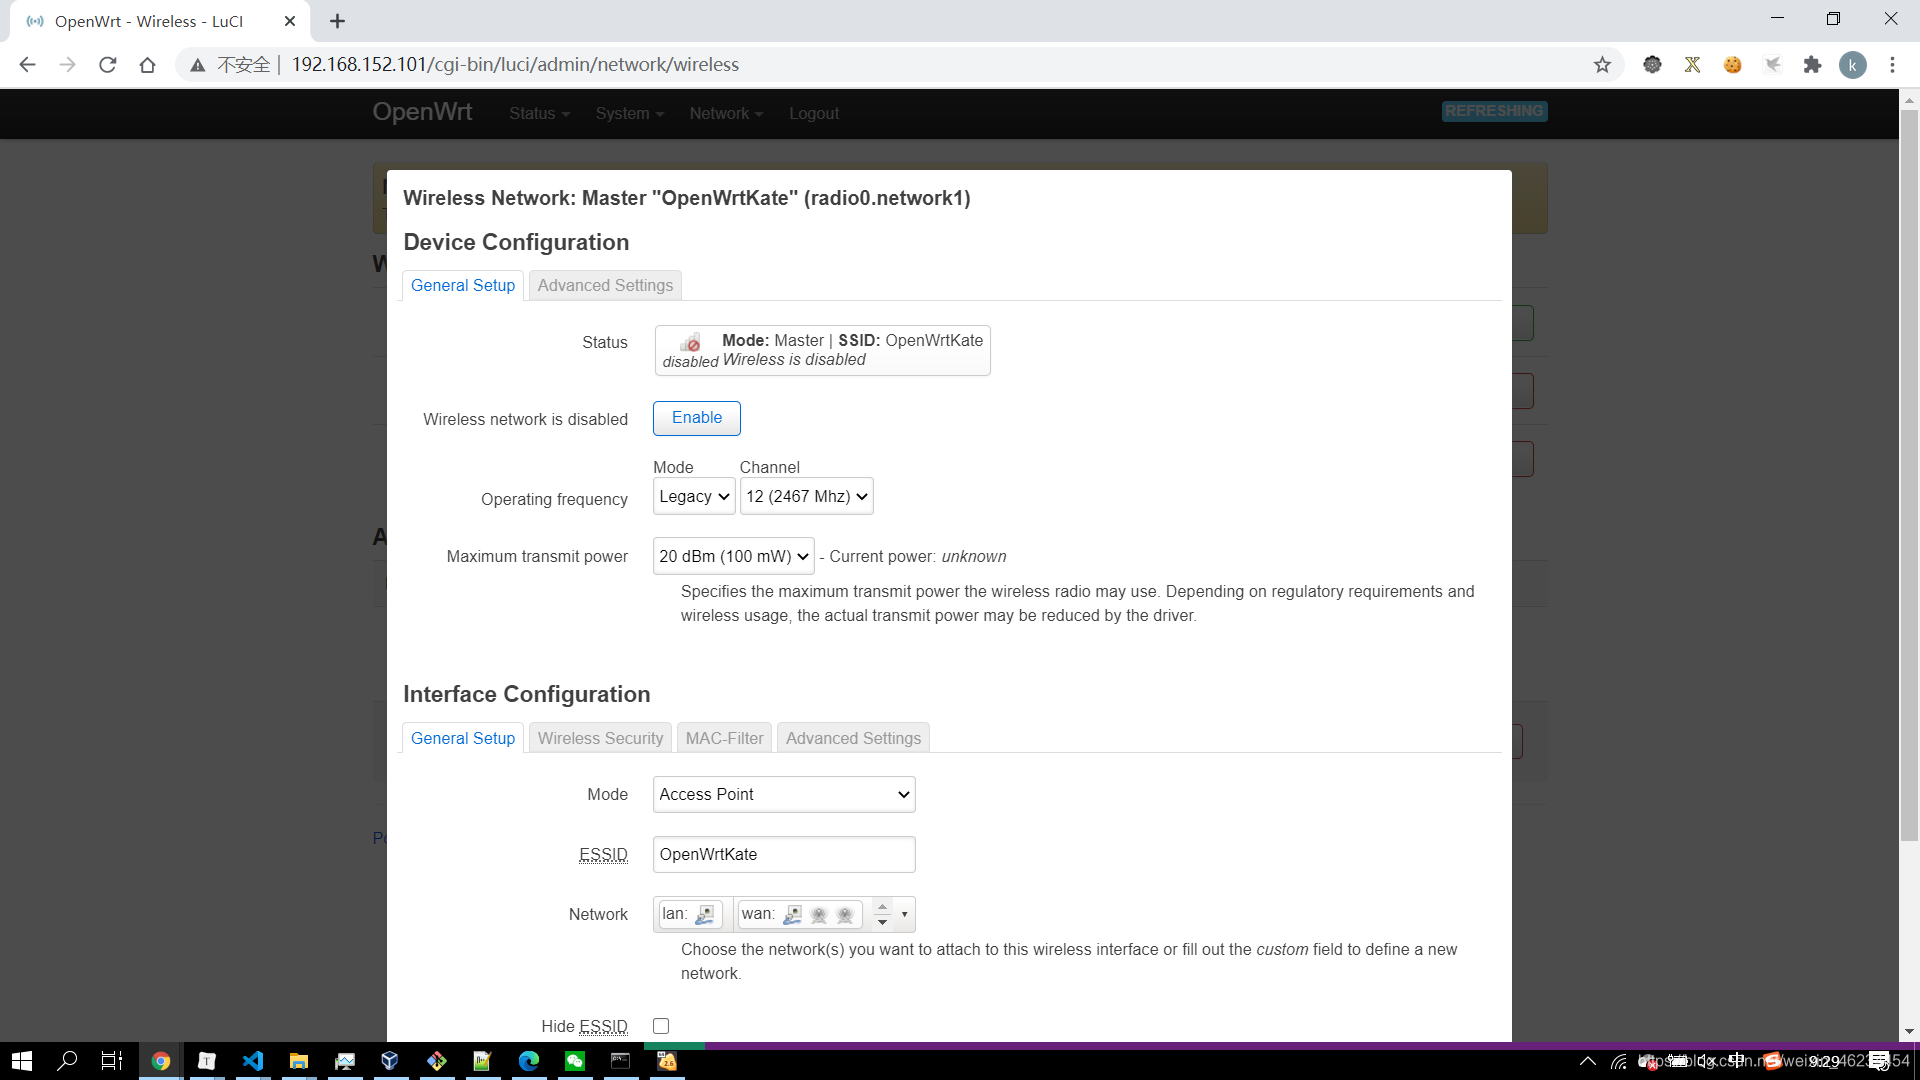
记得点击Enabble启动、保存配置。就可以用手机连接该热点啦~


 17
17

 被折叠的 条评论
为什么被折叠?
被折叠的 条评论
为什么被折叠?
 到【灌水乐园】发言


