


 本文详细解析了Android中Handler的工作原理,包括Looper和MessageQueue的角色,以及它们如何实现跨线程的消息传递。从源码层面探讨了Looper.prepare()和Looper.loop()的内部机制,解释了为何主线程不会因等待消息而阻塞。
写在前面
从业没有很久,生活比较寡淡,向往技术生活。立志成为一名优秀的程序员。目前基础较差,补课。
背景
前两天有个面试,面试问了几个问题,问的时候发现有些地方模糊不清,写个文章加深下自己的印象。
正文
涉及到Android多线程必然绕不开一个东西——Handler。所以Handler到底是个什么东西,郭霖老师的blog里有张图见过好多次(也不知道是不是郭神自己画的)。

Handler的基本用法就不多说了,主要是异步消息通信使用,在不同的线程里面传递消息。
但是Handler为什么能在不同的线程间通信呢?
Handler一般会重写父类的handleMessage()方法,像这样
Handler handler = new Handler(){
        @Override
        public void handleMessage(@NonNull Message msg) {
            super.handleMessage(msg);
        }
    };
用起来好像很简单。但是跟Handler配合使用的MessageQueue和Looper去哪了,在哪里初始化?
我们去看下Looper的源码,找到Looper这个类,有一段注释:
Class used to run a message loop for a thread.  Threads by default do
* not have a message loop associated with them; to create one, call
* {@link #prepare} in the thread that is to run the loop, and then
* {@link #loop} to have it process messages until the loop is stopped.
大概意思是这个类是用来为线程运行一个消息循环,然后还有一些用法巴拉巴拉。还举了个例子:
class LooperThread extends Thread {
  *      public Handler mHandler;
  *
  *      public void run() {
  *          Looper.prepare();
  *
  *          mHandler = new Handler() {
  *              public void handleMessage(Message msg) {
  *                  // process incoming messages here
  *              }
  *          };
  *
  *          Looper.loop();
  *      }
  *  }
ok,这个例子要注意一下这个Looper.prepare(); Looper.loop(),在MainActivity中使用的时候并没有写这俩兄弟,那一定是有人在帮我们负重前行。
java的代码都可以在Main函数里面执行,Android的Main函数就在ActivityThread里面。看下ActivityThread这个类,老样子先看注释吧
/**
 * This manages the execution of the main thread in an
 * application process, scheduling and executing activities,
 * broadcasts, and other operations on it as the activity
 * manager requests.
 *
 * {@hide}
 */
字面意思好懂,不翻译了。看下这个Main函数
public static void main(String[] args) {
        Trace.traceBegin(Trace.TRACE_TAG_ACTIVITY_MANAGER, "ActivityThreadMain");

        // Install selective syscall interception
        AndroidOs.install();

        // CloseGuard defaults to true and can be quite spammy.  We
        // disable it here, but selectively enable it later (via
        // StrictMode) on debug builds, but using DropBox, not logs.
        CloseGuard.setEnabled(false);

        Environment.initForCurrentUser();

        // Make sure TrustedCertificateStore looks in the right place for CA certificates
        final File configDir = Environment.getUserConfigDirectory(UserHandle.myUserId());
        TrustedCertificateStore.setDefaultUserDirectory(configDir);

        Process.setArgV0("<pre-initialized>");

        Looper.prepareMainLooper();

        // Find the value for {@link #PROC_START_SEQ_IDENT} if provided on the command line.
        // It will be in the format "seq=114"
        long startSeq = 0;
        if (args != null) {
            for (int i = args.length - 1; i >= 0; --i) {
                if (args[i] != null && args[i].startsWith(PROC_START_SEQ_IDENT)) {
                    startSeq = Long.parseLong(
                            args[i].substring(PROC_START_SEQ_IDENT.length()));
                }
            }
        }
        ActivityThread thread = new ActivityThread();
        thread.attach(false, startSeq);

        if (sMainThreadHandler == null) {
            sMainThreadHandler = thread.getHandler();
        }

        if (false) {
            Looper.myLooper().setMessageLogging(new
                    LogPrinter(Log.DEBUG, "ActivityThread"));
        }

        // End of event ActivityThreadMain.
        Trace.traceEnd(Trace.TRACE_TAG_ACTIVITY_MANAGER);
        Looper.loop();

        throw new RuntimeException("Main thread loop unexpectedly exited");
    }
内容比较少,就不删减了,首先看下跟Looper相关的内容,其实就两行
Looper.prepareMainLooper();
Looper.loop();
卧槽,这看起来跟示例像极了。就差了个MainLooper,看下这是啥。
-
首先看下这个prepareMainLooper
public static void prepareMainLooper() {
        prepare(false);
        synchronized (Looper.class) {
            if (sMainLooper != null) {
                throw new IllegalStateException("The main Looper has already been prepared.");
            }
            sMainLooper = myLooper();
        }
    }
一个静态方法,首先调用了prepare(),然后用了个同步代码块,判空以后,给赋值一个myLooper();
- prepare()是什么,是不是就是官方示例里提到的那个。。。。Looper.prepare()?
private static void prepare(boolean quitAllowed) {
        if (sThreadLocal.get() != null) {
            throw new RuntimeException("Only one Looper may be created per thread");
        }
        sThreadLocal.set(new Looper(quitAllowed));
    }
首先要还是个判空,判断sThreadLocal.get()是否为空,为空的话调用下一步的sThreadLocal.set(new Looper(quitAllowed));,不然就抛个异常,Looper在每个线程只能创建一次。看来这就是判断是否创建了一次的地方了。必须要看看这个sThreadLocal是啥。
static final ThreadLocal<Looper> sThreadLocal = new ThreadLocal<Looper>();原来是ThreadLocal<Looper>,那就是说,我们获取到了当前线程的Looper对象,如果不为空就判断又要进行初始化了,抛异常,如果为空,说明之前还没搞过,ok,让你搞。就调用set方法。里面的内容后续再看。
-
sMainLooper=myLooper()
public static @Nullable Looper myLooper() {
        return sThreadLocal.get();
    }
很简单,直接返回这个ThreadLocal里面的Looper。相当于给sMianLooper进行赋值了。
这样看起来就比较清晰了。在Main函数中,我们调用了Looper.prepareMainLooper(),在这里面分两步,第一步是prepare(false),猜测一下做的事情就是创建一个Looper,并且赋值给主线程的ThreadLocal,第二部,调用myLooper方法,从ThreadLocal中获取到刚刚创建好的Looper对象。
有的同学要问了ThreadLocal是什么,在里面set和get方法里面做了什么?传入的false又是什么,我也不知道,看看源码
还是从这一句开始
sThreadLocal.set(new Looper(quitAllowed));进去看看,到了ThreadLocal类,这样
public void set(T value) {
        Thread t = Thread.currentThread();
        ThreadLocalMap map = getMap(t);
        if (map != null)
            map.set(this, value);
        else
            createMap(t, value);
    }
ThreadLocal是个泛型类,携带了t,t在ActivityThread里面就是Looper(从sThreadLocal的定义里面就可以看出来)。再看看ThreadLocal里面的ThreadLocalMap和createMap是什么意思
static class ThreadLocalMap {
    //...
        static class Entry extends WeakReference<ThreadLocal<?>> {
            //...
        }
}
好家伙,静态内部类,这里有一大段注释,看下
/**
 * ThreadLocalMap is a customized hash map suitable only for
 * maintaining thread local values. No operations are exported
 * outside of the ThreadLocal class. The class is package private to
 * allow declaration of fields in class Thread.  To help deal with
 * very large and long-lived usages, the hash table entries use
 * WeakReferences for keys. However, since reference queues are not
 * used, stale entries are guaranteed to be removed only when
 * the table starts running out of space.
 */
太长了,用了下百度翻译
*ThreadLocalMap是一个自定义哈希映射,仅适用于维护线程局部值。不导出任何操作在ThreadLocal类之外。类是包私有的允许在类线程中声明字段。帮助处理非常大和长期的使用,哈希表条目使用钥匙的weakreference。但是,由于引用队列不是已使用,只有当表空间开始不足。
太混乱了,淦。
完全不知道在说什么,人工处理下。
大概意思就是,这里的map是一个维护线程局部值的对象,在本类之外没有对外暴露。为了解决长时间的使用的内存泄漏问题,用了弱引用。当表空间开始耗尽时,才保证删除陈旧的条目。
Entry呢,看到就想到了以前的HashMap里面的Entry
/**
 * The entries in this hash map extend WeakReference, using
 * its main ref field as the key (which is always a
 * ThreadLocal object).  Note that null keys (i.e. entry.get()
 * == null) mean that the key is no longer referenced, so the
 * entry can be expunged from table.  Such entries are referred to
 * as "stale entries" in the code that follows.
 */
这次不用百度了,看下有道翻译
这个哈希映射中的条目扩展了WeakReference,使用其主ref字段作为键(始终是一个ThreadLocal对象)。注意,空键(即entry.get() == null)意味着不再引用该键,因此可以从表中删除该条目。在下面的代码中,这样的条目被称为“陈旧条目”。
感觉还行。在我们的ThreadLocalMap中,有一些成员变量,
/**
         * The table, resized as necessary.
         * table.length MUST always be a power of two.
         */
        private Entry[] table;

        /**
         * The number of entries in the table.
         */
        private int size = 0;

        /**
         * The next size value at which to resize.
         */
        private int threshold; // Default to 0
主要就是这个table是一个Entry数组。都是涉及初始化的参数。类似于HaspMap,这里map也有扩展
private void resize() {
            Entry[] oldTab = table;
            int oldLen = oldTab.length;
            int newLen = oldLen * 2;
没抄完,扩展的长度是原来的两倍,并且对元素进行了再哈希。
这里的map是通过getMap(Thread t)进行获取的,代码如下
ThreadLocalMap getMap(Thread t) {
        return t.threadLocals;
    }
返回了该线程的ThreadLocals,这里的t就是Thread.currentThread();
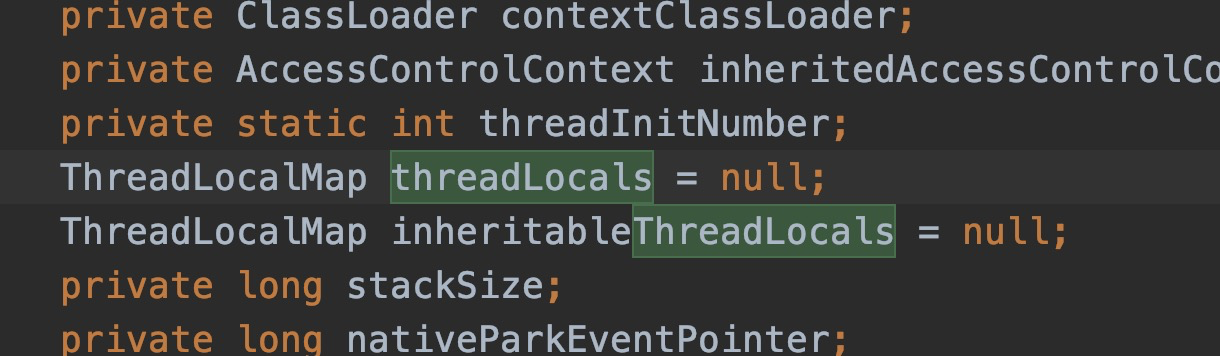
这个threadLocals是Thread中的成员变量,就是刚刚提到的ThreadLocalMap。
ThreadLocal中的map通过如下方法进行初始化
private T setInitialValue() {
        T value = initialValue();
        Thread t = Thread.currentThread();
        ThreadLocalMap map = getMap(t);
        if (map != null)
            map.set(this, value);
        else
            createMap(t, value);
        return value;
    }
最后调用了createMap(t,value)
t是当前的线程,value如下
protected T initialValue() {
        return null;
    }
再看createMap,最后调用了构造函数进行初始化
ThreadLocalMap(ThreadLocal<?> firstKey, Object firstValue) {
            table = new Entry[INITIAL_CAPACITY];
            int i = firstKey.threadLocalHashCode & (INITIAL_CAPACITY - 1);
            table[i] = new Entry(firstKey, firstValue);
            size = 1;
            setThreshold(INITIAL_CAPACITY);
        }
ok,传入了ThreadLocal和firstValue,至于这个firstValue我们后续再做研究。
void createMap(Thread t, T firstValue) {
        t.threadLocals = new ThreadLocalMap(this, firstValue);
    }
到目前为止,prepareMainLooper方法总算是差不多了,梳理下
- 首先调用prepare方法,为主线程的ThreadLocal设置自己的Looper,ThreadLocal中使用Hashmap的形式去管理线程和Looper的关系,每个线程有其对应的Looper,所以在prepare方法里面即使没有加锁,也会去判断是哪个线程,对自己的Looper进行管理。
- 调用myLooper();给主线程的Looper赋值,就是从刚刚的ThreadLocal中获取刚刚prepare好的Looper。
再来看下Looper.loop()
代码有点长,这个也不是今天分析的重点,就不着重看了
final Looper me = myLooper();
final MessageQueue queue = me.mQueue;
for(;;){}
主要结构是这样的,获取当前线程的looper,获取Looper对应的MessageQueue然后进入一个死循环。上学的时候知道在运行一个程序的时候经常会用到一个死循环,大概就是这样的吧,在这个循环里面不断的轮询去获取要处理的消息,就是我们的Handler机制,当然里面做的事情不止这些,也包含了经常会问到的,为啥主线程不会阻塞?这个之后再拿出来看吧
总结
边看边写一个晚上,感觉对自己也是一种提高吧,记录下来,免得以后会忘记。如果有不同的意见和看法,请及时指出,博主水平有限,期待各路大神的指导和教育。不早了,睡觉,加油奥利给。


 960
960

 被折叠的 条评论
为什么被折叠?
被折叠的 条评论
为什么被折叠?
 到【灌水乐园】发言


