


安装VMware17_x版本,安装Ubuntu22.04版本。在Linux环境中安装Zephyr,最好连上VPN,否则无法访问GitHub,则无法正常安装Zephyr源码。
安装Python3.10,cmake,ninja,git等基础套件。
sudo apt install --no-install-recommends git cmake ninja-build gperf \
  ccache dfu-util device-tree-compiler wget \
  python3-dev python3-pip python3-setuptools python3-tk python3-wheel xz-utils file \
  make gcc gcc-multilib g++-multilib libsdl2-dev
安装west
pip3 install --user -U west
重新初始化 Zephyr,进入Zephyr安装目录:
west init
更新 Zephyr 及其所有模块(取决于网速条件,可能会比较漫长):
west update
安装 Python 依赖:
pip3 install --user -r ~/Embedded/zephyr/scripts/requirements.txt
安装SDK( 此命令需要最新版west支持,如不支持需要执行特定版本下载方法):
#需最新版west
west sdk install

#或安装指定版本
west sdk select <version>
用west sdk install命令无需再考虑安装包解压等操作,非常方便!
特定版本下载与安装(示例,版本号需针对性修改),
可使用git describe --tags查看Zephyr版本:

#常规安装方法
wget https://github.com/zephyrproject-rtos/sdk-ng/releases/download/v0.15.2/zephyr-sdk-0.15.2-x86_64-linux-setup.run
chmod +x zephyr-sdk-0.15.2-x86_64-linux-setup.run
./zephyr-sdk-0.15.2-x86_64-linux-setup.run
echo 'export ZEPHYR_TOOLCHAIN_VARIANT=zephyr' >> ~/.bashrc
echo 'export ZEPHYR_SDK_INSTALL_DIR=~/zephyr-sdk-0.15.2' >> ~/.bashrc
source ~/.bashrc
执行完west sdk install,我们就完全构建了Zephyr系统!
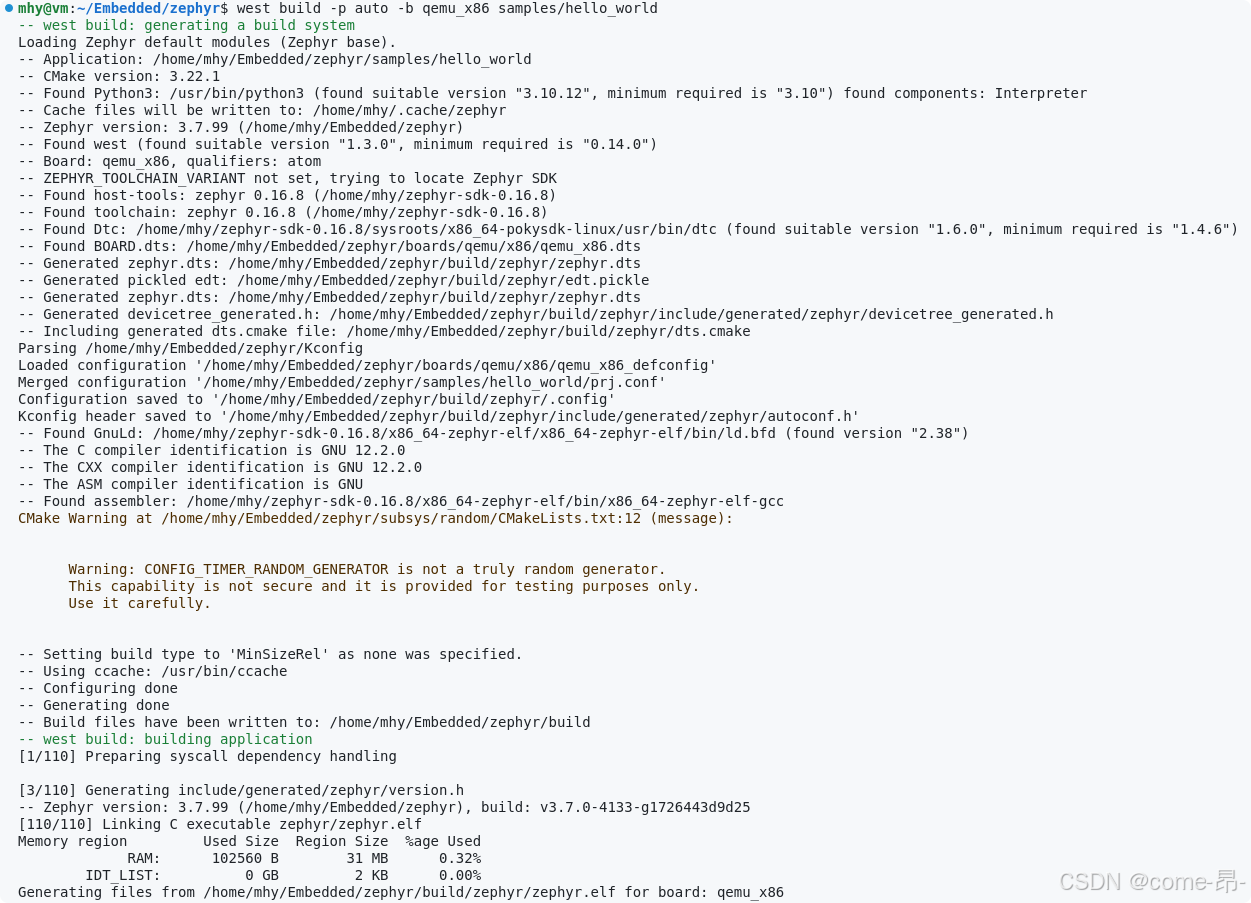
尝试构建一个hello_world示例:
进入你安装好的zephyr文件夹:
#cd ~/zephyr
west build -p auto -b qemu_x86 samples/hello_world
编译成功之后运行:
west build -t run

成功!出现Hello World!
退出命令Ctrl+a再按x。


 被折叠的 条评论
为什么被折叠?
被折叠的 条评论
为什么被折叠?
 到【灌水乐园】发言


