


 本文深入探讨了CSS样式属性的读写,包括element.style和window.getComputedStyle方法,讲解了如何获取元素的计算样式和物理宽高。接着,介绍了如何操作伪元素,如获取其宽高以及通过加类法改变伪元素的CSS。最后,文章触及了元素运动的初步概念。
六、读写样式属性、操作伪元素、元素运动初探
一、读写样式属性
1.1 element.style.xxx
DOM无法直接操作CSS样式表,而是通过操作标签上的style属性来修改/访问样式。
DOM动态设置行内样式的特点:
- 属性值可读可写。
- 多个单词属性名使用小驼峰形式。
- 属性值的写法必须为字符串。
- 复合值一定要拆解赋值,利于排除错误。
- 保留字前加css。
<style type="text/css">
    .box {
      width: 200px;
    }
</style>
<body>
  <div class="box"></div>
  <script type="text/javascript">
    var oDive = document.getElementsByTagName('div')[0];
    // DOM间接操作CSS
    // 值的写法必须是字符串
    oDive.style.width = '100px';
    oDive.style.height = '100px';
    // 多个单词属性名使用小驼峰形式书写
    oDive.style.backgroundColor = 'red';
    // ※复合值要分开书写
    oDive.style.borderWidth = '2px';
    oDive.style.borderStyle = 'solid';
    oDive.style.borderColor = '#000';
    // oDive.style.borderColor = 'black';
    // oDive.style.borderColor = 'rgba(0,0,0,0.2)';
    oDive.style.position = 'absolute';
    oDive.style.left = '100px';
    oDive.style.top = '100px';
    // 保留字前面加css
    oDive.style.cssFloat = 'left';
  </script>
</body>

注:element.style.xxx并没有直接修改内部css样式表,而是在标签的style属性上添加了css样式,而行内css样式的优先级更高。
通过element.style可以查看元素所有能够设置样式的属性名 集合(类数组):

1.2 ※window.getComputedStyle(elem,null)获取元素所有CSS计算属性值
Window.getComputedStyle()方法返回一个对象,该对象在应用活动样式表并解析这些值可能包含的任何基本计算后报告元素的所有CSS属性的值。
(返回元素的所有计算样式集合组成的对象),通过它可获得元素的所有CSS属性的值。
- IE8及以下不支持
- E8及以下支持elem.currentStyle->有些浏览器不支持该方法
- 企业中 获取元素宽高(width/height)的兼容性 写法:
<style type="text/css">
    .box {
      width: 200px;
      height: 200px;
      background-color: green;
    }
</style>
<div class="box"></div>
<script type="text/javascript">
    var oDiv = document.getElementsByTagName('div')[0];
    // 输出一个元素的宽度
    console.log(getStyle(oDiv,'width')); //'200px'
    console.log(getStyle(oDiv,'backgroundColor')); // 'rgb(0, 128, 0)'

    // 获取元素的css属性的兼容性写法
    // 核心方法:window.getComputedStyle  currentStyle
    // 参数分别代表:
    // 1.元素
    // 2.元素的某个属性
    function getStyle(elem, prop){
        // IE8以上使用window.getComputedStyle
        if(window.getComputedStyle){
            // 如果还需要元素的特定属性
            if(prop){
                return window.getComputedStyle(elem,null)[prop];
            }else{
                return window.getComputedStyle(elem,null);
            }
        }else{
            // IE8及以下使用currentStyle属性
            if(prop){
                return elem.currentStyle[prop];
            }else{
                return elem.currentStyle;
            }
        }
    }
</script>
1.3 elem.offsetWidth/offsetHeight返回的元素物理宽高,包括padding、border-width。
HTMLElement.offsetWidth 是一个只读属性,返回一个元素的布局宽度。一个典型的(译者注:各浏览器的offsetWidth可能有所不同)offsetWidth是测量包含元素的边框(border)、水平线上的内边距(padding)、竖直方向滚动条(scrollbar)(如果存在的话)、以及CSS设置的宽度(width)的值。
注:避免使用offsetWidth,获取元素的宽度和高度就使用window.getComputedStyle(elem,null)的兼容性写法。
二、操作伪元素
2.1 获取伪元素的宽高:
window.getComputedStyle(element, [pseudoElt]);
window.getComputedStyle(element, 'after').width;
window.getComputedStyle(element, 'after').height;
pseudoElt (可选):指定一个要匹配的伪元素的字符串。必须对普通元素省略(或null)。
2.2 加类法来操作伪元素css
<style type="text/css">
/*.box的css属性设置*/
...
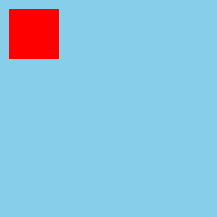
.box::after {
content: "";
display: block;
width: 50px;
height: 50px;
background-color: red;
}
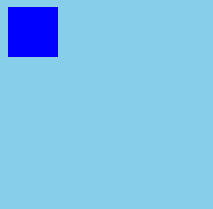
.box.active::after {
background-color: blue;
}
</style>
<div class="box"></div>
<script type="text/javascript">
var oDiv = document.getElementsByTagName('div')[0];
oDiv.onclick = function(){
// 注意这里的类名 s字符串前需要加一个空格
this.className += ' active';
}
</script>
三、元素运动初探
<!DOCTYPE html>
<html lang="en">
<head>
  <meta charset="UTF-8">
  <title>元素运动初探</title>
  <style>
    a {
      text-decoration: none;
    }
    ul {
      padding: 0;
      margin: 0;
      list-style: none;
    }
    .dropdown {
      position: relative;
      width: 200px;
      height: 50px;
      background-color: black;

    /* 使用伪元素增加图标 */
    .dropdown::after {
      content: "";
      /* 定位属性 */
      position: absolute;
      right: 15px;
      top: 18px;
      /* 元素大小 */
      width: 15px;
      height: 15px;
      background-image: url(icons/arrow-down.png);
      background-size: 100% 100%;
      background-repeat: no-repeat;
    }
    /* 改变类名来操作伪元素,准备切换图标 */
    .dropdown.up::after {
      background-image: url(icons/arrow-top.png);
    }
    .dropdown a {
      display: block;
    }
    .dropdown .main {
      height: 100%;
      line-height: 50px;
      text-align: center;
      color: #fff;
    }
    .dropdown .list {
      /* 滑动这里就不能设置dislpay:none */
      /* display: none; */
      height: 0;
      /* 因为列表的item项已经有了高度
      超出list的高度的部分需要隐藏掉 */
      overflow: hidden;
    }
    .dropdown .item {
      height: 40px;
      background-color: #333;
    }
    .dropdown .item:hover {
      background-color: #000;
    }
    .dropdown .item a {
      height: 100%;
      text-align: center;
      line-height: 40px;
      color: #999;
    }
  </style>
</head>
<body>
  <div class="dropdown">
    <a href="javascript:;" class="main">下拉菜单</a>
    <ul class="list">
      <li class="item"><a href="">第1个项目</a></li>
      <li class="item"><a href="">第2个项目</a></li>
      <li class="item"><a href="">第3个项目</a></li>
      <li class="item"><a href="">第4个项目</a></li>
      <li class="item"><a href="">第5个项目</a></li>
    </ul>
  </div>
  <script>
    // 使用 js 来控制下拉列表,可以控制速度,图标也会改变

    // 获取元素 div
    var dropdown = document.getElementsByClassName('dropdown')[0];
    // 使用函数获取元素 ul
    var oList = elemChildren(dropdown)[1];
    // 声明一个计数器,记录现在的高度,和移动的速度(距离)
    var timer = null,
        listHeight = 0,
        speed = 5;

    // 鼠标移入事件,列表下拉滚动,切换箭头图标
    dropdown.onmouseenter = function(){
      // 防止抖动:需要在事件一开始就清除定时器
      // 否则在列表下拉过程中移走鼠标还在计时,发生抖动
      clearInterval(timer);
      // 使用计时器每隔1ms执行一次
      timer = setInterval(function(){
        // 如果下拉列表高度大于200了清除定时器
        if(listHeight >= 200){
          clearInterval(timer);
        }else{
          // 获取到 oList 的高度加上每次要增加的距离
          // 而使用函数获取的 oList 的高度是有 px 单位的,需要使用 parseInt 截取数字部分
          listHeight = parseInt(getStyle(oList, 'height')) + speed;
          // 列表逐渐出现
          oList.style.height = listHeight + 'px';
        }
      }, 1)
      // dropdown添加类名,字符串前有空格,更改图标
      this.className += ' up'
    }

    // 鼠标移出事件,列表上拉消失,切换箭头图标
    dropdown.onmouseleave = function(){
      clearInterval(timer);
      timer = setInterval(function(){
        // 如果列表上拉高度小于0则清除定时器
        if(listHeight <= 0){
          clearInterval(timer);
        }else {
          // 获取到的列表的高度 - 距离
          listHeight = parseInt(getStyle(oList, 'height')) - speed;
          // 列表逐渐消失
          oList.style.height = listHeight + 'px';
        }
      },1)
      // dropdown更改类名更改图标
      this.className = 'dropdown'
    }

    // 获取子元素节点的函数
    function elemChildren(node){
      var temp = {
        'length': 0,
        'push': Array.prototype.push,
        'splice': Array.prototype.splice
      };
      var children = node.childNodes,
          len = node.childNodes.length,
          childItem;
      for(var i = 0; i < len; i++){
        childItem = children[i];
        if(childItem.nodeType === 1){
          temp.push(childItem);
        }
      }
      return temp;
    }

    // 获取元素的 css 属性的兼容性写法
    function getStyle(elem, prop){
      // 如果 window.getComputedStyle 存在
      if(window.getComputedStyle){
        if(prop){
          // 如果具体的 css 属性要获取
          return window.getComputedStyle(elem, null)[prop];
        }else {
          return window.getComputedStyle(elem, null);
        }
      }else {
        if(prop){
          return elem.currentStyle[prop];
        }else {
          return elem.currentStyle;
        }

      }
    }
  </script>
</body>
</html>


 被折叠的 条评论
为什么被折叠?
被折叠的 条评论
为什么被折叠?
 到【灌水乐园】发言


