


 该教程详细介绍了如何创建SpringBoot项目并整合Redis进行缓存操作,包括添加相关依赖、配置application.yml、实现RedisTemplate操作Redis以及配置解决序列化问题。在高并发场景下,通过双重检查和同步代码块解决了并发访问时数据库压力大的问题。
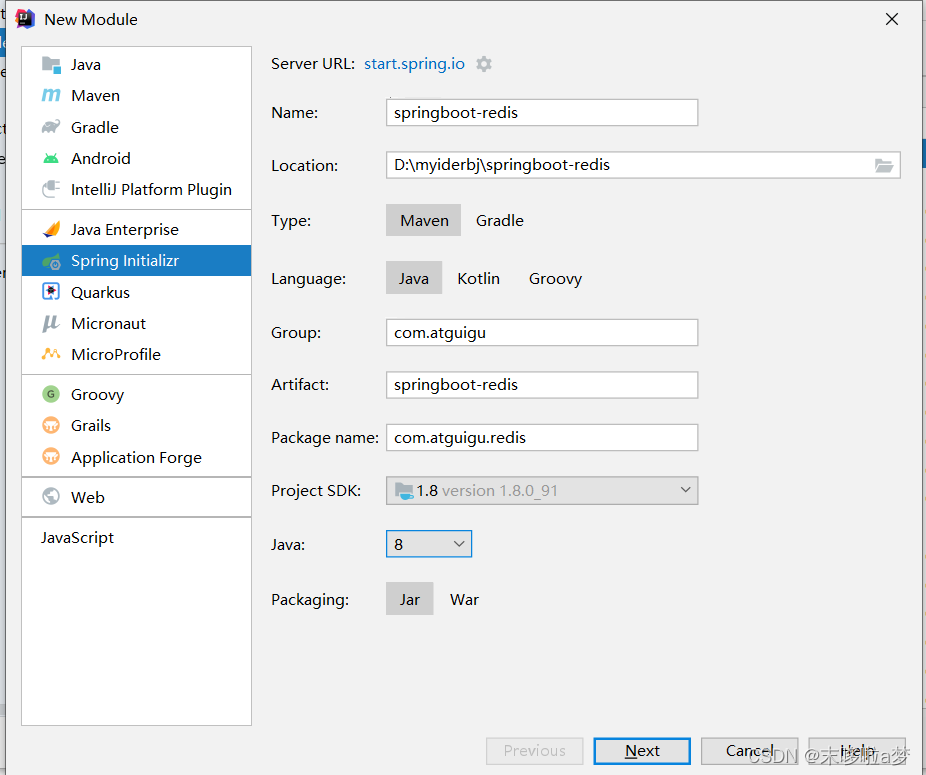
1.创建spring boot项目
创建Spring Boot工程:
点击next,选择自己的spring boot版本号
2.添加相关依赖
本次项目所需要的依赖:
- redis
- apache通用池
- mysql
- mybatis
- 通用mapper
- lombok
- web
- test
引入依赖
<dependencies>
        <!--redis-->
        <dependency>
            <groupId>org.springframework.boot</groupId>
            <artifactId>spring-boot-starter-data-redis</artifactId>
        </dependency>
        <!--apache通用池-->
        <dependency>
            <groupId>org.apache.commons</groupId>
            <artifactId>commons-pool2</artifactId>
        </dependency>
        <!--mysql-->
        <dependency>
            <groupId>mysql</groupId>
            <artifactId>mysql-connector-java</artifactId>
        </dependency>
        <!--mybatis-->
        <dependency>
            <groupId>org.mybatis.spring.boot</groupId>
            <artifactId>mybatis-spring-boot-starter</artifactId>
            <version>2.2.0</version>
        </dependency>
        <!--通用mapper,通用的sql语句-->
        <dependency>
            <groupId>tk.mybatis</groupId>
            <artifactId>mapper-spring-boot-starter</artifactId>
            <version>2.1.5</version>
        </dependency>
        <!--lombok-->
        <dependency>
            <groupId>org.projectlombok</groupId>
            <artifactId>lombok</artifactId>
        </dependency>
        <!-- web -->
        <dependency>
            <groupId>org.springframework.boot</groupId>
            <artifactId>spring-boot-starter-web</artifactId>
        </dependency>
        <!--test-->
        <dependency>
            <groupId>org.springframework.boot</groupId>
            <artifactId>spring-boot-starter-test</artifactId>
            <scope>test</scope>
        </dependency>
</dependencies>
3.配置
application.yml
#端口
server:
  port: 9998

spring:
  #配置数据源
  datasource:
    driver-class-name: com.mysql.cj.jdbc.Driver
    url: jdbc:mysql://localhost:3306/mybatis?serverTimezone=GMT%2B8
    username: root
    password: sa123

  #配置redis
  redis:
    #Redis服务器地址
    host: 192.168.56.101
    #Redis服务连接端口(默认为6379)
    port: 6379
    #Redis数据库索引(默认为0)
    database: 0
    #连接超时时间(毫秒)
    timeout:  1800000
    lettuce:
      pool:
        #连接池最大连接数(使用负值表示没有限制)
        max-active: 8
        #最大阻塞等待时间(负数表示没限制)
        max-wait: -1
        #连接池中的最大空闲连接
        max-idle: 5
        #连接池中的最小空闲连接
        min-idle: 0

#mybatis
mybatis:
  #mapper的xml文件
  mapper-locations: classpath:/mybatis/mapper/*.xml
  type-aliases-package: com.atguigu.redis.entity
  #驼峰设置
  configuration:
    map-underscore-to-camel-case: true

#日志打印
logging:
  level:
     com.atguigu.redis: debug
4.业务实现
RedisTemplate操作Redis
简单使用Redis:
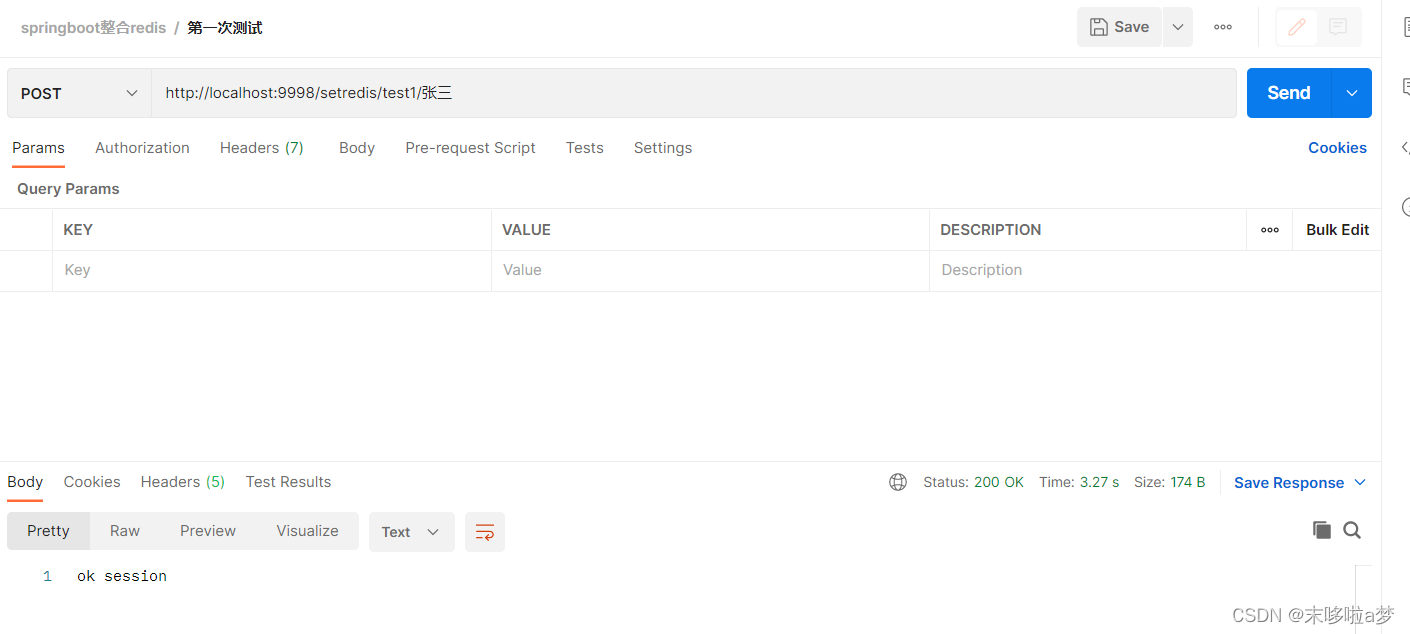
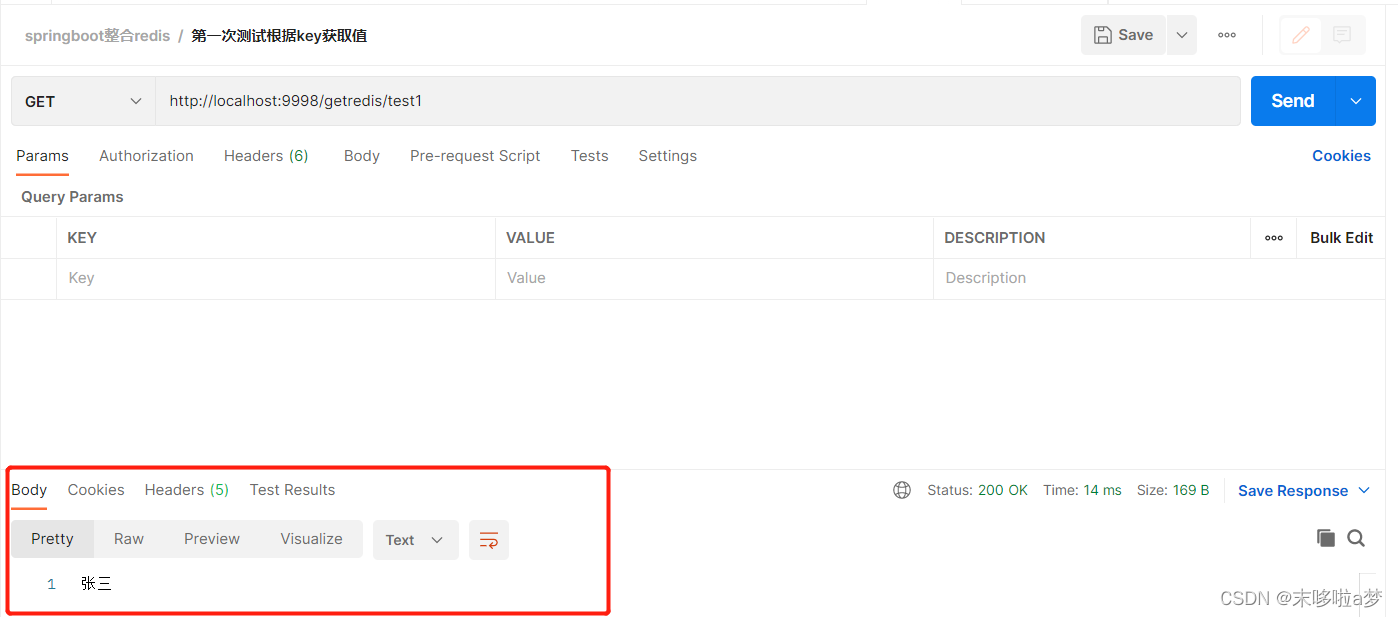
@RestController
public class RedisController {

    @Autowired
    private RedisTemplate redisTemplate;


    @GetMapping("getredis/{key}")
    public Object rediskey(@PathVariable String key){
        return redisTemplate.opsForValue().get(key);
    }

    @PostMapping("setredis/{key}/{value}")
    public String setredis(@PathVariable("key") String key,
                           @PathVariable("value") String value){

        redisTemplate.opsForValue().set(key,value);

        return "ok session";
    }

}
使用Postman测试
设置key和value
根据key获取值
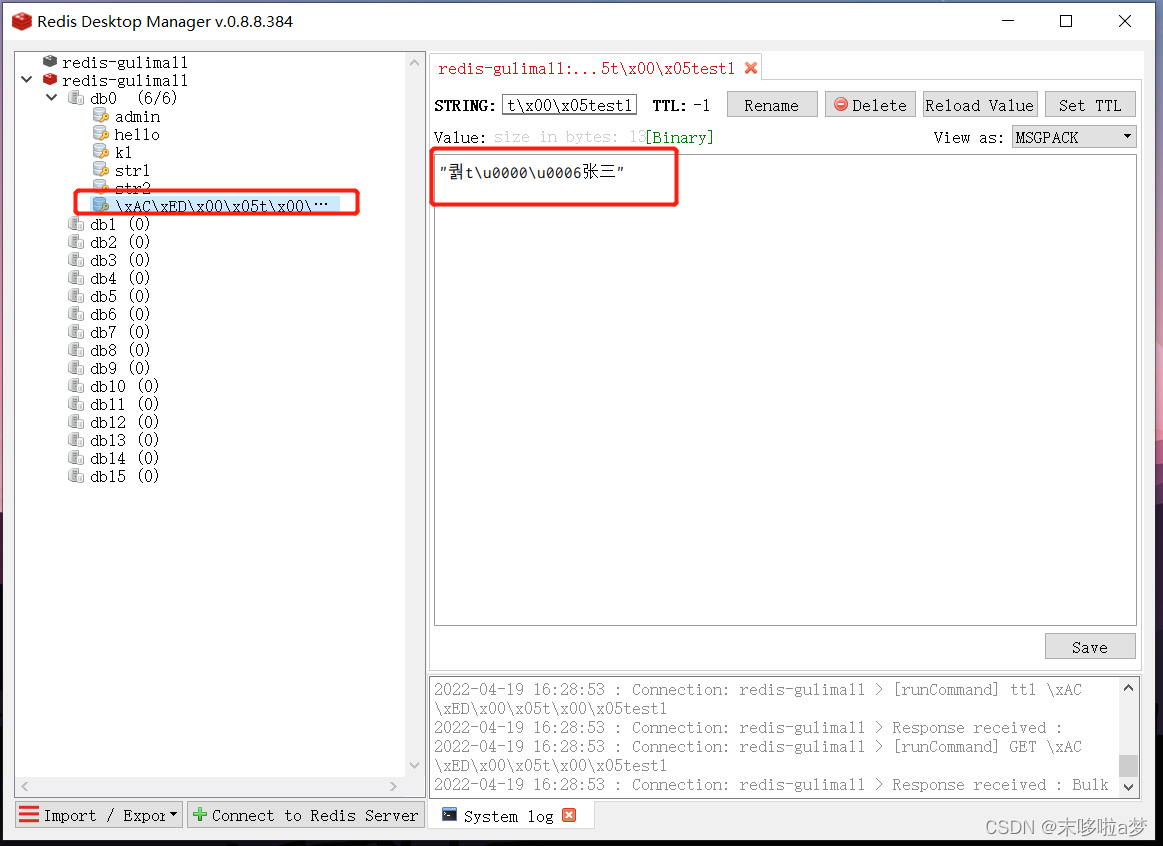
使用Redis Desktop工具查看,出现乱码这是RedisTemplate自带的序列化,为了解决这个问题,请查看下面的配置类
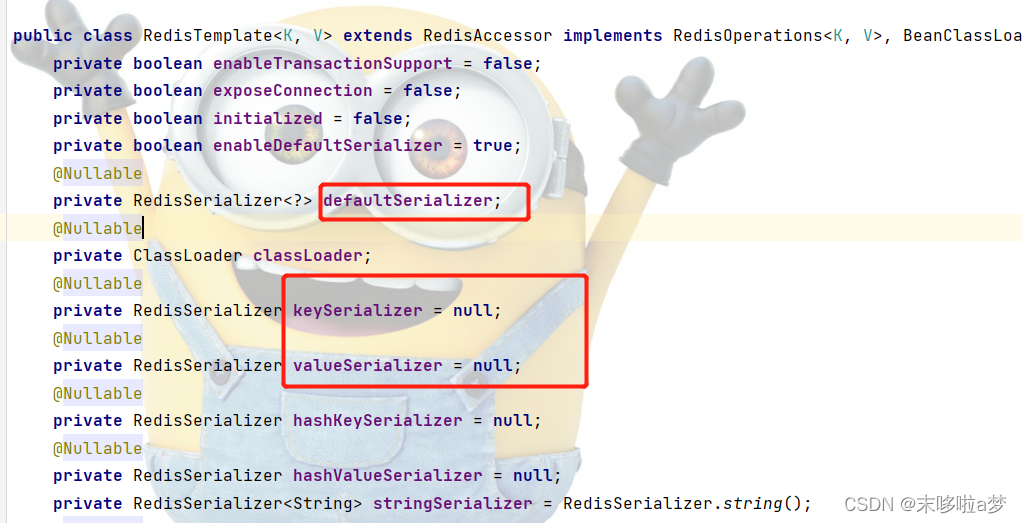
RedisTemplate源码,默认是JdkSerializationRedisSerializer序列化
解决RedisTemplate自带的序列化
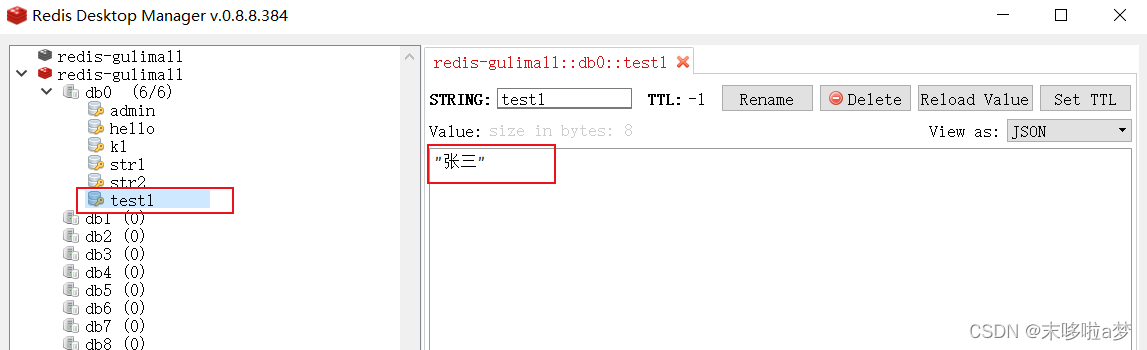
Redis配置类,(第一次配置)解决序列化问题
package com.atguigu.redis.config;

import org.springframework.context.annotation.Bean;
import org.springframework.context.annotation.Configuration;
import org.springframework.data.redis.connection.RedisConnectionFactory;
import org.springframework.data.redis.core.RedisTemplate;
import org.springframework.data.redis.serializer.Jackson2JsonRedisSerializer;
import org.springframework.data.redis.serializer.StringRedisSerializer;

/**
 * @author 尚硅谷学员-it梦想
 * @Title:Redis配置类
 * @date 2022/4/19 16:39
 * @Version 1.0
 */
@Configuration
public class RedisConfig {

    //RedisConnectionFactory会扫描ioc配置文件,找到Redis连接工程
    @Bean
    public RedisTemplate<String,Object> redisTemplate(RedisConnectionFactory factory){
        RedisTemplate<String,Object> redisTemplate = new RedisTemplate<>();
        //连接redis
        redisTemplate.setConnectionFactory(factory);

        //指定key和value的序列化方式
        Jackson2JsonRedisSerializer jackson2JsonRedisSerializer = new Jackson2JsonRedisSerializer(Object.class);
        //redisTemplate.setDefaultSerializer(jackson2JsonRedisSerializer); //指定key和value都是json格式
        redisTemplate.setValueSerializer(jackson2JsonRedisSerializer);//value是Json格式序列化
        redisTemplate.setKeySerializer(new StringRedisSerializer()); //key是String格式序列化

        return redisTemplate;
    }
}
效果如图

整合mysql使用Redis,没有做缓存时
前提工作:mapper,entity,service包
entity包,实体类
package com.atguigu.redis.entity;

import lombok.Data;

import javax.persistence.Id;
import javax.persistence.Table;

/**
 * @author 尚硅谷学员-it梦想
 * @Title:
 * @date 2022/4/20 8:26
 * @Version 1.0
 */
@Data
@Table(name = "t_user")
public class User{
    @Id
    private Integer id;
    private String username;
    private String password;
    private Integer age;
    private String sex;
    private String email;

}
mapper包,整合通用mapper
package com.atguigu.redis.mapper;

import com.atguigu.redis.entity.User;
import tk.mybatis.mapper.common.Mapper;

/**
 * @author 尚硅谷学员-it梦想
 * @Title:
 * @date 2022/4/20 8:29
 * @Version 1.0
 */
public interface UserMapper extends Mapper<User> {
}
service层
package com.atguigu.redis.service;

import com.atguigu.redis.entity.User;

/**
 * @author 尚硅谷学员-it梦想
 * @Title:
 * @date 2022/4/20 8:32
 * @Version 1.0
 */
public interface UserService {

    public void add(User user);

    public User getUsertById(Integer id);
}
impl层
package com.atguigu.redis.service.impl;

import com.atguigu.redis.entity.User;
import com.atguigu.redis.mapper.UserMapper;
import com.atguigu.redis.service.UserService;
import org.springframework.beans.factory.annotation.Autowired;
import org.springframework.stereotype.Service;

import javax.annotation.Resource;

/**
 * @author 尚硅谷学员-it梦想
 * @Title:
 * @date 2022/4/20 8:33
 * @Version 1.0
 */
@Service
public class UserServiceImpl implements UserService {

    @Resource
    private UserMapper userMapper;


    @Override
    public void add(User user) {
          userMapper.insert(user);
    }

    @Override
    public User getUsertById(Integer id) {
        return userMapper.selectByPrimaryKey(id);
    }
}
controller层
package com.atguigu.redis.controller;

import com.atguigu.redis.entity.User;
import com.atguigu.redis.service.UserService;
import org.springframework.beans.factory.annotation.Autowired;
import org.springframework.jdbc.datasource.UserCredentialsDataSourceAdapter;
import org.springframework.web.bind.annotation.GetMapping;
import org.springframework.web.bind.annotation.PathVariable;
import org.springframework.web.bind.annotation.PostMapping;
import org.springframework.web.bind.annotation.RestController;

/**
 * @author 尚硅谷学员-it梦想
 * @Title:
 * @date 2022/4/20 8:43
 * @Version 1.0
 */
@RestController
public class UserController {


    @Autowired
    private UserService userService;


    @PostMapping("/add")
    public String add(User user){
        userService.add(user);
        return "add ok";
    }

    @GetMapping("/getUser/{id}")
    public User getUser(@PathVariable("id") Integer id){
        return userService.getUsertById(id);
    }
}
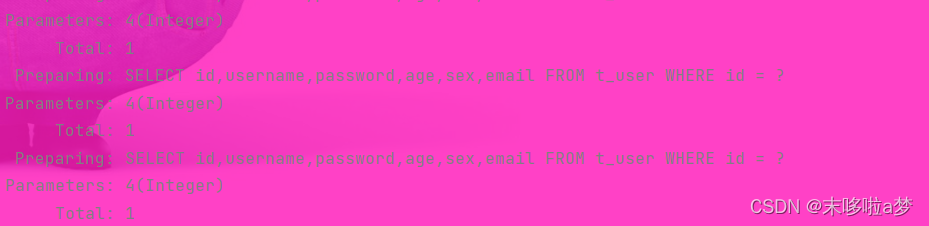
效果:
每次都是查询数据库

整合mysql使用Redis,查询数据库
改造service层和impl层和controller层,把返回值修改成Object
impl层:
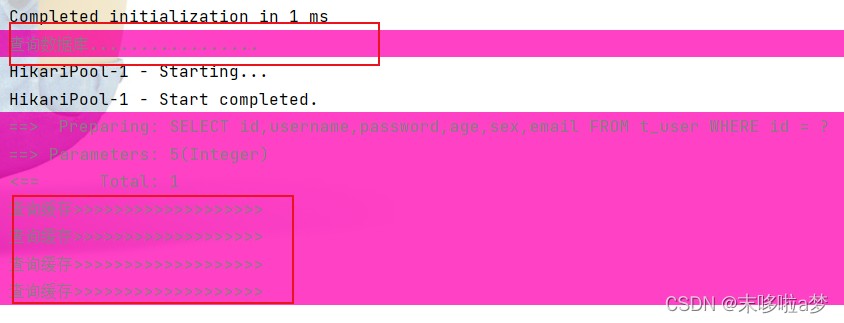
 @Override
    public Object getUsertById(Integer id) {
        //从缓存中获取数据,如果有直接返回
        String key = "user:"+id;//设置key
        Object UserObj = redisTemplate.opsForValue().get(key);
        //如果没有,从数据库中查询,并将数据添加到缓存中
        if (UserObj == null){
            log.debug("查询数据库.................");
            User user = userMapper.selectByPrimaryKey(id);
            redisTemplate.opsForValue().set(key,user);
            return user;
        }else {
            log.debug("查询缓存>>>>>>>>>>>>>>>>>>>");
        }

        return UserObj;
    }
效果,只有第一次查询数据库,其余的都是查询缓存
问题:假如在高并发的访问下,会出现什么情况?
模仿多线程同时访问
controller层:
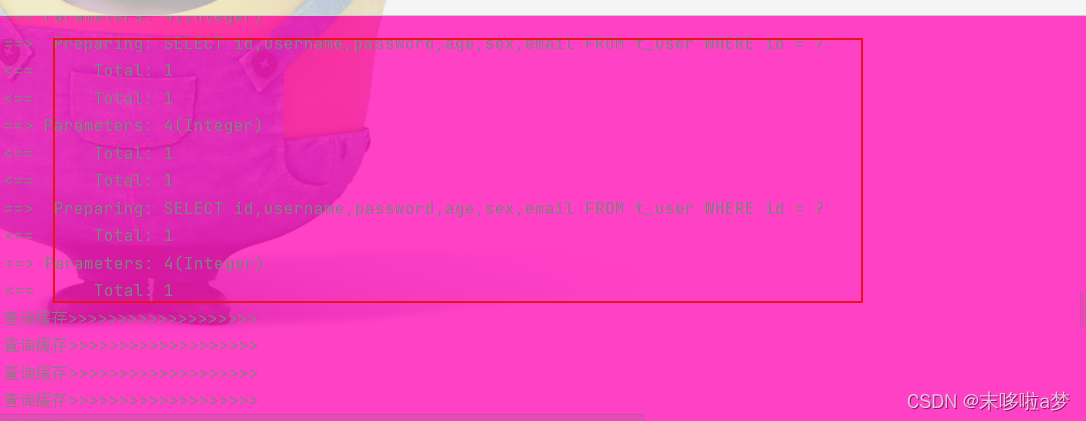
 //多线程访问的情况下(高并发的情况)
    @GetMapping("/getUser/{id}")
    public Object getUser(@PathVariable("id") Integer id){
        //创建线程池
        ExecutorService es = Executors.newFixedThreadPool(200);
        for (int i = 0; i < 500; i++) {
            es.submit(new Runnable() {
                @Override
                public void run() {
                    userService.getUsertById(id);
                }
            });
        }
        return userService.getUsertById(id);
    }
出现的问题,在高并发的情况下,多个线程发现缓存中没有数据,同时查询数据库,给数据库造成严重的压力。
解决:使用同步代码块(双重判断)
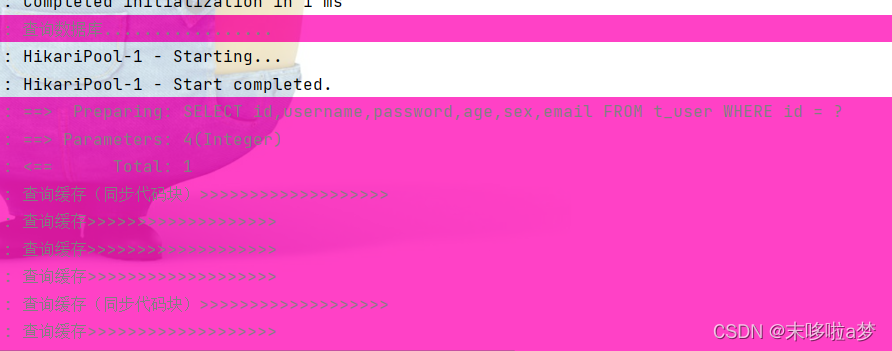
 //解决在高并发的访问下
    @Override
    public Object getUsertById(Integer id) {
        //从缓存中获取数据,如果有直接返回
        String key = "user:"+id;//设置key
        Object UserObj = redisTemplate.opsForValue().get(key);
        //如果没有,从数据库中查询,并将数据添加到缓存中
        if (UserObj == null){
            synchronized (this.getClass()){
                UserObj = redisTemplate.opsForValue().get(key);
                if (UserObj==null){
                    log.debug("查询数据库.................");
                    User user = userMapper.selectByPrimaryKey(id);
                    redisTemplate.opsForValue().set(key,user);
                    return user;
                }else {
                    log.debug("查询缓存(同步代码块)>>>>>>>>>>>>>>>>>>>");
                    return UserObj;
                }
            }
        }else {
            log.debug("查询缓存>>>>>>>>>>>>>>>>>>>");
        }

        return UserObj;
    }
效果:
5.启动类
package com.atguigu.redis;


import org.springframework.boot.SpringApplication;
import org.springframework.boot.autoconfigure.SpringBootApplication;
import tk.mybatis.spring.annotation.MapperScan;

@SpringBootApplication
@MapperScan("com.atguigu.redis.mapper")
public class SpringbootRedisApplication {

    public static void main(String[] args) {
        SpringApplication.run(SpringbootRedisApplication.class, args);
    }

}
完整的Redis配置文件
package com.atguigu.redis.config;

import com.fasterxml.jackson.annotation.JsonAutoDetect;
import com.fasterxml.jackson.annotation.PropertyAccessor;
import com.fasterxml.jackson.databind.ObjectMapper;
import org.springframework.cache.CacheManager;
import org.springframework.cache.annotation.CachingConfigurationSelector;
import org.springframework.cache.annotation.EnableCaching;
import org.springframework.context.annotation.Bean;
import org.springframework.context.annotation.Configuration;
import org.springframework.data.redis.cache.RedisCacheConfiguration;
import org.springframework.data.redis.cache.RedisCacheManager;
import org.springframework.data.redis.connection.RedisConnectionFactory;
import org.springframework.data.redis.core.RedisTemplate;
import org.springframework.data.redis.serializer.Jackson2JsonRedisSerializer;
import org.springframework.data.redis.serializer.RedisSerializationContext;
import org.springframework.data.redis.serializer.RedisSerializer;
import org.springframework.data.redis.serializer.StringRedisSerializer;

import java.time.Duration;

/**
 * @author 尚硅谷学员-it梦想
 * @Title:
 * @date 2022/3/25 21:52
 * @Version 1.0
 */
@EnableCaching //开启缓存
@Configuration
public class RedisConfig extends CachingConfigurationSelector {

    @Bean
    public RedisTemplate<String, Object> redisTemplate(RedisConnectionFactory factory) {
        RedisTemplate<String, Object> template = new RedisTemplate<>();
        RedisSerializer<String> redisSerializer = new StringRedisSerializer();
        Jackson2JsonRedisSerializer jackson2JsonRedisSerializer = new Jackson2JsonRedisSerializer(Object.class);
        ObjectMapper om = new ObjectMapper();
        om.setVisibility(PropertyAccessor.ALL, JsonAutoDetect.Visibility.ANY);
        om.enableDefaultTyping(ObjectMapper.DefaultTyping.NON_FINAL);
        jackson2JsonRedisSerializer.setObjectMapper(om);
        template.setConnectionFactory(factory);
        //key序列化方式
        template.setKeySerializer(redisSerializer);
        //value序列化
        template.setValueSerializer(jackson2JsonRedisSerializer);
        //value hashmap序列化
        template.setHashValueSerializer(jackson2JsonRedisSerializer);
        return template;
    }

    @Bean
    public CacheManager cacheManager(RedisConnectionFactory factory) {
        RedisSerializer<String> redisSerializer = new StringRedisSerializer();
        Jackson2JsonRedisSerializer jackson2JsonRedisSerializer = new Jackson2JsonRedisSerializer(Object.class);
        //解决查询缓存转换异常的问题
        ObjectMapper om = new ObjectMapper();
        om.setVisibility(PropertyAccessor.ALL, JsonAutoDetect.Visibility.ANY);
        om.enableDefaultTyping(ObjectMapper.DefaultTyping.NON_FINAL);
        jackson2JsonRedisSerializer.setObjectMapper(om);
        // 配置序列化(解决乱码的问题),过期时间600秒
        RedisCacheConfiguration config = RedisCacheConfiguration.defaultCacheConfig()
                .entryTtl(Duration.ofSeconds(600))
                .serializeKeysWith(RedisSerializationContext.SerializationPair.fromSerializer(redisSerializer))
                .serializeValuesWith(RedisSerializationContext.SerializationPair.fromSerializer(jackson2JsonRedisSerializer))
                .disableCachingNullValues();
        RedisCacheManager cacheManager = RedisCacheManager.builder(factory)
                .cacheDefaults(config)
                .build();
        return cacheManager;
    }
}
本次Spring Boot整合Redis教学结束


 486
486

 被折叠的 条评论
为什么被折叠?
被折叠的 条评论
为什么被折叠?
 到【灌水乐园】发言


