


 本文深入探讨SpringBoot启动过程,从main方法开始,详细分析new初始化实例、run执行流程,包括计时监控、上下文初始化、参数配置、监听器准备、环境创建及Banner打印等关键步骤。
SpringBoot启动源码详解(一)【万字长文】
1.首先大run!

main方法作为程序的入口,执行SpringApplication.run(),传入参数是启动类的class对象@SpringBootApplication注解

点进来之后,我们发现有两部分,先new,后run,那我们的本文的逻辑就大致出来了
2.new(初始化实例)
//创建一个新的实例,这个应用程序的上下文将要从指定的来源加载Bean
public SpringApplication(ResourceLoader resourceLoader, Class<?>... primarySources) {

		//给变量赋默认值,后续我们都会接触到
        this.sources = new LinkedHashSet();
        this.bannerMode = Mode.CONSOLE;
        this.logStartupInfo = true;
        this.addCommandLineProperties = true;
        this.addConversionService = true;
        this.headless = true;
        this.registerShutdownHook = true;
        this.additionalProfiles = Collections.emptySet();
        this.isCustomEnvironment = false;
        this.lazyInitialization = false;
        this.applicationContextFactory = ApplicationContextFactory.DEFAULT;
        this.applicationStartup = ApplicationStartup.DEFAULT;
        //从这里开始有意思了,首先给资源初始化资源加载器,默认为null
        this.resourceLoader = resourceLoader;
        //断言,就是资源类不允许为null
        Assert.notNull(primarySources, "PrimarySources must not be null");
        //利用LinkedHashSet有序和去重,最资源进行去重
        this.primarySources = new LinkedHashSet(Arrays.asList(primarySources));
        //根据jar包推断当前 WEB 应用类型,一共有三种:NONE,SERVLET,REACTIVE(这个方法可以点进去看看)
        //根据有无javax.servlet.Servlet的jar(servelt)和spring-boot-starter-webflux的jar包,则会启动Reactive模式
        //这里是SERVLET
        this.webApplicationType = WebApplicationType.deduceFromClasspath();
        this.bootstrapRegistryInitializers = this.getBootstrapRegistryInitializersFromSpringFactories();
        //设置应用上线文初始化器,从"META-INF/spring.factories"读取ApplicationContextInitializer类的实例名称集合并去重(springboot的第一个jar包),并进行set去重。(一共7个)
       this.setInitializers(this.getSpringFactoriesInstances(ApplicationContextInitializer.class));
            //设置监听器,从"META-INF/spring.factories"读取ApplicationListener类的实例名称集合并去重,并进行set去重。(一共11个)
        this.setListeners(this.getSpringFactoriesInstances(ApplicationListener.class));
        //栈操作获取最终实例化对象
        this.mainApplicationClass = this.deduceMainApplicationClass();
    }
初始化读取的配置文件全类名
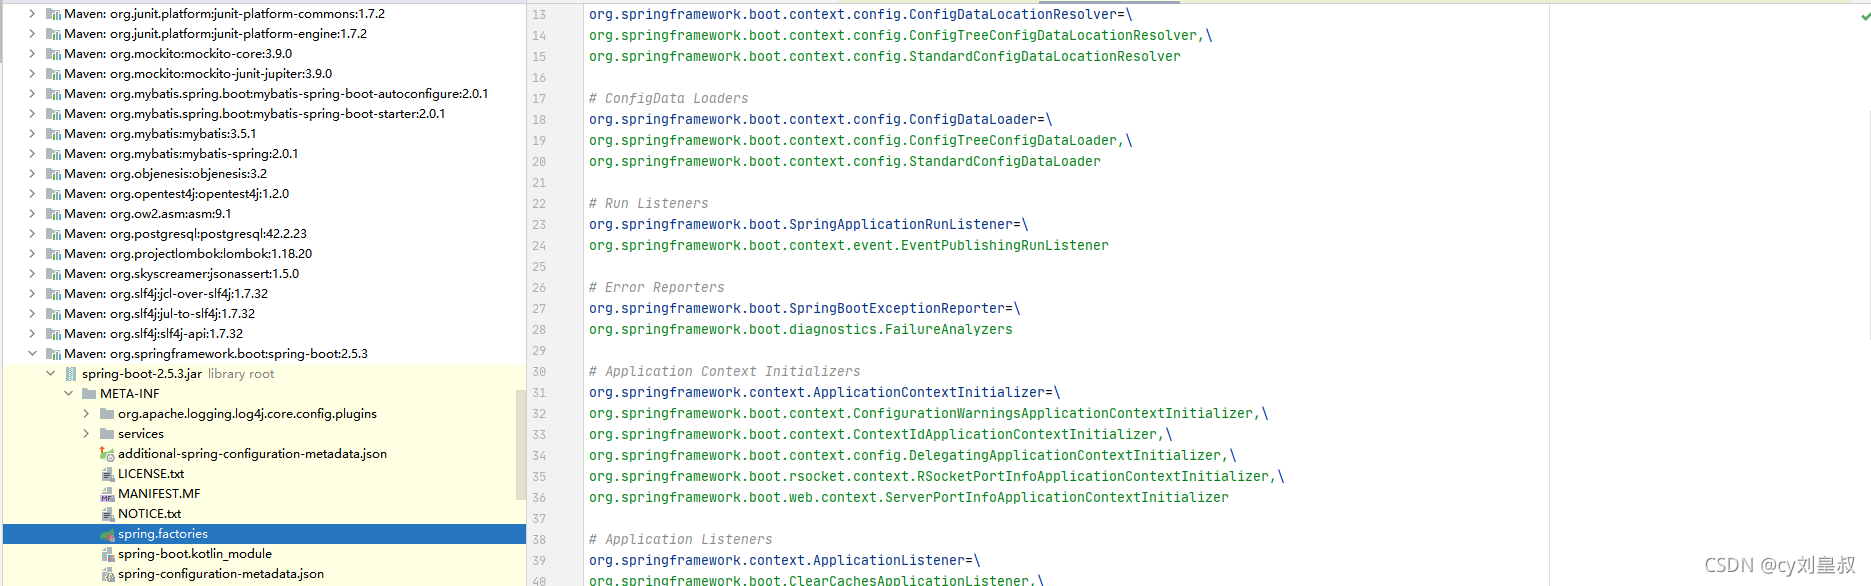
getSpringFactoriesInstances()里面create实例的操作的核心代码逻辑
private <T> List<T> createSpringFactoriesInstances(Class<T> type, Class<?>[] parameterTypes, ClassLoader classLoader, Object[] args, Set<String> names) {

		//实例集合,从上一层的loader中获取,也就是从上面图片中的配置文件中获取
        List<T> instances = new ArrayList(names.size());
        Iterator var7 = names.iterator();

        while(var7.hasNext()) {

            String name = (String)var7.next();

            try {

            	//变量,然后基本反射操作,构造方法获取对象
                Class<?> instanceClass = ClassUtils.forName(name, classLoader);
                Assert.isAssignable(type, instanceClass);
                Constructor<?> constructor = instanceClass.getDeclaredConstructor(parameterTypes);
                T instance = BeanUtils.instantiateClass(constructor, args);
                //添加,然后return
                instances.add
最低0.47元/天 解锁文章


 627
627

 被折叠的 条评论
为什么被折叠?
被折叠的 条评论
为什么被折叠?
 到【灌水乐园】发言


