


Linux安装elasticsearch7.2和kibana7.2最新教程_elasticsearch-analysis-ik7.2.0-优快云博客
elasticsearch入门之下载安装_elasticsearch基础版下载-优快云博客
Centos7 elasticsearch-7.2.0+logstash-7.2.0+kibana-7.2.0+rsyslog 单机部署_logstash 7.2.0部署-优快云博客【启动脚本编写】
一、所需资料下载
1、ElasticSearch7.2.0
https://artifacts.elastic.co/downloads/elasticsearch/elasticsearch-7.2.0-linux-x86_64.tar.gz
2、elasticsearch-analysis-ik-7.2.0 中文分词插件
3、elasticsearch可视化UI插件 ElasticHD
https://github.com/360EntSecGroup-Skylar/ElasticHD/releases/download/1.4/elasticHD_linux_amd64.zip
#head插件
#https://codeload.github.com/mobz/elasticsearch-head/tar.gz/v5.0.0
4、Kibana7.2.0
https://artifacts.elastic.co/downloads/kibana/kibana-7.2.0-linux-x86_64.tar.gz
5、Logtash7.2.0
https://artifacts.elastic.co/downloads/logstash/logstash-7.2.0.tar.gz
二、ElasticSearch7.2.0安装部署
2.1、安装包解压缩
tar -zxvf elasticsearch-7.3.2-linux-x86_64.tar.gz -C ../elasticsearch
2.2、服务配置与启动
1、创建启动该服务的新用户【root用户启动会报错】
1.1创建用户
groupadd esgroup
useradd esuser -g esgroup
passwd esuser
1.2给新用户增加root权限
1.2.1增加 sudoers 文件的写的权限,默认为只读
hmod -v u+w /etc/sudoers
1.2.2 编辑sudoers文件
vi /etc/sudoers
增加es用户root权限 内容如下:
esuser ALL=(ALL) ALL
保存退出
1.2.3删除 sudoers 的写的权限
chmod -v u-w /etc/sudoers
2、修改配置文件
2.1 config/elasticsearch.yml
sudo vim elasticsearch.yml
#设定集群名称
cluster.name:kidgrow
#设定本机节点名称
node.name: hnode-1
#设定数据文件存储路径
path.data:{$elasticsearch_home}/data
#设定日志文件存储路径
path.logs:{$elasticsearch_home}/logs
#修改为自己的ip【目前是本机访问,故127.0.0.1即可。若想外网也访问,0.0.0.0】
network.host: 127.0.0.1
#服务对应的默认端口
http.port:9200
#设定发现主机ip
discovery.seed_hosts: ["127.0.0.1"]
#设定集群初始化节点列表
cluster.initial_master_nodes: ["hnode-1"]
2.2 limits.conf
vim /etc/security/limits.conf
追加以下内容:
* soft nofile 65536
* hard nofile 65536
* soft nproc 4096
* hard nproc 4096
2.3修改 /etc/sysctl.conf
vim /etc/sysctl.conf
追加以下内容:
vm.max_map_count=655360
保存后,执行:
ysctl -p
2.4编辑/etc/security/limit.d/20-nproc.conf配置文件
vi /etc/security/limit.d/20-nproc.conf
改为如下配置
* soft nproc 4096
* hard nproc 4096
root soft nproc unlimited
#esuser 为之前创建的用户
esuser soft nofile 65536
esuser hard nofile 65536
2.5 文件夹elasticsearch授权给esuser
chown -R esuser {$elasticsearch_home}
2.6 防火墙放开elasticsearch控制台服务默认监听9200端口【若需要网络访问】
firewall-cmd --zone=public --add-port=9200/tcp --permanent
firewall-cmd --reload
2.6 服务启动
[root@local elasticsearcch-7.2.0]$ su esuser
[esuser@local elasticsearcch-7.2.0]$ bin/elasticsearch -d
或:
[esuser@local elasticsearcch-7.2.0]$nohup bin/elasticserach &
2.3、服务启动与验证
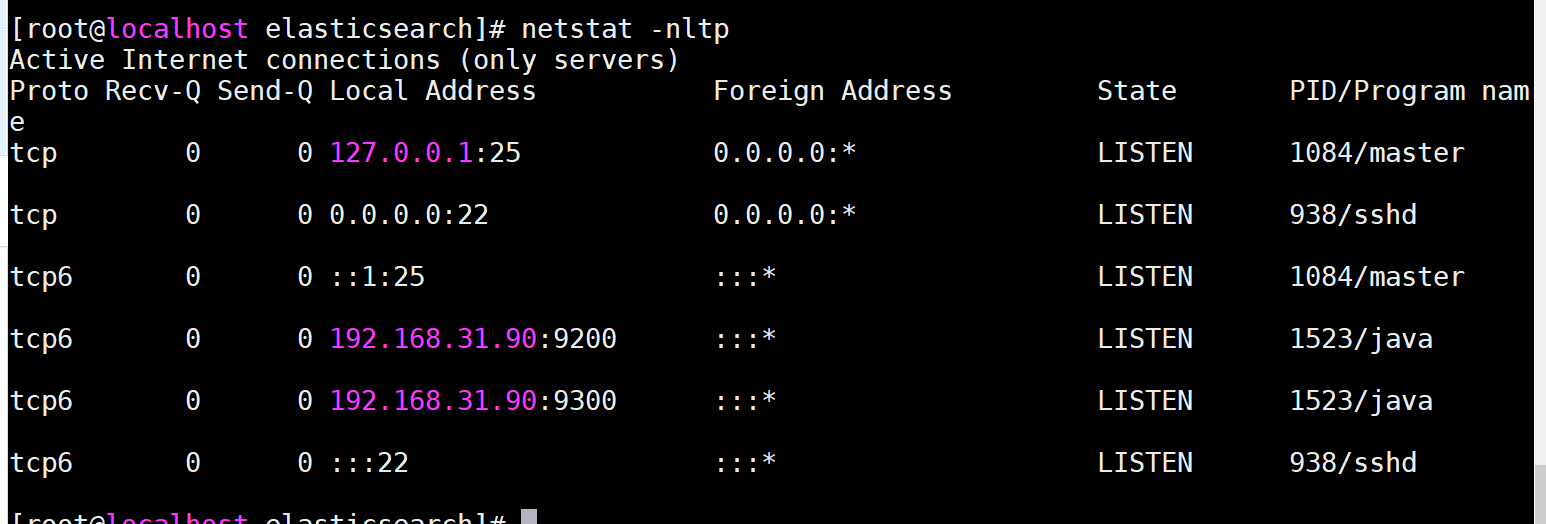
1、端口监听
netstat -nltp
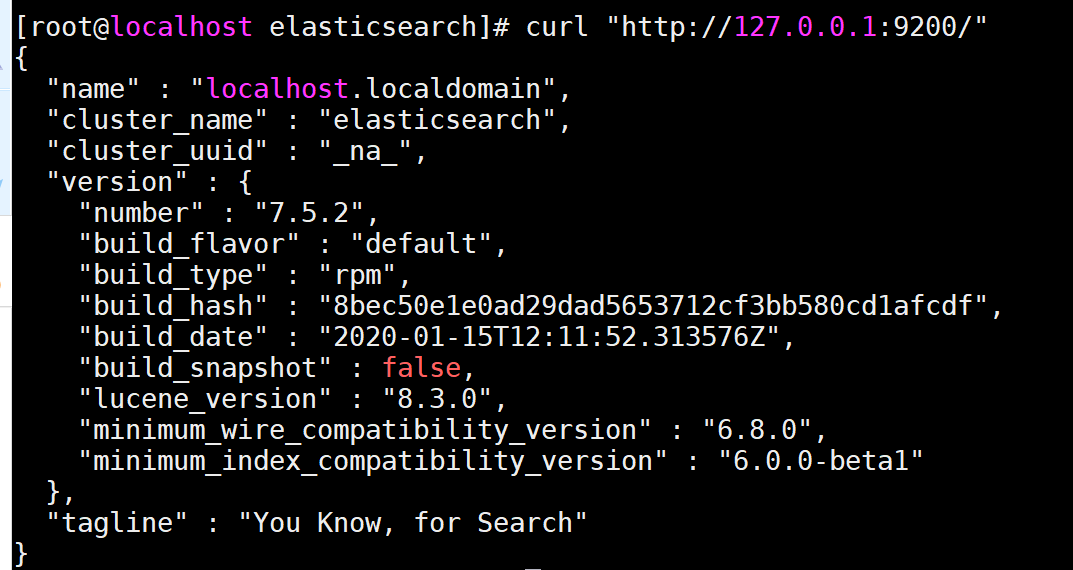
2、服务结果返回
curl "http://127.0.0.1:9200/
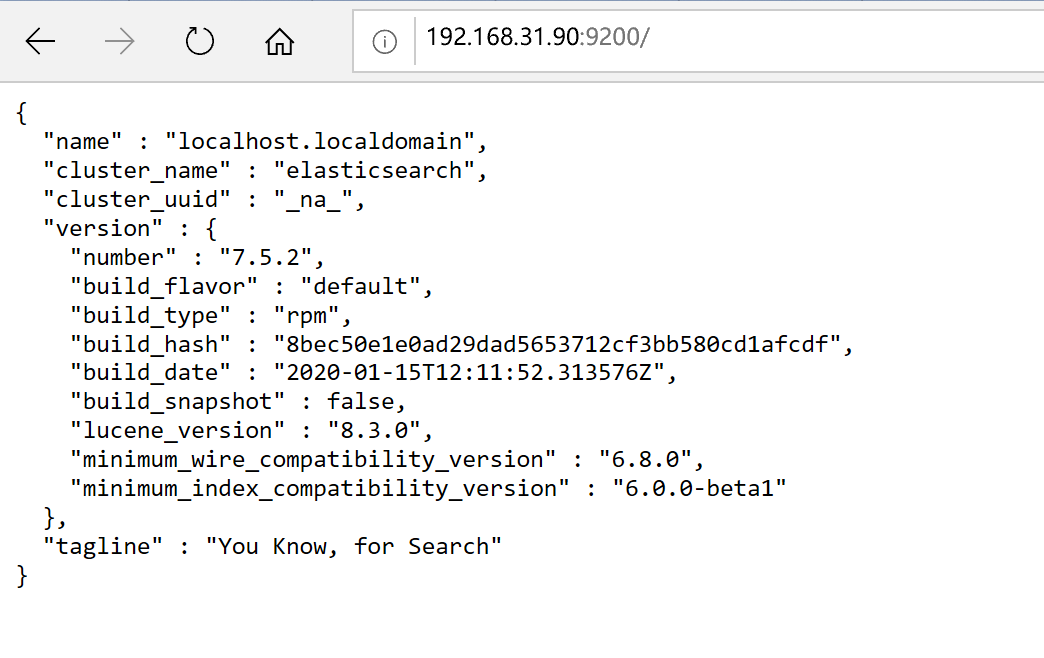
本机浏览器:http://192.168.31.90:9200/ 【192.168.31.90为虚拟机IP】
3、利用ES的cat命令,查询节点情况【https://www.yuque.com/piaoyijushi/xwho5b/hbiv0i】。非常重要,必须验证,直接反映了ES是否能正常提供数据服务。
curl 127.0.0.1:9200/_cat/nodes
curl 127.0.0.1:9200/_cat/master?v 等
2.4 中文分词插件安装
1、将elasticsearch-analysis-ik-7.2.0.zip 解压缩
2、将解压缩的文件夹内容上传到{$elasticsearch_home}/plugins/ik
3、重启elasticsearch服务
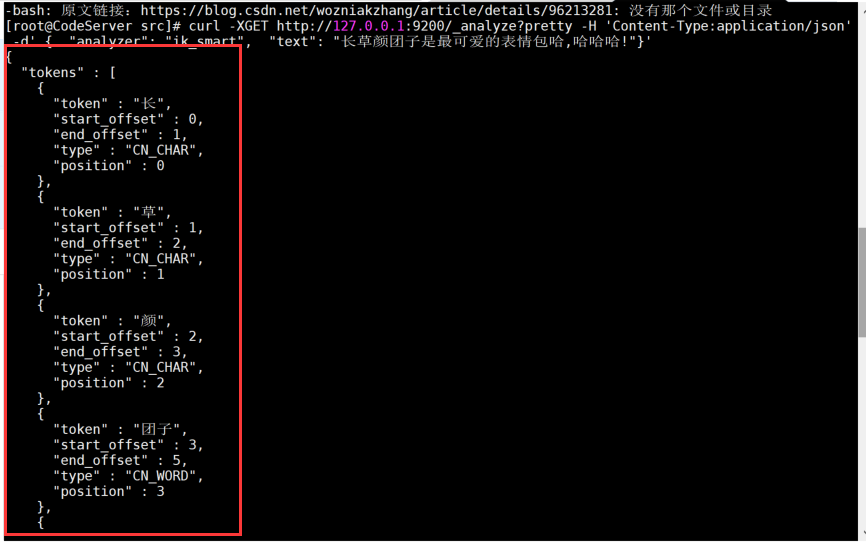
4、用curl命令验证
curl -XGET http://127.0.0.1:9200/_analyze?pretty -H 'Content-Type:application/json' -d' { "analyzer": "ik_smart", "text": "长草颜团子是最可爱的表情包哈,哈哈哈!"}'
返回结果如下:
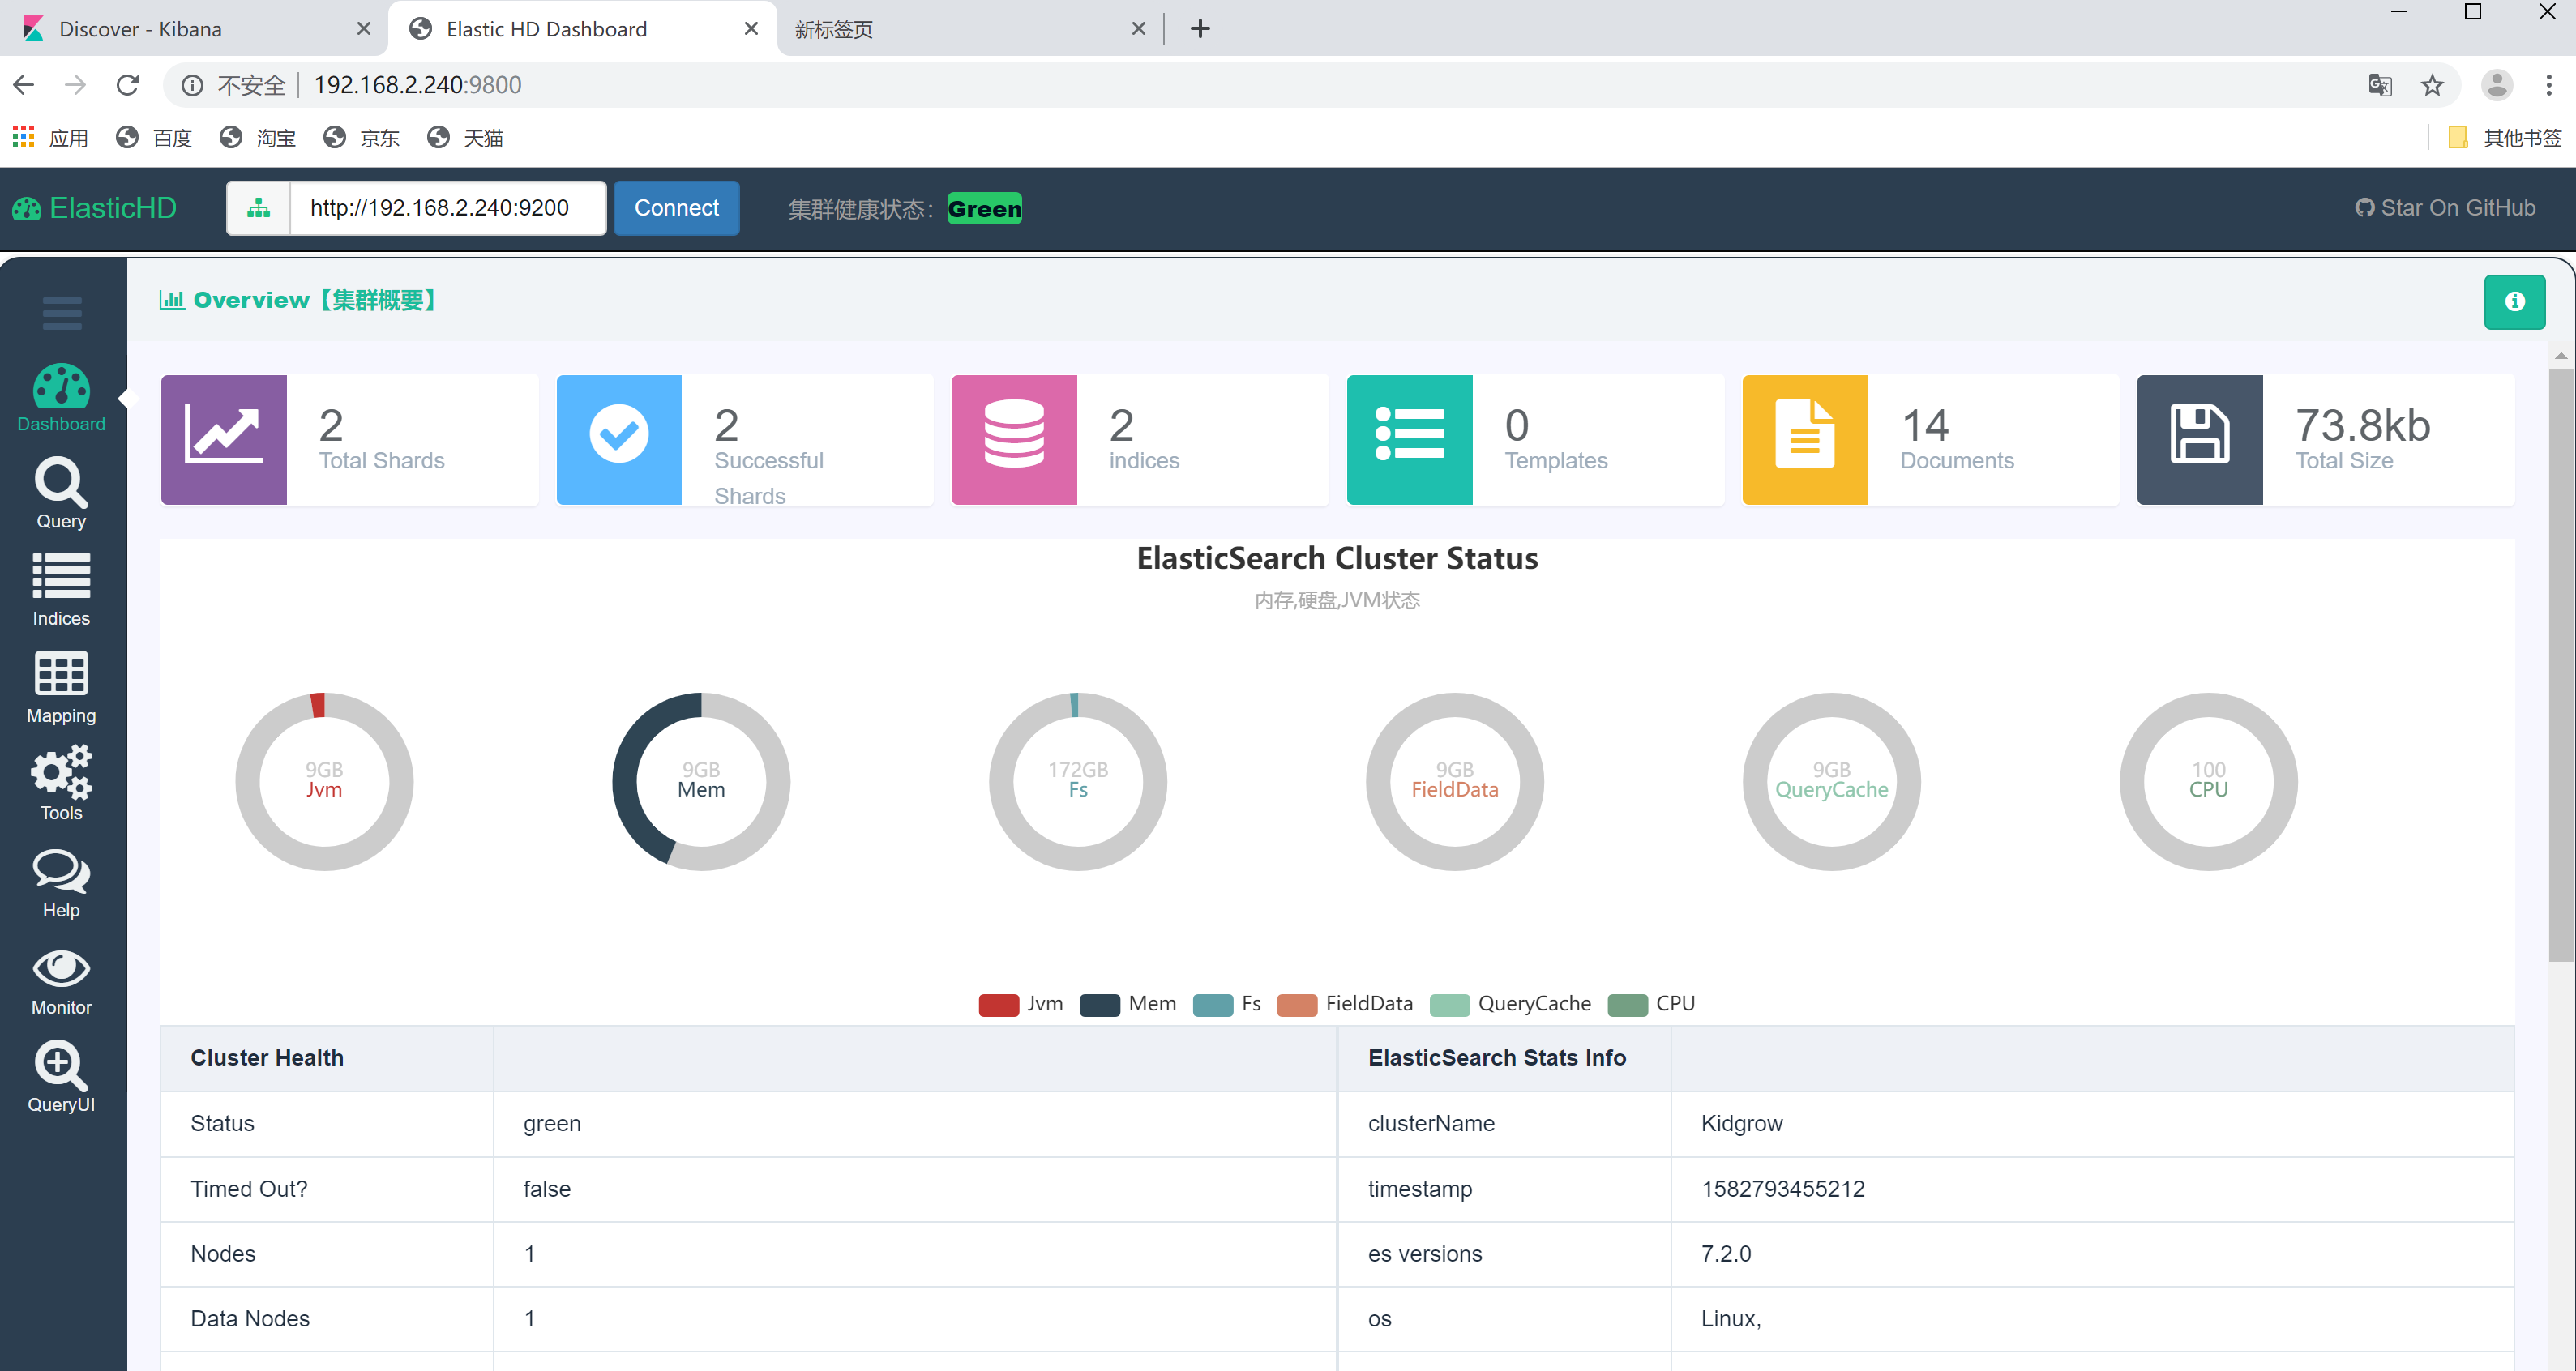
2.5 ElasticSearch可视化UI插件ElasticHD安装
1、压缩包解压缩
unzip elasticHD_linux_amd64.zip -d /home
2、修改ElasticHD权限
chmod -R 777 ElasticHD
3、防火墙增加端口
firewall-cmd --zone=public --add-port=9800/tcp --permanent
firewall-cmd --reload
4、插件启动
./ElasticHD -p http://192.168.2.240:9800
5、浏览器打开http://192.168.2.240:9800
2.6 启动脚本
新建脚本文件:
vim /home/esuser/es-start.sh
内容如下:
#!/bin/sh
cd /home/elasticsearch-7.2.0
nohup bin/elasticsearch &
tail -f nohup.out
启动:
su esuser
sh es-start.sh
三、Kibana7.2.0安装部署
3.1 压缩包解压
tar -zxvf kibana-7.2.0-linux-x86_64.tar.gz -C /home/
文件夹改名
mv kibana-7.2.0-linux-x86_64 kibana-7.2.0
3.2 修改配置文件
1、{$kibana_home}/config/kibana.yml
vim kibana.yml
修改内容如下:
第2行:server.port:5601
第7行:server.host: "0.0.0.0"
第28行:elasticsearch.hosts: ["http://127.0.0.1:9200"]
2、 文件夹kibana授权给esuser
chown -R esuser {$kibana_home}
3、防火墙放开Kibana控制台服务默认监听5601端口
firewall-cmd --zone=public --add-port=5601/tcp --permanent
firewall-cmd --reload
3.3 服务启动
切换esuser用户
su esuser
服务启动
启动elasticsearch
nohup ./elasticsearch &
启动kibana
nohup ./kibana &
3.4 启动脚本
新建脚本文件:
vim /home/esuser/kibana-start.sh
内容如下:
#!/bin/sh
cd /home/kibana-7.2.0
nohup bin/kibana &
tail -f nohup.out
启动:
su esuser
sh kibana-start.sh
四、Logstash7.2.0安装部署
4.1 压缩包解压缩
tar -zxvf logstash-7.2.0.tar.gz
4.2 增加配置文件
vim /home/elk/logstash-7.2.0/config/logstash-rsyslog.conf
内容如下:
input {
syslog {
port => 514
type => "rsyslog"
}
}
filter {
if [type] == 'rsyslog' {
urldecode { # 编码转换#
all_fields=>true
}
mutate {
split => ["message","||"] # 拆分日志#
add_field => {"HostName" => "%{[message][0]}"}
add_field => {"Facility" => "%{[message][1]}"}
add_field => {"Mes" => "%{[message][5]}"}
remove_field => ["message","facility_label","facility","severity_label","severity","priority","timestamp","program"]
}
if [Facility] == "local5" {
mutate {
split => ["Mes",","] # 拆分日志#
add_field => {"ClientIp" => "%{[Mes][0]}"}
add_field => {"LoginUserName" => "%{[Mes][1]}"}
add_field => {"SessionId" => "%{[Mes][2]}"}
remove_field => ["Mes"]
}
}
if [Facility] == "user" {
mutate {
split => ["Mes",","] # 拆分日志#
add_field => {"Euid" => "%{[Mes][0]}"}
add_field => {"WhoInfo" => "%{[Mes][1]}"}
add_field => {"ExecPath" => "%{[Mes][2]}"}
add_field => {"ExecCmd" => "%{[Mes][3]}"}
remove_field => ["Mes"]
}
}
}
}
output {
if [type] == 'rsyslog' and [Facility] == "local5" {
elasticsearch {
hosts => ["localhost:9200"]
index => ["logstash-login-%{+YYYY.MM.dd}"]
}
}else if [type] == 'rsyslog' and [Facility] == "user" {
elasticsearch {
hosts => ["localhost:9200"]
index => ["logstash-user-%{+YYYY.MM.dd}"]
}
}
}
4.3 服务启动
cd /home/elk/logstash-7.2.0/
nohup bin/logstash -f /home/elk/logstash-7.2.0/config/logstash-rsyslog.conf
4.4 rsyslog配置
***注:root用户操作 ***
4.4.1 、添加如下配置到 /etc/bashrc 文件末尾
up_client_ip=`(who am i|cut -d\( -f2|cut -d\) -f1)`
logger -p local5.info -- $up_client_ip,$(whoami),$$
export PROMPT_COMMAND='{ msg=$(history 1 | { read x y; echo $y; });logger -p user.notice "[euid=$(whoami)]",$(who am i),`pwd`",$msg"; }'
readonly PROMPT_COMMAND
4.4.2 、修改配置 /etc/rsyslog.conf
vim /etc/rsyslog.conf
新增文件末尾:
$template StdLOGFormat,"%fromhost%||%syslogfacility-text%||%syslogpriority-text%||%timereported:::date-mysql%||%timegenerated:::date-mysql%||%msg%||%iut%||%programname%||%syslogtag%"
*.* @@127.0.0.1:514;StdLOGFormat
4.4.3 、重启


 848
848

 被折叠的 条评论
为什么被折叠?
被折叠的 条评论
为什么被折叠?
 到【灌水乐园】发言


