


一.数据类型
List:对于list里面的数据没有类型限制,如[1 , 1.2 , ’hello’ , …]
np.array:能够很方便的存储大量数据的图片数据,不过不支持gpu计算、自动求导等。
tf.Tensor:没有上述两种的缺点。
- Tensor(广泛的概念):
Scalar:标量,如1.1,是0维的数据,Dim=0
Vector:向量,如[1.1] , [1.1,2.2,…],是一维的,Dim=1
Matrix:矩阵,如[[1.1,2.2],[3.3,4.4],[5.5,6.6]]是一个2×3的矩阵,是二维的,Dim=2
Tensor:维度大于二,Dim>2,不过我们一般也可以把上面所有的叫做tensor,即在Tensorflow中,所有的数据都叫做tensor。它支持的基础数据类型有:
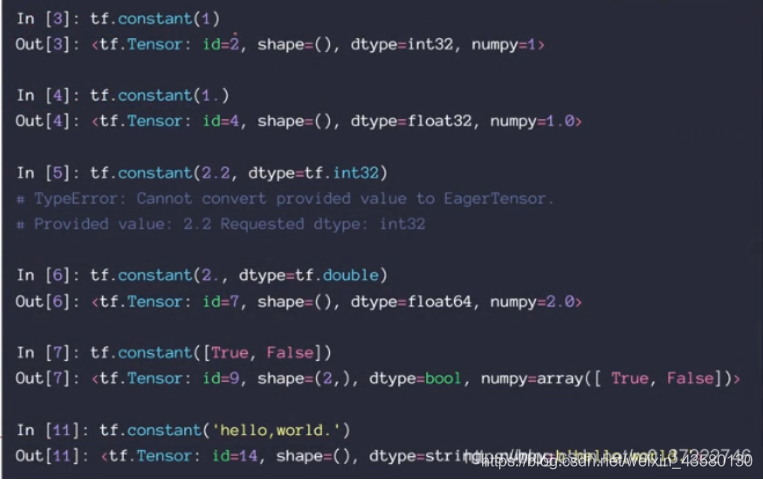
int, float, double
bool
String
Constant就是创建一个普通的tensor对象;括号中为1,则就是整型的1;括号中为1.,则就是浮点型的1;
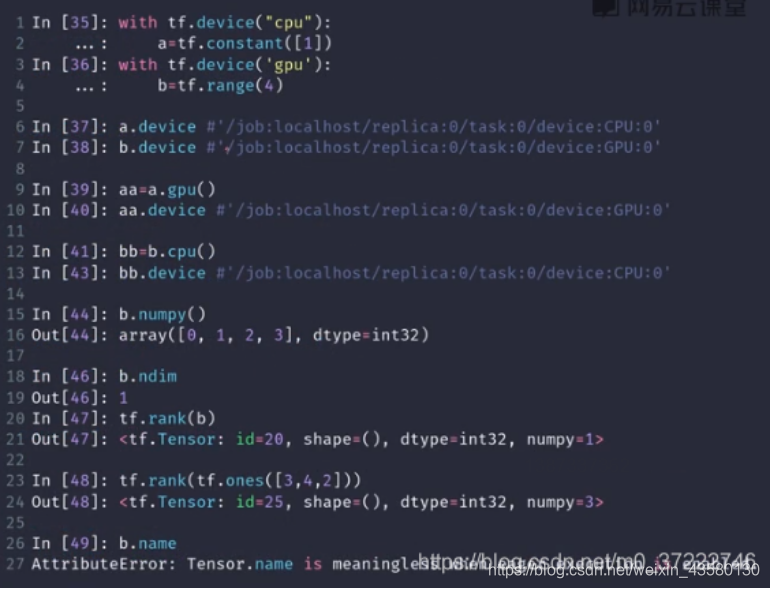
.device:返回当前tensor对象所在设备
.numpy():返回对象在numpy下的定义
.ndim: 返回对象的dim维度
.rank(): 返回对象的维度,以tensor的形式表示
.is_tensor(a):返回a是否是tensor
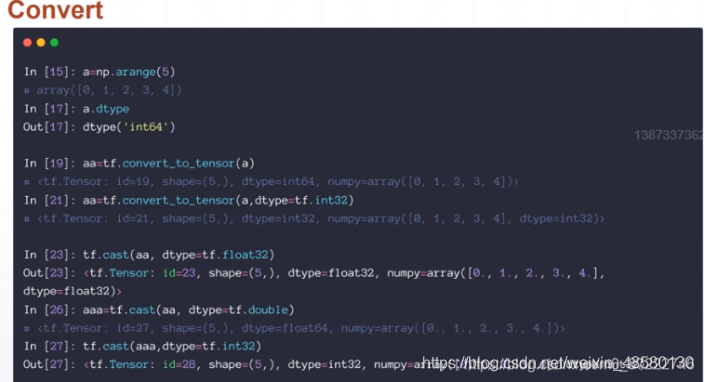
tf.Convert_to_tensor:将numpy对象转换成tensor对象
tf.cast: tensor 对象之间类型转换
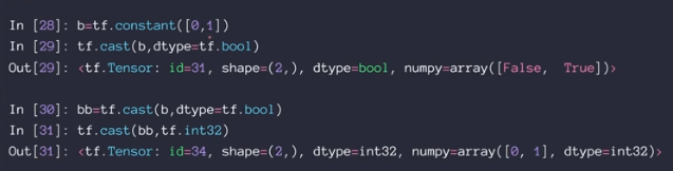
Bool 与int 互相转:
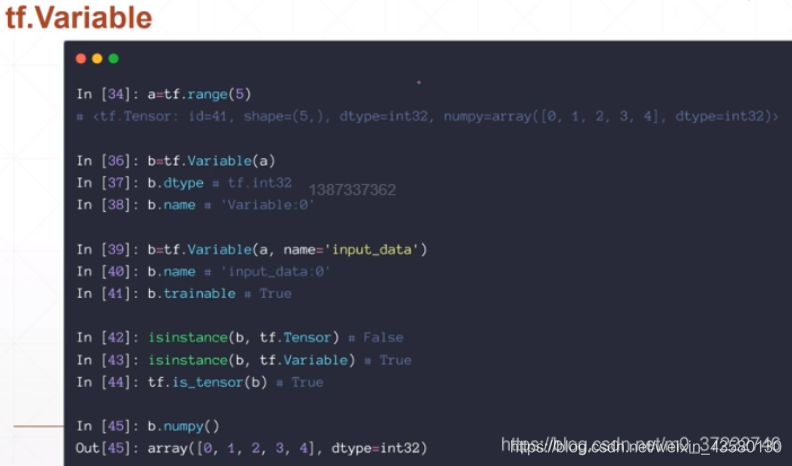
一个tensor对象可以被包装成variable对象,一个variable对象具有可求导等属性。
trainable : 表示是否可训练。含义有是否记录梯度信息,是否可求导。
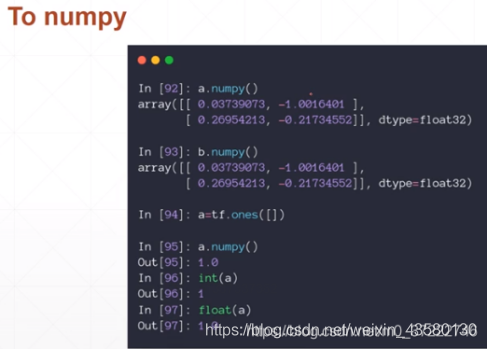
Numpy:tensor对象转numpy对象
Int、float:将tensor对象转成numpy对象的标量值
二.创建Tensor
- tf.convert_to_tensor(
value,
dtype=None,
name=None,
preferred_dtype=None
):该函数将各种类型的Python对象转换为Tensor对象。它接受张量对象、数字数组、Python列表和Python标量。
各种创建tensor的方法如下所示,代码注释中标明了各函数作用:
tf.convert_to_tensor()
tf.zeros([])
tf.zeros_like(a)
tf.random.normal()
tf.random.uniform()
tf.random.shuffle()
print(tf.convert_to_tensor(np.ones([2,3]))) #生成数组
#out:tf.Tensor(
#    [[1. 1. 1.]
#    [1. 1. 1.]], shape=(2, 3), dtype=float64)

#注意:这里的[2,3],在convert_to_tensor的理解就是表示shape,是一个2行3列
#而数组[[1,2],[3,4]]的的data就是[[1,2],[3,4]],而它的shape为[2,2],表示2行2列

print(tf.convert_to_tensor(np.zeros([2,3]))) #生成全0数组
#out:tf.Tensor(
#    [[0. 0. 0.]
#     [0. 0. 0.]], shape=(2, 3), dtype=float64)

print(tf.convert_to_tensor([1,2]))  #list转换为tensor形式,一维长度为2
#out:tf.Tensor([1 2], shape=(2,), dtype=int32)

print(tf.convert_to_tensor([1,2.]))  #还可以自动匹配类型
#out:<tf.Tensor: id=4, shape=(2,), dtype=float32, numpy=array([1., 2.], dtype=float32)>

print(tf.zeros([])) #初始化为0
#out:tf.Tensor(0.0, shape=(), dtype=float32)

print(tf.zeros([2,3,3])) #初始化一个值为0的,形状如下的
#out: tf.Tensor(
# [[[0. 0. 0.]
#   [0. 0. 0.]
#   [0. 0. 0.]]
#
#  [[0. 0. 0.]
#   [0. 0. 0.]
#   [0. 0. 0.]]], shape=(2, 3, 3), dtype=float32)

a = tf.zeros([2,3,3])
print(tf.zeros_like(a))
print(tf.zeros(a.shape))
#上述两个写法输出是相同的,都是输出一个与a形状相同但是值全为0的数组

#同样,可以初始化全为1,与上述同样用法
#也可以使用如下fill()方法,直接设定初始化的值和shape
print(tf.fill([2,3],9))
#out: tf.Tensor(
# [[9 9 9]
#  [9 9 9]], shape=(2, 3), dtype=int32)


#随机初始化.random.normal()
print(tf.random.normal([2,2],mean=1,stddev=1))
#mean:均值,stddev:方差;若是不指定这两个参数的话,就是一个标准的正态分布
#out: tf.Tensor(
# [[0.15135801 0.11397684]
#  [2.2785785  3.1513007 ]], shape=(2, 2), dtype=float32)
print(tf.random.truncated_normal([2,2],mean=0,stddev=1))
#截断的正态分布

print(tf.random.uniform([2,2],minval=0,maxval=1))#均匀分布,范围:0~1
#out: tf.Tensor(
# [[0.5758002  0.84875727]
#  [0.28111458 0.21054292]], shape=(2, 2), dtype=float32)

a = tf.range(10)
print(tf.random.shuffle(a))#随机打散
三.索引与切片(对tensor部分数据进行读取)
基础索引:直接对每个维度的index进行定义
通过numpy就不需要每个维度都写[],只需要每个维度之间用逗号连接;
代码举例:
#通过索引取值,tensorflow方法:
a = tf.ones([1,5,5,3])
print(a[0][0])
#out:tf.Tensor(
# [[1. 1. 1.]
#  [1. 1. 1.]
#  [1. 1. 1.]
#  [1. 1. 1.]
#  [1. 1. 1.]], shape=(5, 3), dtype=float32)#是一个5*3的矩阵,即后两位

print(a[0][0][0])
#tf.Tensor([1. 1. 1.], shape=(3,), dtype=float32)   #就是第0行的结果

print(a[0][0][0][2])
#out:tf.Tensor(1.0, shape=(), dtype=float32)    #就是第3个元素 1.0

#通过索引取值,numpy方法:
a = tf.random.normal([4,28,28,3])

print(a[1].shape)   #得到第一个维度元素的shape,等同于a[1,:,:,:].shape
#out:(28, 28, 3)

print(a[1,2].shape) #numpy风格:维度之间只需要逗号分隔
#out:(28, 3)
**切片:**第一个元素index为0,它的index可以正着计数,也可以倒着计数,倒着的话最后一个元素index为-1;
[a:b]:a为切片的起始位置,b为切片的末端位置,输出包含a不包含b;
代码举例:
a = tf.range(10)
#tf.Tensor([0 1 2 3 4 5 6 7 8 9], shape=(10,), dtype=int32),
print(a[-1:])   #out:tf.Tensor([9], shape=(1,), dtype=int32),即为从-1元素开始到末尾,这里的index=-1就是最后一个元素 9
print(a[-2:])   #out:tf.Tensor([8 9], shape=(2,), dtype=int32),从倒数第二个元素到最后一个元素
print(a[2:])    #out:tf.Tensor([2 3 4 5 6 7 8 9], shape=(8,), dtype=int32),从index=2的元素到最后一个元素
print(a[:2])    #out:tf.Tensor([0 1], shape=(2,), dtype=int32),从第一个元素(index=0)到index=2的元素2(不包括)
print(a[:-1])   #out:tf.Tensor([0 1 2 3 4 5 6 7 8], shape=(9,), dtype=int32,不包括index=-1的元素9
[a: b:-1]:第三位为负则为逆序采样,且从末尾开始数为a到b,-2就需要每两个数采一个,-3即为每三个数采一个;
代码举例:
a = tf.range(4)
#tf.Tensor([0 1 2 3], shape=(4,), dtype=int32)
print(a[::-1])  #out:tf.Tensor([3 2 1 0], shape=(4,), dtype=int32)
print(a[::-2])  #out:tf.Tensor([3 1], shape=(2,), dtype=int32)
print(a[2::-2])  #out:tf.Tensor([2 0], shape=(2,), dtype=int32)
tf.gather:按照特定顺序采样,代码如下:
#data:[classes,students,subjects] = [4,35,8]
a = tf.ones([4,35,8])
print(tf.gather(a,axis=0,indices=[2,3]).shape)  #out:(2, 35, 8):在第0维采样2个,其他维全采样
#数据源:a;维度axis:0;索引号indices=[2,3]==>即在a中的0维上查找index=2和index=3的数据
print(tf.gather(a,axis=0,indices=[2,1,3,0]).shape)   #out:(4, 35, 8):在第0维采样4个,其他维全采样
#按照indices中的顺序采样
print(tf.gather(a,axis=1,indices=[2,3,7,16,9]).shape)   #out:(4, 5, 8):在第1维采样5个,其他维全采样
#按照indices中的顺序采样
tf.gather_nd:按照特定维度采样
print(tf.gather_nd(a,[0]).shape)  #out:(35, 8)
print(tf.gather_nd(a,[0,1]).shape)  #out:(8,)

print(tf.gather_nd(a,[0,0],[1,1]).shape) #对第0个教室的第0个学生和第1个教室的第1个学生进行采样。
#out:(2,8):采到的是2个学生,每个学生有8门课

print(tf.gather_nd(a,[0,0,0],[1,1,1],[2,2,2]).shape) #对第0个教室的第0个学生的第0门课进行采样
#out:(3):采到的是三个学生的三门课,一共3门课


 2382
2382

 被折叠的 条评论
为什么被折叠?
被折叠的 条评论
为什么被折叠?
 到【灌水乐园】发言


