< dependency> < groupId> </ groupId> < artifactId> </ artifactId> < version> </ version> </ dependency> package com. yx. jwt ;
import com. auth0. jwt. JWT;
import com. auth0. jwt. algorithms. Algorithm ;
import org. junit. jupiter. api. Test ;
import org. springframework. boot. test. context. SpringBootTest ;
import java. util. Calendar ;
import java. util. HashMap ;
import java. util. Map ;
class JWTDemoApplicationTests {
@Test
void contextLoads ( ) {
Map < String , Object > = new HashMap < > ( ) ;
Calendar instance = Calendar . getInstance ( ) ;
instance. add ( Calendar . SECOND, 20 ) ;
String token = JWT. create ( )
. withHeader ( map)
. withClaim ( "userId" , 21 )
. withClaim ( "username" , "zhangsan" )
. withExpiresAt ( instance. getTime ( ) )
. sign ( Algorithm . HMAC256 ( "@93!#49&$33" ) ) ;
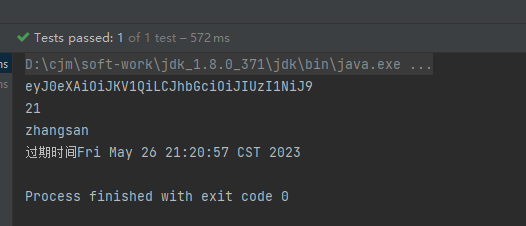
System . out. println ( token) ;
}
}
@Test
public void test ( ) {
JWTVerifier jwtVerifier = JWT. require ( Algorithm . HMAC256 ( "@93!#49&$33" ) ) . build ( ) ;
DecodedJWT verify = jwtVerifier. verify ( "eyJ0eXAiOiJKV1QiLCJhbGciOiJIUzI1NiJ9.eyJleHAiOjE2ODUxMDcyNTcsInVzZXJJZCI6MjEsInVzZXJuYW1lIjoiemhhbmdzYW4ifQ.JN5Dq_7iUfcr7tQcaHLiCFZMb0Byr7rUkDvNKA_2xf0" ) ;
System . out. println ( verify. getHeader ( ) ) ;
System . out. println ( verify. getClaims ( ) . get ( "userId" ) . asInt ( ) ) ;
System . out. println ( verify. getClaims ( ) . get ( "username" ) . asString ( ) ) ;
System . out. println ( "过期时间" + verify. getExpiresAt ( ) ) ;
}
package com. yx. jwt. utils ;
import com. auth0. jwt. JWT;
import com. auth0. jwt. JWTCreator ;
import com. auth0. jwt. JWTVerifier ;
import com. auth0. jwt. algorithms. Algorithm ;
import com. auth0. jwt. exceptions. JWTVerificationException ;
import com. auth0. jwt. interfaces. DecodedJWT ;
import java. util. Calendar ;
import java. util. Map ;
public class JWTUtils {
private static final String SING = "@93!#49&$33" ;
public static String getToken ( Map < String , String > ) {
Calendar instance = Calendar . getInstance ( ) ;
instance. add ( Calendar . DATE, 7 ) ;
JWTCreator. Builder builder = JWT. create ( ) ;
map. forEach ( ( k, v) -> {
builder. withClaim ( k, v) ;
} ) ;
String token = builder. withExpiresAt ( instance. getTime ( ) ) . sign ( Algorithm . HMAC256 ( SING) ) ;
return token;
}
public static void verify ( String token) {
DecodedJWT verify = JWT. require ( Algorithm . HMAC256 ( SING) ) . build ( ) . verify ( token) ;
}
public static DecodedJWT getTokenInfo ( String token) {
DecodedJWT verify = JWT. require ( Algorithm . HMAC256 ( SING) ) . build ( ) . verify ( token) ;
return verify;
}
}
<?xml version="1.0" encoding="UTF-8"?>
< projectxmlns = " http://maven.apache.org/POM/4.0.0" xmlns: xsi= " http://www.w3.org/2001/XMLSchema-instance" xsi: schemaLocation= " http://maven.apache.org/POM/4.0.0 https://maven.apache.org/xsd/maven-4.0.0.xsd" > < modelVersion> </ modelVersion> < parent> < groupId> </ groupId> < artifactId> </ artifactId> < version> </ version> < relativePath/> </ parent> < groupId> </ groupId> < artifactId> </ artifactId> < version> </ version> < name> </ name> < description> </ description> < properties> < java.version> </ java.version> </ properties> < dependencies> < dependency> < groupId> </ groupId> < artifactId> </ artifactId> </ dependency> < dependency> < groupId> </ groupId> < artifactId> </ artifactId> < version> </ version> </ dependency> < dependency> < groupId> </ groupId> < artifactId> </ artifactId> < version> </ version> </ dependency> < dependency> < groupId> </ groupId> < artifactId> </ artifactId> < version> </ version> </ dependency> < dependency> < groupId> </ groupId> < artifactId> </ artifactId> < optional> </ optional> </ dependency> < dependency> < groupId> </ groupId> < artifactId> </ artifactId> < scope> </ scope> </ dependency> < dependency> < groupId> </ groupId> < artifactId> </ artifactId> < version> </ version> </ dependency> </ dependencies> < build> < plugins> < plugin> < groupId> </ groupId> < artifactId> </ artifactId> < configuration> < excludes> < exclude> < groupId> </ groupId> < artifactId> </ artifactId> </ exclude> </ excludes> </ configuration> </ plugin> </ plugins> </ build> < repositories> < repository> < id> </ id> < name> </ name> < url> </ url> < snapshots> < enabled> </ enabled> </ snapshots> </ repository> < repository> < id> </ id> < name> </ name> < url> </ url> < releases> < enabled> </ enabled> </ releases> </ repository> </ repositories> < pluginRepositories> < pluginRepository> < id> </ id> < name> </ name> < url> </ url> < snapshots> < enabled> </ enabled> </ snapshots> </ pluginRepository> < pluginRepository> < id> </ id> < name> </ name> < url> </ url> < releases> < enabled> </ enabled> </ releases> </ pluginRepository> </ pluginRepositories> </ project>
spring. datasource. type= com. alibaba. druid. pool. DruidDataSource. datasource. driver- class - name= com. mysql. cj. jdbc. Driver. datasource. url= jdbc: mysql: / / localhost: 3306 / jwt? characterEncoding= UTF- 8 & useSSL= false
spring. datasource. username= root
spring. datasource. password= root
mybatis. type- aliases- package = com. example. jwt. entity
mybatis. mapper- locations= classpath: mapperpackage com. example. jwt. entity ;
import lombok. Data ;
import lombok. experimental. Accessors ;
@Data
@Accessors ( chain = true )
public class User {
private Integer id;
private String username;
private String password;
}
package com. example. jwt. dao ;
import com. example. jwt. entity. User ;
import org. apache. ibatis. annotations. Mapper ;
@Mapper
public interface UserDAO {
User login ( User user) ;
}
<?xml version="1.0" encoding="UTF-8"?>
<! DOCTYPE mapper
PUBLIC "-//mybatis.org//DTD Mapper 3.0//EN"
"http://mybatis.org/dtd/mybatis-3-mapper.dtd" > < mappernamespace = " com.example.jwt.dao.UserDAO" > < selectid = " login" parameterType = " User" resultType = " User" > </ select> </ mapper> package com. example. jwt. service ;
import com. example. jwt. entity. User ;
public interface UserService {
User login ( User user) ;
}
package com. example. jwt. service. impl ;
import com. example. jwt. dao. UserDAO ;
import com. example. jwt. entity. User ;
import com. example. jwt. service. UserService ;
import org. springframework. beans. factory. annotation. Autowired ;
import org. springframework. stereotype. Service ;
import org. springframework. transaction. annotation. Propagation ;
import org. springframework. transaction. annotation. Transactional ;
@Service
@Transactional
public class UserServiceImpl implements UserService {
@Autowired
private UserDAO userDAO;
@Override
@Transactional ( propagation = Propagation . SUPPORTS)
public User login ( User user) {
User login = userDAO. login ( user) ;
if ( login != null ) {
return login;
}
throw new RuntimeException ( "登录失败~~" ) ;
}
}
package com. example. jwt. interceptors ;
import com. auth0. jwt. exceptions. AlgorithmMismatchException ;
import com. auth0. jwt. exceptions. SignatureVerificationException ;
import com. auth0. jwt. exceptions. TokenExpiredException ;
import com. auth0. jwt. interfaces. DecodedJWT ;
import com. example. jwt. utils. JWTUtils ;
import com. fasterxml. jackson. databind. ObjectMapper ;
import org. springframework. web. servlet. HandlerInterceptor ;
import javax. servlet. http. HttpServletRequest ;
import javax. servlet. http. HttpServletResponse ;
import java. util. HashMap ;
import java. util. Map ;
public class JWTInterceptor implements HandlerInterceptor {
@Override
public boolean preHandle ( HttpServletRequest request, HttpServletResponse response, Object handler) throws Exception {
Map < String , Object > = new HashMap < > ( ) ;
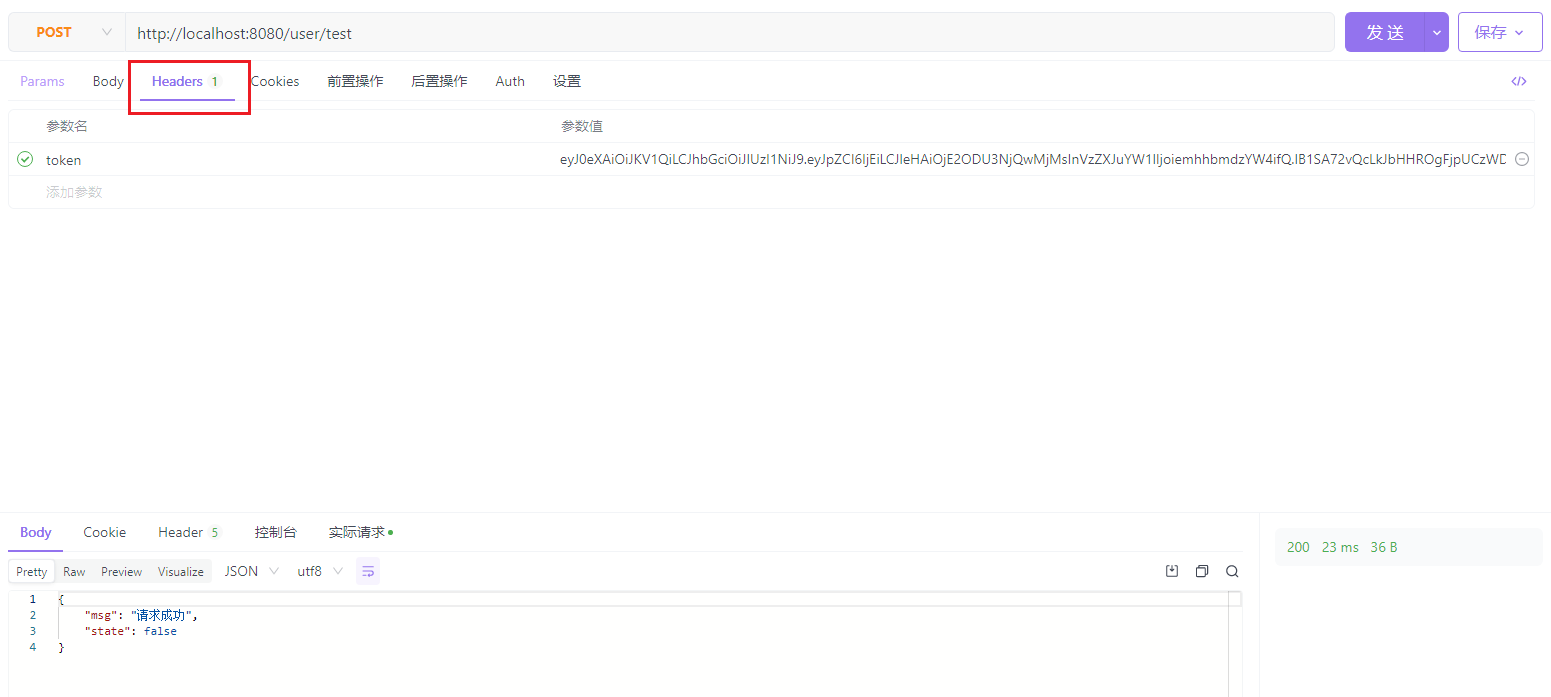
String token = request. getHeader ( "token" ) ;
try {
DecodedJWT verify = JWTUtils . verify ( token) ;
return true ;
} catch ( SignatureVerificationException e) {
map. put ( "msg" , "无效签名" ) ;
e. printStackTrace ( ) ;
} catch ( TokenExpiredException e) {
map. put ( "msg" , "token失效" ) ;
e. printStackTrace ( ) ;
} catch ( AlgorithmMismatchException e) {
map. put ( "msg" , "token算法不一致" ) ;
e. printStackTrace ( ) ;
} catch ( Exception e) {
map. put ( "msg" , "token无效!" ) ;
e. printStackTrace ( ) ;
}
map. put ( "state" , false ) ;
String json = new ObjectMapper ( ) . writeValueAsString ( map) ;
response. setContentType ( "application/json;charset=UTF-8" ) ;
response. getWriter ( ) . println ( json) ;
return false ;
}
}
package com. example. jwt. config ;
import com. example. jwt. interceptors. JWTInterceptor ;
import org. springframework. context. annotation. Configuration ;
import org. springframework. web. servlet. config. annotation. InterceptorRegistry ;
import org. springframework. web. servlet. config. annotation. WebMvcConfigurer ;
@Configuration
public class InterceptorConfig implements WebMvcConfigurer {
@Override
public void addInterceptors ( InterceptorRegistry registry) {
registry. addInterceptor ( new JWTInterceptor ( ) )
. addPathPatterns ( "/user/test" )
. excludePathPatterns ( "/user/login" ) ;
}
}


 1055
1055

 被折叠的 条评论
为什么被折叠?
被折叠的 条评论
为什么被折叠?
 到【灌水乐园】发言


