


这个功能我是封装成了组件,方便以后的复用,如果用的少的可以单独在页面写
普通的
先看效果。gif截图工具最近有点不太正常。。。。。。上代码
notice.wxml代码
图片的css样式根据个人情况修改下吧
<!--components/notice/notice.wxml-->
<view class="notice-container">
	<image style="width:30rpx;height:30rpx;margin:0 20rpx" src="{{imagePath}}/station-nav.png"></image>
	<view class="content-wrapper">
		<view class="content-text" animation="{{animationData}}">
			<text id="text">{{text}}</text>
		</view>
	</view>
	<image style="width:30rpx;height:30rpx;margin-left:20rpx" src="{{imagePath}}/arrow-right.png"></image>
</view>
notice.js代码
这里部分代码还能优化一下,以后有时间在重构一下吧,比如可以用es6的解构赋值;
还有像下面的滚动时间也可以是动态传入的,懒得改了
// components/notice/notice.js
const { imageProPath } = require('../../utils/imageUrlUtil.js')

Component({
  /**
   * 组件的属性列表
   */
  properties: {
    //文字内容
    text: {
      type: String,
      value: '我是文字我是文字我是文字我是文字'
    }
  },

  /**
   * 组件的初始数据
   */
  data: {
    animation: null, //文字滚动动画集
    timer: null, //定时器
    duration: 0, //设置滚动速度,数值越大速度越慢
    textWidth: 0, //文本宽度
    wrapWidth: 0, //容器宽度
    setTimer: null,
    imagePath: imageProPath
  },

  pageLifetimes: {
    show(){
      this.initAnimation(this.data.text)
    },
    hide(){

      this.destroyTimer()
      this.setData({
        timer: null,
      })
      clearInterval(this.data.setTimer)
    }
  },

  methods: {
    //初始化动画,text为公告内容
    initAnimation(text){
      let that = this
      //设置时间
      this.data.duration = 10000
      //创建动画并选择动画节点
      this.data.animation = wx.createAnimation({
        duration: this.data.duration,
        timingFunction: 'linear'
      })
      let query = this.createSelectorQuery()
      query.select('.content-wrapper').boundingClientRect()
      query.select('#text').boundingClientRect()
      // 设置容器宽度和文本宽度
      query.exec((rect) => {
        that.setData({
          wrapWidth: rect[0].width,
          textWidth: rect[1].width
        }, () => {
          this.startAnimation()
        })
      })
    },
    // 为定时器设置动画
    startAnimation() {
      // 设置X轴的偏移位置并导出动画
      const resetAnimation = this.data.animation.translateX(this.data.wrapWidth).step({
        duration: 0
      })
      //导出动画
      this.setData({
        animationData: resetAnimation.export()
      })
      const animationData = this.data.animation.translateX(-this.data.textWidth).step({
        duration: this.data.duration
      })
      setTimeout(() => {
        this.setData({
          animationData: animationData.export()
        })
      }, 100)
      const timer = setTimeout(() => {
        this.startAnimation()
      }, this.data.duration)
      this.setData({
        timer
      })
    },
    //销毁定时器
    destroyTimer() {
      if (this.data.timer) {
        clearTimeout(this.data.timer);
      }
    }
  }
})
notice.wxss代码
/* components/notice/notice.wxss */
.notice-container{
  display: flex;
  align-items: center;
  justify-content: space-between;
  padding: 10rpx 0;
  margin: 16rpx 0 30rpx 0;
  border-radius: 10rpx;
  background-color: #FFCF80;
}
.content-wrapper {
  width: 550rpx;
  overflow: hidden;
}
.content-text {
  color: #fff;
  white-space: nowrap;
  font-size: 24rpx;
}
使用
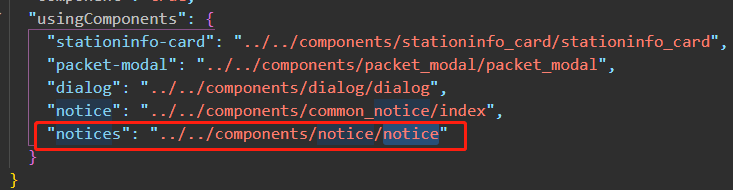
在json文件中引入这个组件
在wxml调用

更加变态的
大早上刚到公司,产品和我说这样的滚动不太好啊,我想配置单独文字的颜色,然后进行滚动,我当时真想**********!!!!。生气伤身体,老老实实实现功能吧
刚开始本想直接for循环遍历的,然后直接渲染每个颜色的,做完之后发现不对有bug啊,因为这样每个item我们都带有animation,并且时间都是一样的:10000,这样不行,来稍微改一下布局和js
修改后的wxml
最外面包裹了一个盒子:box,获取到box和每个content-text宽度进行动态计算textWidth和duration
<view class="notice-wrapper" wx:if="{{noticeText.length}}">
	<image style="width:30rpx;height:30rpx;margin:0 20rpx 0 50rpx" src="{{imagePath}}/icons/notice-icon.png"></image>
	<view class="box">
		<!-- 这里是使用纯css写的文字滚动 -->
		<!-- <view class="animate" style="color:{{item.color}}" wx:for="{{noticeText}}" wx:key="index">
          {{item.content}}
        </view> -->
        <view class="content-text" animation="{{animationData}}">
          <view id="text" style="color:{{item.color}}" wx:for="{{noticeText}}" wx:key="index">{{item.content}}</view>
        </view>
    </view>
</view>
box只是加了一点普通的css
/* 通知栏 */
.notice-wrapper{
  display: flex;
  align-items: center;
  padding: 10rpx 0;
  border-radius: 10rpx;
  margin: 16rpx 0 30rpx 0;
}
.content-wrapper{
  width: 450rpx;
  height: 40rpx;
  color: #F39800;
  overflow: hidden;
}
#text{
  display: flex;
  margin-right: 30rpx;
}
.box {
  position: relative;
  display: flex;
  width: 450rpx;
  overflow: hidden;
}

.animate {
  display: flex;
  align-items: center;
  padding-left: 20px;
  font-size: 12px;
  color: #000;
  /* display: inline-block;
  white-space: nowrap; */
  animation: 15s wordsLoopMarque linear infinite normal;
}

@keyframes wordsLoopMarque {
  0% {
    transform: translateX(0px);
    -webkit-transform: translateX(0px);
  }
  100% {
    transform: translateX(-100%);
    -webkit-transform: translateX(-100%);
  }
}

@-webkit-keyframes wordsLoopMarque {
  0% {
    transform: translateX(0px);
    -webkit-transform: translateX(0px);
  }
  100% {
    transform: translateX(-100%);
    -webkit-transform: translateX(-100%);
  }
}
js也只是修改initAnimation和startAnimation这两个方法就好
initAnimation修改
initAnimation(text) {
      let that = this
      let query = wx.createSelectorQuery()
      query.select('.content-text').boundingClientRect()
      query.select('.box').boundingClientRect()
      // 设置容器宽度和文本宽度
      query.exec((rect) => {
        console.log(rect[1])
        let boxWidth = rect[1].width
        //设置时间
        this.data.duration = 2500 * (rect[0].width / boxWidth)
        //创建动画并选择动画节点
        this.data.animation = wx.createAnimation({
          duration: this.data.duration,
          timingFunction: 'linear'
        })
        that.setData({
          textWidth: rect[0].width <= boxWidth ? boxWidth : rect[0].width,
          wrapWidth: boxWidth
        }, () => {
          this.startAnimation()
        })
      })
    },
startAnimation修改
startAnimation() {
      // 设置X轴的偏移位置并导出动画
      const resetAnimation = this.data.animation.translateX(this.data.wrapWidth).step({
        duration: 0
      })
      //导出动画
      this.setData({
        animationData: resetAnimation.export()
      })
      //这里是主要修改的地方
      const animationData = this.data.animation.translateX(-(this.data.textWidth+this.data.wrapWidth)+100).step({
        duration: this.data.duration
      })
      setTimeout(() => {
        this.setData({
          animationData: animationData.export()
        })
      }, 100)
      const timer = setTimeout(() => {
        this.startAnimation()
      }, this.data.duration)
      this.setData({
        timer
      })
    },


 6320
6320

 被折叠的 条评论
为什么被折叠?
被折叠的 条评论
为什么被折叠?
 到【灌水乐园】发言


