


很多同学租了服务器不知道怎么样用,可能当时就是为了学习个Linux系统的操作或是试试SSH远程连接就没有其他的操作了,显得特别浪费。大部分人租用服务器都会开发/部署一个属于自己的网站,或是利用服务器去训练数据集。
本文的内容就是带着大家来安装一个简洁的博客网站——docsify,在部署安装的过程中会遇到比较多的问题,不过都不要紧,我摸着石头过河,你们骑着我过河就行。
好了,闲话不多说,开始我们今天的主题,如果各位老师对我的安装说明有任何疑问的,请各位老师批评指正!
环境准备
本次安装是基于Ubuntu20.04版本,第一步我们先安装Nginx代理服务器
首先更新一下源
sudo apt update
安装Nginx
-
安装Nginx的常用命令
sudo apt-get install nginx -
查看Nginx的版本
nginx -v
# 输出结果nginx version: nginx/1.18.0 (Ubuntu)
- Nginx的状态操作命令
# systemctl命令
# 查看状态
sudo systemctl status nginx
# 启动
sudo systemctl start nginx
# 停止
sudo systemctl stop nginx
# 重启
sudo systemctl restart nginx
- 查看文件结构
# 查看文件结构
tree /etc/nginx
/etc/nginx
├── conf.d
├── fastcgi.conf
├── fastcgi_params
├── koi-utf
├── koi-win
├── mime.types
├── modules-available
├── modules-enabled
│   ├── 50-mod-http-image-filter.conf -> /usr/share/nginx/modules-available/mod-http-image-filter.conf
│   ├── 50-mod-http-xslt-filter.conf -> /usr/share/nginx/modules-available/mod-http-xslt-filter.conf
│   ├── 50-mod-mail.conf -> /usr/share/nginx/modules-available/mod-mail.conf
│   └── 50-mod-stream.conf -> /usr/share/nginx/modules-available/mod-stream.conf
├── nginx.conf
├── proxy_params
├── scgi_params
├── sites-available
│   └── default
├── sites-enabled
│   └── default -> /etc/nginx/sites-available/default
├── snippets
│   ├── fastcgi-php.conf
│   └── snakeoil.conf
├── uwsgi_params
└── win-utf
此时Nginx已经安装好了,这种安装方式是直接从Ubuntu中的包里下载Nginx进行安装,较之源码安装少了灵活性,但是简单许多。
安装node.js
- 安装node.js的相关命令
curl -sL https://deb.nodesource.com/setup_20.x | sudo bash -
上面的20是指定要安装的版本,可以根据自己的需要进行修改
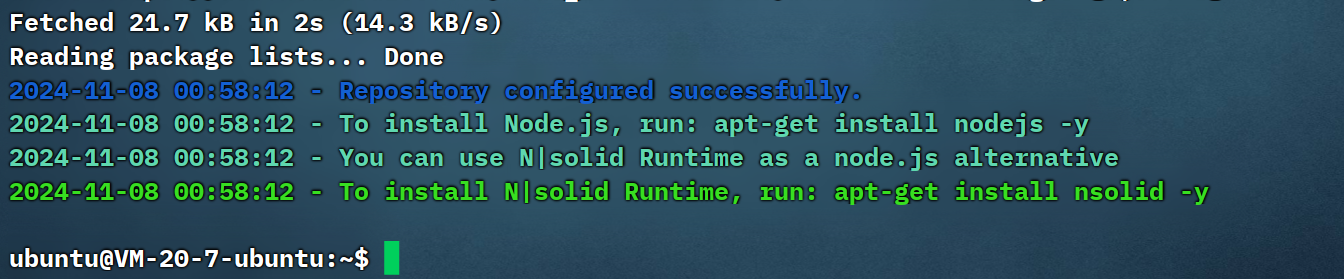
下载成功后的结果如上图所示。
- 按照提示进行安装
sudo apt-get install nsolid -y
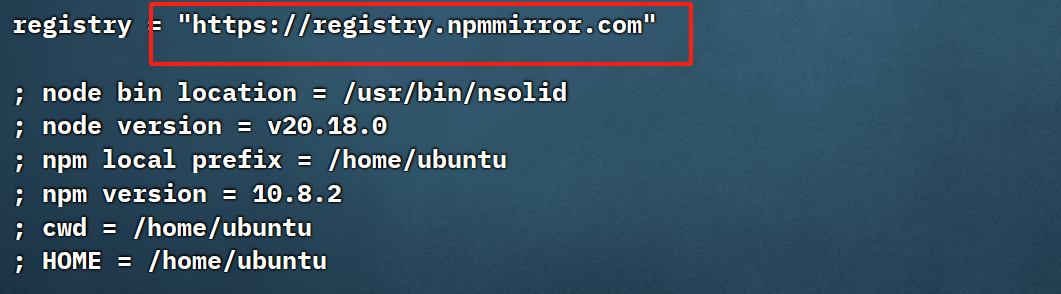
- 修改为国内的镜像源
这里很容易搜索到过期的淘宝镜像
sudo npm config set registry https://registry.npmmirror.com
- 查看是否更改
npm config list
安装docsify
- 直接使用npm命令进行安装即可
sudo npm install -g docsify-cli

执行成功之后如上图所示
- 查看版本信息
docsify -v

- 进入
/var/www目录,并创建文件夹repository
cd /var/www
sudo mkdir repository
配置Nginx
- 进入
/etc/nginx/conf.d文件夹中,并创建static.conf文件
cd /etc/nginx/conf.d
sudo static.conf
并输入如下内容
server {
    listen       80;
    server_name  localhost;  # 设置成你的IP地址

    charset utf-8; # 防止中文显示出现乱码

    #access_log  logs/host.access.log  main;

    location / {
        root   /var/www/repository; # 你的静态资源路径
        index  index.html index.htm;# 访问的文件为html, htm
    }
}
- 验证你的语法是否全部正确
sudo nginx -t

若结果如上图所示,则表示正确
- 启动nginx
sudo systemctl start nginx
最后在浏览器中输入你的IP地址即可方法自己的博客网站了
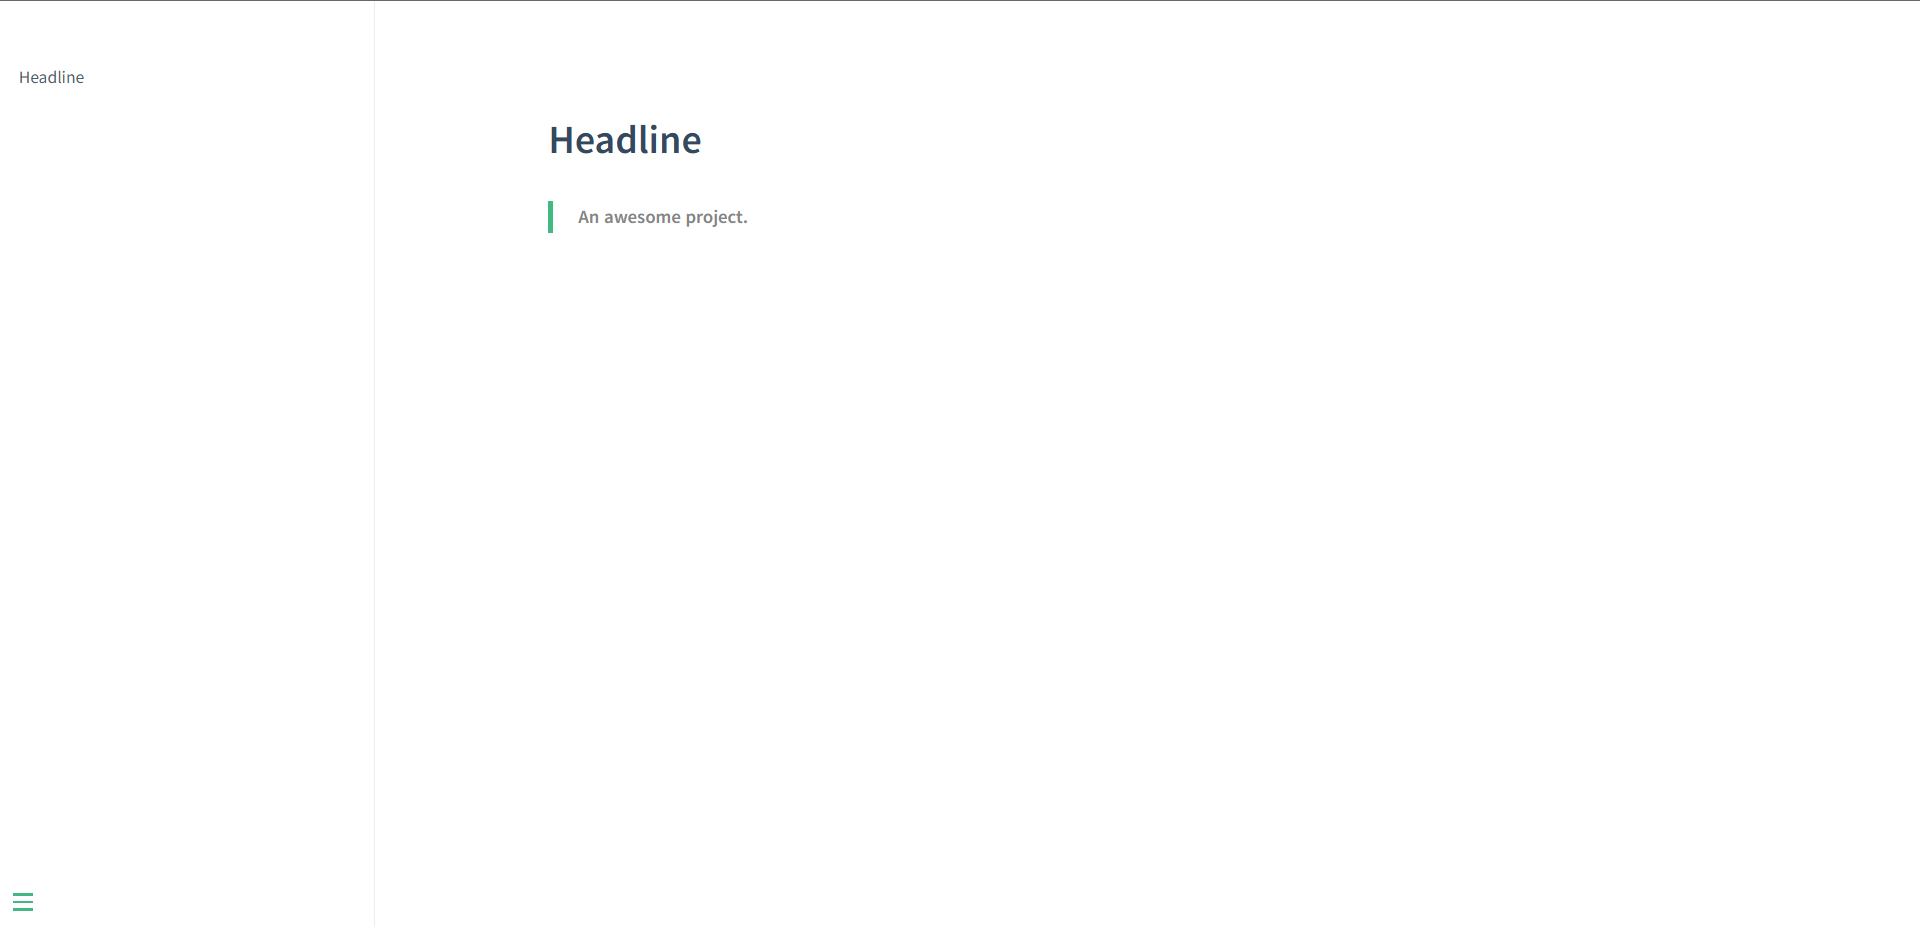
不过你打开这个页面的速度是非常的慢的,因为他要去远程加载vue.css文件,这个是基于Vue开发的一款博客网站,所以建议你下载下来进行配置。
最后文章写到这里就结束了,如果有什么需要改进的地方,请各位老师批评指正!
路漫漫其修远兮,吾将上下而求索
欢迎关注【小志Codings】,带你了解更多!


 被折叠的 条评论
为什么被折叠?
被折叠的 条评论
为什么被折叠?
 到【灌水乐园】发言


