


 本文详细介绍在Ubuntu 16.04上安装ROS Kinetic版本的全过程,包括设置资源列表、添加密钥、更新源等步骤,并提供了解决安装过程中常见问题的方法。
一、ubuntu16.04安装ros系统的过程(后面有安装过程填过的坑)
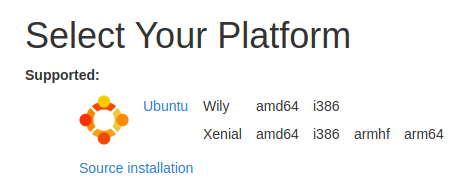
安装注意事项:1.一定要确定安装的ros版本要考虑2个方面(系统版本和芯片架构),以官网为准:
kinetic版本:http://wiki.ros.org/kinetic/Installation,其中Xenial代表ubuntu的16.04
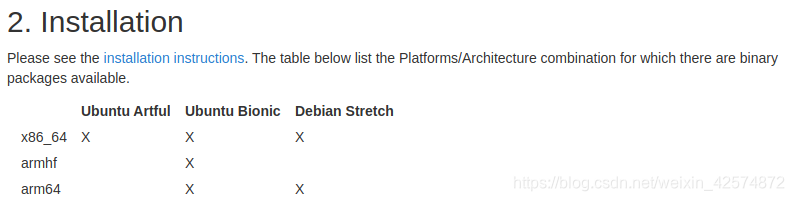
melodic版本:http://wiki.ros.org/melodic,其中x表示支持的芯片架构(arm64)和对应的系统版本(Bionic就是ubuntu的18.04版本名称)
接下来开始安装ros系统(也有直接通过sh脚本文件执行的)官网的安装过程
1.设置ubuntu的resource.list
这一步会根据 Ubuntu Linux 发行版本的不同,添加不同的源。Ubuntu 的版本通过 lsb_release -sc 获得,一旦添加了正确的软件库,操作系统就知道去哪里下载程序,并根据命令自动安装软件。
sudo sh -c 'echo "deb http://packages.ros.org/ros/ubuntu $(lsb_release -sc) main" > /etc/apt/sources.list.d/ros-latest.list'这句话执行之后,会生成/etc/apt/sources.list.d/ros-latest.list,文件内容如下
deb http://mirrors.ustc.edu.cn/ros/ubuntu/ xenial main
2.添加key
sudo apt-key adv --keyserver 'hkp://keyserver.ubuntu.com:80' --recv-key C1CF6E31E6BADE8868B172B4F42ED6FBAB17C6543.配置完成下载源,必须更新
sudo apt-get update4.开始下载ros的安装包(这里如果安装出现问题可以尝试换一个镜像源)
sudo apt-get install ros-kinetic-desktop-full5.初始化 ros(这里是执行ros的一个指令,这个指令会执行一个python文件)
sudo rosdep init
6.更新ros配置(同样是执行python文件,实现ros的配置更新)
rosdep update7.初始化环境变量
echo "source /opt/ros/kinetic/setup.bash" >> ~/.bashrc
8. 更新系统环境配置
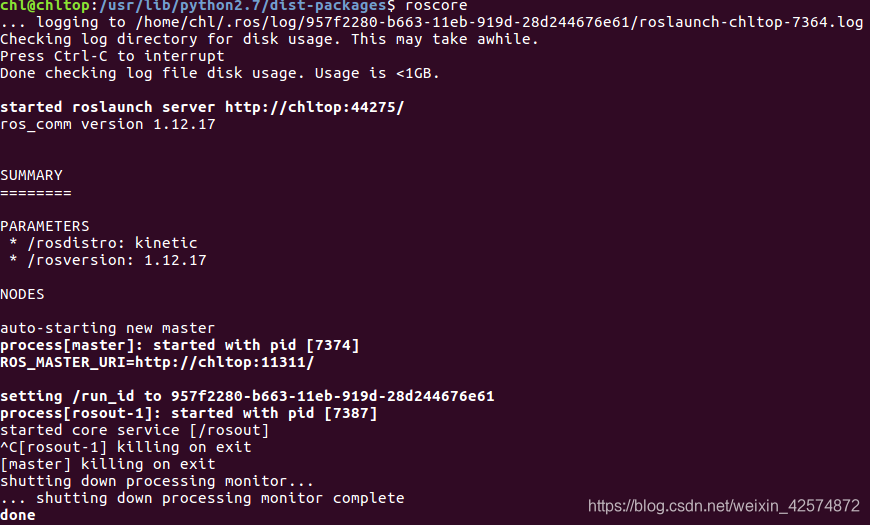
source ~/.bashrc9.验证ros是否安装成功
roscore结果如下则表示安装成功
二、安装过程遇到的问题及解决方案
1.在安装过程中的第5和6个步骤会遇到下载raw.githubusercontent.com遇到问题(推荐使用方法二)
原因:在解析这个域名的时候遇到错误,所以想着直接通过本机hosts文件自主解析域名
解决方法一:在/etc/hosts文件添加下列指令,其中的ip地址是时变的,可以通过一些查询ip地址的网址来查看我使用的查询ip地址的网址是
185.199.108.133 raw.githubusercontent.com
185.199.109.133 raw.githubusercontent.com
185.199.110.133 raw.githubusercontent.com
185.199.111.133 raw.githubusercontent.comsudo gedit /etc/hosts结果:看天命有的时候有用,有的时候没有,这个方法也不能百分百解决问题
解决方法二:将需要使用的包直接下载下来
1.直接通过git clone将安装包下载下来。 这个位置如果你没有外网也可能不能访问,可以通过在浏览器中直接访问https://github.com/ros/rosdistro来查看是否能下载。如果不能则直接下载,则可以使用本人上传在网址的资源:https://download.youkuaiyun.com/download/weixin_42574872/18788363
git clone https://github.com/ros/rosdistro.git2.下载完成后解压文件
sudo unzip rosdistro-master.zip3.然后修改rosdep需要执行的python文件,将其中的URL后的地址设置成这个安装包的安装位置我当时安装的就是:
根据本人rosdistro-master目录的安装位置
修改rep3.py文件为REP3_TARGETS_URL = 'file:///home/chl/rosSoft/rosdistro-master/releases/targets.yaml'
修改__init__.py文件为DEFAULT_INDEX_URL = 'file:///home/chl/rosSoft/rosdistro-master/index-v4.yaml'
修改rosdep2/sources_list.py文件为DEFAULT_SOURCES_LIST_URL = 'file:///home/chl/rosSoft/rosdistro-master/rosdep/sources.list.d/20-default.list'
cd /usr/lib/python2.7/dist-packages
sudo gedit rosdep2/rep3.py
sudo gedit rosdistro/__init__.py
sudo gedit rosdep2/sources_list.py
4.最后修改rosdep init生成的文件,如果这个文件没有可以自己在这个位置创建一个这个文件就可以了。说的更直白一点就是你手动创建这个文件就不用执行rosdep init指令了。
创建这个文件的指令如下:
sudo mkdir -p /etc/ros/rosdep/sources.list.d/20-default.list打开这个文档,指令如下:
cd /etc/ros/rosdep/sources.list.d
sudo gedit 20-default.list
20-default.list文件修改后的内容如下:
# os-specific listings first
yaml file:///home/chl/rosSoft/rosdistro-master/rosdep/osx-homebrew.yaml osx

# generic
yaml file:///home/chl/rosSoft/rosdistro-master/rosdep/base.yaml
yaml file:///home/chl/rosSoft/rosdistro-master/rosdep/python.yaml
yaml file:///home/chl/rosSoft/rosdistro-master/rosdep/ruby.yaml
gbpdistro file:///home/chl/rosSoft/rosdistro-master/releases/fuerte.yaml fuerte

# newer distributions (Groovy, Hydro, ...) must not be listed anymore, they are being fetched from the rosdistro index.yaml instead
结果:这个方法百分百能解决无法连接到raw的网址问题所有的ros系统版本都可以使用这个方法,推荐使用
解决方法三:修改域名解析地址,但是我还没有测试,成功概率不高
sudo gedit /etc/resolv.conf
nameserver 8.8.8.8 #google域名服务器
nameserver 8.8.4.4 #google域名服务器
sudo  apt-get update
rosdep update
三、其他问题
1.全局系统代理
- 在~/.bashrc中添加如下内容
sudo gedit ~/.bashrcexport http_proxy='http://proxy.xxx.com:8080'
export https_proxy='http://proxy.xxx.com:8080'
export ftp_proxy='hhttp://proxy.xxx.com:8080'
export no_proxy='localhost,127.0.0.1'source ~/.bashrc2.修改git的代理(git clone如果不能下载可以尝试修改但是不一定成功,还可以查看端口号是否被占用)
#设置代理,此处为案例演示
git config --global http.proxy http://proxy.xxx.com:8080
#查看代理
git config --global http.proxy
#删除代理
git config --global --unset http.proxy
git config --global --unset https.proxy
3.取消系统代理(在git clone的时候或者使用浏览器的时候,都没成功)
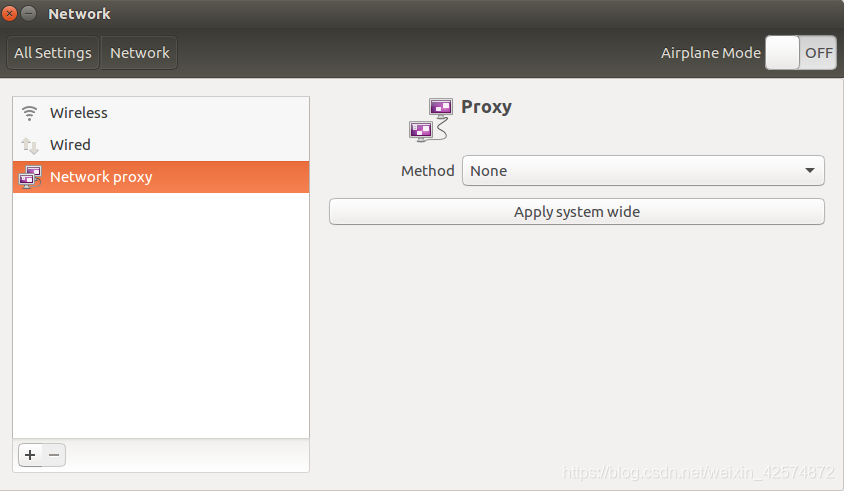
unset http_proxy
unset ftp_proxy
unset all_proxy
unset https_proxy
unset no_proxy
4.使用系统设置取消系统代理(浏览器成功实现了直连网络) ,配置成如下结果:
参考文献


 1030
1030

 被折叠的 条评论
为什么被折叠?
被折叠的 条评论
为什么被折叠?
 到【灌水乐园】发言


