


InnoSetup打包编译好的QT程序
介绍
Inno Setup:用于打包安装程序
具体步骤
- 首先打开inno setup compiler

- 第二步

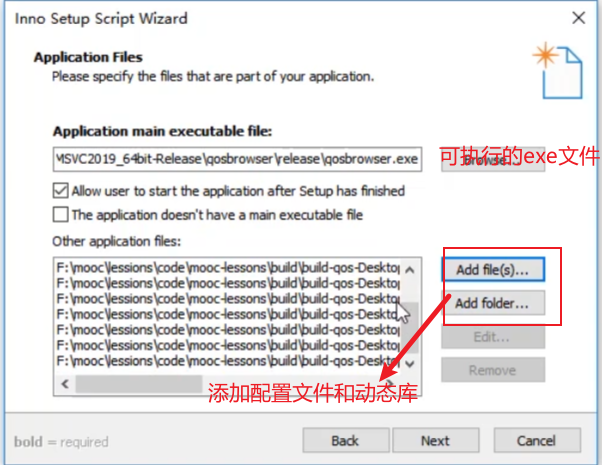
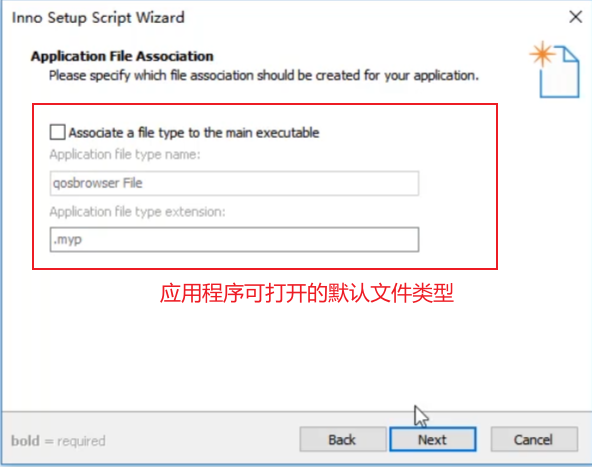
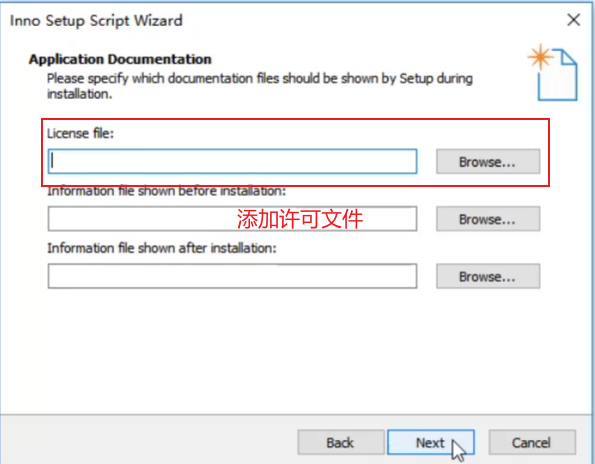
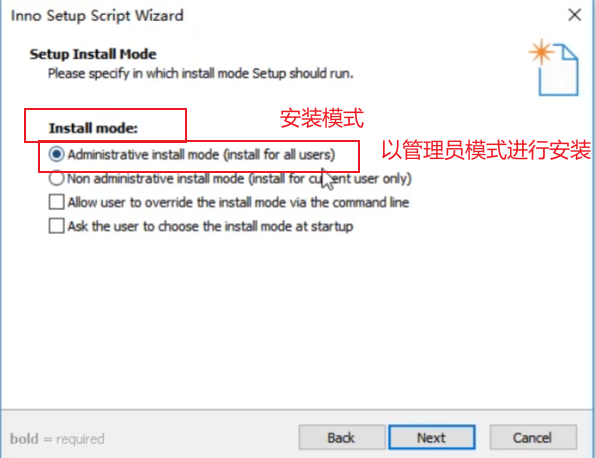
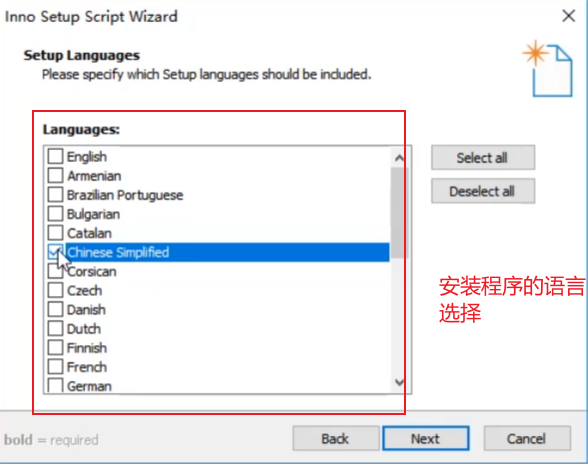
- 接下来按照图示进行


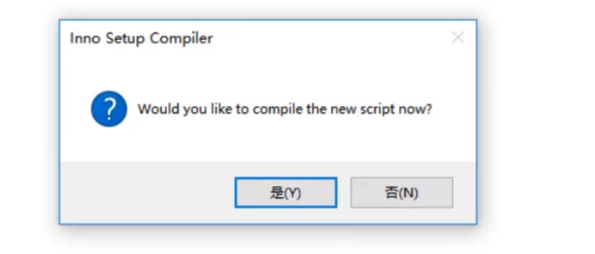
一路next,会弹出一个编译脚本,然后点击是
4. 确认脚本无误后,单击运行,输出安装包

自定义脚本
在配置完成后,生成的脚本中,就是以script的形式写出了配置内容,可以自行更改。
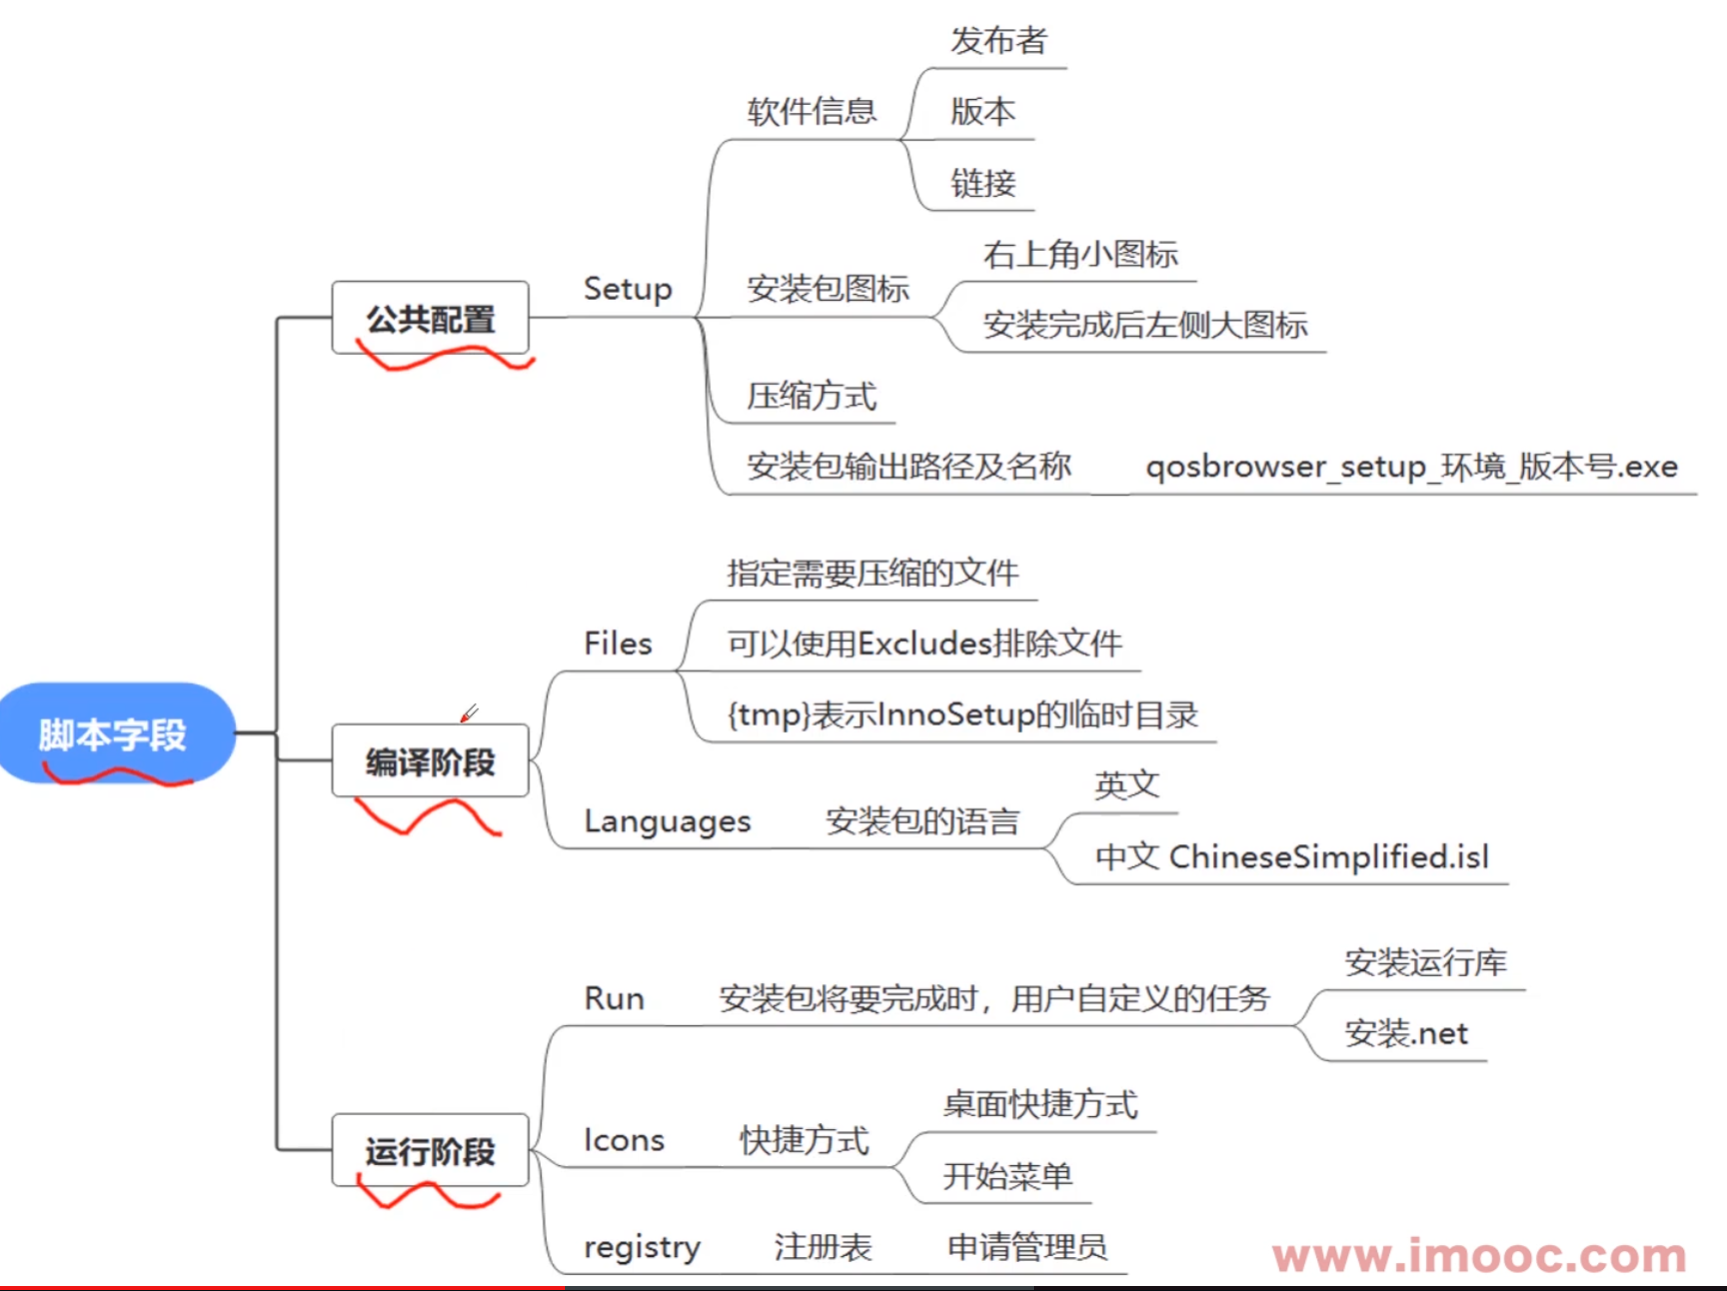
一个完整的示例
; Script generated by the Inno Setup Script Wizard.
; SEE THE DOCUMENTATION FOR DETAILS ON CREATING INNO SETUP SCRIPT FILES!

#define MyAppName "qosbrowser"
#define MyAppVersion "0.0.1"
#define MyAppPublisher "XiaoDouLaoShi"
#define MyAppURL "https://www.example.com/"
#define MyAppExeName "qosbrowser.exe"
#define MyEnv "prod"
#define MyRes "static"
#define MyBuild "..\build\build-qos-Desktop_Qt_5_15_2_MSVC2019_64bit-Release\qosbrowser\release"


; 基本信息设置
[Setup]
; NOTE: The value of AppId uniquely identifies this application. Do not use the same AppId value in installers for other applications.
; (To generate a new GUID, click Tools | Generate GUID inside the IDE.)
; 它表示一个产品安装包的唯一id,如果做另外一个新产品则需要重新生成一个appid
AppId={{95827DF0-FC44-439C-9225-6CB9BCC43A55}
AppName={#MyAppName}
AppVersion={#MyAppVersion}
;AppVerName={#MyAppName} {#MyAppVersion}
AppPublisher={#MyAppPublisher}
AppPublisherURL={#MyAppURL}
AppSupportURL={#MyAppURL}
AppUpdatesURL={#MyAppURL}
DefaultDirName={autopf}\{#MyAppName}
DisableProgramGroupPage=yes
; Uncomment the following line to run in non administrative install mode (install for current user only.)
;PrivilegesRequired=lowest
OutputDir=.\output
OutputBaseFilename={#MyAppName}_setup_{#MyEnv}_{#MyAppVersion}
SetupIconFile=.\static\images\logo.ico
Compression=lzma
SolidCompression=yes
WizardStyle=modern
WizardImageFile={#MyRes}\images\setup.bmp
WizardSmallImageFile={#MyRes}\images\setup_small.bmp

; 多语言安装
[Languages]
Name: "chinesesimplified"; MessagesFile: "compiler:Languages\ChineseSimplified.isl"

; 本节是可选的。它定义了安装程序在安装期间将执行的所有用户自定义任务。
[Tasks]
Name: "desktopicon"; Description: "{cm:CreateDesktopIcon}"; GroupDescription: "{cm:AdditionalIcons}"; Flags: unchecked

; 指定需要打包的文件
[Files]
Source: "{#MyBuild}\*"; DestDir: "{app}"; Excludes: "*.cpp,*.h,*.obj,*.res"; Flags: recursesubdirs ignoreversion
Source: "{#MyRes}\tools\VC_redist.x64.exe"; DestDir: "{tmp}/tools"; Flags: ignoreversion

; NOTE: Don't use "Flags: ignoreversion" on any shared system files


[registry]
;本段处理程序在注册表中的键值
Root:HKCU;Subkey:Software\Microsoft\Windows NT\CurrentVersion\AppCompatFlags\Layers;ValueType: string; ValueName:{app}\qosbrowser.exe;ValueData:~ RUNASADMIN;


; 本节是可选的。定义了安装程序在开始菜单和/或其他位置(如桌面)创建的任何快捷方式。
[Icons]
Name: "{autoprograms}\{#MyAppName}"; Filename: "{app}\{#MyAppExeName}"
Name: "{autodesktop}\{#MyAppName}"; Filename: "{app}\{#MyAppExeName}"; Tasks: desktopicon

; 部分是可选的,它指定在程序成功安装之后,但在安装程序显示最终对话框之前要执行的任意数量的程序。
[Run]
Filename: "{tmp}\tools\VC_redist.x64.exe"; Parameters: /q;
Filename: "{app}\{#MyAppExeName}"; Description: "{cm:LaunchProgram,{#StringChange(MyAppName, '&', '&&')}}"; Flags: nowait postinstall skipifsilent
更改引入配置文件/动态库路径
这里指定需要打包的文件的路径
; Excludes表示打包时排除哪些文件
[Files]
Source: "{#MyBuild}\*"; DestDir: "{app}"; Excludes: "*.cpp,*.h,*.obj,*.res"; Flags: recursesubdirs ignoreversion
申请管理员权限
如果安装在C盘program files下,则需要管理员权限
;以下内容是修改程序,使其默认以管理员权限运行
[registry]
;本段处理程序在注册表中的键值
Root:HKCU;Subkey:Software\Microsoft\Windows NT\CurrentVersion\AppCompatFlags\Layers;ValueType: string; ValueName:{app}\qosbrowser.exe;ValueData:~ RUNASADMIN;
设置安装过程界面的图标和图片
; 下面这个static目录要和output(也就是安装包放置目录)同级
#define MyRes "static"
WizardImageFile={#MyRes}\images\setup.bmp
WizardSmallImageFile={#MyRes}\images\setup_small.bmp
C++程序依赖运行库
需要在脚本中添加安装运行库:VC_redist.x64.exe(有些项目依赖这个运行库,但用户电脑可能没有这个库,所以需要在安装软件时同时配置)
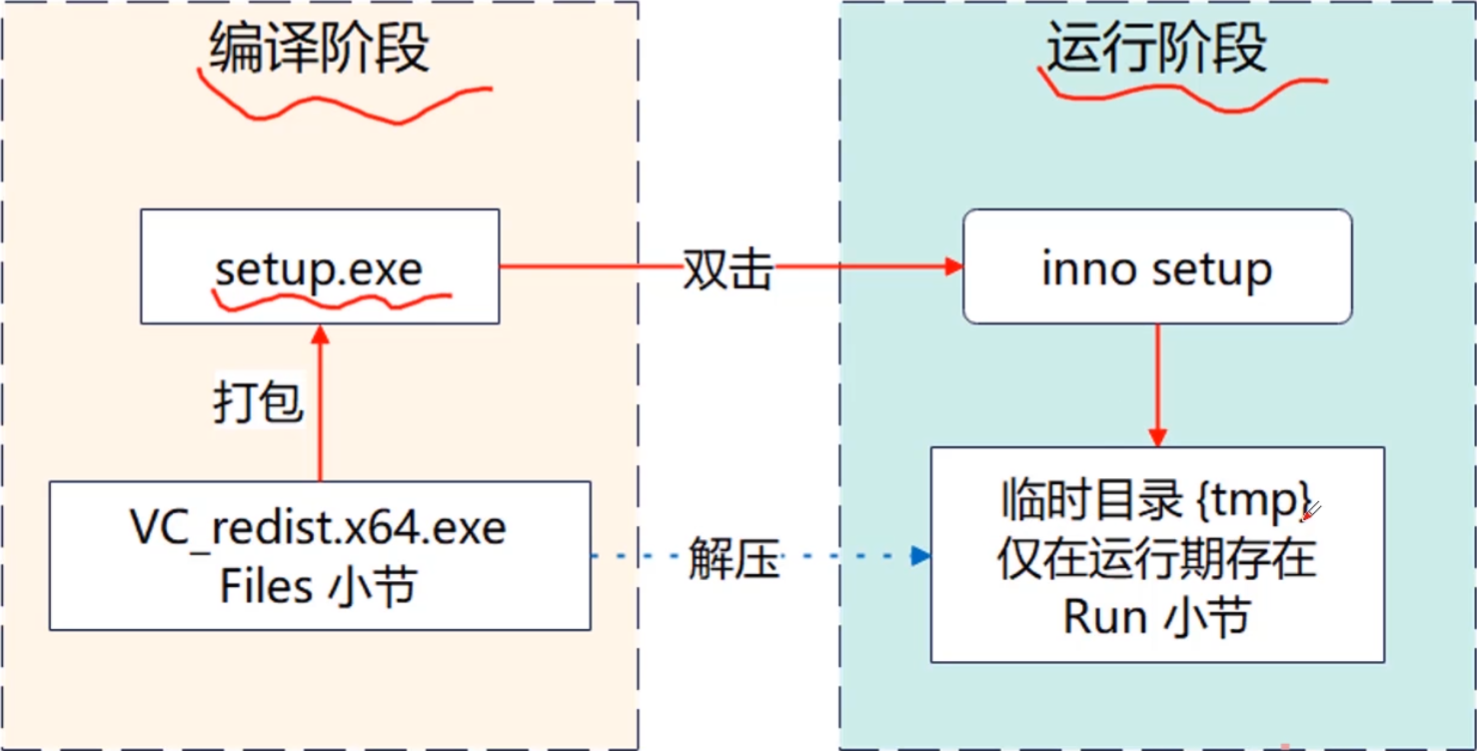
1、在Files 小节下添加运行库路径,(后面的{tmp}目录是生成的临时文件夹)
2、不需要在安装过程中弹出提示安装运行库,在[Run]里添加静默安装:
Parameters:/q
[Files]
Source: "{#MyRes}\tools\VC_redist.x64.exe"; DestDir: "{tmp}/tools"; Flags: ignoreversion

[Run]
Filename: "{tmp}\tools\VC_redist.x64.exe"; Parameters: /q;
参考:
[1] 慕课网课程


 590
590

 被折叠的 条评论
为什么被折叠?
被折叠的 条评论
为什么被折叠?
 到【灌水乐园】发言


