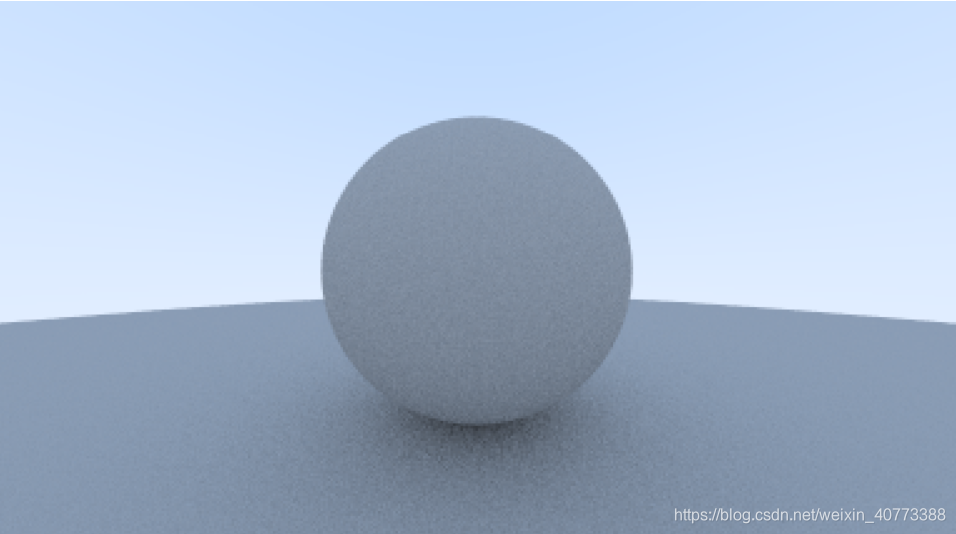
写在开头:这一章介绍了三种不同的生成漫射材质的方法,分别如下面三个图所示:

还提到了gamma矫正。
(这篇我现在没有太多的见解,基本是直译,斜体部分就是直译部分)
(直译)现在我们拥有了物体和每个像素中通过的多条射线,已经可以创作出一些看上去逼真的材质。我们将从漫射材料开始。一个问题是我们是否混合和匹配几何和材质(这样我们可以将一个材质分配给多个球体,反之亦然),或者几何和材质是否紧密结合(这对于几何和材质连接的过程对象可能是有用的)。我们将使用单独的-这是通常在大多数渲染器-但要知道的局限性。
7.1 一种简单的漫散物质
漫射物体本身并不发光,而是更具其固有色呈现出周围环境的颜色。漫反射面发射光的方向是随机的。如下图,我们将三条光线平行的投入两个漫反射面间,他们回有不同的随机行为:

这些光线也可能被吸收而不是反射。物体表面越黑,越容易吸收光线(这也是他们为什么黑的原因)。
实际上,任何能随机化方向的算法都可以生成看起来粗糙的表面。其中一个最简单的实现方法实现了完全正确的理想的漫反射表面。(我过去常常把它当作一种偷懒的方法,在数学上接近理想的朗伯特((Lambertian)定理。)
(读者Vassillen Chizhov证明了the lazy hack确实只是一个lazy hack,而且是不准确的。理想的兰伯特的正确表现并不需要更多的工作,并在本章的最后提出。)
这里有两个单位半径的球体相切于表面的交点P,这两个圆的圆心分别是(P + n) 和(P - n),n是交点表面的法向量。圆心在(P - n)处的圆(图中蓝色的圆)被认为在表面的内部,圆心在(P + n)处的圆(图中红色的圆)被认为在表面的外部。选择圆心与射线起点在表面同一侧的圆(图中红色的圆),在该圆中随机选择一点S,并从交点P发出一条指向S点的射线,即向量(S - P)。

我们需要一个在单位圆中随机选择一点的方法。我们将使用通常最简单的算法:拒绝法:
- 在单位立方体中随机选择一个点,其中,x、y、z的取值范围都是[-1, 1)。
- 如果生成的点在单位圆内,则返回该点,否则重新生成,直到生成符合条件的向量random_in_unit_sphere。
- 点s的坐标是:P + n + random_in_unit_sphere。
代码如下:
// 网页上的代码 vec3.h     random utility functions
class vec3 {
  public:
    ...
    inline static vec3 random() {
        return vec3(random_double(), random_double(), random_double());
    }
      inline static vec3 random(double min, double max) {
        return vec3(random_double(min,max), random_double(min,max),
                         random_double(min,max));
    }
}
// 网页上的代码 vec3.h The random_in_unit_sphere() function
vec3 random_in_unit_sphere() {
while (true) {
auto p = vec3::random(-1,1);
if (p.length_squared() >= 1) continue;
return p;
}
}
更新ray_color()函数,以使用新的随机方向生成器:
// 网页上的代码 main.cc
color ray_color(const ray& r, const hittable& world) {
    hit_record rec;
      if (world.hit(r, 0, infinity, rec)) {
               point3 target = rec.p + rec.normal + random_in_unit_sphere();
        return 0.5 * ray_color(ray(rec.p, target - rec.p), world);
      }
      vec3 unit_direction = unit_vector(r.direction());
   auto t = 0.5*(unit_direction.y() + 1.0);
   return (1.0-t)*color(1.0, 1.0, 1.0) + t*color(0.5, 0.7, 1.0);
}
7.2 限制子射线的数量
这里隐藏着一个潜在的问题。ray_color函数是一个递归函数,只有当它没有击中任何东西的时候才会结束递归、返回,但是有些情况下这个递归过程要执行很久,久到程序堆栈放不下。为了防止这种情况发生,我们限制最大的递归深度,在最大深度返回黑色,代码如下:
// 网页代码 main.cc

color ray_color(const ray& r, const hittable& world, int depth) {
       hit_record rec;
       // If we've exceeded the ray bounce limit, no more light is gathered.
    if (depth <= 0)
        return color(0,0,0);
       if (world.hit(r, 0, infinity, rec)) {
        point3 target = rec.p + rec.normal + random_in_unit_sphere();
               return 0.5 * ray_color(ray(rec.p, target - rec.p), world, depth-1);
       }
       vec3 unit_direction = unit_vector(r.direction());
    auto t = 0.5*(unit_direction.y() + 1.0);
    return (1.0-t)*color(1.0, 1.0, 1.0) + t*color(0.5, 0.7, 1.0);
}
...
int main() {
    const auto aspect_ratio = 16.0 / 9.0;
    const int image_width = 384;
    const int image_height = static_cast<int>(image_width / aspect_ratio);
    const int samples_per_pixel = 100;
       const int max_depth = 50;
        ...
    for (int j = image_height-1; j >= 0; --j) {
        std::cerr << "\rScanlines remaining: " << j << ' ' << std::flush;
        for (int i = 0; i < image_width; ++i) {
            color pixel_color(0, 0, 0);
            for (int s = 0; s < samples_per_pixel; ++s) {
                auto u = (i + random_double()) / (image_width-1);
                auto v = (j + random_double()) / (image_height-1);
                ray r = cam.get_ray(u, v);
                              pixel_color += ray_color(r, world, max_depth);
                      }
            write_color(std::cout, pixel_color, samples_per_pixel);
        }
    }
        std::cerr << "\nDone.\n";
}
效果如下:(物体有阴影了,看上去有真实感了!)

7.3 为准确的颜色强度使用伽玛校正
注意球体下面的阴影,这个图片非常暗,但是我们的球体每次反弹只吸收一半的能量,所以它们是50%的反射器。如果你看不到阴影,不要担心,我们现在就会解决。这些球体看起来应该很亮(在现实生活中,是浅灰色)。这样做的原因是,几乎所有图像查看器都假设图像经过了gamma校正,这意味着0到1的值在存储为字节之前进行了一些转换。有很多很好的理由,但对于我们的目的,我们只需要知道它。对于第一个近似,我们可以用“gamma 2”表示提高颜色的1/gamma次方,或者在我们的简单例子中,就是平方根:
(这里对于Gamma Correction可以参考https://blog.youkuaiyun.com/candycat1992/article/details/46228771,和https://www.youtube.com/watch?v=LKnqECcg6Gw)

rgb在开平方后会变大一点,画面就会变量一些。
// 网页代码 color.h
void write_color(std::ostream &out, color pixel_color, int samples_per_pixel) {
    auto r = pixel_color.x();
    auto g = pixel_color.y();
    auto b = pixel_color.z();
       // Divide the color total by the number of samples and gamma-correct for gamma=2.0.
    auto scale = 1.0 / samples_per_pixel;
    r = sqrt(scale * r);
    g = sqrt(scale * g);
    b = sqrt(scale * b);

      // Write the translated [0,255] value of each color component.
    out << static_cast<int>(256 * clamp(r, 0.0, 0.999)) << ' '
        << static_cast<int>(256 * clamp(g, 0.0, 0.999)) << ' '
        << static_cast<int>(256 * clamp(b, 0.0, 0.999)) << '\n';
}
这就产生了我们想要的浅灰色:

7.4 解决影子粉刺Fixing Shadow Acne
这里还有一个小问题。有些反射光线不是在t=0处,而是在t= - 0.0000001或t=0.00000001处,或者是球的中间部分给出的任何浮点近似值。所以我们需要忽略接近零的点:
// 网站上的代码 main.cc
if (world.hit(r, 0.001, infinity, rec)) {
这消除了暗影痤疮的问题。是的,确实是这么叫的。
结果如下:

7.5 真实的Lambertian反射
本文提出的抑制方法在沿表面法线方向偏移的单位球中产生随机点。这对应于在半球上选择方向,其概率接近正态分布,而以掠射角(在光学中,掠射角和反射的入射角是互补的。掠角是入射光线和反射面之间的角度。对于法线入射,掠角为直角。
来自 <https://www.quora.com/What-is-a-grazing-angle> )散射光线的概率较低。这个分布随cos3(ϕ)变化,ϕ是从法向量到PS的夹角。这是有用的,因为到达浅角度的光传播到更大的区域,因此对最终颜色的贡献较小。
然而,我们感兴趣的是Lambertian分布,他是一个cos(ϕ)的分布。真实朗伯体的射线散射接近正态分布的概率更高,但分布更均匀。这是通过在单位球面上的拾取点来实现的,沿着表面法线偏移。球上的拾取点可以通过在单位球上拾取点,然后对其进行归一化来实现。
代码如下:
// 网页上的代码vec3.h
vec3 random_unit_vector() {
    auto a = random_double(0, 2*pi);
    auto z = random_double(-1, 1);
    auto r = sqrt(1 - z*z);
    return vec3(r*cos(a), r*sin(a), z);
}

这个 random_unit_vector()是random_in_unit_vector()的替代。
// 网站上的代码 main.cc
color ray_color(const ray& r, const hittable& world, int depth) {
    hit_record rec;
        // If we've exceeded the ray bounce limit, no more light is gathered.
    if (depth <= 0)
        return color(0,0,0);
        if (world.hit(r, 0.001, infinity, rec)) {
                point3 target = rec.p + rec.normal + random_unit_vector();
                return 0.5 * ray_color(ray(rec.p, target - rec.p), world, depth-1);
    }
       vec3 unit_direction = unit_vector(r.direction());
    auto t = 0.5*(unit_direction.y() + 1.0);
    return (1.0-t)*color(1.0, 1.0, 1.0) + t*color(0.5, 0.7, 1.0);
}
在渲染后我们得到了一张相似的图片:

很难说出这两种散射方法的区别,因为我们的两个球的场景很简单,但是我们应该注意到以下两个重要的视觉差异:
- 在改变后阴影变得更少(不太明显)了。
- 在改变后球面都变亮(颜色变浅)了。
着两个变化都是因为光线散射得更均匀,更少的光被散射到法线方向。这意味着,对于漫射物体,由于更多的光线进入相机,将变得更亮。对于阴影。由于更少的光直接向上反射,小球下面的大球变得更加明亮。
7.6 另一种散射方式
这本书中最初提出的方法被证明为是对Lamberian的不正确的近似。这个错误持续如此之久的一个原因是它很难被:
- 数学证明概率分布是不正确的;
- 直观地解释为什么cos(ϕ)是可取的(以及它会是什么样子)。
不常见的是,每天物体在完全地散射,所以我们对这些物体在光下的视觉直觉可能是不完善的。
在学习的兴趣下,我们将介绍一个直接和易于理解的散射方法。在前面的两个方法中我们有一个随机向量,第一个的是随机长度的,第二个是单位长度的,offset from the hit point by the normal。向量必须被法线取代的原因可能不是特别明显。
一个更直观的方法是对命中的点所有的角度都有一个统一的散射方向,不依赖于从法线(到反射角)的角度(with no dependence on the angle from the normal)。许多早期的raytracing paper使用了这个散射方法(在采用Lambertian diffuse之前)。
// 网站上的代码 vec3.h
vec3 random_in_hemisphere(const vec3& normal) {
    vec3 in_unit_sphere = random_in_unit_sphere();
    if (dot(in_unit_sphere, normal) > 0.0) // In the same hemisphere as the normal
        return in_unit_sphere;
    else
        return -in_unit_sphere;
}
将新的公式放入ray_color()函数:
// 网站上的代码 main.cc
color ray_color(const ray& r, const hittable& world, int depth) {
    hit_record rec;
// If we've exceeded the ray bounce limit, no more light is gathered.
    if (depth <= 0)
        return color(0,0,0);
       if (world.hit(r, 0.001, infinity, rec)) {
                point3 target = rec.p + random_in_hemisphere(rec.normal);
                return 0.5 * ray_color(ray(rec.p, target - rec.p), world, depth-1);
    }
        vec3 unit_direction = unit_vector(r.direction());
    auto t = 0.5*(unit_direction.y() + 1.0);
    return (1.0-t)*color(1.0, 1.0, 1.0) + t*color(0.5, 0.7, 1.0);
}
效果如下:

在这个教程中,这个场景将会越来越复杂。鼓励您在上面提供不同的漫反射渲染器之间切换。许多场景将包含不成比例的漫反射材料。你可以通过理解不同的散射方法对场景照明的影响来获得有价值的见解(You can gain valuable insight by understanding the effect of different diffuse methods on the lighting of the scene.)。


 本文深入探讨了三种漫射材质的生成方法,包括简单的漫散物质、真实的Lambertian反射及另一种散射方式。文章详细讲解了每种方法的原理与实现,如在单位半径球体中随机选择点生成漫反射方向,使用Gamma矫正提升颜色强度,以及如何避免影子粉刺等问题。


 被折叠的 条评论
为什么被折叠?


