


 本文详细介绍了如何在SpringBoot项目中搭建单元测试环境,包括添加Maven依赖、创建测试目录、构建测试基类及具体测试类的过程。通过实例演示了自动化测试的实现,帮助开发者提高代码质量和测试效率。
Springboot 搭建测试用例
1.添加maven依赖
<dependency>
    <groupId>org.springframework.boot</groupId>
    <artifactId>spring-boot-starter-test</artifactId>
    <scope>test</scope>
</dependency>
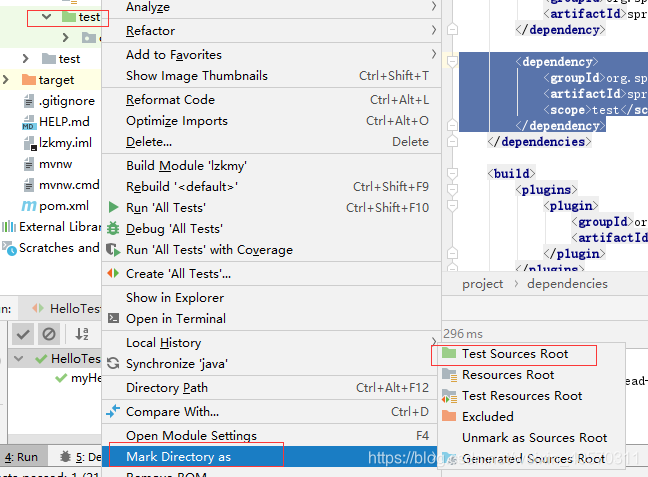
2.新建test目录
右键-->>Mark Directory as --->> Test Sources Root
3.新建测试父类
import org.junit.After;
import org.junit.Before;
import org.junit.runner.RunWith;
import org.springframework.boot.test.context.SpringBootTest;
import org.springframework.test.context.junit4.SpringRunner;
import org.springframework.test.context.web.WebAppConfiguration;
@RunWith(SpringRunner.class)
@SpringBootTest
@WebAppConfiguration
public class ApplicationTest {
@Before
public void init(){
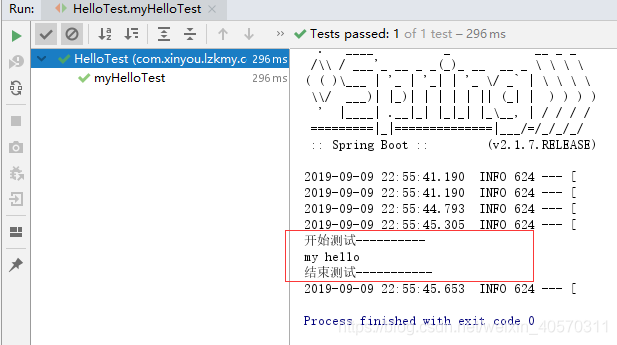
System.out.println("开始测试----------");
}
@After
public void after(){
System.out.println("结束测试-----------");
}
}
4.新建测试类
测试类继承测试父类
import com.xinyou.lzkmy.ApplicationTest;
import com.xinyou.lzkmy.service.HelloService;
import org.junit.Test;
import org.springframework.beans.factory.annotation.Autowired;

public class HelloTest extends ApplicationTest {


    @Autowired
    private HelloService helloService;

    @Test
    public void myHelloTest(){
        String myHello = helloService.myHello();
        System.out.println(myHello);
    }

}
5.运行测试
星游


 1451
1451

 被折叠的 条评论
为什么被折叠?
被折叠的 条评论
为什么被折叠?
 到【灌水乐园】发言


