


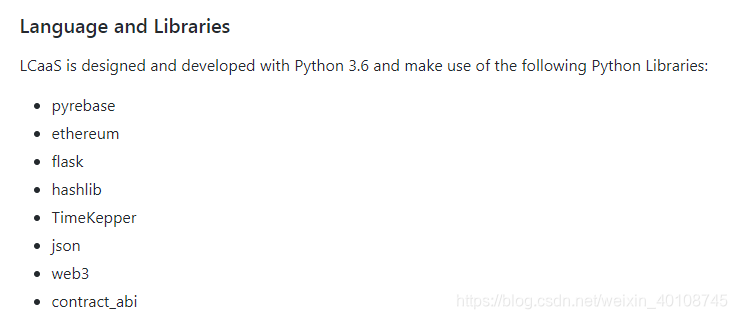
一、Python知识准备
源码:https://github.com/WilliamPourmajidi/LCaaS
1.LCaaS_timer = TimeKeeper("ICSETimerLCaaS.csv")
Timekeeper是一个用于通过向InfluxDB发送测量值来检测实时Python代码的库。(需要Python 2.7或3.2+以及InfluxDB 0.9.0+。)
您可以使用上下文管理器或装饰函数来记录完成该函数或代码块所需时间的挂钟时间:
from timekeeper import TimeKeeper

tk = TimeKeeper(
"udp+influxdb://localhost/databasename",
prefix="location-1.cluster-1.app-1.", # if you prefer Graphite style over tags
tags={"host": "location-1.cluster-1.app-1"},
)

@tk.decorate("some_slow_function", tags={"foo": "bar"})
def slowpoke():
	sleep(9001)

def slowpoke2():
	with tk.context("some_other_slow_function", tags={"foo": "baz"}):
	sleep(9001)
influxdb是目前比较流行的时间序列数据库。
- 何谓时间序列数据库?
什么是时间序列数据库,最简单的定义就是数据格式里包含Timestamp字段的数据,比如某一时间环境的温度,CPU的使用率等。但是,有什么数据不包含Timestamp呢?几乎所有的数据其实都可以打上一个Timestamp字段。时间序列数据的更重要的一个属性是如何去查询它,包括数据的过滤,计算等等。
Influxdb
Influxdb是一个开源的分布式时序、时间和指标数据库,使用go语言编写,无需外部依赖。它有三大特性:
- 时序性(Time Series):与时间相关的函数的灵活使用(诸如最大、最小、求和等);
- 度量(Metrics):对实时大量数据进行计算;
- 事件(Event):支持任意的事件数据,换句话说,任意事件的数据我们都可以做操作。
同时,它有以下几大特点:
- schemaless(无结构),可以是任意数量的列;
- min, max, sum, count, mean, median 一系列函数,方便统计;
- Native HTTP API, 内置http支持,使用http读写;
- Powerful Query Language 类似sql;
- Built-in Explorer 自带管理工具。
二、学习使用Firebase
1. 使用已有的Google账号注册登录
2.创建项目
步骤如下:
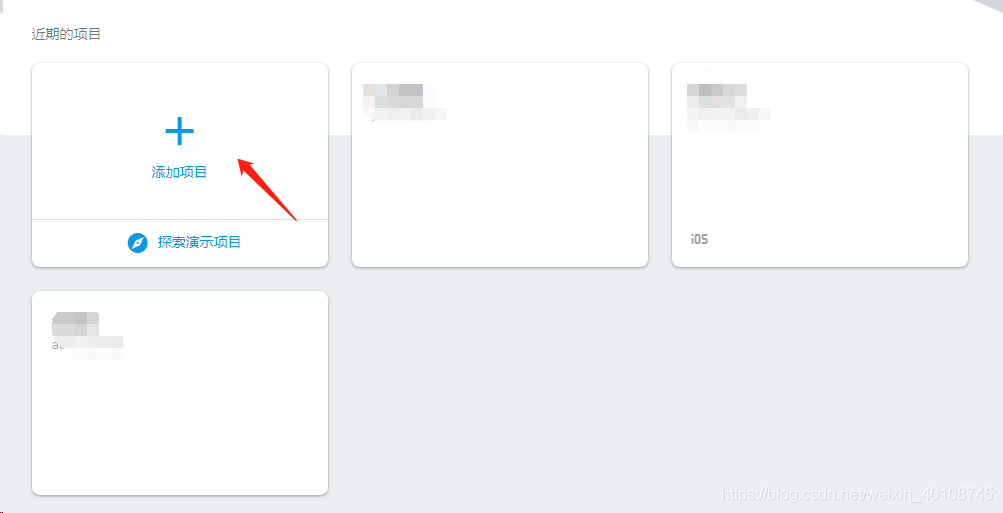
(1)点击“添加项目”
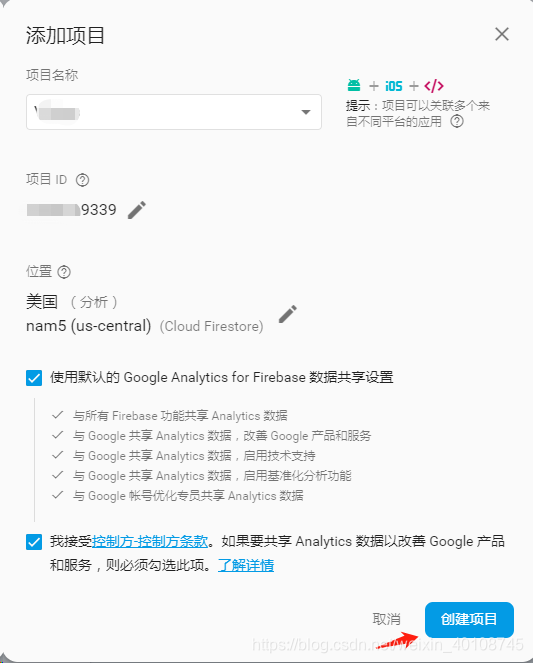
 (2)完善项目添加信息
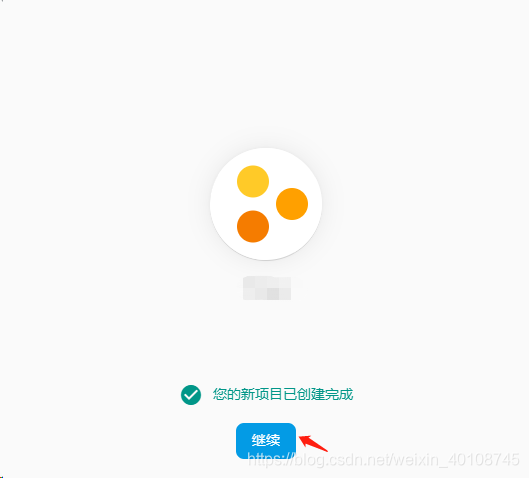
(3)项目创建完成
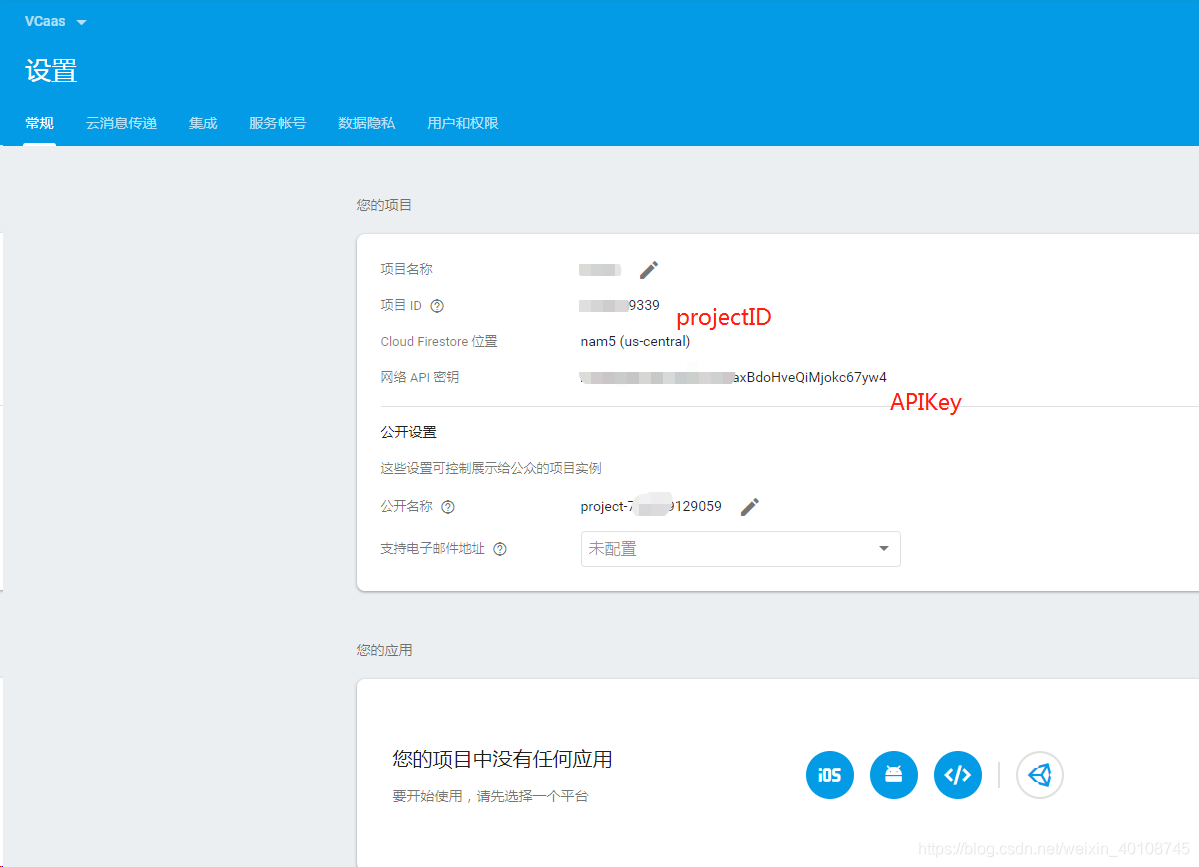
(4)项目的关键信息
将对应的关键信息填入代码中相应的位置:
config = {
  "apiKey": "apiKey",
  "authDomain": "projectId.firebaseapp.com",
  "databaseURL": "https://databaseName.firebaseio.com",
  "storageBucket": "projectId.appspot.com"
   "messagingSenderId": "***************",
   "serviceAccount": "serviceAccountKey.json"
}

firebase = pyrebase.initialize_app(config)
auth = firebase.auth()
user = auth.create_user_with_email_and_password("random@**.com", "password")
# user['idToken']
db = firebase.database()

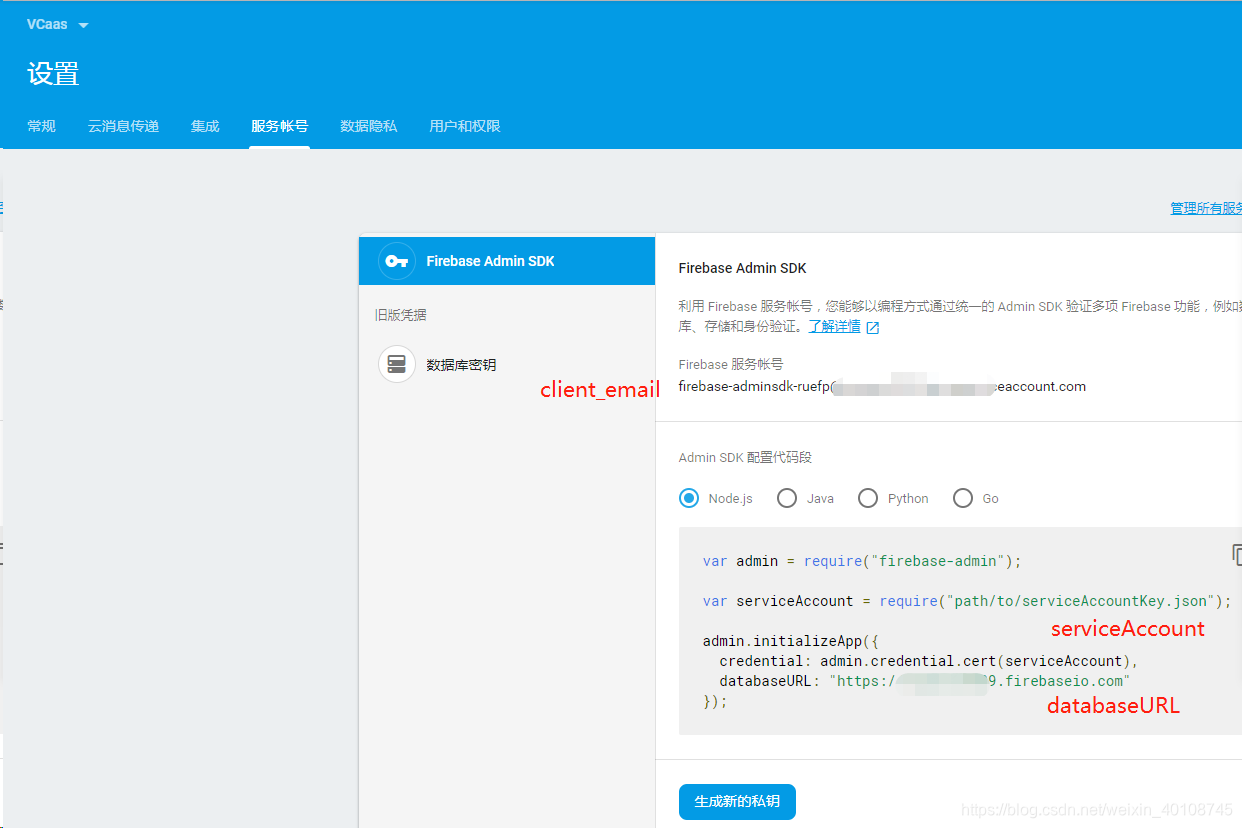
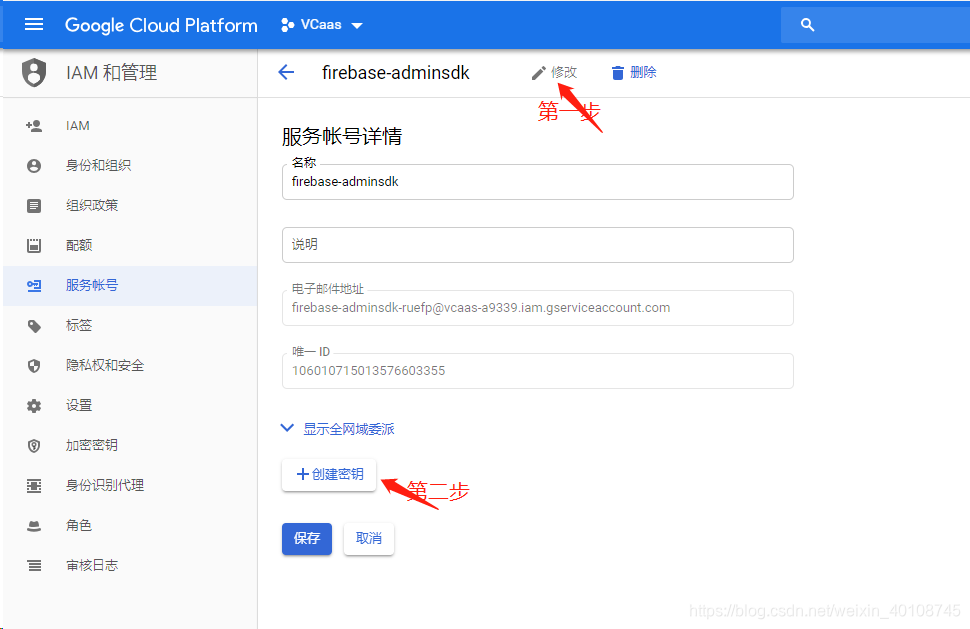
(5)为firebase-adminsdk创建私钥
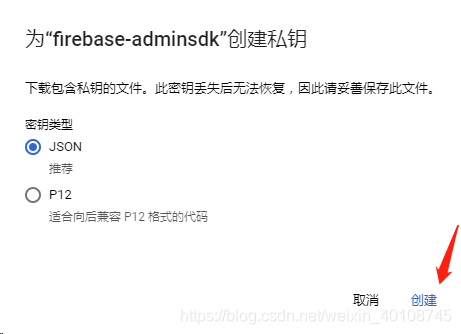 生成json格式的文件
{
  "type": "service_account",
  "project_id": "****-2018",
  "private_key_id": "66051dc7440c********62e7980f94e7",
  "private_key": "-----BEGIN PRIVATE KEY-----\***************************w==\n-----END PRIVATE KEY-----\n",
  "client_email": "tester2018@****-2018.iam.gserviceaccount.com",
  "client_id": "1078*****7189676396",
  "auth_uri": "https://accounts.google.com/o/oauth2/auth",
  "token_uri": "https://accounts.google.com/o/oauth2/token",
  "auth_provider_x509_cert_url": "https://www.googleapis.com/oauth2/v1/certs",
  "client_x509_cert_url": "https://www.googleapis.com/robot/v1/metadata/x509/tester2018%40bcaas-2018.iam.gserviceaccount.com"
}
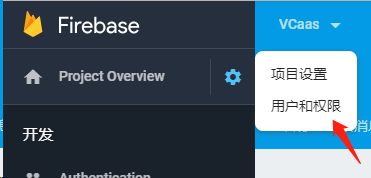
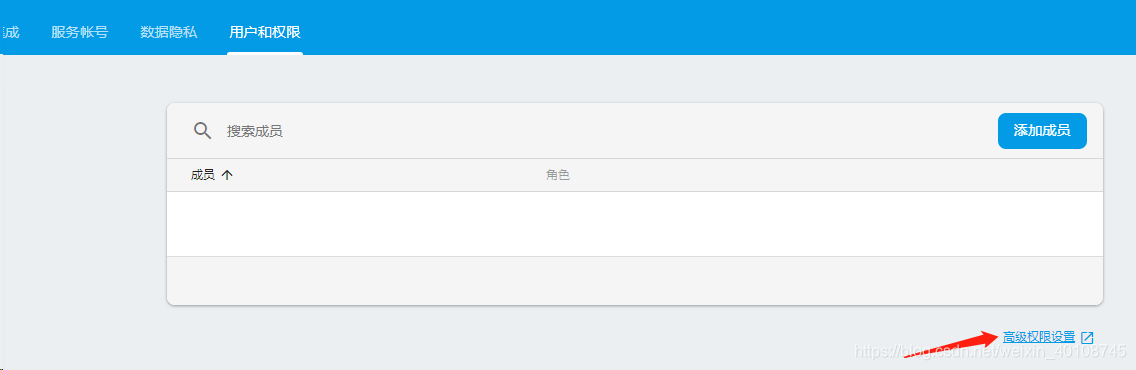
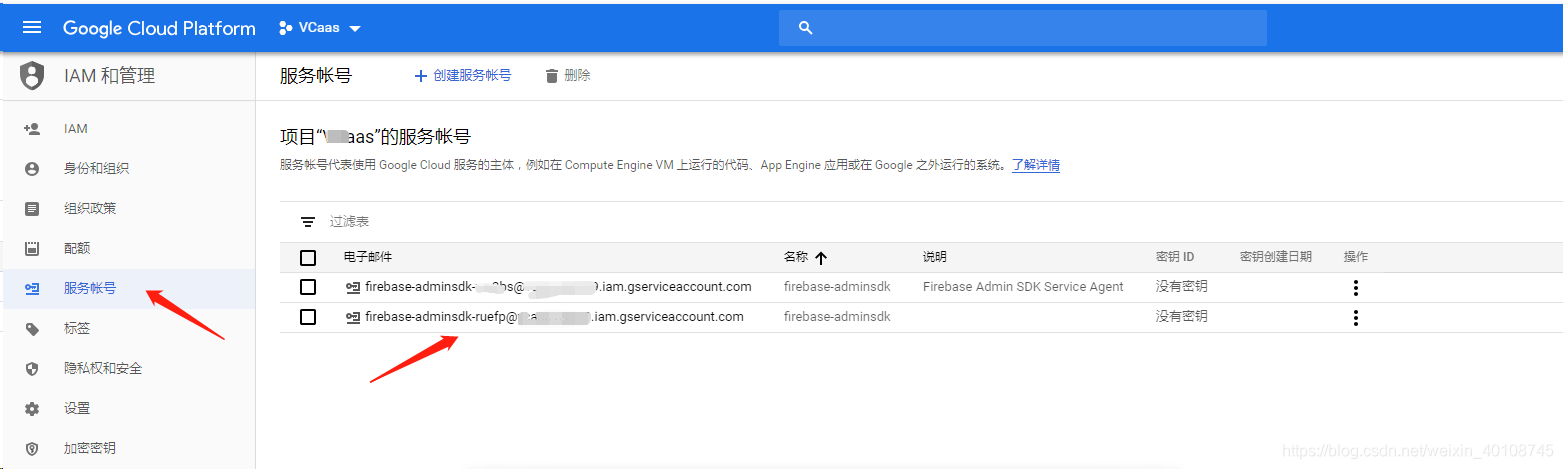
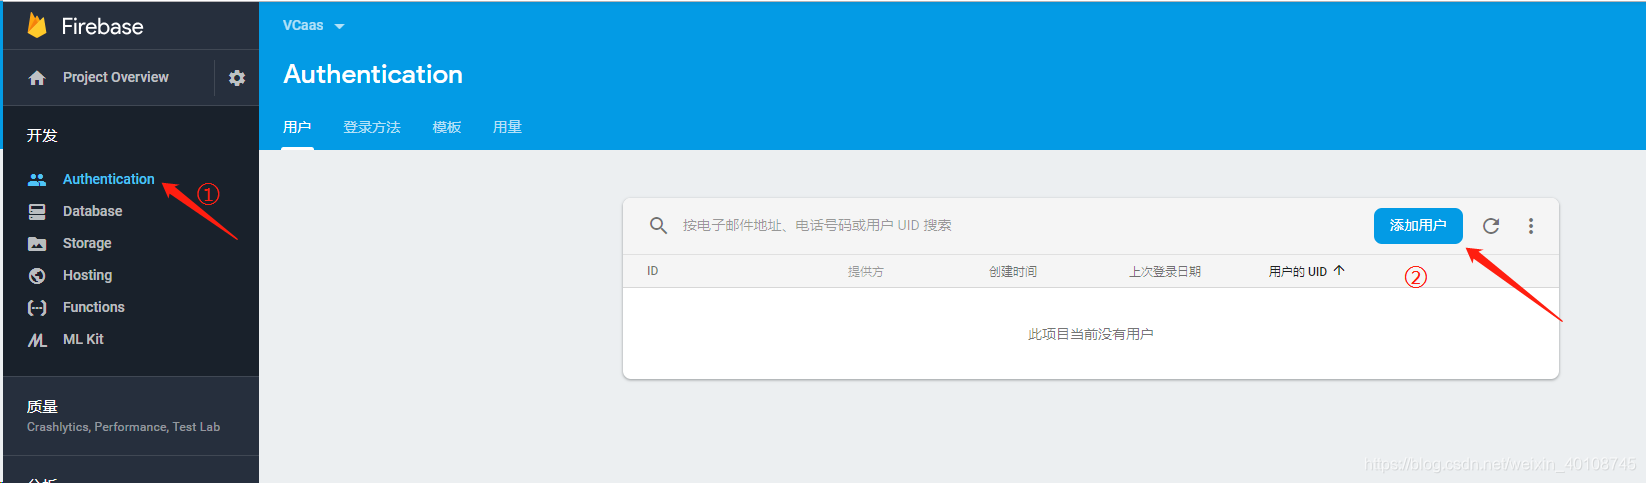
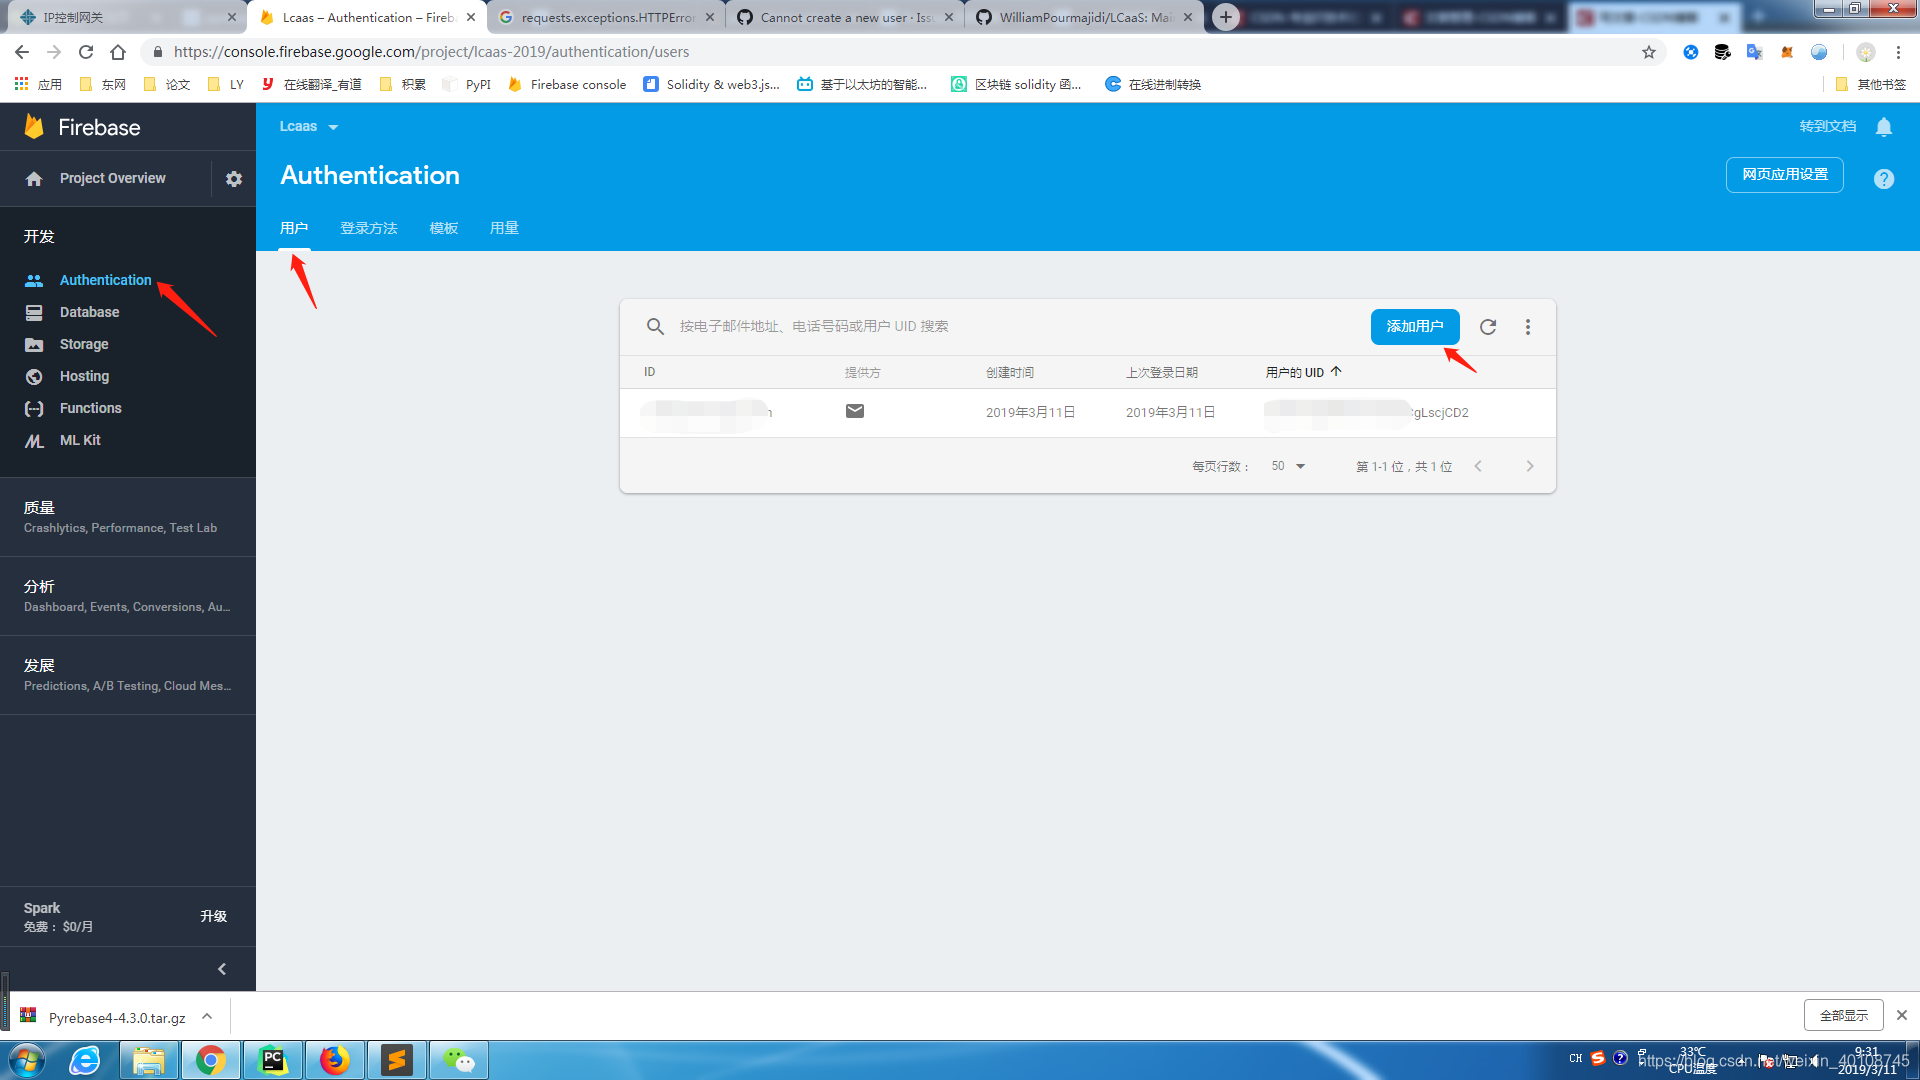
(6)为项目添加用户
三、遇到的错误总结
1、该项目运行所需要的Python库不能安装(在cmd下安装会遇到很多问题)
解决方法:
方法1: 在Pycharm下创建该项目的虚拟运行环境,然后在terminal中用pip install ***安装
 方法2:有些包在该环境下也不能安装,可以到python官方的第三方库的仓库PyPI中下载whl文件来进行安装,比如下载TimeKeeper:
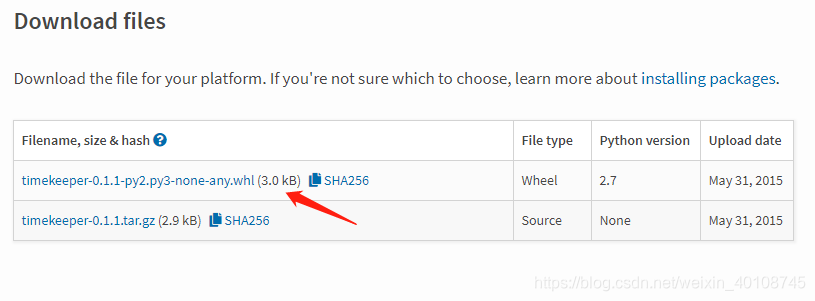 点击链接将文件保存到合适的位置
 安装方式:
安装方式:
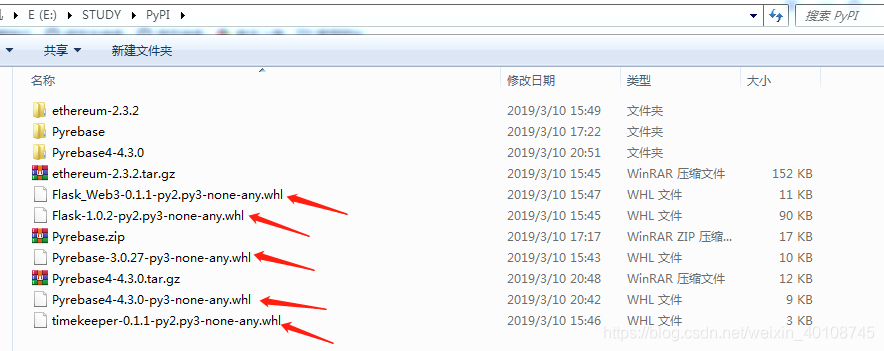
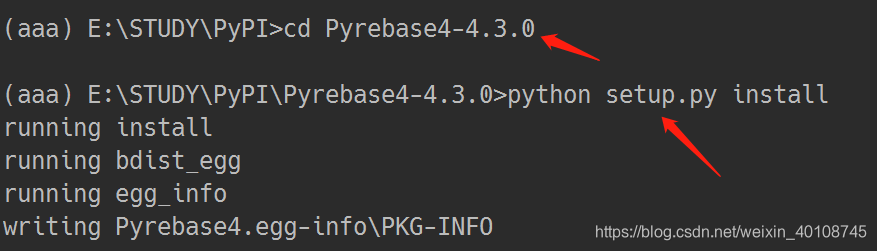
 方法2:有些包前两种方式均不能安装,比如Pyrebase,可以到python官方的第三方库的仓库PyPI中下载tar.gz文件解压,进行安装

安装方式:
2.运行过程中遇到认证问题
requests.exceptions.HTTPError: [Errno 400 Client Error: Bad Request for url: https://www.googleapis.com/identitytoolkit/v3/relyingparty/verifyPassword?key=APIKey]
相关代码:
config = {
  "apiKey": "apiKey",
  "authDomain": "projectId.firebaseapp.com",
  "databaseURL": "https://databaseName.firebaseio.com",
  "storageBucket": "projectId.appspot.com"
}
firebase = pyrebase.initialize_app(config)
auth = firebase.auth()
user = auth.create_user_with_email_and_password("random@gmail.com", "crazy_password")
这个问题是弄混了firebase的登录账号密码和项目下账号密码的关系,运行时代码的账号密码为登录的账号密码,该项目下并没有账号密码,解决方法如下:
- 点击Authentication,在用户下点击添加用户,输入该项目的用户的账号密码,然后代人
user = auth.create_user_with_email_and_password()中
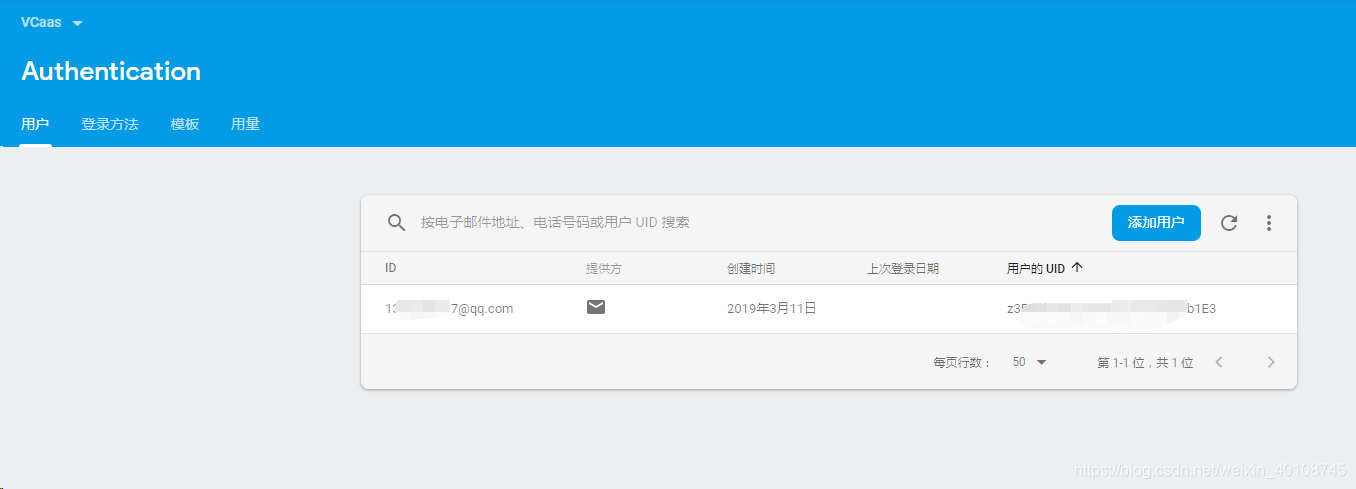
修改之后,再次点击运行:
 点击链接查看:
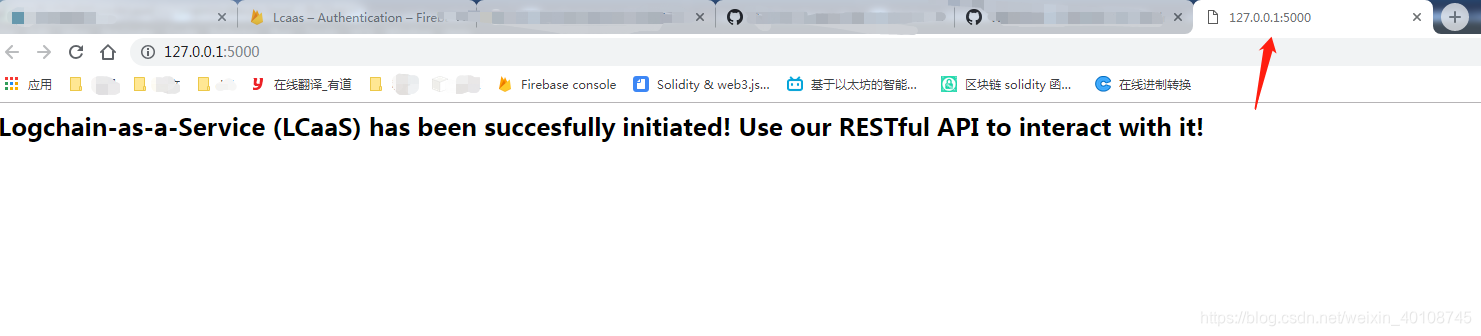 成功!
成功!


 380
380

 被折叠的 条评论
为什么被折叠?
被折叠的 条评论
为什么被折叠?
 到【灌水乐园】发言


