


PyQtGraph是一个基于PyQt的图形绘制库,它提供了丰富的2D和3D图形绘制功能。您可以使用Qt Designer来创建图形界面,然后在PyQtGraph中使用它们。
下面是一个示例,演示了如何在Qt Designer中创建一个图形界面,然后在PyQtGraph中使用它:
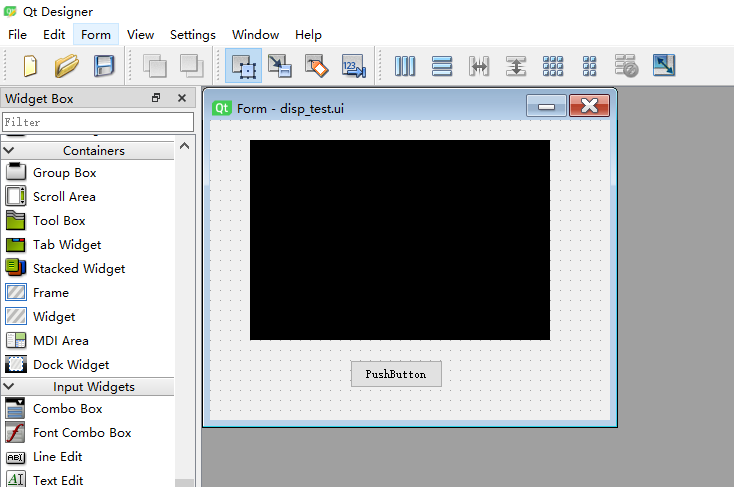
创建图形界面
在Qt Designer中创建一个图形界面:创建一个窗口,并在窗口中添加一个按钮和一个图形视图。选择OpenGL Widget。
保存ui
将界面保存为.ui文件:在Qt Designer中,选择“文件”>“保存”,并选择.ui文件作为文件类型。
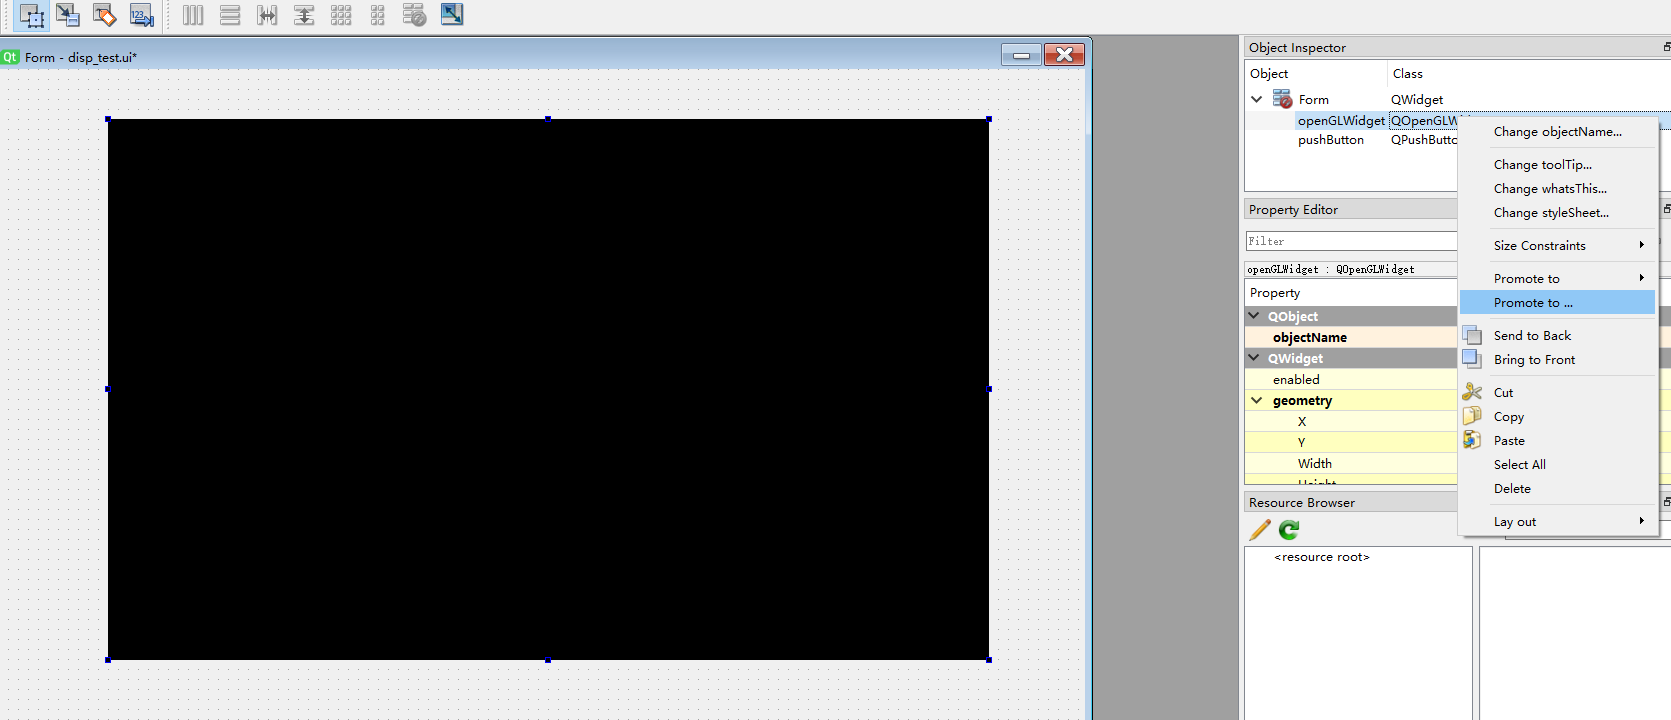
提升显示控件
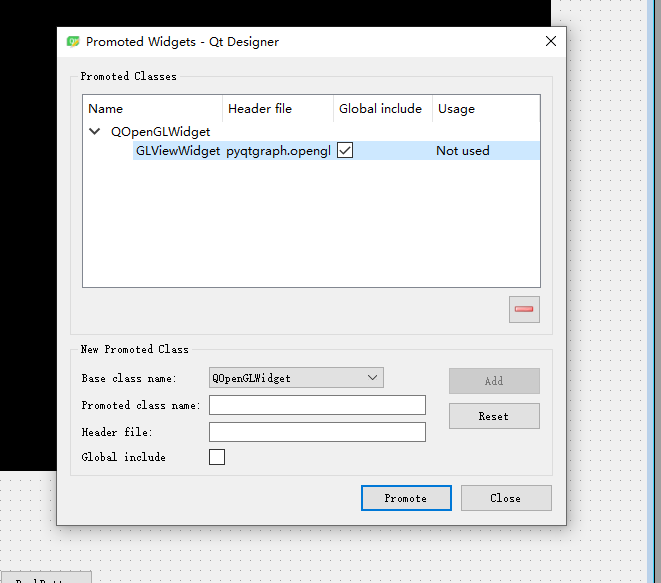
下面开始提升OpenGLWidget显示控件,选中我创建的QOpenGLWidget,右键,选择“提升为”
然后进入Promoted界面,设置需要提升到的类名GLViewWidget,头文件直接选择pyqtgraph.opengl,单击add添加这个提升选项。
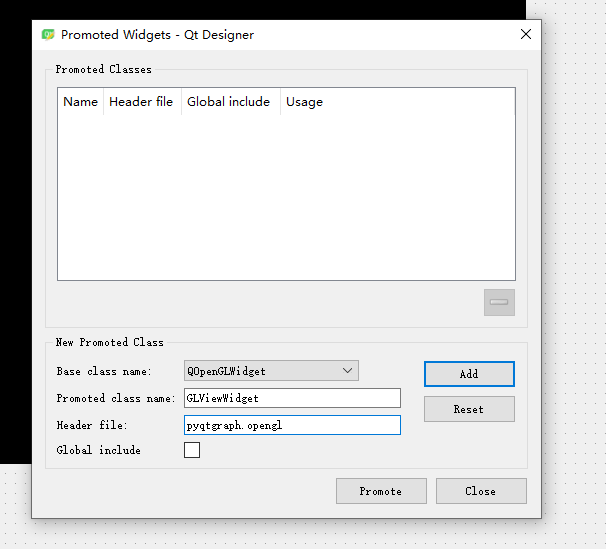
选中Global include,最后单击Promote进行提升操作
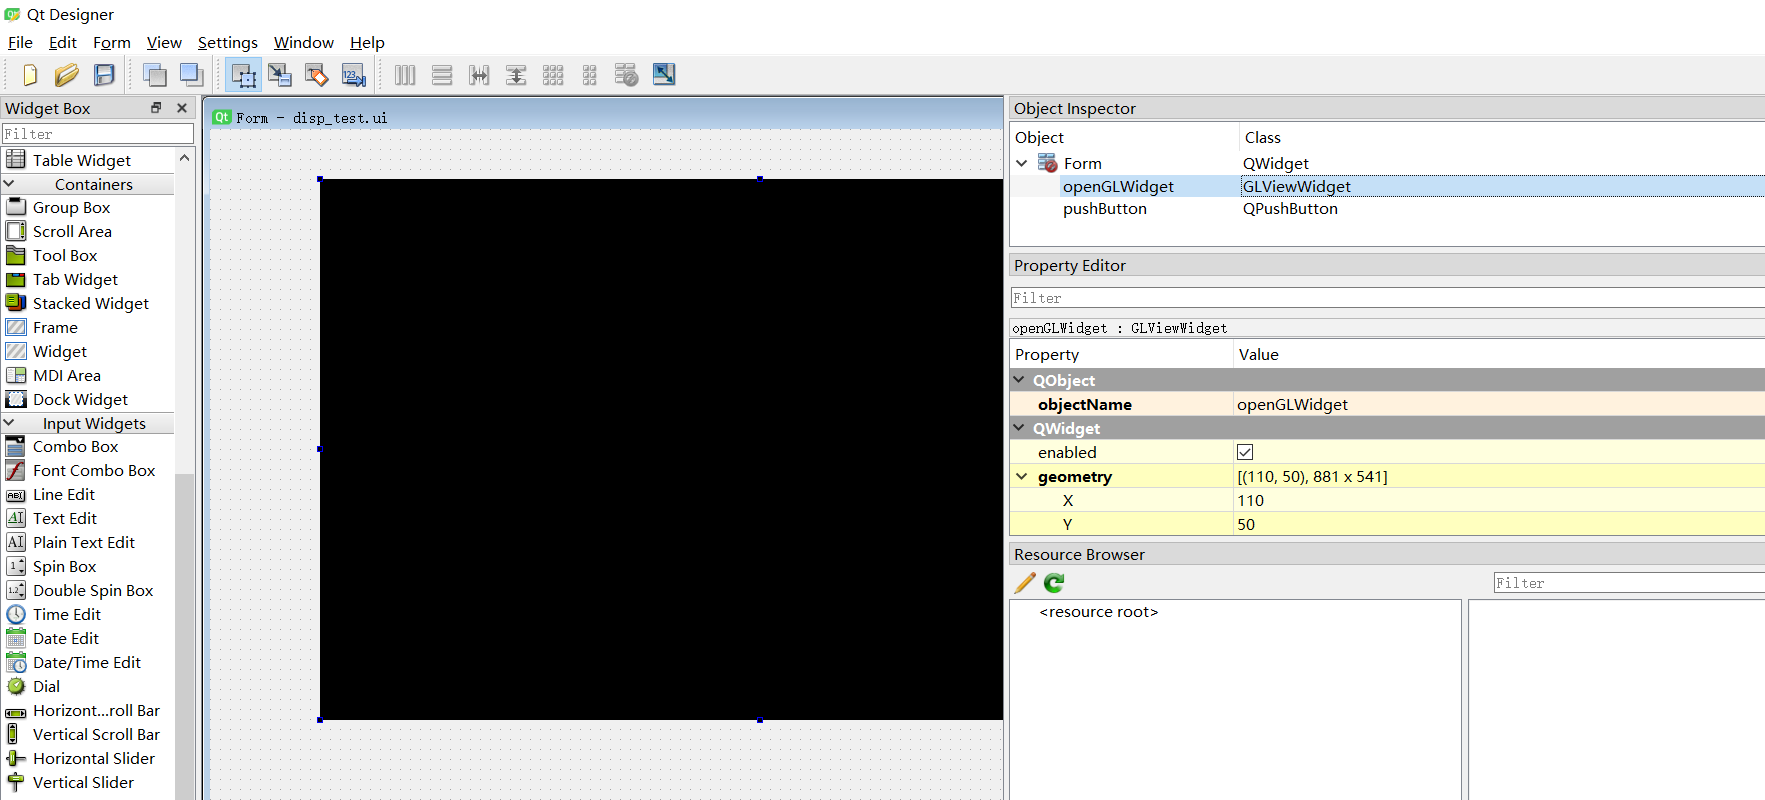
提升完成后的界面是这样子的:
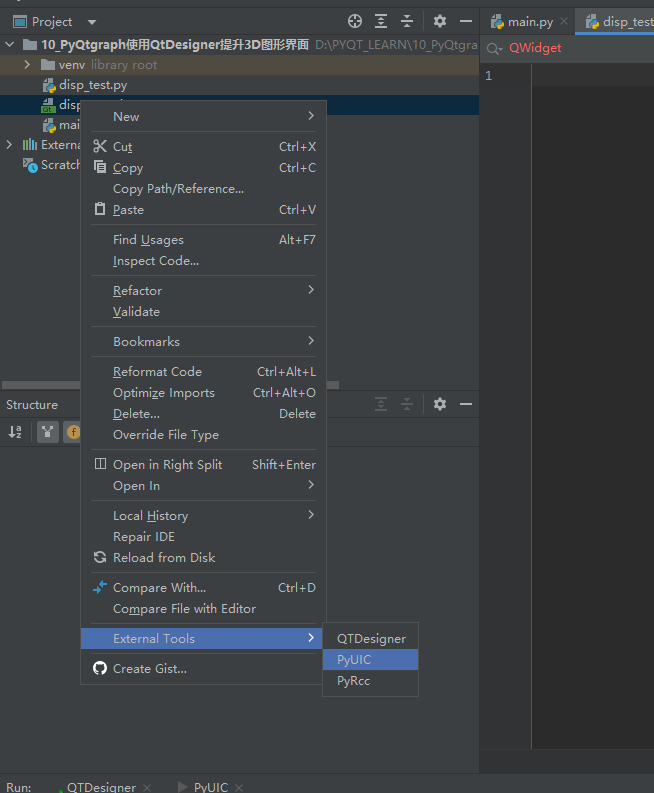
创建一个python工程
配置好pyuic5,创建main.py。将ui后缀,生成py代码,我的ui名称是disp_test.ui->disp_test.py。
Pyuic代码
以下是disp_test.py的自动生成的代码。
# -*- coding: utf-8 -*-

# Form implementation generated from reading ui file 'disp_test.ui'
#
# Created by: PyQt5 UI code generator 5.15.7
#
# WARNING: Any manual changes made to this file will be lost when pyuic5 is
# run again.  Do not edit this file unless you know what you are doing.


from PyQt5 import QtCore, QtGui, QtWidgets


class Ui_Form(object):
    def setupUi(self, Form):
        Form.setObjectName("Form")
        Form.resize(1087, 739)
        self.pushButton = QtWidgets.QPushButton(Form)
        self.pushButton.setGeometry(QtCore.QRect(440, 690, 93, 28))
        self.pushButton.setObjectName("pushButton")
        self.openGLWidget = GLViewWidget(Form)
        self.openGLWidget.setGeometry(QtCore.QRect(110, 50, 881, 541))
        self.openGLWidget.setObjectName("openGLWidget")

        self.retranslateUi(Form)
        QtCore.QMetaObject.connectSlotsByName(Form)

    def retranslateUi(self, Form):
        _translate = QtCore.QCoreApplication.translate
        Form.setWindowTitle(_translate("Form", "Form"))
        self.pushButton.setText(_translate("Form", "PushButton"))
from pyqtgraph.opengl import GLViewWidget
代码
main.py的代码如下
import sys
import pyqtgraph as pg
import pyqtgraph.opengl as gl
from PyQt5 import QtWidgets
from disp_test import Ui_Form  # 加载绘制的UI界面
app = QtWidgets.QApplication(sys.argv)


class Create_point_cloud(QtWidgets.QWidget, Ui_Form):  # 系统主界面
    def __init__(self):
        super(Create_point_cloud, self).__init__()
        self.com = None
        self.com_ser = None
        self.setupUi(self)
        self.sp = None
        self.tr = None
        self.initFunction()

    def initFunction(self):
        self.openGLWidget.opts['distance'] = 2000  # 初始视角高度
        self.openGLWidget.setWindowTitle('GLScatterPlotItem')  # 定义窗口标题
        gl_axis = gl.GLAxisItem()  # 添加xyz坐标轴
        gl_axis.glOptions = 'opaque'
        gl_axis.setSize(1000, 1000, 1000)
        self.openGLWidget.addItem(gl_axis)


if __name__ == '__main__':
    print("程序开始")
    point_cloud_ui = Create_point_cloud()
    point_cloud_ui.show()
    sys.exit(app.exec_())
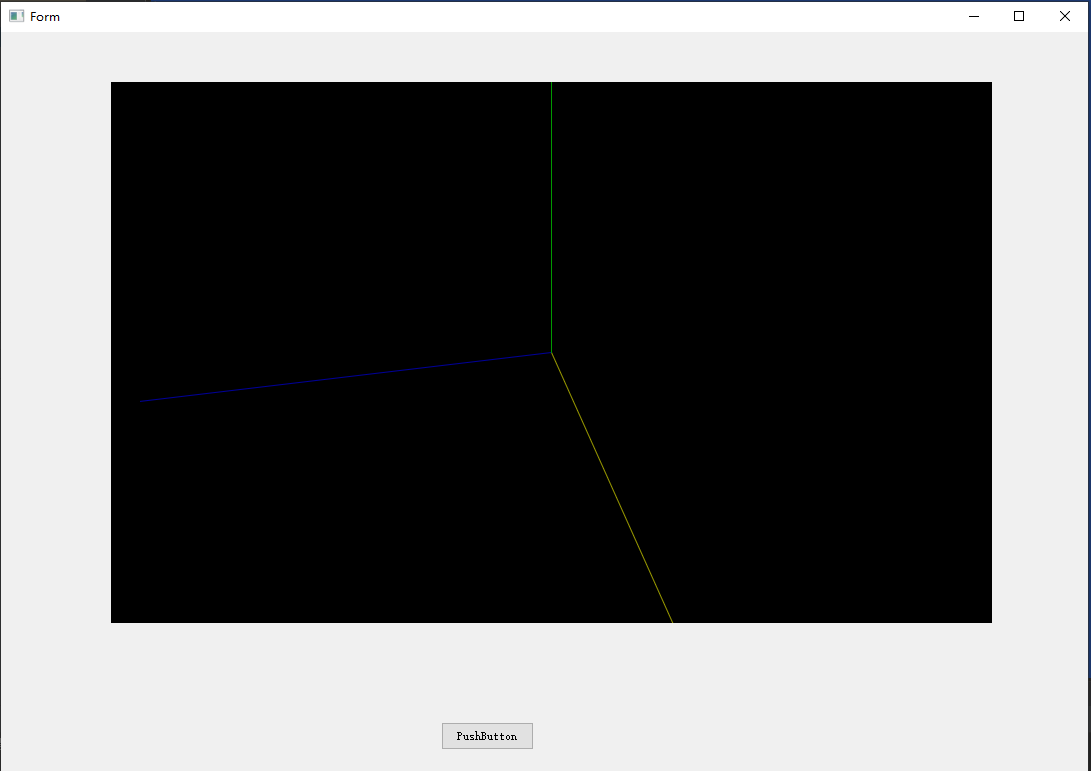
运行结果
可以显示3D控件了,可以看见轴坐标了。
原工程已经上传到资源,请移步下载:
https://download.youkuaiyun.com/download/weixin_39888010/87433207


 20
20

 被折叠的 条评论
为什么被折叠?
被折叠的 条评论
为什么被折叠?
 到【灌水乐园】发言


