


 本文介绍了如何在Visual Studio 2015环境下配置OpenCV_contrib扩展模块。步骤包括下载opencv和opencv_contrib库,使用CMake生成build文件,配置编译选项,特别注意勾选NONFREE选项,以及设置环境变量,确保库路径正确。
Opencv_contrib附加依赖包在VS2015环境配置

首先下载opencv库
再下载拓展模块contrib库
下载cmake软件

利用CMake软件使用opencv库,cmakebuild文件夹为生成目录,自己创建的,和以前的build在同一个文件夹下面,为了方便

完成


选择opencv_contrib库的位置,记得勾选NONFREE

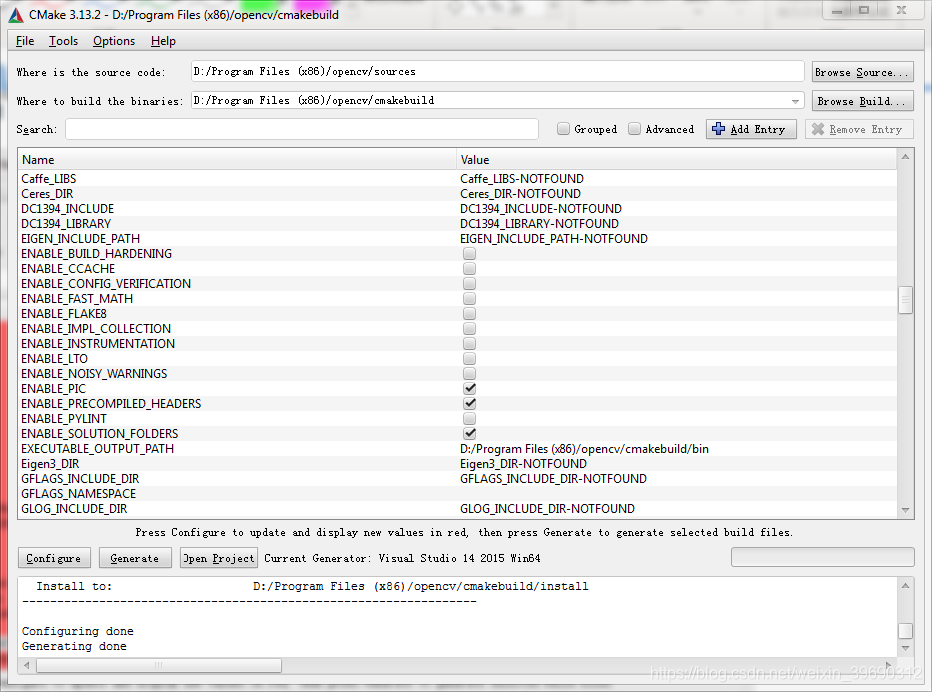
编译完成
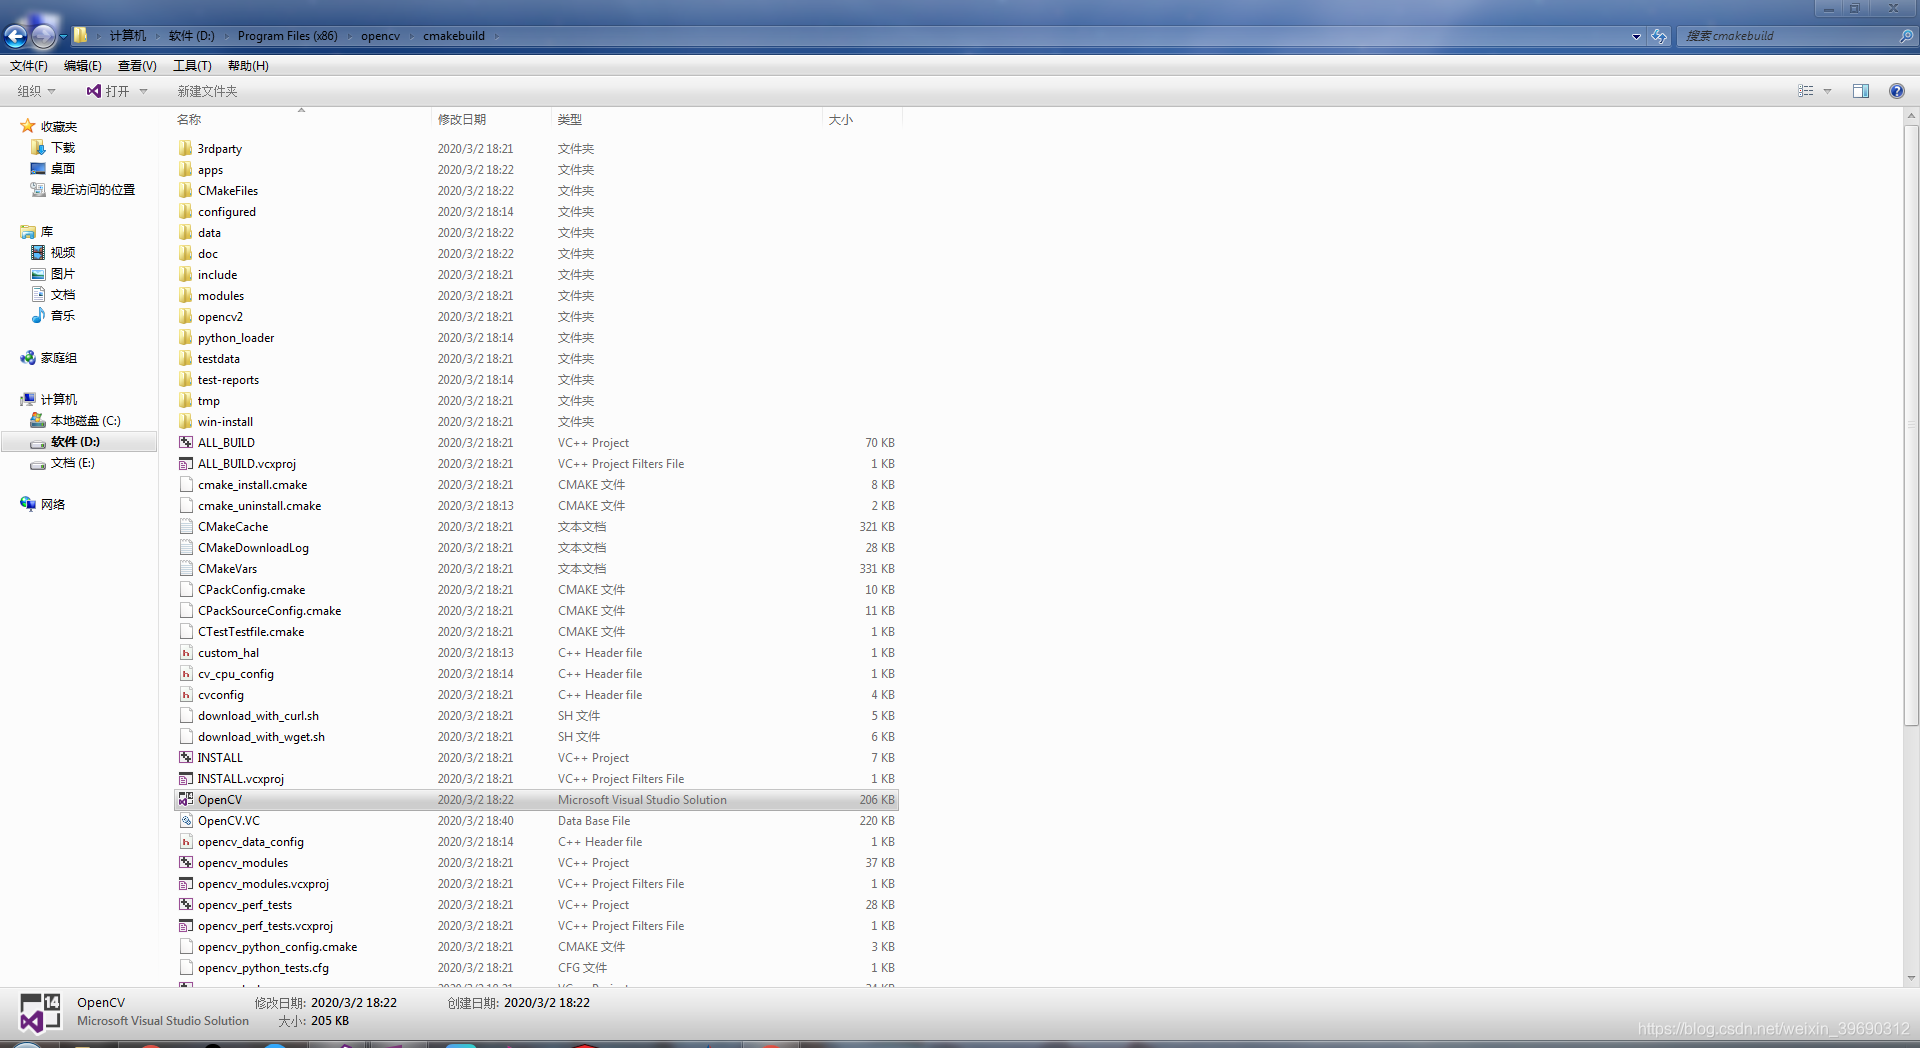
1.在OpenCV目录下打开图中所示文件
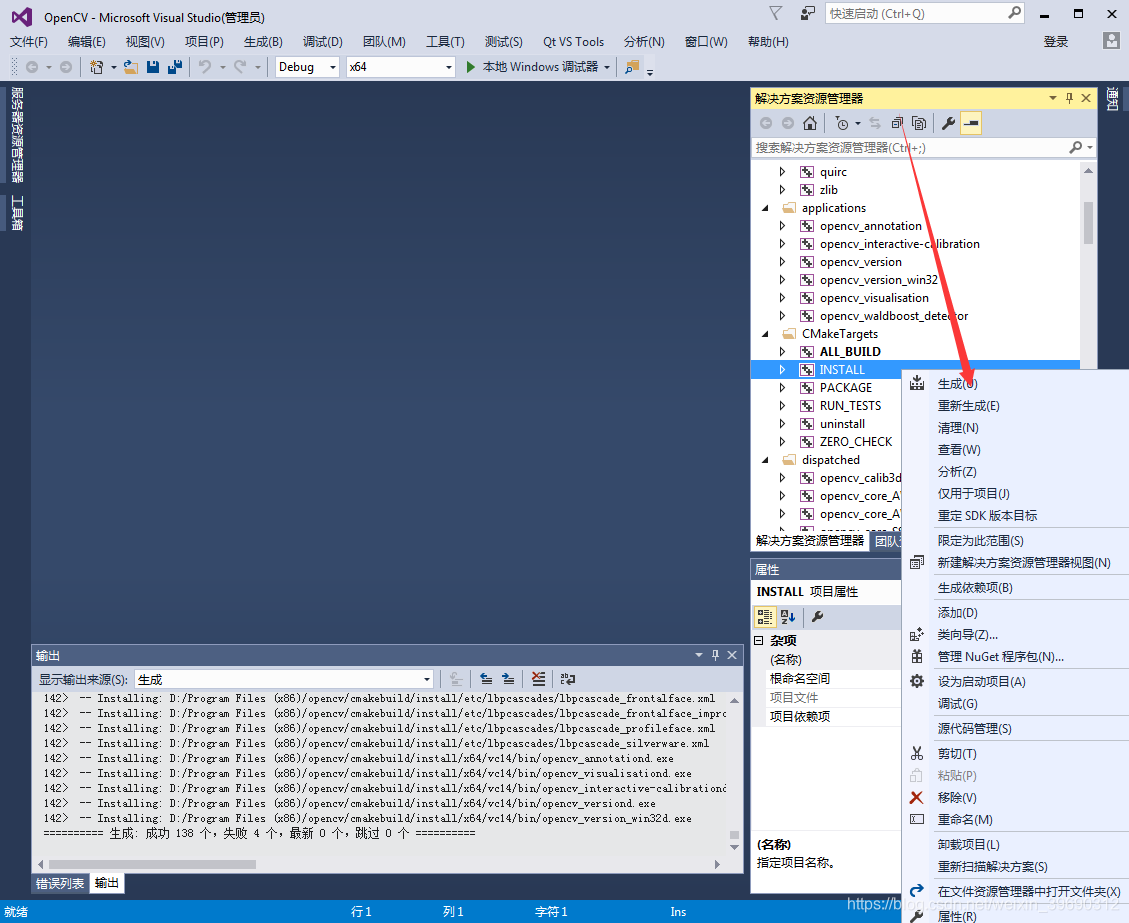
2.生成
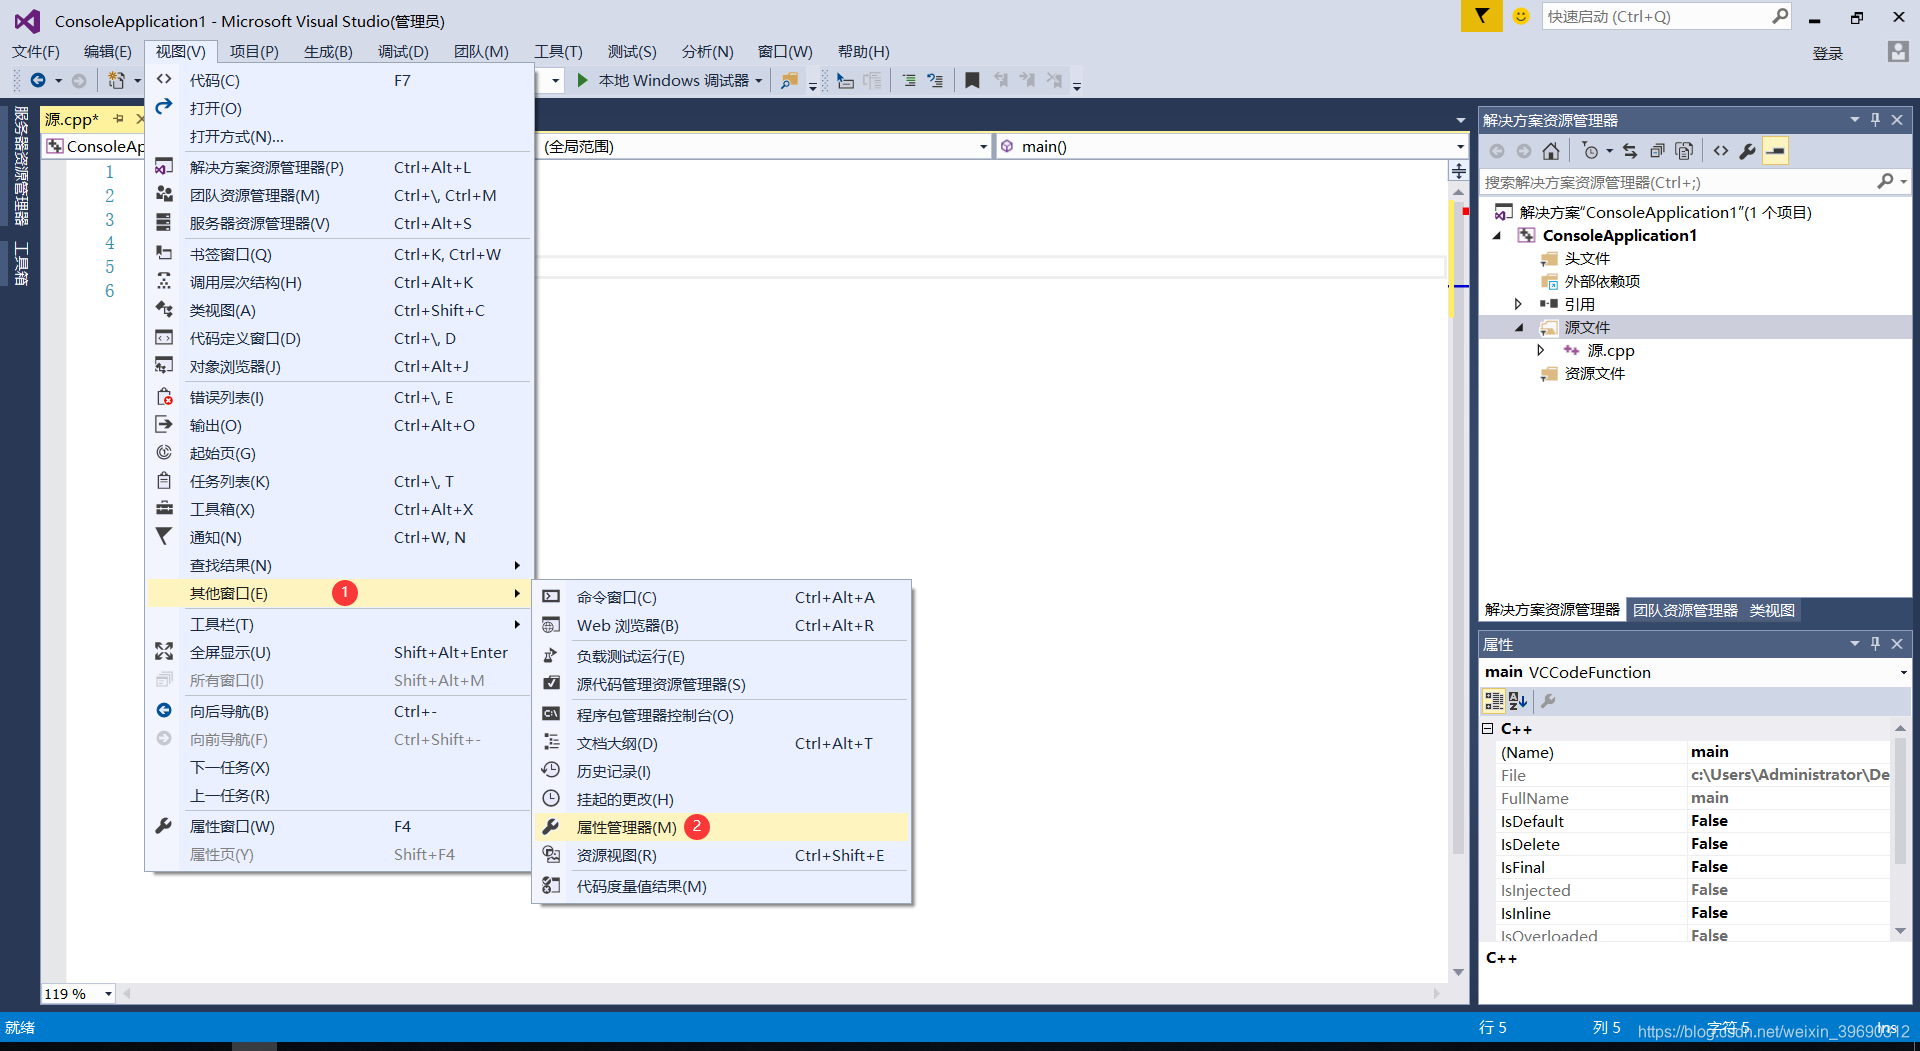
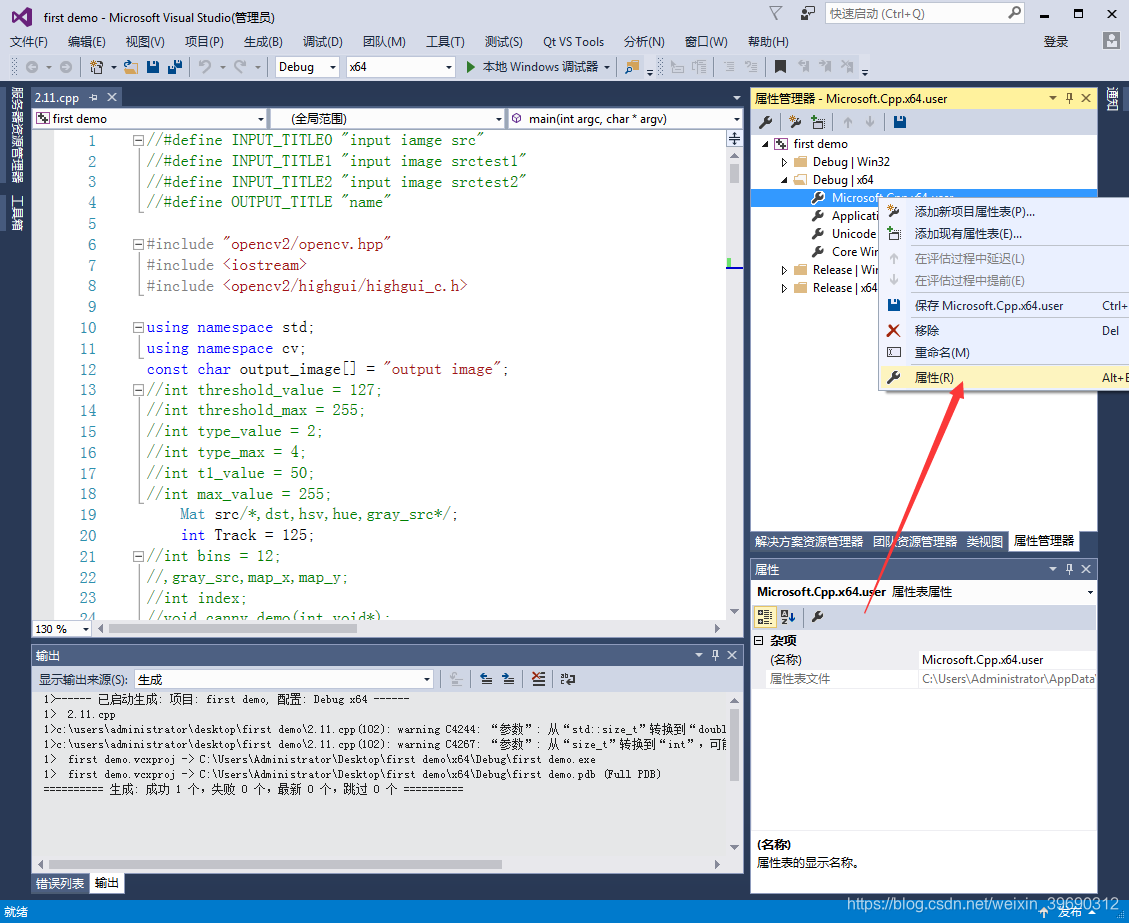
1.配置依赖项
(2020.04.28补个图,配置属性的界面的打开方式)
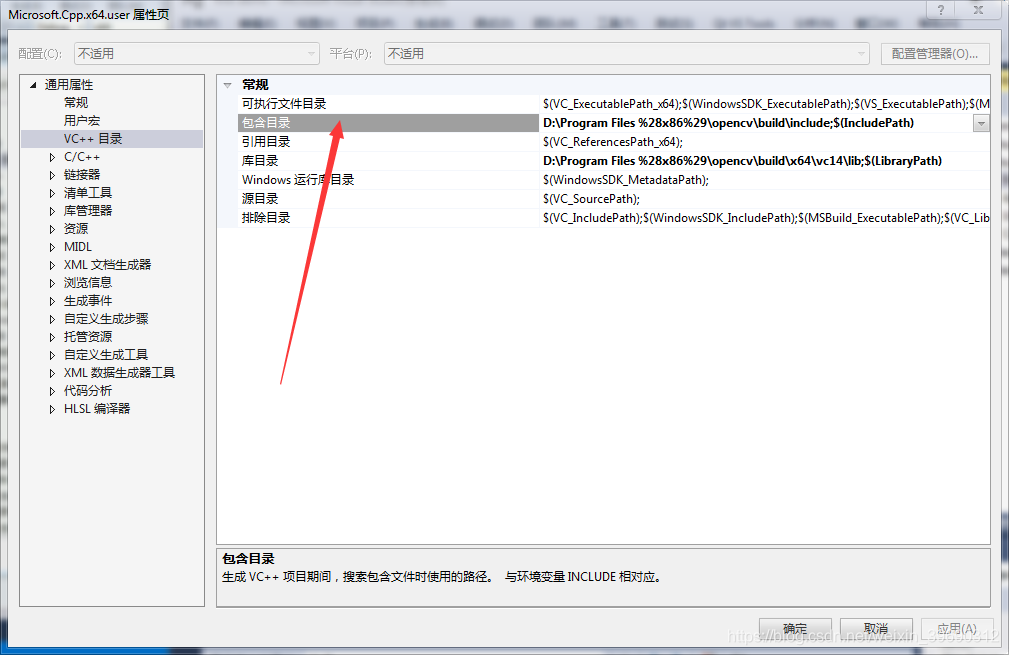
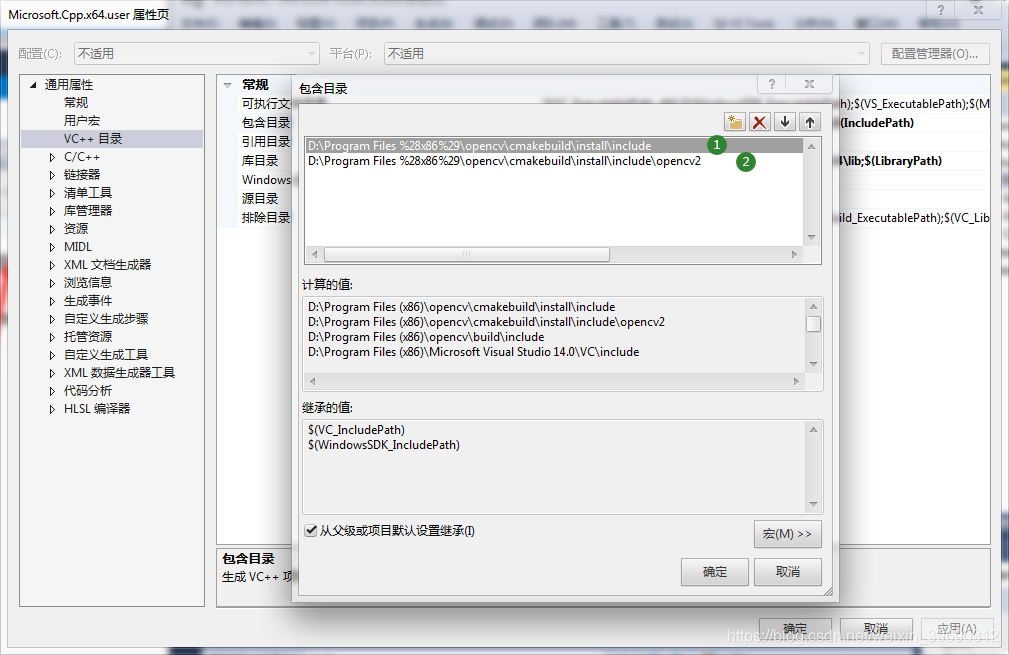
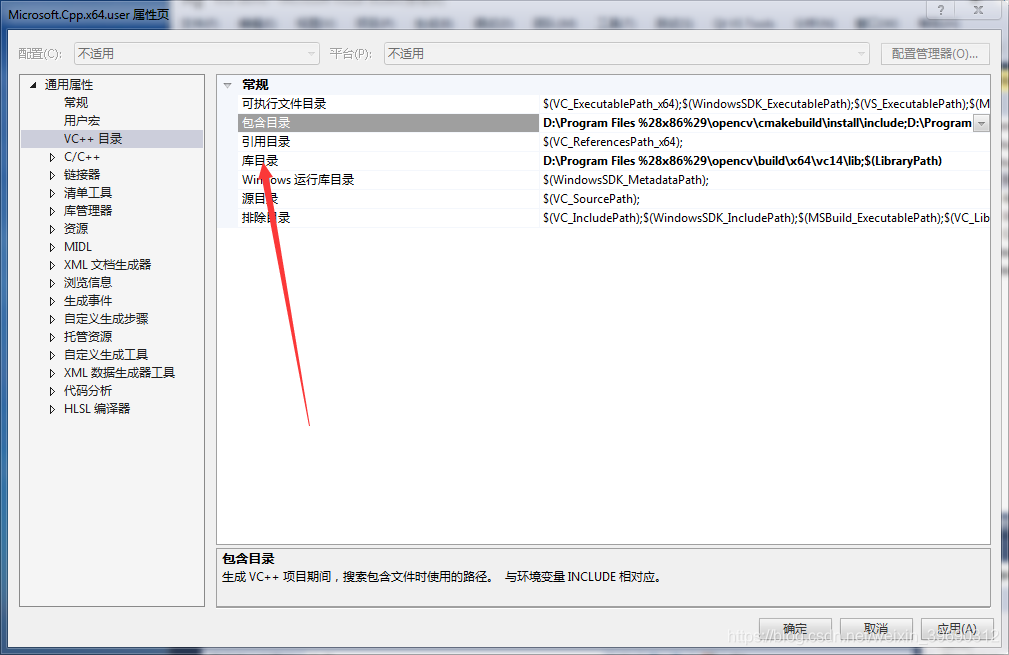
2.包含目录
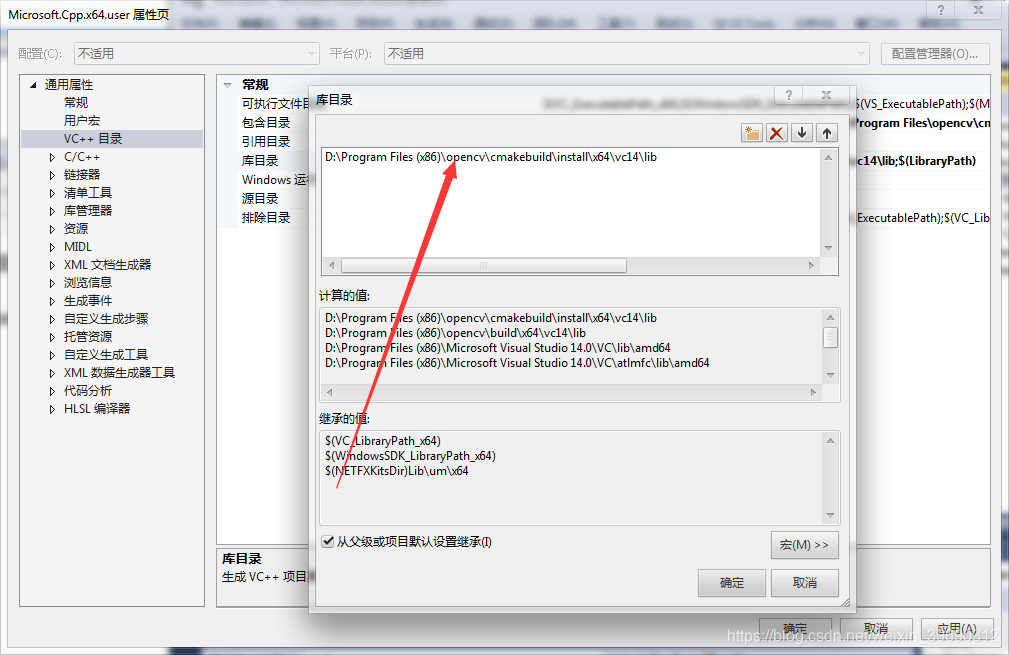
2.库目录
3.附加依赖项
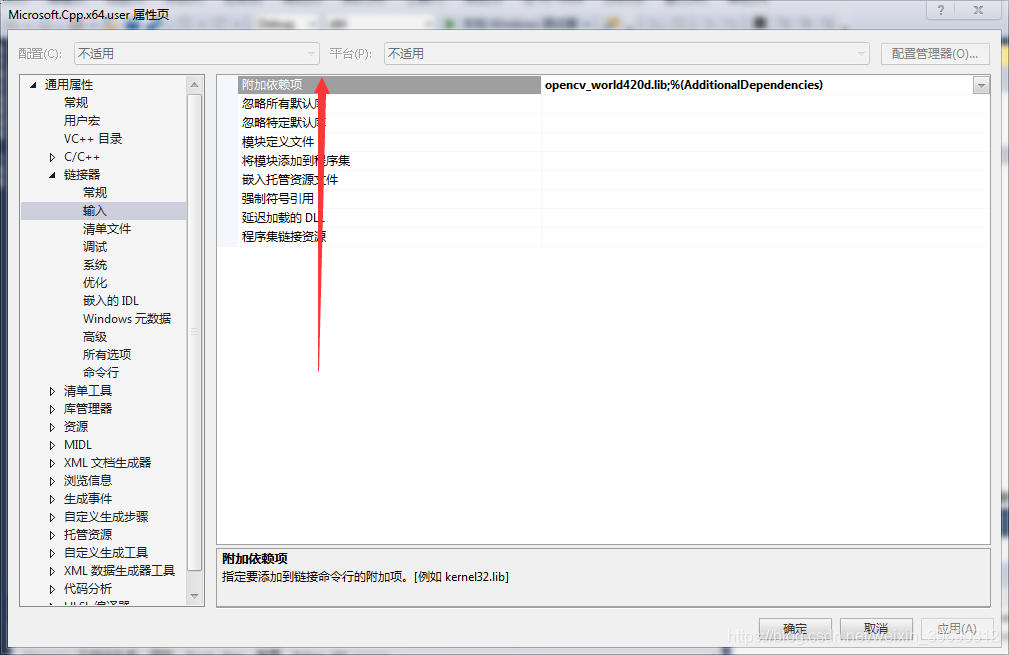
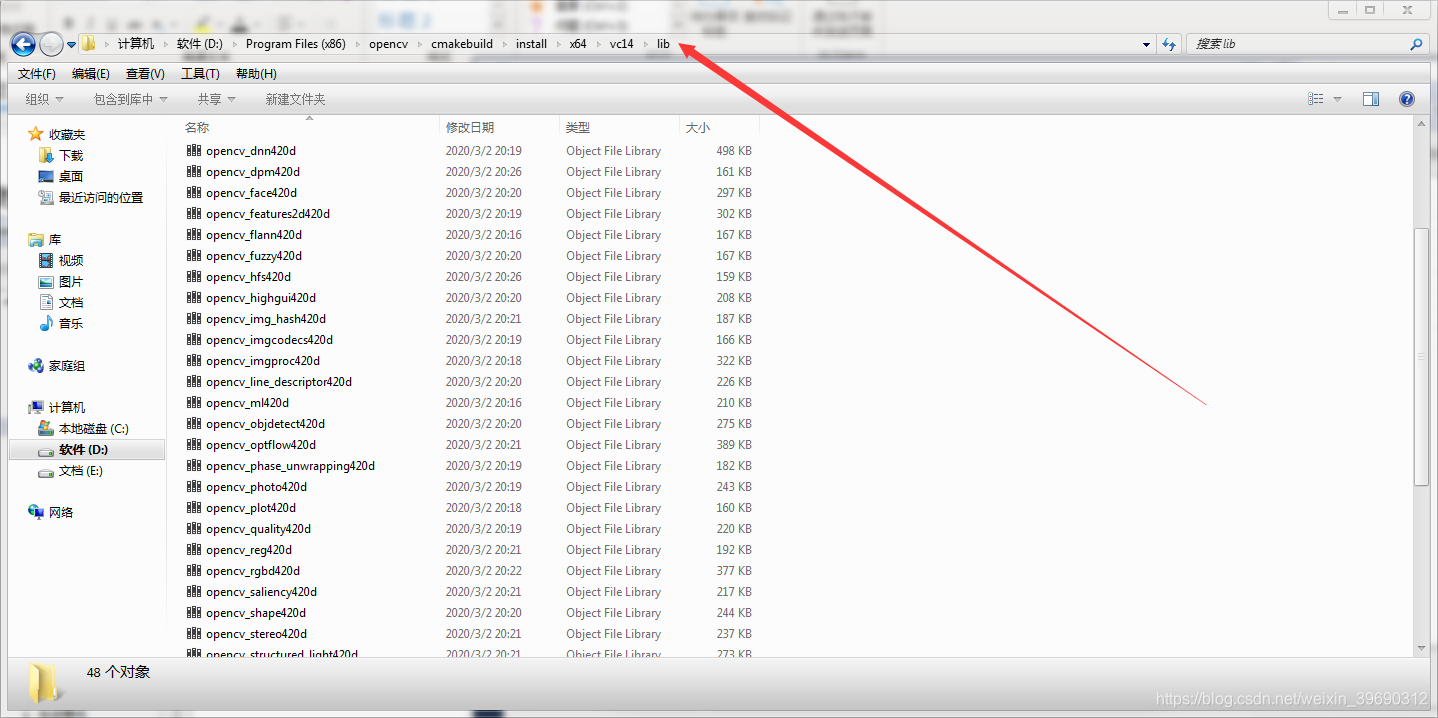
打开此目录,把目录下的.lib文件全部添加
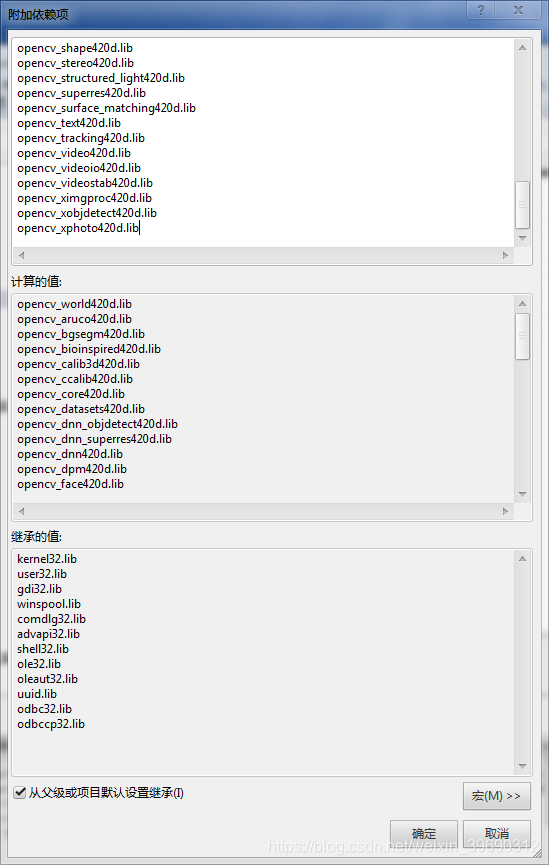
这里可以用一段C++代码来把这些库提取出来存为txt文件。代码如下
#include <fstream>
#include <iostream>
#include<io.h>
using namespace std;

void findfile(string , string );
int main(int argc, char **argv)
{
	string mode = "\\*.lib";
	string path = "C:\\Program Files\\OpenCV\\cmakebuild\\install\\x64\\vc14\\lib";//lib库文件夹路径
	findfile(path, mode);
	return 0;
}

void findfile(string path, string mode)
{
	_finddata_t file;//用来存储文件各种信息的结构体
	intptr_t handle;
	string libpath = path + mode;
	ofstream fout("lib库.txt");
	handle = _findfirst(libpath.c_str(), &file);//string的成员函数c_str(),该函数返回字符串的首字符的地址; _findfirst函数查找第一个文件,若成功则返回一个用于查找用的句柄
	if (handle == -1L)
	{
		cout << "can not match the folder path" << endl;
		system("pause");
	}
	do {
		cout << file.name << ";" << endl;
		fout << file.name << ";" << endl;

	} while (_findnext(handle, &file) == 0);

	_findclose(handle);
}
4.更改环境变量
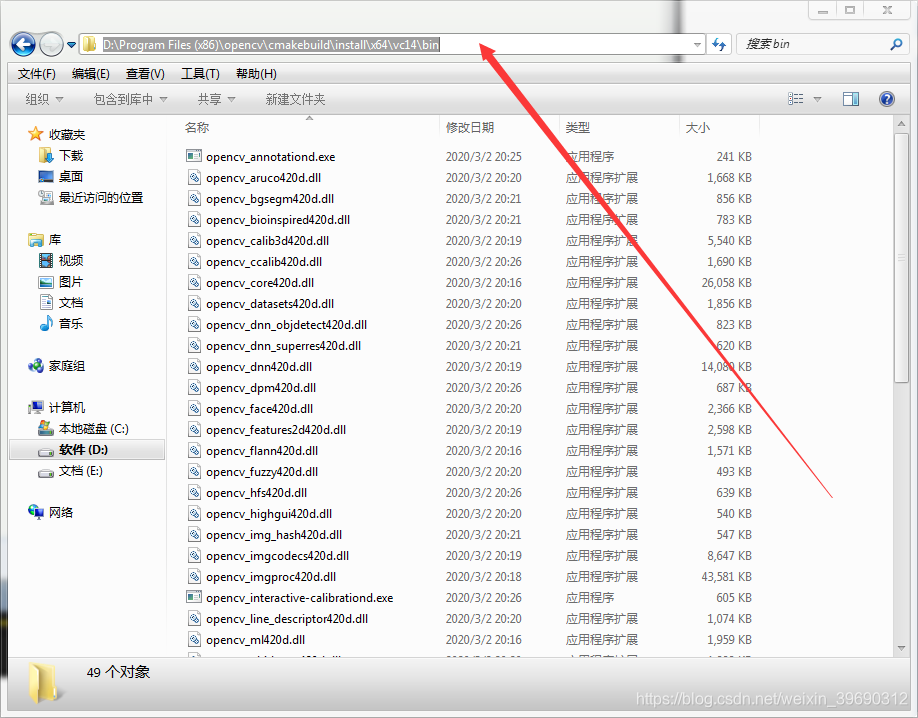
复制此目录
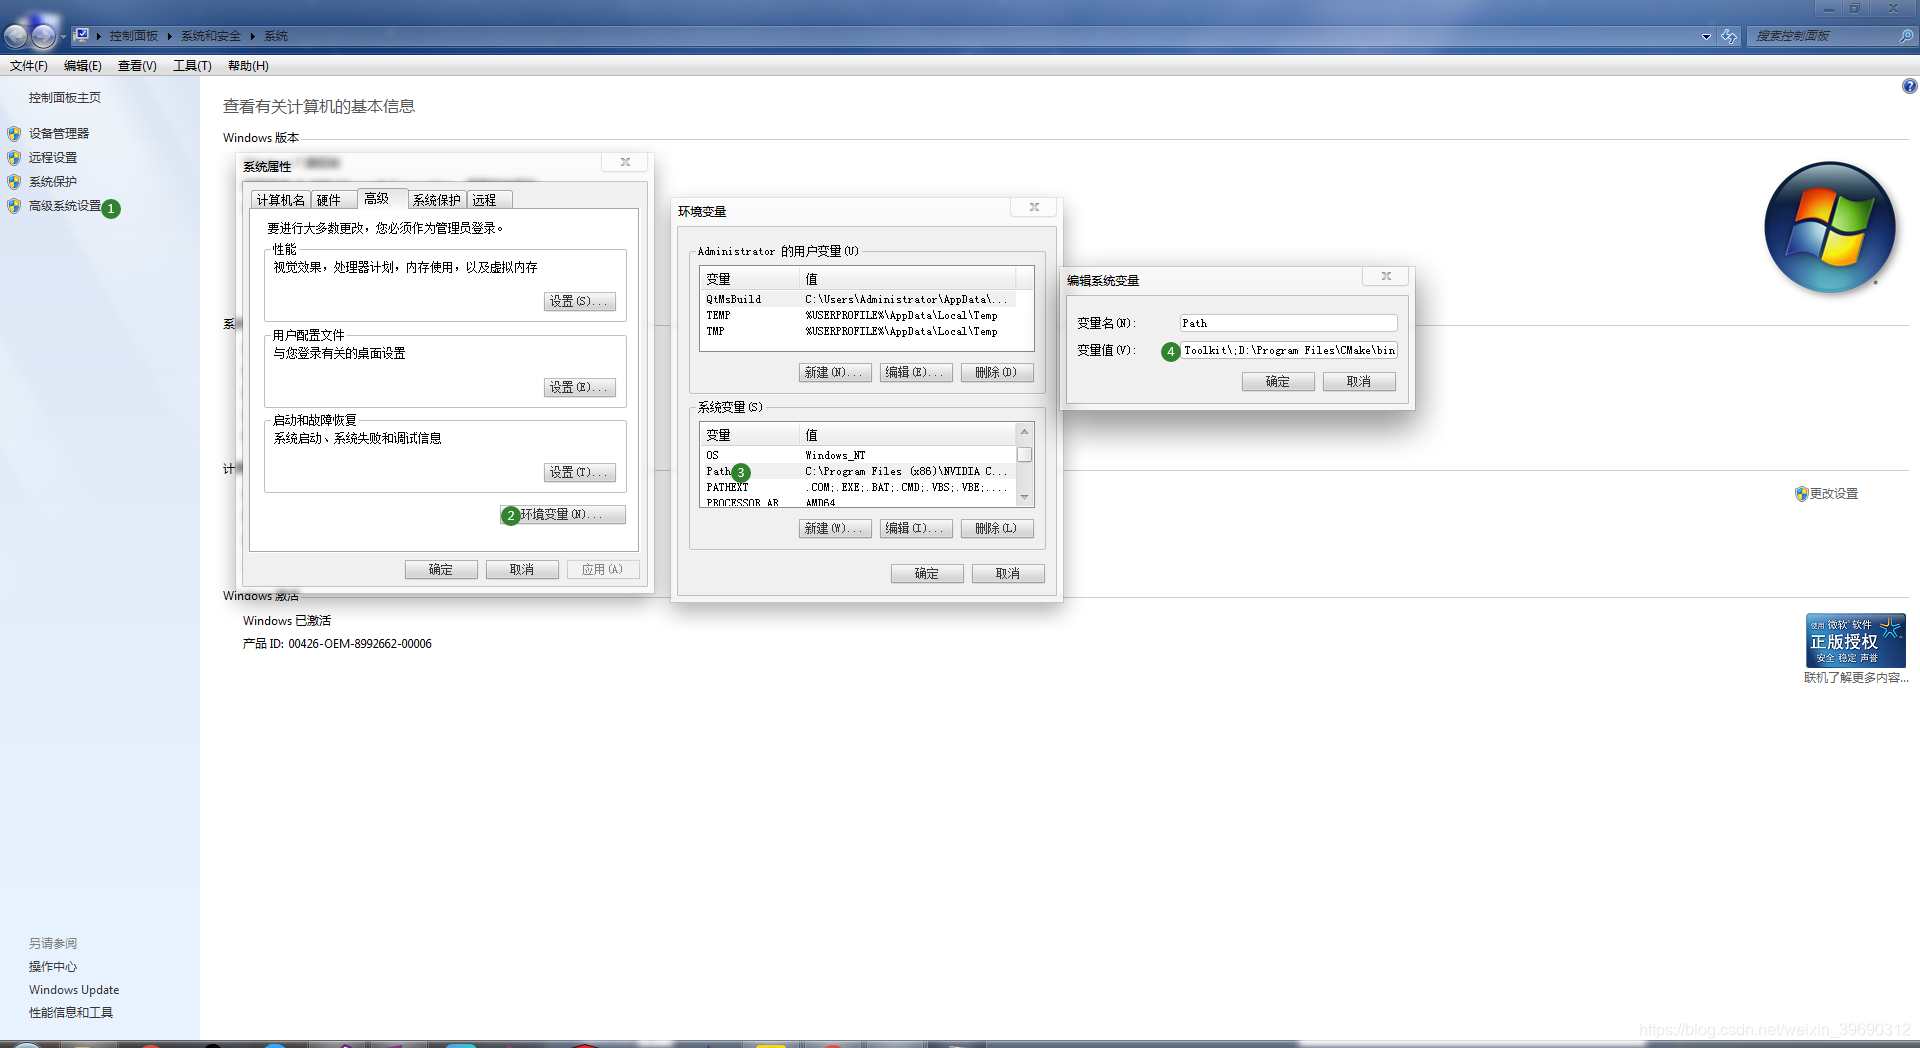
把序号4那里的目录全部拷贝出来,例如这里是
C:\Program Files (x86)\NVIDIA Corporation\PhysX\Common;%SystemRoot%\system32;%SystemRoot%;%SystemRoot%\System32\Wbem;%SYSTEMROOT%\System32\WindowsPowerShell\v1.0\;C:\Program Files (x86)\Windows Kits\8.1\Windows Performance Toolkit\D:\Program Files (x86)\opencv\build\x64\vc14\bin;C:\Program Files (x86)\Windows Kits\8.1\Windows Performance Toolkit\;D:\Program Files\CMake\bin
由于之前已经配置过一次opencv,所以里面已经有包含,但是这里要更改一下目录
C:\Program Files (x86)\NVIDIA Corporation\PhysX\Common;%SystemRoot%\system32;%SystemRoot%;%SystemRoot%\System32\Wbem;%SYSTEMROOT%\System32\WindowsPowerShell\v1.0\;C:\Program Files (x86)\Windows Kits\8.1\Windows Performance Toolkit\D:\Program Files (x86)\opencv\cmakebuild\install\x64\vc14\bin;C:\Program Files (x86)\Windows Kits\8.1\Windows Performance Toolkit\;D:\Program Files\CMake\bin
最后全部点确定。


 1万+
1万+

 被折叠的 条评论
为什么被折叠?
被折叠的 条评论
为什么被折叠?
 到【灌水乐园】发言


