


 本文详细介绍了如何在Matlab环境中配置摄像头,通过安装DCAMHardware和OSGenericVideoInterface两个必要软件包,解决摄像头调用问题,并提供了一段用于摄像头调用的示例代码。
以下为本人采坑后的小结,为了照顾小白白们(鄙人也是 ),内容显得很多,其实最终就需要安装两个包DCAM Hardware和OS Generic Video Interface,有基础的童鞋看到这,自己安装这两个包就OK了,下面内容可以pass了,小白们请继续。
注:文中matlab为2016破解版,过程中需要联网(only需要几十兆流量),需要登陆matlab账户,没有可以提前注册一个。
Step1:安装DCAM Hardware
在matlab命令框中输入imaqhwinfo,回车,会返回关于电脑设备适配器和matlab版本信息,如下:
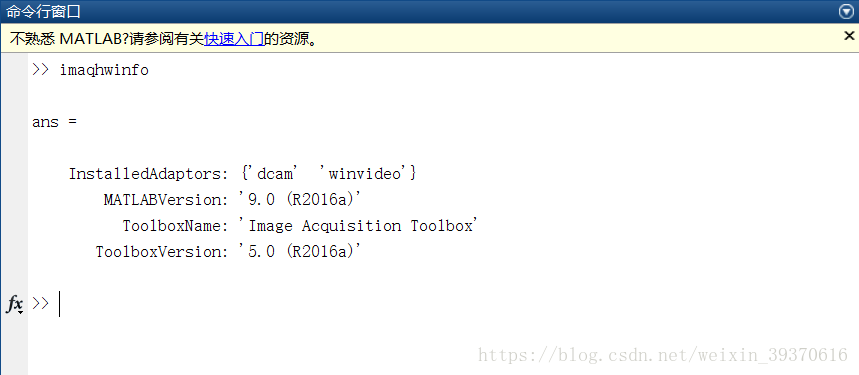
如图上显示,我这里已经安装了两个适配器:“dcam”和”winvideo“,如果你之前没安装过,imaqhwinfo命令执行完后会提示你需要安装适配器。
上面操作也可以pass,下面才是重点
点击提示或者直接在matlab命令框中输入supportPackageInstaller(注意中间没有空格),回车,出现如下窗口:
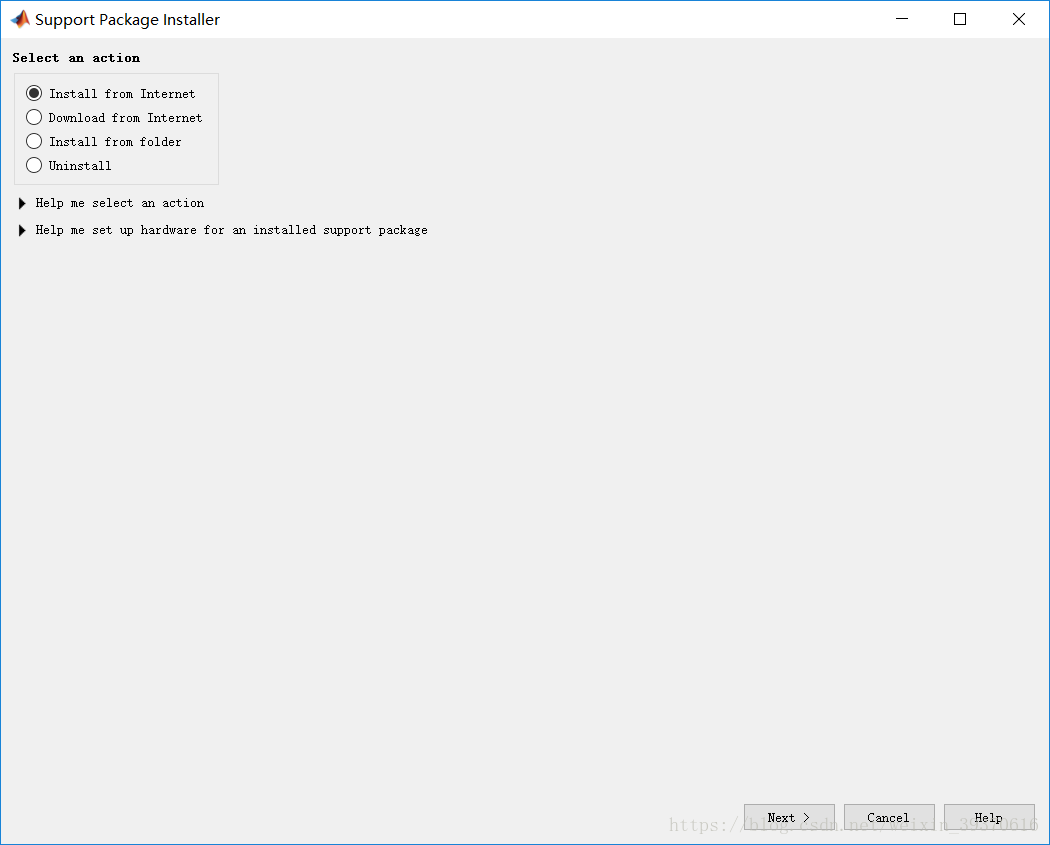
点击next,出现下面窗口:
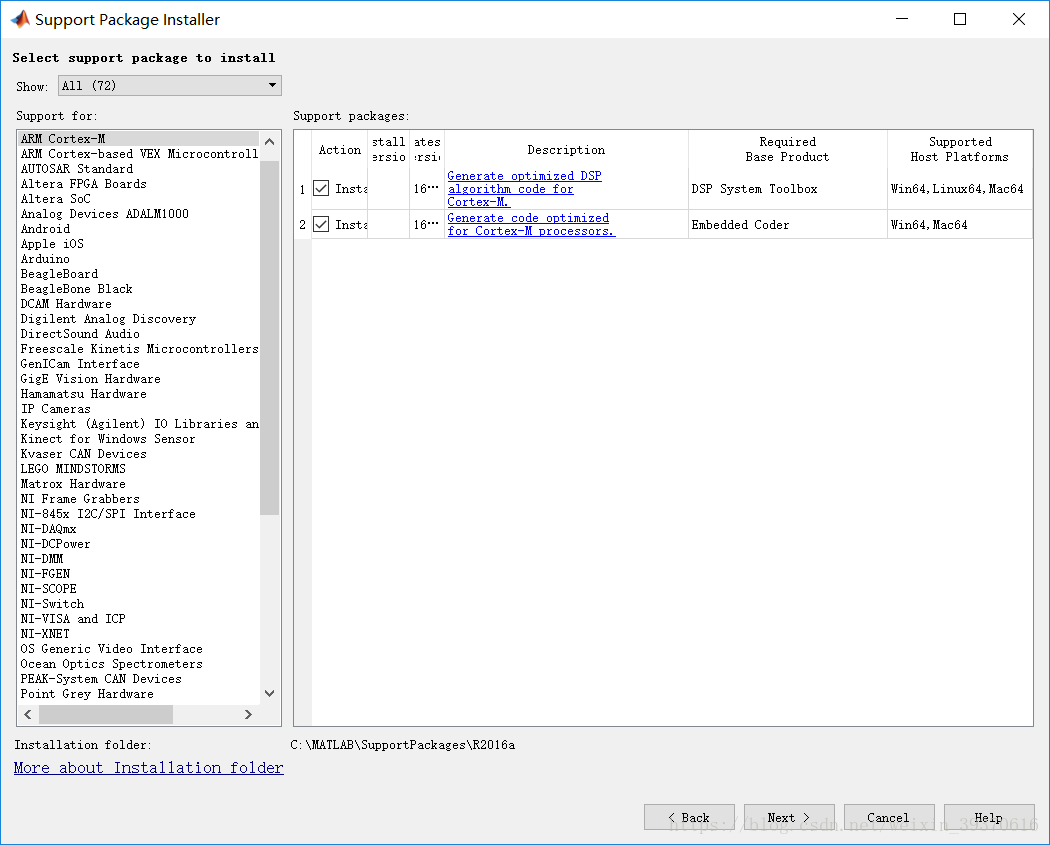
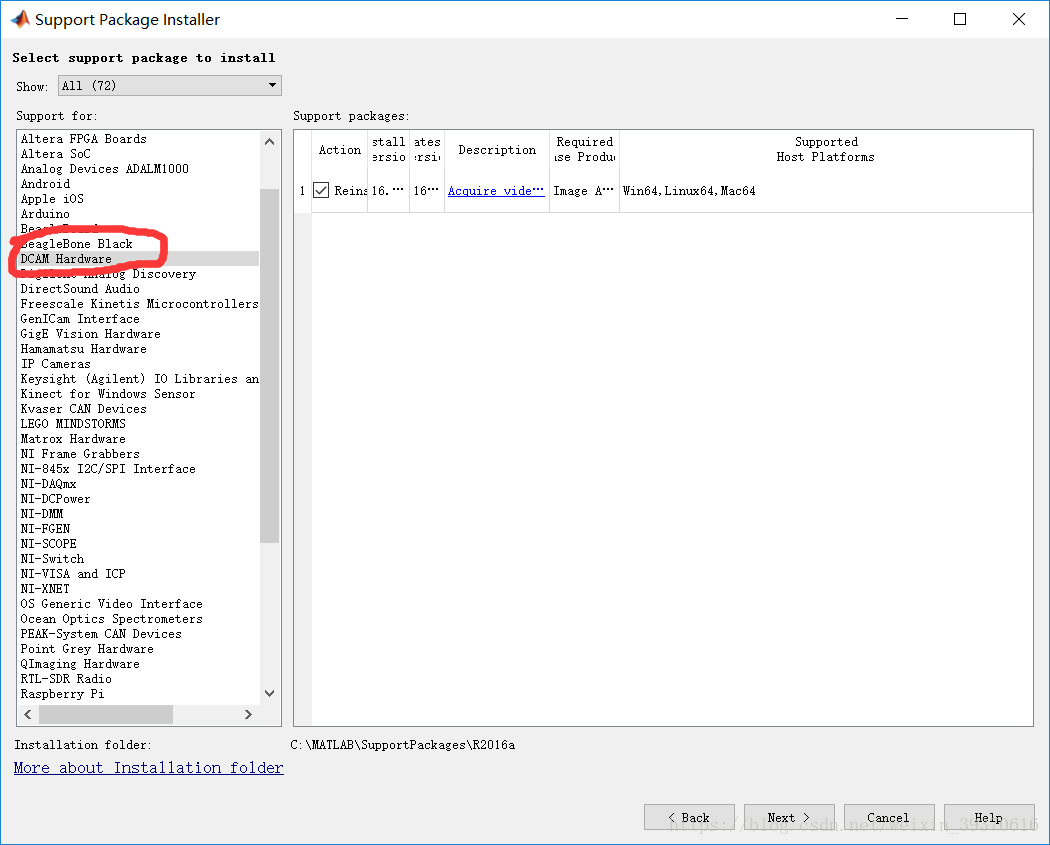
所有需要安装或者已经安装的包都可以在这里查看和安装,我们找到DCAM Hardware,如下图:
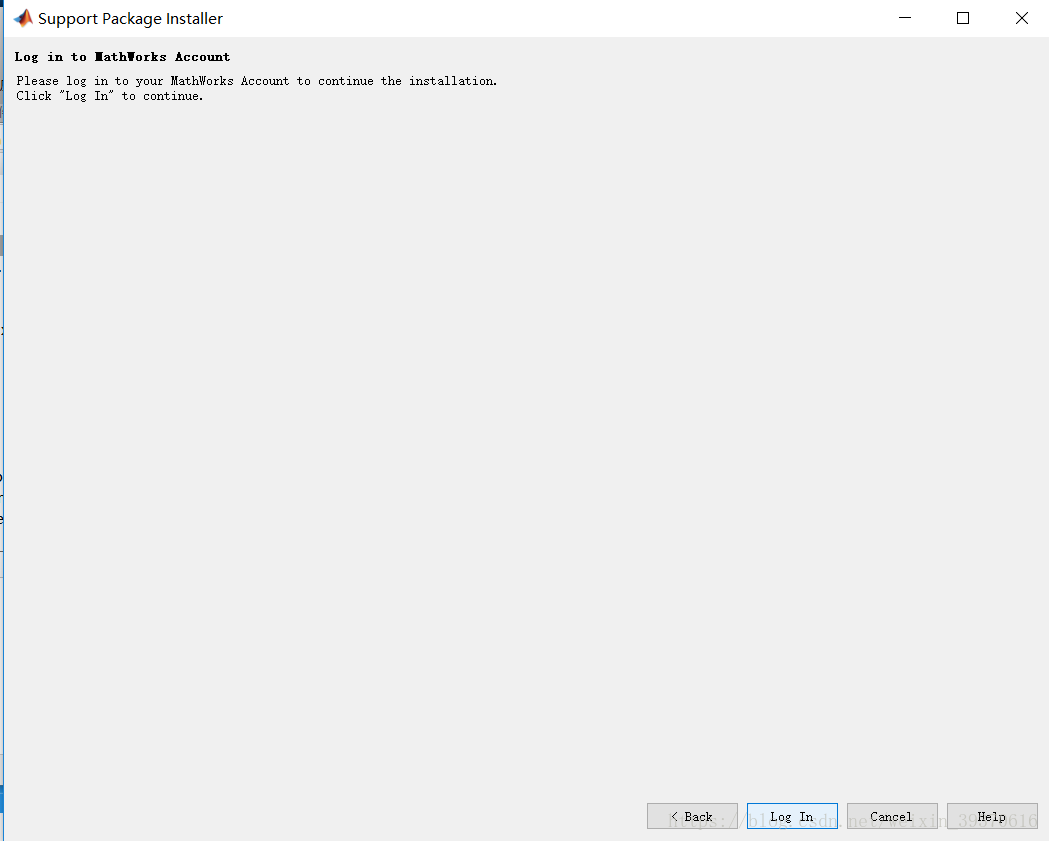
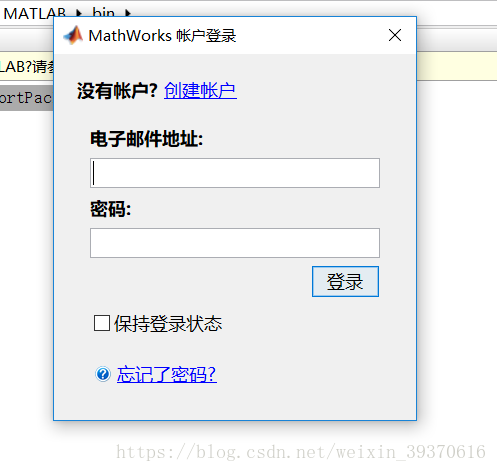
点击next,中间需要登陆matlab账号,没有自己注册一个就可以了,如下:
根据提示一直到finish就可以了。
Step2:安装OS Generic Video Interface包
如果没有这个包,调用摄像头会出现如下错误:
win_info=imaqhwinfo(*dcam*)
警告: No DCAM compliant devices were found.
If you have a DCAM compliant device, refer to the DCAM troubleshooting section
in the toolbox User*s Guide for information on setting up your device.
Now back to our business
在命令框输入supportPackageInstaller,回车如下
点击next,得到如下:
找到supportPackageInstaller,如下:
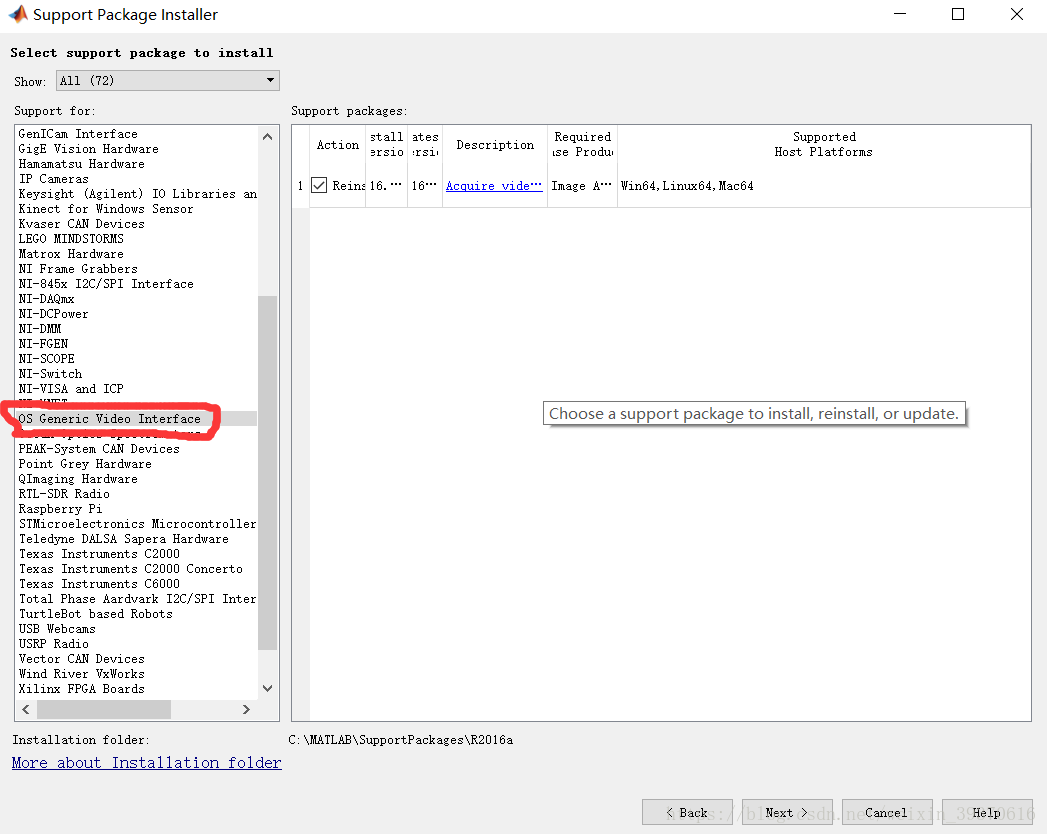
安装过程和上面的DCAM Hardware一样。
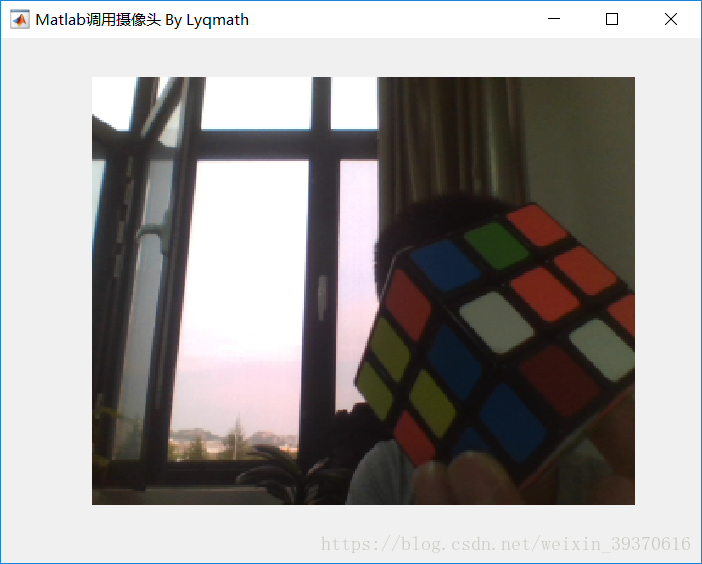
Step3:测试
在matlab命令框输入edit camera(用来编写摄像头调用程序),可以直接复制下面的代码到编辑器中
% By lyqmath
clc;
clear all;
close all;
vid = videoinput('winvideo', 1, 'YUY2_320x240');
set(vid,'ReturnedColorSpace','rgb');
vidRes=get(vid,'VideoResolution');
width=vidRes(1);
height=vidRes(2);
nBands=get(vid,'NumberOfBands');
figure('Name', 'Matlab调用摄像头 By Lyqmath', 'NumberTitle', 'Off', 'ToolBar', 'None', 'MenuBar', 'None');
hImage=image(zeros(vidRes(2),vidRes(1),nBands));

preview(vid,hImage);
保存并运行。开始尽情自拍吧
参考文章:
- 文中程序参考:https://www.cnblogs.com/wangyarui/p/6083093.html
- 优秀人士提供的matlab打开摄像头的other方法们:https://blog.youkuaiyun.com/wzy0754/article/details/38664779


 9959
9959

 被折叠的 条评论
为什么被折叠?
被折叠的 条评论
为什么被折叠?
 到【灌水乐园】发言


