


Spring5框架新功能
1、整个Spring5基于JDK8,运行时兼容JDK9,许多不建议使用的类和方法在代码库中被删除
2、Spring5框架自带了通用的日志封装
(1)已经移除了Log4jConfigListener,官方建议使用Log4j2
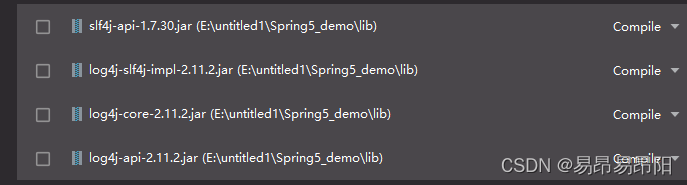
(2)Spring5框架整合Log4j2
- 1、引入jar包
- 2、log4j2.xml配置
<?xml version="1.0" encoding="UTF-8"?>
<!--status:Log4j2内部日志的输出级别,OFF > FATAL > ERROR > WARN > INFO > DEBUG > TRACE > ALL -->
<!--monitorInterval:定时检测配置文件的修改,有变化则自动重新加载配置,时间单位为秒,最小间隔为5s -->
<!-- Configuration后面的status用于设置log4j2自身内部的信息输出,可以不设置,当设置为trace时,可以看到log4j2内部各种详细输出 -->
<Configuration status="DEBUG" monitorInterval="1800">
    <!--properties:设置全局变量 -->
    <properties>
        <!--LOG_HOME:指定当前日志存放的目录 -->
        <property name="LOG_HOME">logs</property>
        <!--FILE_NAME:指定日志文件的名称 -->
        <property name="FILE_NAME">test</property>
    </properties>
    <!--Appenders:定义日志输出目的地,内容和格式等 -->
    <Appenders>
        <!--Console:日志输出到控制台标准输出 -->
        <Console name="Console" target="SYSTEM_OUT">
            <!--pattern:日期,线程名,日志级别,日志名称,日志信息,换行 -->
            <PatternLayout pattern="%d{yyyy-MM-dd HH:mm:ss.SSS} [%t] %-5level [%L] - %msg%n" />
        </Console>
        <!--RollingFile:日志输出到文件,下面的文件都使用相对路径 -->
        <!--fileName:当前日志输出的文件名称 -->
        <!--filePattern:备份日志文件名称,备份目录为logs下面以年月命名的目录,备份时使用gz格式压缩 -->
        <RollingFile name="RollingFile" fileName="${LOG_HOME}/${FILE_NAME}.log"
                     filePattern="${LOG_HOME}/$${date:yyyy-MM}/${FILE_NAME}-%d{yyyy-MM-dd}-%i.log.gz">
            <PatternLayout pattern="%d{yyyy-MM-dd HH:mm:ss.SSS} [%t] %-5level [%L] - %msg%n" />
            <!--Policies:触发策略决定何时执行备份 -->
            <Policies>
                <!--TimeBasedTriggeringPolicy:日志文件按照时间备份 -->
                <!--interval:每1天生成一个新文件,时间单位需要结合filePattern时间%d{yyyy-MM-dd} -->
                <!--同理,如果要每1小时生成一个新文件,则改成%d{yyyy-MM-ddHH} -->
                <!--modulate:对备份日志的生成时间纠偏,纠偏以0为基准进行,"0+interval"决定启动后第一次备份时间 -->
                <TimeBasedTriggeringPolicy interval="1" modulate="true" />
                <!--SizeBasedTriggeringPolicy:日志文件按照大小备份 -->
                <!--size:指定日志文件最大为100MB,单位可以为KB、MB或GB -->
                <SizeBasedTriggeringPolicy size="200MB" />
            </Policies>
            <!--DefaultRolloverStrategy:翻转策略决定如何执行备份 -->
            <!--max:最多保存5个备份文件,结合时间使用后,在每个时间段内最多有5个备份,多出来的会被覆盖 -->
            <!--compressionLevel:配置日志压缩级别,范围0-9,0不压缩,1压缩速度最快,9压缩率最好,目前只对于zip压缩文件类型有效 -->
            <DefaultRolloverStrategy max="5" compressionLevel="1">
                <!--Delete:删除匹配到的过期备份文件 -->
                <!--maxDepth:由于备份文件保存在${LOG_HOME}/$${date:yyyy-MM},所以目录深度设置为2 -->
                <Delete basePath="${LOG_HOME}" maxDepth="2">
                    <!--IfFileName:匹配文件名称 -->
                    <!--glob:匹配2级目录深度下的以.log.gz结尾的备份文件 -->
                    <IfFileName glob="*/*.log.gz" />
                    <!--IfLastModified:匹配文件修改时间 -->
                    <!--age:匹配超过180天的文件,单位D、H、M、S分别表示天、小时、分钟、秒-->
                    <IfLastModified age="180D" />
                </Delete>
            </DefaultRolloverStrategy>
        </RollingFile>
    </Appenders>
    <!--Loggers:定义日志级别和使用的Appenders -->
    <Loggers>
        <!--name: 打印日志的类的包路径 -->
        <!--additivity: true当前的Logger打印的日志附加到Root,false仅仅打印到RollingFile -->
        <Logger name="org.apache.logging.log4j" level="ERROR" additivity="true">
            <AppenderRef ref="RollingFile" />
        </Logger>
        <!--Root:日志默认打印到控制台 -->
        <!--level日志级别: ALL < TRACE < DEBUG < INFO < WARN < ERROR < FATAL < OFF -->
        <Root level="DEBUG">
            <AppenderRef ref="Console" />
        </Root>
    </Loggers>
</Configuration>
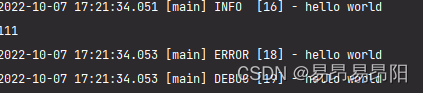
- 3、日志输出明细

- 4、自定义日志
public class TestMain {
    private static final Logger logger = LoggerFactory.getLogger(TestMain.class);
    public static void main(String[] args) {
        logger.info("hello world");
        System.out.println("111");
        logger.error("hello world");
        logger.debug("hello world");
    }
}
3、核心容器支持@Nullable注解
(1)@Nullable注解可以使用在方法上面表示方法,属性值上,参数值上
(2)@Nullable用在方法上,表示方法返回值可以为空
(3)@Nullable用在属性值上,表示属性值可以为空
(4)@Nullable用在参数值上,表示参数值可以为空
4、Spring5核心容器支持函数式风格GenericApplicationContext
利用GenericApplicationContext中的registerBean进行bean的注入
	@Test
    public void test1() {
        GenericApplicationContext context = new AnnotationConfigApplicationContext(SpringConfigTx.class);
        context.registerBean("bandCardService1", BandCardService.class, ()->new BandCardService());
        Object contextBean = context.getBean("bandCardService1");
        System.out.println(contextBean);
    }
5、支持整合JUnit5
<?xml version="1.0" encoding="UTF-8"?>
<beans xmlns="http://www.springframework.org/schema/beans"
       xmlns:xsi="http://www.w3.org/2001/XMLSchema-instance"
       xmlns:context="http://www.springframework.org/schema/context"
       xmlns:tx="http://www.springframework.org/schema/tx"
       xmlns:aop="http://www.springframework.org/schema/aop"
       xsi:schemaLocation="http://www.springframework.org/schema/beans http://www.springframework.org/schema/beans/spring-beans.xsd
                        http://www.springframework.org/schema/context  http://www.springframework.org/schema/context/spring-context.xsd
                        http://www.springframework.org/schema/tx  http://www.springframework.org/schema/tx/spring-tx.xsd
                        http://www.springframework.org/schema/aop  http://www.springframework.org/schema/aop/spring-aop.xsd">
    <!-- 注入组件扫描类 -->
    <context:component-scan base-package="com.company.base.spring9"/>
    <!-- 引入外部配置文件 -->
    <context:property-placeholder location="classpath:orm.properties"/>
    <!-- 注入数据源信息 -->
    <bean id="dataSource" class="com.alibaba.druid.pool.DruidDataSource">
        <property name="driverClassName" value="${jdbc.driverClassName}"/>
        <property name="url" value="${jdbc.url}"/>
        <property name="username" value="${jdbc.username}"/>
        <property name="password" value="${jdbc.password}"/>
    </bean>
    <!-- 注入jdbcTemplate的操作bean -->
    <bean id="jdbcTemplate" class="org.springframework.jdbc.core.JdbcTemplate">
        <property name="dataSource" ref="dataSource"/>
    </bean>

    <!-- 注入事务管理器 -->
    <bean id="txManager" class="org.springframework.jdbc.datasource.DataSourceTransactionManager">
        <property name="dataSource" ref="dataSource"/>
    </bean>

    <!-- 配置通知 -->
    <tx:advice id="txAdvice" transaction-manager="txManager">
        <tx:attributes>
            <!-- 指定哪种规则的方法上面添加事务 -->
            <tx:method name="operAccount" isolation="REPEATABLE_READ"/>
        </tx:attributes>
    </tx:advice>
    <!-- 配置切面和切入点 -->
    <aop:config>
        <!-- 配置切入点 -->
        <aop:pointcut id="tx" expression="execution(* com.company.base.spring9.service.BandCardService.*(..))"/>
        <!-- 配置通知 -->
        <aop:advisor advice-ref="txAdvice" pointcut-ref="tx"/>
    </aop:config>
</beans>
(1)整合JUnit4
// 表明使用的JUnit版本
@RunWith(SpringJUnit4ClassRunner.class)
// 注入xml配置文件
@ContextConfiguration("classpath:txxml.xml")
public class TestJUnit4 {

    // 通过注解使用BandCardService,因为ContextConfiguration注解已将txxml.xml文件里的Bean注册到容器了
    @Autowired
    private BandCardService bandCardService;

    @Test
    public void test() {
        // 进行测试
        bandCardService.operAccount("zhangsan", "lisi", 100);
    }
}
(2)整合JUnit5
// 表明使用的JUnit版本
//@ExtendWith(SpringExtension.class)
// 注入xml配置文件
//@ContextConfiguration("classpath:txxml.xml")
@SpringJUnitConfig(locations = "classpath:txxml.xml")
public class TestJUnit5 {

    // 通过注解使用BandCardService,因为ContextConfiguration注解已将txxml.xml文件里的Bean注册到容器了
    @Autowired
    private BandCardService bandCardService;

    @Test
    public void test() {
        // 进行测试
        bandCardService.operAccount("zhangsan", "lisi", 100);
    }
}


 1万+
1万+

 被折叠的 条评论
为什么被折叠?
被折叠的 条评论
为什么被折叠?
 到【灌水乐园】发言


