


 本文介绍了使用Keras(TensorFlow后端)进行交通标志图像分类的过程,包括数据处理、图片格式转换、CNN模型搭建、训练及预测。通过数据增强提升模型泛化能力,最终实现约95%的准确率。实验中遇到的问题如数据输入错误已解决,并提出改进建议,如增大图片尺寸和使用更复杂的网络结构。
数据的处理
数据的介绍
本次实验使用的数据是有关交通标志的数据,其实验内容参考了网站:实验参考网站
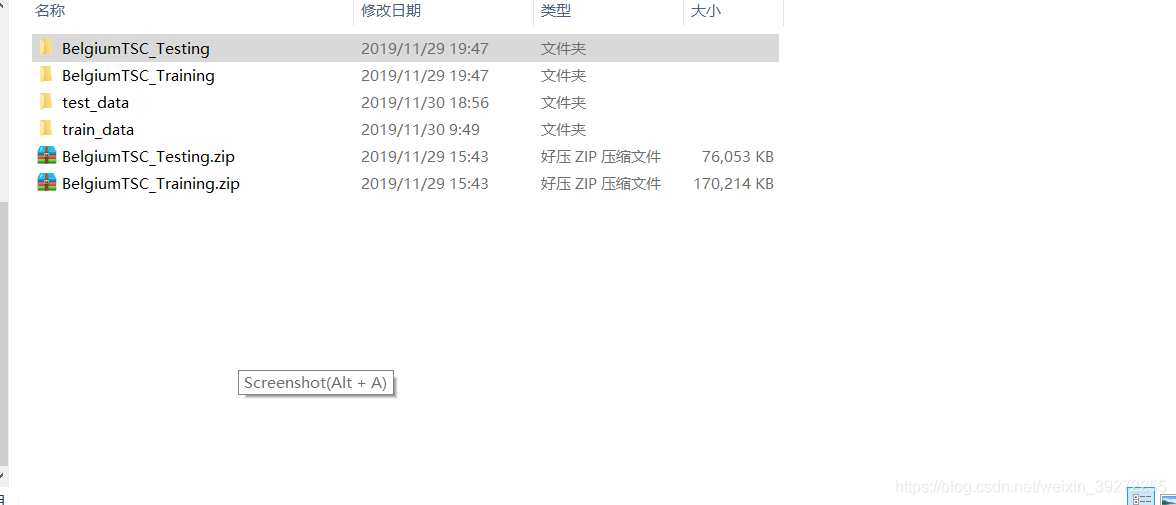
数据集的下载网站:数据集下载,只需要下载的是BelgiumTS for Classification (cropped images) 目录下面的两个文件:
BelgiumTSC_Training (171.3MBytes)
BelgiumTSC_Testing (76.5MBytes)
一共有62种交通标志
图片的处理
由于下载的图片格式是ppm,需要转成png格式,使用python代码进行批量图片的格式转换。
from PIL import Image
import os
input_train_path="C:/study_content/DataSet/BelgiumTSC_Training/Training"
output_train_path = "C:/study_content/DataSet/train_data/"
input_test_path="C:/study_content/DataSet/BelgiumTSC_Testing/Testing"
output_test_path = "C:/study_content/DataSet/test_data/"
def batch_image(in_dir, out_dir):
    if not os.path.exists(out_dir):
        print(out_dir, 'is not existed.')
        os.mkdir(out_dir)
    if not os.path.exists(in_dir):
        print(in_dir, 'is not existed.')
        return -1
    directories = [d for d in os.listdir(in_dir) if os.path.isdir(os.path.join(in_dir, d))]
    for d in directories:
        # 每一类的路径
        label_directory = os.path.join(in_dir, d)
        new_directory = os.path.join(out_dir, d)
        out_folder = os.path.exists(out_dir+d)
        if not out_folder:
            os.mkdir(new_directory)
        file_names = [os.path.join(label_directory, f) for f in os.listdir(label_directory) if f.endswith(".ppm")]
        # file_names is every photo which is end with ".ppm"
        count = 0
        for files in file_names:
            file_path, extfilename = os.path.split(files)
            filename, extname = os.path.splitext(extfilename)
            out_file = filename + '.png'
            # print(filepath,',',filename, ',', out_file)
            im = Image.open(files)
            new_path = os.path.join(new_directory, out_file)
            print(count, ',', new_path)
            count = count + 1
            im.save(new_path)
if __name__ == '__main__':
    batch_image(input_test_path, output_test_path)
    batch_image(input_train_path, output_train_path)
转换成功后分别保存在上图中的test_data与train_data中。
搭建CNN
CNN的种类繁多,无法确实使用什么样的网络结构,从最简单的LetNet开始实验,然后再改进。
1、搭建网络结构代码(保存在net文件夹的lenet.py中):
from keras.models import Sequential
from keras.layers.convolutional import Conv2D
from keras.layers.convolutional import MaxPooling2D
from keras.layers.core import Activation
from keras.layers.core import Flatten
from keras.layers.core import Dense
from keras import backend as K
class LeNet:
    @staticmethod
    def build(width, height, depth, classes):
        # initialize the model
        model = Sequential()
        inputShape = (height, width, depth)
        # if we are using "channels last", update the input shape
        if K.image_data_format() == "channels_first":   #for tensorflow
            inputShape = (depth, height, width)
        # first set of CONV => RELU => POOL layers
        model.add(Conv2D(20, (5, 5),padding="same",input_shape=inputShape))
        model.add(Activation("relu"))
        model.add(MaxPooling2D(pool_size=(2, 2), strides=(2, 2)))
        #second set of CONV => RELU => POOL layers
        model.add(Conv2D(50, (5, 5), padding="same"))
        model.add(Activation("relu"))
        model.add(MaxPooling2D(pool_size=(2, 2), strides=(2, 2)))
        # first (and only) set of FC => RELU layers
        model.add(Flatten())
        model.add(Dense(500))
        model.add(Activation("relu"))
        # softmax classifier
        model.add(Dense(classes))
        model.add(Activation("softmax"))
        # return the constructed network architecture
        return model
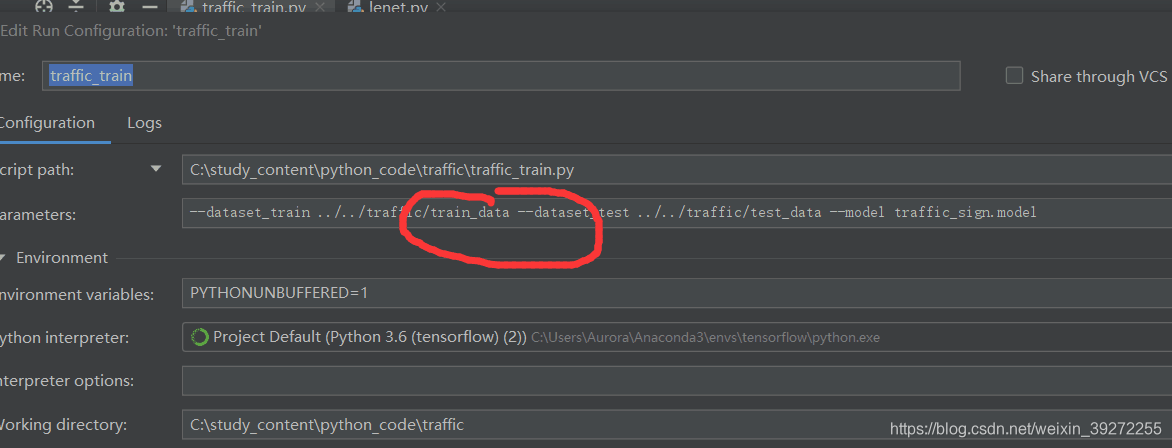
2、参数解析器的定义,新建traffic_train.py,
import matplotlib
matplotlib.use("Agg")
# import the necessary packages
from keras.preprocessing.image import ImageDataGenerator
from keras.optimizers import Adam
from sklearn.model_selection import train_test_split
from keras.preprocessing.image import img_to_array
from keras.utils import to_categorical
from imutils import paths
import matplotlib.pyplot as plt
import numpy as np
import argparse
import random
import cv2
import os
import sys
sys.path.append('..')
from net.lenet import LeNet
def args_parse():
    # construct the argument parse and parse the arguments
    ap = argparse.ArgumentParser()
    ap.add_argument("-dtest", "--dataset_test", required=True,
        help="path to input dataset_test")
    ap.add_argument("-dtrain", "--dataset_train", required=True,
        help="path to input dataset_train")
    ap.add_argument("-m", "--model", required=True,
        help="path to output model")
    ap.add_argument("-p", "--plot", type=str, default="plot.png",
        help="path to output accuracy/loss plot")
    args = vars(ap.parse_args())
    return args
其中conv2d表示执行卷积,maxpooling2d表示执行最大池化,Activation表示特定的激活函数类型,Flatten层用来将输入“压平”,用于卷积层到全连接层的过渡,Dense表示全连接层(500个神经元)。
运行代码时出现错误请参考:https://mp.youkuaiyun.com/mdeditor/103340294
运行代码前需要pip安装matplotlib,sklearn(安装sklearn时会出现错误提示),但是再次运行代码已经无错误,说明安装成功。

3、载入数据:读入图片和对应标签信息(traffic_train.py)
接下来我们需要读入图片和对应标签信息。
def load_data(path):
    print("[INFO] loading images...")
    data = []
    labels = []
    # grab the image paths and randomly shuffle them
    imagePaths = sorted(list(paths.list_images(path)))
    random.seed(42)
    random.shuffle(imagePaths)
    # loop over the input images
    for imagePath in imagePaths:
        # load the image, pre-process it, and store it in the data list
        image = cv2.imread(imagePath)
        image = cv2.resize(image, (norm_size, norm_size))
        image = img_to_array(image)
        data.append(image)
        # extract the class label from the image path and update the
        # labels list
        label = int(imagePath.split(os.path.sep)[-2])
        labels.append(label)
    # scale the raw pixel intensities to the range [0, 1]
    data = np.array(data, dtype="float") / 255.0
    labels = np.array(labels)
    # convert the labels from integers to vectors
    labels = to_categorical(labels, num_classes=CLASS_NUM)
    return data,labels
4、训练
def train(aug,trainX,trainY,testX,testY,args):
    # initialize the model
    print("[INFO] compiling model...")
    model = LeNet.build(width=norm_size, height=norm_size, depth=3, classes=CLASS_NUM)
    opt = Adam(lr=INIT_LR, decay=INIT_LR / EPOCHS)
    model.compile(loss="categorical_crossentropy", optimizer=opt,
        metrics=["accuracy"])
    # train the network
    print("[INFO] training network...")
    H = model.fit_generator(aug.flow(trainX, trainY, batch_size=BS),
        validation_data=(testX, testY), steps_per_epoch=len(trainX) // BS,
        epochs=EPOCHS, verbose=1)
    # save the model to disk
    print("[INFO] serializing network...")
    model.save(args["model"])
    # plot the training loss and accuracy
    plt.style.use("ggplot")
    plt.figure()
    N = EPOCHS
    plt.plot(np.arange(0, N), H.history["loss"], label="train_loss")
    plt.plot(np.arange(0, N), H.history["val_loss"], label="val_loss")
    plt.plot(np.arange(0, N), H.history["acc"], label="train_acc")
    plt.plot(np.arange(0, N), H.history["val_acc"], label="val_acc")
    plt.title("Training Loss and Accuracy on traffic-sign classifier")
    plt.xlabel("Epoch #")
    plt.ylabel("Loss/Accuracy")
    plt.legend(loc="lower left")
    plt.savefig(args["plot"])
注意:
使用了Adam优化器,多分类问题用类别交叉熵(categorical_crossentropy)。但若执行的分类任务仅有两类,损失函数应更换为二进制交叉熵损失函数(binary cross-entropy)
主函数:
#python train.py --dataset_train ../../traffic-sign/train --dataset_test ../../traffic-sign/test --model traffic_sign.model
if __name__=='__main__':
    args = args_parse()
    train_file_path = args["dataset_train"]
    test_file_path = args["dataset_test"]
    trainX,trainY = load_data(train_file_path)
    testX,testY = load_data(test_file_path)
    # construct the image generator for data augmentation
    aug = ImageDataGenerator(rotation_range=30, width_shift_range=0.1,
        height_shift_range=0.1, shear_range=0.2, zoom_range=0.2,
        horizontal_flip=True, fill_mode="nearest")
    train(aug,trainX,trainY,testX,testY,args)
在正式训练之前我们还使用了数据增广技术(ImageDataGenerator)来对我们的小数据集进行数据增强(对数据集图像进行随机旋转、移动、翻转、剪切等),以加强模型的泛化能力。
代码出现错误:‘Input data in NumpyArrayIterator should have rank 4. You passed an array with shape’, (0,)
原因:图片的路径错误
解决方案:
得到的损失精确的结果为显示在plot.png中,准确率在95%左右。
预测单张图片
# import the necessary packages
from keras.preprocessing.image import img_to_array
from keras.models import load_model
import numpy as np
import argparse
import imutils
import cv2
norm_size = 32
def args_parse():
    # construct the argument parse and parse the arguments
    ap = argparse.ArgumentParser()
    ap.add_argument("-m", "--model", required=True,
                    help="path to trained model model")
    ap.add_argument("-i", "--image", required=True,
                    help="path to input image")
    ap.add_argument("-s", "--show", action="store_true",
                    help="show predict image", default=False)
    args = vars(ap.parse_args())
    return args
def predict(args):
    # load the trained convolutional neural network
    print("[INFO] loading network...")
    model = load_model(args["model"])
    # load the image
    image = cv2.imread(args["image"])
    orig = image.copy()
    # pre-process the image for classification
    image = cv2.resize(image, (norm_size, norm_size))
    image = image.astype("float") / 255.0
    image = img_to_array(image)
    image = np.expand_dims(image, axis=0)
    # classify the input image
    result = model.predict(image)[0]
    # print (result.shape)
    proba = np.max(result)
    label = str(np.where(result == proba)[0])
    label = "{}: {:.2f}%".format(label, proba * 100)
    print(label)
    if args['show']:
        # draw the label on the image
        output = imutils.resize(orig, width=400)
        cv2.putText(output, label, (10, 25), cv2.FONT_HERSHEY_SIMPLEX,
                    0.7, (0, 255, 0), 2)
        # show the output image
        cv2.imshow("Output", output)
        cv2.waitKey(0)
# python predict.py --model traffic_sign.model -i ../2.png -s
if __name__ == '__main__':
    args = args_parse()
    predict(args)
总结
可以改进的地方
1、图片归一化为64,可能这个尺寸有点小,如果把尺寸改为128或256,效果可能会更好;
2、可以考虑更深的网络,比如VGG,GoogLeNet等;
3、数据增强部分还可以再做一做。
延申
将norm_size改为64,即图片归一化为128,测试结果识别率由50%左右提高到99%。


 8万+
8万+

 被折叠的 条评论
为什么被折叠?
被折叠的 条评论
为什么被折叠?
 到【灌水乐园】发言


