


1 创建flow
方式1
通过携程扩展函数FlowKt中的flow扩展函数可以直接构建flow,只需要传递FlowCollector收集器实现类就可以了
private fun create1(){
        val intFlow = createFlow()
        println("创建int flow: $intFlow")
        runBlocking {
            println("开始收集")
            intFlow.collect {
                println(it)
            }
            println("收集结束")
        }
    }

    /**
     * 创建flow 方式1
     */
    private fun createFlow(): Flow<Int> = flow {
        delay(1000)
        emit(1)
        delay(1000)
        emit(2)
        delay(1000)
        emit(3)
    }
通过该flow扩展函数可以了解到如下信息
函数定义泛型时需要将泛型放到fun 和函数名中间
例如
public fun <T> flow(@kotlin.BuilderInference block: suspend kotlinx.coroutines.flow.FlowCollector<T>.() -> kotlin.Unit)
定义好之后,函数中传参也可以使用该泛型继续向下传递,例如这里传递给了FlowCollector接口,用于规定flow收集器应该发送什么数据给调用方
方式2
private fun create2() {
        // 创建flow 方式2
        println("创建flow 方式2")
        val flow2 = flowOf(1, 2, 3).onEach {
            delay(1000)
        }
        runBlocking {
            flow2.collect {
                println(it)
            }
        }
    }
flowof 扩展函数其实内部也是调用flow扩展函数,只不过flowof是将传递进来的可变参数,遍历了一遍,并且调用flow收集器的emit方法发送取出而已
方式3
 private fun create3() {
        println("创建flow 方式3")
        runBlocking {
            val flow3 = listOf(1,2,3).asFlow().onEach {
                delay(1000)
            }
            flow3.collect {
                println(it)
            }
        }
    }
调用list顶级接口类Iterable的asFlow方法,其实内部还是调用了flow扩展函数,将元素遍历之后emit出去的
2 取消或中断flow
   // 测试Flow的取消 取消Flow只需要取消它所在的携程即可
    private fun testCancelFlow() {
        runBlocking {
            withTimeoutOrNull(250) { // 在 250 毫秒后超时
                simple().collect { value -> println(value) }
            }
            println("Done")
        }
    }

    fun simple(): Flow<Int> = flow {
        for (i in 1..3) {
            delay(100)
            println("Emitting $i")
            emit(i)
        }
    }
通过withTimeoutOrNull 函数可以实现取消flow携程功能, 通过该功能可以处理类似于某些场景下的超时机制,兜底逻辑等,例如:
在30秒内处理不完数据状态的转换,就直接结束当前处理,只展示处理过后的数据就可以了。因为有些场景下,数据量较大,用户等待时间太长的情况下,一般用户无法接受,所以只能采用妥协的方式来规定一个最大等待时间,来处理该组数据。一般会用在对数据做某种优化处理,但这种处理即使处理不完的情况下,产品也能接受的情况下,才会采用该方案。否则不建议执行兜底方案处理。
3 Flow 操作符
collect 是Flow中最常用,最基础的末端操作符,主要用于Flow启动流的挂起函数。除了collect还有一些其他的操作符,例如:
- 转换为各种集合的操作符: toList/toSet/toCollection
- 用于流元素计算的操作符:reduce / fold
- 计算数量的操作符:count
- 用于切换协程作用域线程的操作符:launcherIn/productIn/broadcastIn, 这里的productIn以及broadcastIn 暂时没有了解清楚其用法和作用,暂时放在这里
collect 操作符使用
collect 是Flow最基础的操作符,大多数场景下都会使用它来收集Flow中生产的数据信息
runBlocking {
            listOf(1,2,3,4,5).asFlow().collect { value -> println(value) }
        }
reduce 操作符使用
作用1: 用于数据求和
 private fun testReduce() {
        runBlocking {
            val num = listOf(1,2,3,4,5).asFlow().reduce { a, b -> a + b }
            println("求和的结果:$num")
        }
    }
作用2:用于求最大值
private fun testReduce1() {
        runBlocking {
            val maxNum = listOf(1, 5, 2, 4, 5, 6, 3).asFlow().reduce { a, b ->
                if (a > b) a else b
            }
            println("求集合中的最大值:${maxNum}")
        }
    }
fold 操作符使用
fold 也是用于计算的操作符,只不过fold可以设置累加器的初始值,与reduce相比 多一个设置初始值的操作
private fun testFold() {
        runBlocking {
            val sum = (1..5).asFlow().fold(100) { a, b -> a + b }
            println("设置初始值后的累加结果:$sum")
        }
    }
launchIn 操作符使用
launchIn用于指定协程作用域,如果单独看如下这块代码可能觉得launchIn好像没有什么作用,但是一旦多个流想要并发执行时,launchIn就可以起到它该有的作用,为流指定了协程作用域之后,相当于每个流开启了一个协程,每个流都在自己协程中运行,所以可以使用launchIn来实现并发的功能。
 val mDispatcher = Executors.newSingleThreadExecutor().asCoroutineDispatcher()
    private fun testLaunchIn() {
        val scope = CoroutineScope(mDispatcher)
        (1..5).asFlow().onEach { println(it) }.onCompletion { mDispatcher.close() }.launchIn(scope)
    }
launchIn 可以让流并发执行,例如下边这段代码,我们发现正常的流操作是一个流完成后才会执行另一个流,是串行执行的。
private fun testLaunchIn2() {
        runBlocking {
            val cosTime = measureTimeMillis {
                (1..5).asFlow()
                    .onEach { delay(200) }
                    .flowOn(Dispatchers.IO)
                    .collect{ println(it) }

                flowOf("one", "two", "three", "four", "five")
                    .onEach { delay(200) }
                    .flowOn(Dispatchers.IO)
                    .collect{ println(it) }
            }
            println("cosTime: $cosTime")
        }
    }
运行结果
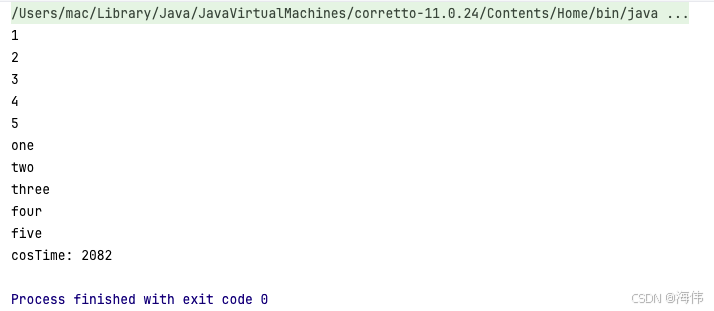
很明显,这里的流没有并发执行,如果我们想要节省时间,提高效率,可以使用launchIn来优化这段代码,如下:
private fun testLaunchIn3() {
        runBlocking {
            val cosTime = measureTimeMillis {
                (1..5).asFlow()
                    .onEach { delay(200) }
                    .flowOn(Dispatchers.IO)
                    .onEach { println(it) }
                    .launchIn(this)

                flowOf("one", "two", "three", "four", "five")
                    .onEach { delay(200) }
                    .flowOn(Dispatchers.IO)
                    .onEach { println(it) }
                    .launchIn(this)

            }
            println("cosTime: ${cosTime}")
        }
    }
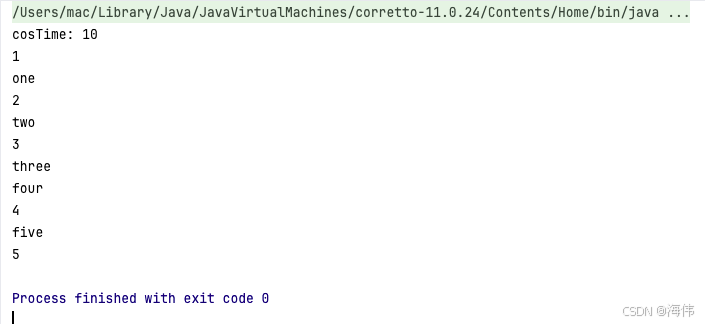
通过launchIn执行之后,我们发现这段代码竟然从耗时2082直接降到了10毫秒,而且这里流的执行,也被运行在被指定的IO线程的协程当中了,不再阻塞当前线程的执行,也就是我们通常说的,异步并发执行了。
4 Flow的连续性测试
private fun testFlowContinuity() {
        runBlocking {
            (1..5).asFlow()
                .filter {
                    println("Filter $it")
                    it % 2 == 0
                }
                .map {
                    println("Map $it")
                    "string $it"
                }
                .collect {
                    println("Collect $it")
                }
        }
    }
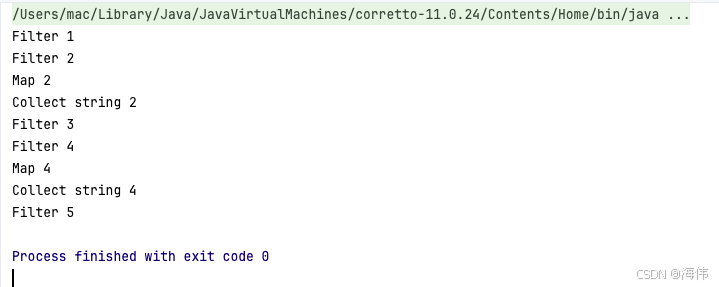
通过结果我们会发现流的每一个环节执行的时候都是自上而下的,并且是每个元素都会执行完流的全部流程之后,才会执行下一个元素。
5 流的状态监听
流的状态监听,主要有以下几个
onStart 监听流开始执行
onCompletion 监听流执行完成
try … finally 也可以监听整个流事件执行结束
private fun testStatusListener() {
        runBlocking {
            try {
                (1..5).asFlow()
                    .onEach { delay(200) }
                    .onStart { println("Start...") }
                    .onCompletion { println("Completion...") }
                    .collect {
                        println(it)
                    }
            }finally {
                println("执行结束")
            }
        }
    }
执行结果
Start…
1
2
3
4
5
Completion…
执行结束
6 Flow缓存策略
Flow在设置buffer的时候有三种策略,可以使用BufferOverflow枚举类参数来设置。如下:
- suspend 挂起
- drop_oldest 删除老的
- drop_latest 删除最新的
** 1 设置BufferOverflow.SUSPEND 挂起**
private fun testFlowBuffer() {
        runBlocking {
            (1..5).asFlow()
                .onEach {
                    delay(100)
                    println("product data $it")
                }.buffer(2, BufferOverflow.SUSPEND)
                .collect {
                    delay(700)
                    println("collect: $it")
                }
        }
    }
运行结果
product data 1
product data 2
product data 3
product data 4
collect: 1
product data 5
collect: 2
collect: 3
collect: 4
collect: 5
该方式可以让生产和收集并发执行,当没有触发收集时,会一直生产,知道buffer区装满之后,才会停止生产,等到收集被执行完毕后,才会继续生产下一个,这种方式不会丢失数据,能保证每一个元素都会被生产和收集。效率上要比不设置缓冲区要快一些,因为有了缓冲区就可以在未触发收集函数时一直生产来提高效率。
2 设置BufferOverflow.DROP_OLDEST 删除老的数据模式
 private fun testFlowBufferOverflow2() {
        runBlocking {
            val cosTime = measureTimeMillis {
                (1..5).asFlow()
                    .onEach {
                        delay(100)
                        println("product data: $it")
                    }.buffer(2, BufferOverflow.DROP_OLDEST)
                    .collect {
                        delay(700)
                        println("collect: $it")
                    }
            }
            println("耗时:${cosTime}")
        }
    }
运行结果
product data: 1
product data: 2
product data: 3
product data: 4
product data: 5
collect: 1
collect: 4
collect: 5
耗时:2264
可以看到,这里收集器只收集到了1、4、5三个元素
原因分析:
生产完1之后,发现收集器还未到触发时机,因为生产完1只需要耗费100毫秒,但是收集一个数据需要700毫秒,所以生产完一个数据之后还有600毫秒是剩余时间,也不会触发收集,这时flow发现设置了缓存区,缓存区可缓存数量为2,则开始生产2、3,等缓存区也被生产满了之后,这时发现收集器还不需要触发,继续生产,因为缓存策略设置为删除老的数据,这时程序发现还有新的数据待生产,则继续生产新数据,而将缓存中的数据清除,所以这里看到又生产4 、5,将4、5又放入缓存区等待收集,最后1、2、3、4、5都生产完毕之后,等待700毫秒收集器开始收集,将未放在缓存区内的数据1收集后,又开始收集4、5,这时现象就能看到只收集了1、4、5了。
3 设置缓冲区为BufferOverflow.DROP_LATEST 丢弃最后产生的数据 也就是丢弃新数据 保留老的数据
 private fun testFlowDropLatest() {
        runBlocking {
            (1..5).asFlow()
                .onEach {
                    delay(100)
                    println("product data: $it")
                }
                .buffer(2, BufferOverflow.DROP_LATEST)
                .collect {
                    delay(700)
                    println("collect: $it")
                }
        }
    }
运行结果
product data: 1
product data: 2
product data: 3
product data: 4
product data: 5
collect: 1
collect: 2
collect: 3
这段代码明显和上一段代码有很大区别,在同样缓存区数量为2的情况下,这次最终收集结果中却包含了2、3数据 丢弃了4、5 数据。这就是drop_latest的作用,在生产过程中,会在缓存区中缓存指定大小的数据条目,如果还有新数据在不断地生产,则会丢弃掉最新生产的数据,直到收集器收集结束。
7 conflate 合并功能
在某些场景下,流的执行,其实用户只想关心开始和结束的数据,并不关心中间的过程数据,这个时候就可以利用conflate合并功能
private fun testFlowConflate() {
        runBlocking {
            val cosTime = measureTimeMillis {
                (1..5).asFlow().onEach {
                    delay(100)
                    println("product data: $it")
                }.conflate()
                    .collect{
                        delay(700)
                        println("collect: $it")
                    }
            }
            println("cosTime: $cosTime")
        }
    }
运算结果
product data: 1
product data: 2
product data: 3
product data: 4
product data: 5
collect: 1
collect: 5
cosTime: 1557
会发现上述运算结果,收集器中只收集了开始和结尾的数据。
该模式其实类似于给Flow设置缓存区策略为BufferOverflow.DROP_OLDEST,且缓存区尺寸为0,和设置合并功能最终结果是一致的。
8 Flow 异常处理
未捕获异常时
private fun testCatchException() {
        runBlocking {
            (1..5).asFlow().onEach {
                if (it == 4){
                    throw Exception("test exception")
                }
                delay(100)
                println("product data: $it")
            }
                .onCompletion {
                    println("onCompletion")
                }
                .collect {
                    println("collect: $it")
                }
        }
    }
运行结果
product data: 1
collect: 1
product data: 2
collect: 2
product data: 3
collect: 3
onCompletion
Exception in thread “main” java.lang.Exception: test exception
…
不进行任何异常处理的情况,在执行了onCompletion之后 会抛出相应的异常信息
onCompletion 中也可以捕获到异常信息
private fun testCatchException() {
        runBlocking {
            (1..5).asFlow().onEach {
                if (it == 4){
                    throw Exception("test exception")
                }
                delay(100)
                println("product data: $it")
            }
                .onCompletion { cause ->
                    if (cause != null) {
                        println("flow completed exception")
                        println("异常信息:${cause.message}")
                    }else {
                        println("onCompletion")
                    }
                }
                .collect {
                    println("collect: $it")
                }
        }
    }
运行结果
product data: 1
collect: 1
product data: 2
collect: 2
product data: 3
collect: 3
flow completed exception
异常信息:test exception
如果需要捕获异常可以使用catch
private fun testCatchException() {
        runBlocking {
            (1..5).asFlow().onEach {
                if (it == 4){
                    throw Exception("test exception")
                }
                delay(100)
                println("product data: $it")
            }
                .onCompletion { cause ->
                    if (cause != null) {
                        println("flow completed exception")
                        println("异常信息:${cause.message}")
                    }else {
                        println("onCompletion")
                    }
                }.catch { ex ->
                    println("catch exception: ${ex.message}")
                }
                .collect {
                    println("collect: $it")
                }
        }
    }
运行结果
product data: 1
collect: 1
product data: 2
collect: 2
product data: 3
collect: 3
flow completed exception
异常信息:test exception
catch exception: test exception
使用catch之后,就不会报异常了
如果将catch和onCompletion更换下位置,把catch放在前面,则不会影响下游的onCompletion
private fun testCatchException() {
        runBlocking {
            (1..5).asFlow().onEach {
                if (it == 4) {
                    throw Exception("test exception")
                }
                delay(100)
                println("product data: $it")
            }.catch { ex ->
                println("catch exception: ${ex.message}")
            }.onCompletion { cause ->
                if (cause != null) {
                    println("flow completed exception")
                    println("异常信息:${cause.message}")
                } else {
                    println("onCompletion")
                }
            }.collect {
                println("collect: $it")
            }
        }
    }
执行结果
product data: 1
collect: 1
product data: 2
collect: 2
product data: 3
collect: 3
catch exception: test exception
onCompletion
retry/ retryWhen 异常重试机器
retry 可以设置异常重试次数,根据异常信息可以判断是否要触发异常重试
private fun testCatchException() {
        runBlocking {
            (1..5).asFlow().onEach {
                if (it == 4) {
                    throw Exception("test exception")
                }
                delay(100)
                println("product data: $it")
            }.retry(2) {
                it.message == "test exception"
            }.catch { ex ->
                println("catch exception: ${ex.message}")
            }.onCompletion { cause ->
                if (cause != null) {
                    println("flow completed exception")
                    println("异常信息:${cause.message}")
                } else {
                    println("onCompletion")
                }
            }.collect {
                println("collect: $it")
            }
        }
    }
运行结果
product data: 1
collect: 1
product data: 2
collect: 2
product data: 3
collect: 3
product data: 1
collect: 1
product data: 2
collect: 2
product data: 3
collect: 3
product data: 1
collect: 1
product data: 2
collect: 2
product data: 3
collect: 3
catch exception: test exception
onCompletion
retryWhen用法
 private fun testCatchException() {
        runBlocking {
            (1..5).asFlow().onEach {
                if (it == 4) {
                    throw Exception("test exception")
                }
                delay(100)
                println("product data: $it")
            }.retryWhen { cause, attempt ->
                cause.message == "test exception" && attempt < 2
            }.catch { ex ->
                println("catch exception: ${ex.message}")
            }.onCompletion { cause ->
                if (cause != null) {
                    println("flow completed exception")
                    println("异常信息:${cause.message}")
                } else {
                    println("onCompletion")
                }
            }.collect {
                println("collect: $it")
            }
        }
    }
执行结果
product data: 1
collect: 1
product data: 2
collect: 2
product data: 3
collect: 3
product data: 1
collect: 1
product data: 2
collect: 2
product data: 3
collect: 3
product data: 1
collect: 1
product data: 2
collect: 2
product data: 3
collect: 3
catch exception: test exception
onCompletion
retry 和 retryWhen区别目前看只是设置重试条件的方式不同,在作用上目前看是一致的。
9 Flow的线程切换
flowOn 可以实现流生产或转换等环节的线程切换功能,例如:
private fun testFlowOn() {
        runBlocking {
            (1..5).asFlow()
                .onEach {
                    printWithThreadInfo("product data: $it")
                }.flowOn(Dispatchers.IO)
                .map {
                    printWithThreadInfo("$it to string")
                    "String: $it"
                }.flowOn(mDispatcher)
                .onCompletion {
                    mDispatcher.close()
                }
                .collect{
                    printWithThreadInfo("collect: $it")
                }
        }
    }
运行结果
DefaultDispatcher-worker-1 : product data: 1
DefaultDispatcher-worker-1 : product data: 2
DefaultDispatcher-worker-1 : product data: 3
DefaultDispatcher-worker-1 : product data: 4
DefaultDispatcher-worker-1 : product data: 5
pool-1-thread-1 : 1 to string
pool-1-thread-1 : 2 to string
pool-1-thread-1 : 3 to string
pool-1-thread-1 : 4 to string
pool-1-thread-1 : 5 to string
main : collect: String: 1
main : collect: String: 2
main : collect: String: 3
main : collect: String: 4
main : collect: String: 5
上述结果中可以看出,流在生产环节是受到第一个flowOn影响,将整个生产环节运行在了默认的io线程当中,而map转换时又受到了第二个flowOn的影响,运行在了线程池分配的工作线程中,最后的收集工作还是运行在主线程中。
10 Flow 中间转换操作符
中间操作符这块,flow跟其他java流类似,其中相同用法的操作符有很多,例如我们经常会用到的map转换功能,filter 过滤, take 提取等等,这里我们罗列下flow的操作符把,如下:
- map
- transform
- onEach
- filter
- drop/ dropWhile
- take
- zip
- combine
- flattenConcat / flattenMerge
- flatMapMerge / flatMapContact
- flatMapLatest
map 转换操作符
map 让流或集合中的元素从一种类型转换成一种最新的类型输出到下游
 private fun testMap() {
        runBlocking {
            (1..5).asFlow().map { "string $it" }
                .collect{
                    println(it)
                }
        }
    }
运行结果
string 1
string 2
string 3
string 4
string 5
transform 转换操作符
transform 也是转换,与map转换不同,transform转换是通过调用emit来完成转换的,并且一次转换过程中,可以调用多次emit来转换出多个结果。
private fun testTransform() {
        runBlocking {
            (1..5).asFlow()
                .transform {
                    emit(it * 2)
                    delay(100)
                    emit("String: $it")
                }
                .collect {
                    println(it)
                }
        }
    }
运行结果
2
String: 1
4
String: 2
6
String: 3
8
String: 4
10
String: 5
onEach 遍历操作符
遍历流中的元素
 private fun testOnEach() {
        runBlocking {
            (1..5).asFlow()
                .onEach {
                    println("onEach: $it")
                }
                .collect {
                    println(it)
                }
        }
    }
运行结果
onEach: 1
1
onEach: 2
2
onEach: 3
3
onEach: 4
4
onEach: 5
5
filter 过滤操作符
过滤出流中想要的元素
  private fun testFilter() {
        runBlocking {
            (1..5).asFlow()
                .filter { it % 2 ==0 }
                .collect{
                    println(it)
                }
        }
    }
运行结果
2
4
drop / dropWhile 过滤操作符
过滤掉前几个元素
 private fun testDrop() {
        runBlocking {
            (1..5).asFlow()
                .drop(2) // 删除前两个元素
                .collect{
                    println(it)
                }
        }
    }
运行结果
3
4
5
dropWhile 根据设置的条件删除元素
 runBlocking {
            (1..5).asFlow()
                .dropWhile { it < 4 } // 删除小于4的元素
                .collect{
                    println(it)
                }
        }
运行结果
4
5
take 过滤操作符
取多少个emit发射的元素,也就是说设置需要获取流中元素的数量
 private fun testTake() {
        runBlocking {
            listOf(1,2,3,4,5).asFlow().take(3).collect{
                println(it)
            }
        }
    }
运行结果
1
2
3
zip 合并操作符
zip 是可以将2个flow进行合并的操作符, 合并完最终结果会以数量少的流元素个数作为最终合并后流的个数
 private fun testZip() {
        // 合并完最终结果会以数量少的流元素个数作为最终合并后流的个数
        runBlocking {
            val flowA = (1..6).asFlow()
            val flowB = flowOf("one", "two", "three", "four", "five").onEach { delay(200) }
            flowA.zip(flowB) { a, b -> "$a and $b"}
                .collect {
                    println(it)
                }
        }
        println("----------------------------------")

        runBlocking {
            val flowA = (1..6).asFlow()
            val flowB = flowOf("one", "two", "three", "four", "five","six", "seven").onEach { delay(200) }
            flowA.zip(flowB) { a, b -> "$a and $b"}
                .collect {
                    println(it)
                }
        }
    }
运行结果
1 and one
2 and two
3 and three
4 and four
5 and five
----------------------------------
1 and one
2 and two
3 and three
4 and four
5 and five
6 and six
combine 合并操作符
这个合并和前面的zip不太一样,zip会每个去对应两个流内的元素,而combine则不一样,combine会每次发射一个自己最新的元素来和flowB的元素进行合并,发射节奏不取决于flowB的节奏,而是取决于flowA自身的发射节奏。
该模式会多出很多冗余配对,目前没有想到该合并方式的使用场景。如果后续想到了,或者大家知道的话可以留言或私信我。
private fun testCombine() {
        runBlocking {
            // 每次合并时flowA 会发出新的item来和flowB进行合并
            val flowA = (1..5).asFlow().onEach { delay(100) }
            val flowB = flowOf("one", "two", "three", "four", "five").onEach { delay(200) }
            flowA.combine(flowB) {a, b -> "$a and $b"}
                .collect{
                    println(it)
                }
        }
    }
运行结果
1 and one
2 and one
3 and one
4 and two
5 and two
5 and three
5 and four
5 and five
flattenConcat 合并操作符
flattenConcat 可以将多个流拼接后,将其内部元素扁平拆解为类似一个流的效果,并且按照流的顺序,相当于流与流的简单拼接,例如:
private fun testFlattenConcat() {
        runBlocking {
            val flowA = (1..5).asFlow()
            val flowB = flowOf("one", "two", "three", "four", "five").onEach { delay(1000) }
            flowOf(flowA,flowB)
                .flattenConcat() // 拆解每个流中的元素,使flowA flowB中的元素扁平的展开
                .collect{ println(it) }
        }
    }
运行结果
1
2
3
4
5
one
two
three
four
five
flattenMerge 合并操作符
flattenMerge 对于合并流的对收集流规则的设置,主要是对并发路数的控制,内部可以设置并发路数,如果并发路数为1,则和flattenConcat没有任何区别。例子如下:
private fun testFlattenMarge() {
        runBlocking {
            val flowA = (1..5).asFlow().onEach { delay(100) }
            val flowB = flowOf("one", "two", "three", "four", "five").onEach { delay(200) }
            flowOf(flowA,flowB)
                .flattenMerge(2)
                .collect{ println(it) }
        }
    }
运行结果
1
one
2
3
two
4
5
three
four
five
flatMapMerge 转换合并操作符
flatMapMerge是先执行map转换,后直接合并处理,例:
private fun testFlatMapMerge() {
        runBlocking {
            (1..5).asFlow()
                .flatMapMerge {
                    flow {
                        emit(it)
                        delay(1000)
                        emit("string: $it")
                    }
                }.collect{ println(it) }
        }
    }
运行结果
1
2
3
4
5
string: 1
string: 2
string: 3
string: 4
string: 5
flatMapConcat 转换合并操作符
flatMapConcat 是map之后直接拼接,对比flatMapMerge来说,flatMapConcat是针对流的拼接,flatMapMerge是针对流元素的合并。从运行结果上就能看出来区别。
private fun testFlatMapConcat() {
        runBlocking {
            (1..5).asFlow()
                .flatMapConcat {
                    flow {
                        emit(it)
                        delay(1000)
                        emit("string: $it")
                    }
                }.collect{ println(it) }
        }
    }
运行结果
1
string: 1
2
string: 2
3
string: 3
4
string: 4
5
string: 5
flatMapLatest 合并操作符
当发射了新值以后,上一个flow会被自动取消掉。
  private fun testFlatMapLatest() {
        runBlocking {
            (1..5).asFlow().onEach { delay(100) }
                .flatMapLatest {
                    flow {
                        println("begin flatMapLatest $it")
                        delay(200)
                        emit("string: $it")
                        println("end flatMapLatest $it")
                    }
                }.collect {
                    println(it)
                }
        }
    }
运行结果
begin flatMapLatest 1
begin flatMapLatest 2
begin flatMapLatest 3
begin flatMapLatest 4
begin flatMapLatest 5
end flatMapLatest 5
string: 5


 4992
4992

 被折叠的 条评论
为什么被折叠?
被折叠的 条评论
为什么被折叠?
 到【灌水乐园】发言


