


好久没有更新了,原谅自己放了个假最近又在赶进度,所以。。。更新的内容是很靠后的第八章,因为最近工作要用就先跳了,后面会更新笔记编号。。。加油加油!
在二值图像中寻找轮廓
void cv::findContours ( InputOutputArray image,
OutputArrayOfArrays contours,
OutputArray hierarchy,
int mode,
int method,
Point offset = Point()
)
image: 输入图像,需为8位单通道图像,图像非0像素视为1。 可以用compare(), imrange(), threshold(), adaptivethreshold(), canny()等函数创建,注意:此函数会在提取图像轮廓的同时修改图像内容。
If mode equals to RETR_CCOMP or RETR_FLOODFILL, the input can also be a 32-bit integer image of labels (CV_32SC1).
contours: 检测到的轮廓,每个轮廓存储为一个点向量,即用point类型的vector,例如可为类型vector >。
hierarchy: 可选的输出向量,包含图像的拓扑信息。 每个轮廓contours[i],
hierarchy[i][0] , 后一个轮廓,
hierarchy[i][1] , 前一个轮廓,
hierarchy[i][2] , 父轮廓,
hierarchy[i][3], 内嵌轮廓的索引编号。
如果没有对应项,hierarchy[i]中的对应项设为负数。
mode: 检索模式,可选模式包括
RETR_EXTERNAL: 只监测最外层轮扩。hierarchy[i][2] = hierarchy[i][3] = -1
RETR_LIST: 提取所有轮廓,并放置在list中。检测的轮廓不建立等级关系。
RETR_CCOMP: 提取所有轮廓,并将其组织为双层结构,顶层为联通域的外围边界,次层为空的内层边界。
RETR_TREE: 提取所有轮廓,并重新建立网状的轮廓结构。
method: 轮廓的近似办法,包括
CHAIN_APPROX_NONE: 获取每个轮廓的每个像素,相邻两点像素位置差不超过1,max(abs(x1-x2),abs(y1-y2)) == 1
CHAIN_APPROX_SIMPLE: 压缩水平方向,垂直方向,对角线方向的元素,只保留该方向的终点坐标
CHAIN_APPROX_TC89_LI /CHAIN_APPROX_TC89_KCOS: 使用Teh-Chinl链逼近算法中的一个
[135] C-H Teh and Roland T. Chin. On the detection of dominant points on digital curves. Pattern Analysis and Machine Intelligence, IEEE Transactions on, 11(8):859–872, 1989.
offSet: 每个轮廓点的可选偏移量,默认Point(), 当ROI图像中找出的轮廓需要在整个图中进行分析时,可利用这个参数。
绘制轮廓
void cv::drawContours ( InputOutputArray image,
InputArrayOfArrays contours,
int contourIdx,
const Scalar & color,
int thickness = ,
int lineType = LINE_8,
InputArray hierarchy = noArray(),
int maxLevel = INT_MAX,
Point offset = Point()
)
image: 目标图像
contours: 输入轮廓,每个轮廓存储为一个点向量
contourIdx: 需要绘制的轮廓的编号,如果为负,绘制所有轮廓
color: 轮廓颜色
thickness: 轮廓线条粗细度,如果为负值(如thickness==cv_filled),绘制在轮廓内部
lineType: 线条类型
8: 8连通线型
4: 4连通线型
LINE_AA (OpenCV2: CV_AA): 抗锯齿线型
hierarchy: 可选层次结构
maxLevel: 绘制轮廓的最大等级
offset: 可选轮廓偏移参数
事例程序1
#include
#include
#include
// main
int main( int argc, char** argv )
{
// loading image
cv::Mat srcImage = cv::imread("1.jpg", );
imshow("original image", srcImage);
// initialize result image
cv::Mat dstImage = cv::Mat::zeros(srcImage.rows, srcImage.cols, CV_8UC3);
// thresholding image
srcImage = srcImage > ;
imshow("thresholding image", srcImage);
// finding contours
std::vector<:vector> > contours;
std::vector<:vec4i> hierarchy;
// for opencv 2
// cv::findContours(srcImage, contours, hierarchy, CV_RETR_CCOMP, CV_CHAIN_APPROX_SIMPLE);
// for opencv 3
cv::findContours(srcImage, contours, hierarchy, cv::RETR_CCOMP, cv::CHAIN_APPROX_SIMPLE);
// iterate through all levels, and draw contours in random color
int index = ;
for (; index>=; index = hierarchy[index][]) {
cv::Scalar color(rand()&, rand()&, rand()&);
// for opencv 2
// cv::drawContours(dstImage, contours, index, color, CV_FILLED, 8, hierarchy);
// for opencv 3
cv::drawContours(dstImage, contours, index, color, cv::FILLED, , hierarchy);
imshow("contours", dstImage);
cv::waitKey();
}
cv::imwrite("result.jpg", dstImage);
return ;
}
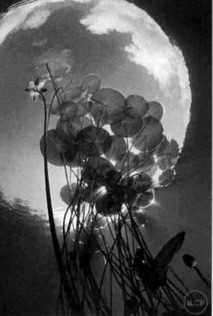
1.jpg
result.jpg

事例程序2
#include
#include
#include
#include
#define WINDOW_NAME1 "original image"
#define WINDOW_NAME2 "contours"
// global variables
cv::Mat g_srcImage;
cv::Mat g_grayImage;
cv::Mat g_cannyMat_output;
int g_nThresh = ;
int g_nThresh_max = ;
cv::RNG g_rng();
std::vector<:vector> > g_vContours;
std::vector<:vec4i> g_vHierarchy;
// functions
void on_ThreshChange(int, void*);
// main
int main( int argc, char** argv )
{
// change the text color of console
system("color 1F");
// loading image
g_srcImage = cv::imread("1.jpg", );
if (!g_srcImage.data){
std::cerr << "ERROR while loading image." << std::endl;
return false;
}
// convert to gray-scale and blur
cv::cvtColor(g_srcImage, g_grayImage, cv::COLOR_BGR2GRAY);
cv::blur(g_grayImage, g_grayImage, cv::Size(,));
// create window
cv::namedWindow(WINDOW_NAME1, cv::WINDOW_AUTOSIZE);
imshow(WINDOW_NAME1, g_srcImage);
// create tracker bar
cv::createTrackbar("Canny Threshold", WINDOW_NAME1, &g_nThresh, g_nThresh_max, on_ThreshChange);
on_ThreshChange(, );
cv::waitKey();
return ;
}
void on_ThreshChange(int, void*)
{
cv::Canny(g_grayImage, g_cannyMat_output, g_nThresh, g_nThresh*, );
cv::findContours(g_cannyMat_output, g_vContours, g_vHierarchy, cv::RETR_TREE, cv::CHAIN_APPROX_SIMPLE);
cv::Mat drawing = cv::Mat::zeros(g_cannyMat_output.size(), CV_8UC3);
for (int i = ; i
cv::Scalar color(g_rng.uniform(, ), g_rng.uniform(, ), g_rng.uniform(, ));
cv::drawContours(drawing, g_vContours, i, color, , , g_vHierarchy);
}
imshow(WINDOW_NAME2, drawing);
}
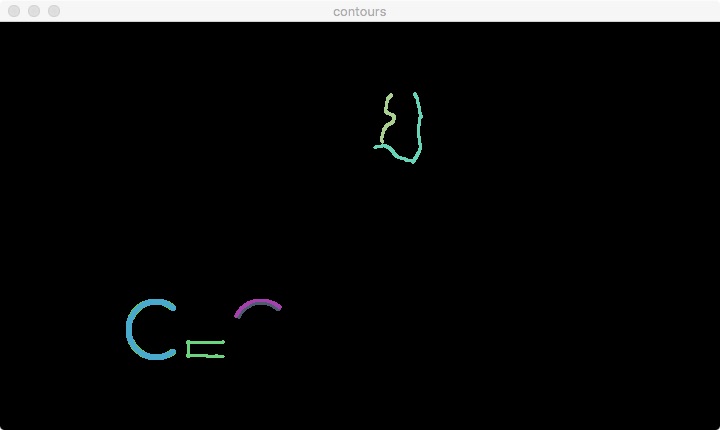
结果图:


图像显示 imshow()[OpenCV 笔记5]
void imshow(const string& winname InputArray mat); winname 窗口表识名称 mat 需要显示的图像.InputArray类型,声明如下 ...
实例:图形绘制[OpenCV 笔记15]
DrawShapes.cxx # include "DrawShapes_utils.h" #define WINDOW_NAME1 "Painting 1" ...
OpenCV基本架构[OpenCV 笔记0]
最近正在系统学习OpenCV,将不定期发布笔记,主要按照毛星云的的顺序学习,会参考官方教程和文档.学习工具是Xcode+CMake,会对书中一部分内容更正,并加入 ...
访问图像中的像素[OpenCV 笔记16]
再更一发好久没更过的OpenCV,不过其实写到这个部分对计算机视觉算法有所了解的应该可以做到用什么查什么了,所以后面可能会更的慢一点吧,既然开了新坑,还是机器学习更有研究价值吧... 图像在内存中的存 ...
Core模块其他常用知识点[OpenCV 笔记14]
Matx 轻量级的Mat,必须在使用前规定好大小,比如一个2x3的float型的Matx,可以声明为Matx23f Vec Vec是Matx的一个派生类,是一个一维的Matx,跟vector很相似.在 ...
颜色空间转换 cvtColor()[OpenCV 笔记13]
void cvtColor(InputArray src, OutputArray dst, ) src: 输入图像 dst: 输出图像 code: 颜色空间转换标识符 OpenCV2的CV_前缀宏命 ...
图像储存容器Mat[OpenCV 笔记11]
IplImage 与 Mat IplImage是OpenCV1中的图像存储结构体,基于C接口创建.在退出之前必须release,否则就会造成内存泄露.在一些只能使用C语言的嵌入式系统中,不得不使用. ...
鼠标操作[OpenCV 笔记10]
) winname 窗口名字 onMouse 指定窗口每次鼠标事件发生的时候,被调用的函数指针.函数的原型应为void Foo(int event, int x, int y, int flags, ...
滑动条 Trackbar[OpenCV 笔记9]
OpenCV中没有实现按钮的功能,我们可以利用滑动条来实现按钮功能. , ); trackbarname 轨迹条的名字. winname 窗口的名字,轨迹条会依附在这个窗口上. value 一个指向整 ...
随机推荐
[sqoop1.99.6] 基于1.99.6版本的一个小例子
1.创建mysql数据库.表.以及测试数据mysql> desc test;+-------+-------------+------+-----+---------+------------- ...
ECMAScript 6学习笔记(二):let和块级作用域
同步发布于:https://mingjiezhang.github.io/(转载请说明此出处). ES6中加入了let,也让JavaScript拥有了块级作用域. 没有块级作用域的JavaScript ...
xhEditor struts2实现图片上传
xhEditor的环境搭建请参考http://blog.youkuaiyun.com/itmyhome1990/article/details/38422255,这时我们打开图片功能 是没有上传按钮的 如果想要出 ...
SpringBoot工作机制
1:前言 回顾探索Spring框架 1.spring ioc IoC其实有两种方式,一种就是DI,而另一种是DL,即Dependency Lookup(依赖查找),前者是当前软件实体被动接受其依赖的其 ...
NTFS文件系统详细分析
NTFS文件系统详细分析 第一部分 什么是NTFS文件系统 想要了解NTFS,我们首先应该认识一下FAT.FAT(File Allocation Table)是“文件分配表”的意思.对我们来说 ...
D - Game Prediction
Suppose there are M people, including you, playing a special card game. At the beginning, each playe ...
Win32 API编程:使用CreateProcess创建新进程
#include #include #include int main(int argc, char ...
Centos7 服务 service 设置命令 systemctl 用法 (替代service 和 chkconfig)
在Centos 中 systemctl 是设置系统服务的命令,即 service , 它融合之前service和chkconfig的功能于一体. 可以使用它永久性或只在当前会话中启用/禁用服务 ...
Python中正则模块re.compile、re.match及re.search函数用法
import rehelp(re.compile)'''输出结果为:Help on function compile in module re: compile(pattern, flags=0) C ...


 1321
1321

 被折叠的 条评论
为什么被折叠?
被折叠的 条评论
为什么被折叠?
 到【灌水乐园】发言


