


 本文详细介绍了如何在Spring Boot项目中集成RabbitMQ,包括配置依赖、设置连接参数、定义消息队列、实现消息发送与接收,以及通过测试验证功能。
前提 已经安装RabbitMQ
1、配置pom文件,添加spring-boot-starter-amqp的支持
<dependency>
    <groupId>org.springframework.boot</groupId>
    <artifactId>spring-boot-starter-amqp</artifactId>
</dependency>
2、配置application.properties文件
配置rabbitmq的安装地址、端口以及账户信息
spring.application.name=spirng-boot-rabbitmq
spring.rabbitmq.host=127.0.0.1
spring.rabbitmq.port=5672
spring.rabbitmq.username=guest
spring.rabbitmq.password=guest
3、配置消息队列
@Configuration
public class RabbitConfig {
    @Bean
    public Queue queue() {
        return new Queue("q_hello_world");
    }
}
4、发送者
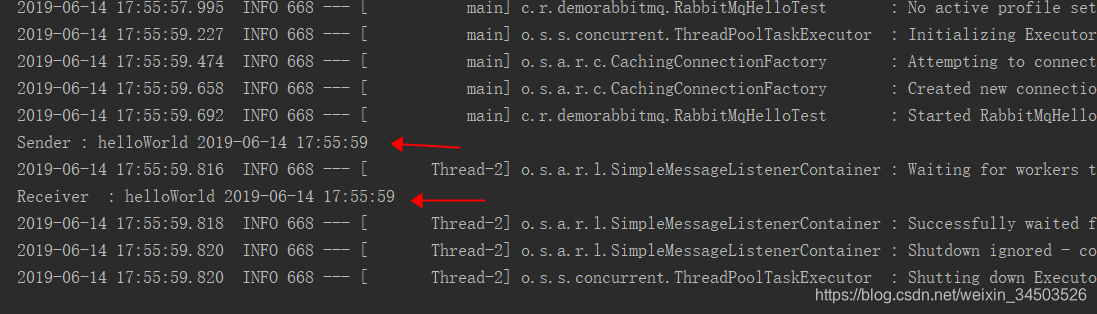
@Component
public class HelloSender {
    @Autowired
    private AmqpTemplate rabbitTemplate;

    public void send() {
        String date = new SimpleDateFormat("yyyy-MM-dd HH:mm:ss").format(new Date());//24小时制
        String context = "helloWorld " + date;
        System.out.println("Sender : " + context);
        this.rabbitTemplate.convertAndSend("q_hello_world", context);
    }

}
5、接收者
@Component
@RabbitListener(queues = "q_hello_world")
public class HelloReceiver {
    @RabbitHandler
    public void process(String hello) {
        System.out.println("Receiver  : " + hello);
    }
}
6、测试
@RunWith(SpringRunner.class)
@SpringBootTest
public class RabbitMqHelloTest {
    @Autowired
    private HelloSender helloSender;

    @Test
    public void hello() throws Exception {
        helloSender.send();
    }
}
控制台日志输出


 50万+
50万+

 被折叠的 条评论
为什么被折叠?
被折叠的 条评论
为什么被折叠?
 到【灌水乐园】发言


