


 本文深入讲解SpringBoot配置机制,包括自定义属性配置、多环境配置及YAML文件使用,帮助开发者掌握灵活配置技巧。
为了让Spring Boot更好的生成配置元数据文件,我们需要添加如下依赖(不然没有提示就苦逼了),该依赖只会在编译时调用,所以不用担心会对生产造成影响…
<dependency>
    <groupId>org.springframework.boot</groupId>
    <artifactId>spring-boot-configuration-processor</artifactId>
    <optional>true</optional>
</dependency>
自定义属性配置
Spring Boot提供的SpringApplication类会搜索并加载application.properties文件来获取配置属性值。
winner.name = winner_0715
winner.address = beijing
不需要其他配置,我们只需要通过 @Value("${属性名}") 注解来加载对应的配置属性,
@Value("${winner.name}")
private String name;
@Value("${winner.address}")
private String address;
自定义文件配置
定义一个名为demo.properties的资源文件,自定义配置文件的命名不强制 application 开头
winner.name=winner_0715
winner.address=beijing
winner.email=winner_0715@163.com
其次定义PropertiesDemo.java文件,用来映射我们在demo.properties中的内容。
package com.winner.service;

import org.springframework.boot.context.properties.ConfigurationProperties;
import org.springframework.context.annotation.PropertySource;
import org.springframework.stereotype.Component;

/**
 * @author winner_0715
 * @description:
 * @date 2018/12/3
 */
@Component
@PropertySource("classpath:demo.properties")
@ConfigurationProperties(prefix = "winner")
public class PropertiesDemo {
    private String name;
    private String address;
    private String email;

    public String getName() {
        return name;
    }

    public void setName(String name) {
        this.name = name;
    }

    public String getAddress() {
        return address;
    }

    public void setAddress(String address) {
        this.address = address;
    }

    public String getEmail() {
        return email;
    }

    public void setEmail(String email) {
        this.email = email;
    }

    @Override
    public String toString() {
        final StringBuilder sb = new StringBuilder("PropertiesDemo2{");
        sb.append("name='").append(name).append('\'');
        sb.append(", address='").append(address).append('\'');
        sb.append(", email='").append(email).append('\'');
        sb.append('}');
        return sb.toString();
    }
}
接下来在 PropertiesController用来注入 PropertiesDemo测试我们编写的代码
package com.winner.web;

import com.winner.service.PropertiesDemo1;import org.springframework.beans.factory.annotation.Autowired;
import org.springframework.web.bind.annotation.RequestMapping;
import org.springframework.web.bind.annotation.RequestMethod;
import org.springframework.web.bind.annotation.RestController;

/**
 * @author winner_0715
 * @description:
 * @date 2018/12/3
 */
@RestController
public class PropertiesController {

    @Autowired
    private PropertiesDemo propertiesDemo;

    @RequestMapping(value = "/properties/get", method = RequestMethod.GET)
    public PropertiesDemo getPropertiesDemo() {
        return propertiesDemo;
    }

}
多环境化配置
在真实的应用中,常常会有多个环境(如:开发,测试,生产等),不同的环境相关的配置不同,如数据库连接,第三方接口url,这个时候就需要用到spring.profile.active的强大功能了,它的格式为 application-{profile}.properties,这里的 application 为前缀不能改,{profile}是我们自己定义的。对于多环境的配置,各种项目构建工具或是框架的基本思路是一致的,通过配置多份不同环境的配置文件,再通过打包命令指定需要打包的内容之后进行区分打包,Spring Boot也不例外,或者说更加简单。
在pom.xml中增加不同环境打包的配置:
<!-- 不同环境查找不同配置文件 -->
<profiles>
    <profile>
        <id>dev</id>
        <properties>
            <profiles.active>dev</profiles.active>
        </properties>
        <activation>
            <activeByDefault>true</activeByDefault>
        </activation>
    </profile>
    <profile>
        <id>beta</id>
        <properties>
            <profiles.active>beta</profiles.active>
        </properties>
    </profile>
    <profile>
        <id>prod</id>
        <properties>
            <profiles.active>prod</profiles.active>
            <maven.test.skip>true</maven.test.skip>
            <scope.jar>provided</scope.jar>
        </properties>
    </profile>
</profiles>
<build>
    <resources>
        <resource>
            <directory>src/main/resources</directory>
            <filtering>true</filtering>
            <excludes>
                <exclude>application-dev.properties</exclude>
                <exclude>application-beta.properties</exclude>
                <exclude>application-prod.properties</exclude>
            </excludes>
        </resource>
        <resource>
            <directory>src/main/resources</directory>
            <filtering>true</filtering>
            <includes>
                <include>application-${profiles.active}.properties</include>
                <include>application.properties</include>
            </includes>
        </resource>
    </resources>
    <plugins>
        <plugin>
            <groupId>org.springframework.boot</groupId>
            <artifactId>spring-boot-maven-plugin</artifactId>
            <configuration>
                <fork>true</fork>
            </configuration>
        </plugin>
    </plugins>
</build>
使用占位符,在打包时替换,首先在配置文件中增加:
spring.profiles.active=@profiles.active@
执行打包命令:
mvn package -Ptest
或者不使用profile的形式,通过 active 加载测试环境的配置。
java -jar ***.jar --spring.profiles.active=test
YAML文件
相对于属性文件,YAML 文件是一个更好的配置文件格式。Spring Boot 提供的 SpringApplication 类也提供了对 YAML 配置文件的支持。
创建application.yml 文件
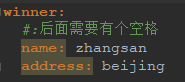
等价于
winner.name=zhangsan
winner.address=beijing


 2022
2022

 被折叠的 条评论
为什么被折叠?
被折叠的 条评论
为什么被折叠?
 到【灌水乐园】发言


