


 本文介绍如何使用 Spring Security 进行 Web 应用的安全控制。通过示例演示了配置 Spring Security 的过程,包括依赖引入、MVC 控制器及安全配置等步骤。并展示了不同页面的访问权限设置。

1.跟着spring官方给的guide做个demo,来学习spring security.
首先引入依赖:
dependencies {
    compile('org.springframework.boot:spring-boot-starter-web')
    compile('org.springframework.boot:spring-boot-starter-thymeleaf')
    compile('org.springframework.cloud:spring-cloud-starter-security')
    testCompile group: 'junit', name: 'junit', version: '4.12'
}
2.配置springmvc
package com.test.security;

import org.springframework.context.annotation.Configuration;
import org.springframework.web.servlet.config.annotation.ViewControllerRegistry;
import org.springframework.web.servlet.config.annotation.WebMvcConfigurer;

@Configuration
public class MvcConfig implements WebMvcConfigurer {


    public void addViewControllers(ViewControllerRegistry registry) {

        registry.addViewController("/home").setViewName("home");
        registry.addViewController("/").setViewName("home");
        registry.addViewController("/hello").setViewName("hello");
        registry.addViewController("/login").setViewName("login");
    }

}
3.配置spring security
package com.test.security;

import org.springframework.context.annotation.Bean;
import org.springframework.context.annotation.Configuration;
import org.springframework.security.config.annotation.web.builders.HttpSecurity;
import org.springframework.security.config.annotation.web.configuration.EnableWebSecurity;
import org.springframework.security.config.annotation.web.configuration.WebSecurityConfigurerAdapter;
import org.springframework.security.core.userdetails.User;
import org.springframework.security.core.userdetails.UserDetails;
import org.springframework.security.core.userdetails.UserDetailsService;
import org.springframework.security.provisioning.InMemoryUserDetailsManager;

@Configuration
@EnableWebSecurity
public class SecurityConfiguration extends WebSecurityConfigurerAdapter {


    protected void configure(HttpSecurity http) throws Exception {

        http.authorizeRequests()
                .antMatchers("/", "/home").permitAll()
                .anyRequest().authenticated()
                .and()
                .formLogin()
                .loginPage("/login")
                .permitAll()
                .and()
                .logout()
                .permitAll();
    }


    @Bean
    @Override
    public UserDetailsService userDetailsService() {
        UserDetails user =
                User.withDefaultPasswordEncoder()
                        .username("user")
                        .password("password")
                        .roles("USER")
                        .build();

        return new InMemoryUserDetailsManager(user);
    }
}
以上配置做了如下工作
- 除了“/”,”/home”(首页),”/login”(登录),”/logout”(注销),之外,其他路径都需要认证,以上4个path是允许所有人所有角色访问。
- 指定“/login”该路径为登录页面,当未认证的用户尝试访问任何受保护的资源时,都会跳转到“/login”,比如如果用户访问下面的hello页面时,也会跳转到/login.
- 默认指定“/logout”为注销页面
- 配置一个内存中的用户认证器,使用user/password作为用户名和密码,具有USER角色
4.项目的启动点
package com.test.security;

import org.springframework.boot.SpringApplication;
import org.springframework.boot.autoconfigure.SpringBootApplication;

@SpringBootApplication
public class application {


    public static void main(String[] args) {
        SpringApplication.run(application.class, args);

    }
}
5.接下来是要访问的页面,其中home.html,login.html是不受安全控制的页面;
而hello.html页面是受安全控制的。
home.html 主要是欢迎页面,并有个跳转链接到hello页面,但是hello页面需要安全验证
<!DOCTYPE html>
<html xmlns="http://www.w3.org/1999/xhtml" xmlns:th="http://www.thymeleaf.org" xmlns:sec="http://www.thymeleaf.org/thymeleaf-extras-springsecurity3">
<head>
    <title>Spring Security Example</title>
</head>
<body>
<h1>Welcome!</h1>
<p>Click <a th:href="@{/hello}">here</a> to see a greeting.</p>
</body>
</html>
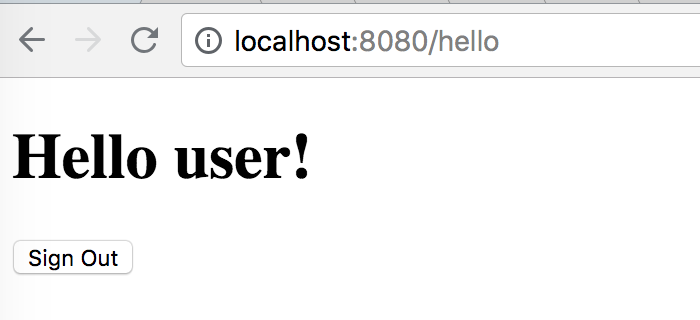
hello.html
<!DOCTYPE html>
<html xmlns="http://www.w3.org/1999/xhtml" xmlns:th="http://www.thymeleaf.org"
      xmlns:sec="http://www.thymeleaf.org/thymeleaf-extras-springsecurity3">
<head>
    <title>Hello World!</title>
</head>
<body>
<h1 th:inline="text">Hello [[${#httpServletRequest.remoteUser}]]!</h1>
<form th:action="@{/logout}" method="post">
    <input type="submit" value="Sign Out"/>
</form>
</body>
</html>
login.html
<!DOCTYPE html>
<html xmlns="http://www.w3.org/1999/xhtml" xmlns:th="http://www.thymeleaf.org"
xmlns:sec="http://www.thymeleaf.org/thymeleaf-extras-springsecurity3">
<head>
<title>Spring Security Example </title>
</head>
<body>
<div th:if="${param.error}">
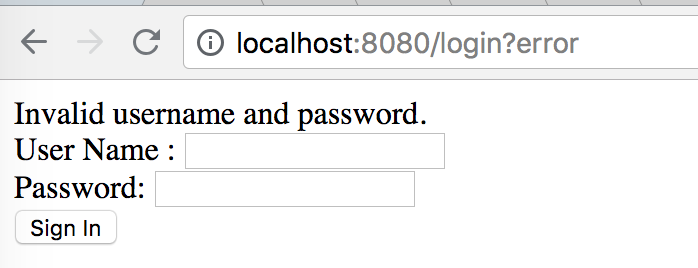
Invalid username and password.
</div>
<div th:if="${param.logout}">
You have been logged out.
</div>
<form th:action="@{/login}" method="post">
<div><label> User Name : <input type="text" name="username"/> </label></div>
<div><label> Password: <input type="password" name="password"/> </label></div>
<div><input type="submit" value="Sign In"/></div>
</form>
</body>
</html>
运行后运行结果如下:
登录http://localhost:8080/ 跳转到home页面
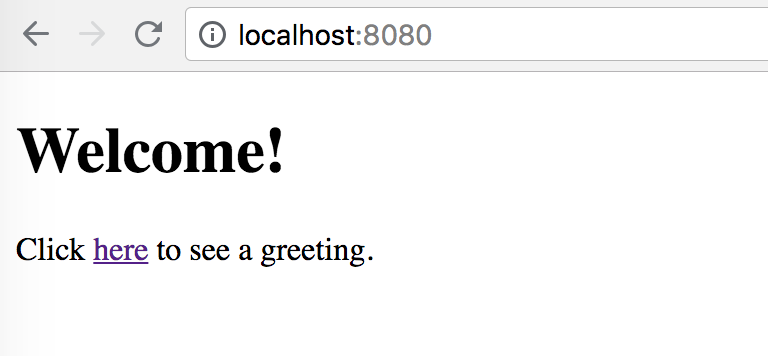
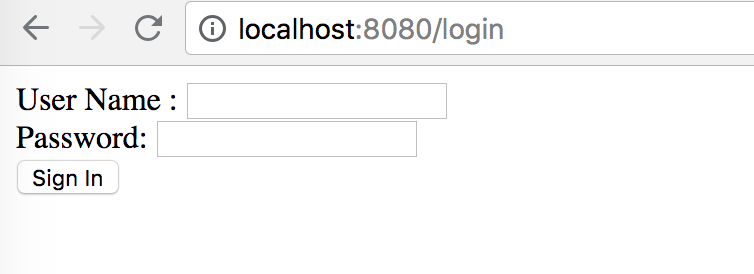
然后点击here要去往hello页面,点击here后跳转到以下要输入用户名和密码的页面,因为要访问hello页面是需要权限的。
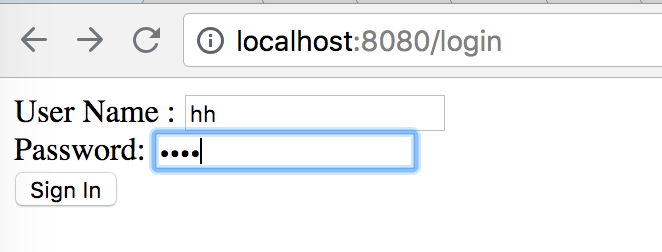
此时输入一个错误的用户名和密码,
点击登录,会爆出错误的信息如下:
如果输入正确的,用户名和密码,以上在SecurityConfiguration类中设置的user password,会出现以下页面:
然后点击sign out


 被折叠的 条评论
为什么被折叠?
被折叠的 条评论
为什么被折叠?
 到【灌水乐园】发言


