


 本文介绍了一个简单的Ajax实战案例,包括前端使用jQuery发起GET请求并处理服务器返回的数据,后端使用Servlet接收请求并返回响应。通过本例,读者可以了解Ajax的基本工作原理及其实现方式。

1.为什么要使用Ajax
优点: 局部刷新 提高用户体验
2.Ajax发出请求的demo
这里使用servlet 到后台
2.1使用到的技术
(1)jquery
(2)Ajax
(3)servlet
(4) 输出流 PrintWriter out = response.getWriter()
2.2 实现过程
2.2.1 前端
新建jsp页面
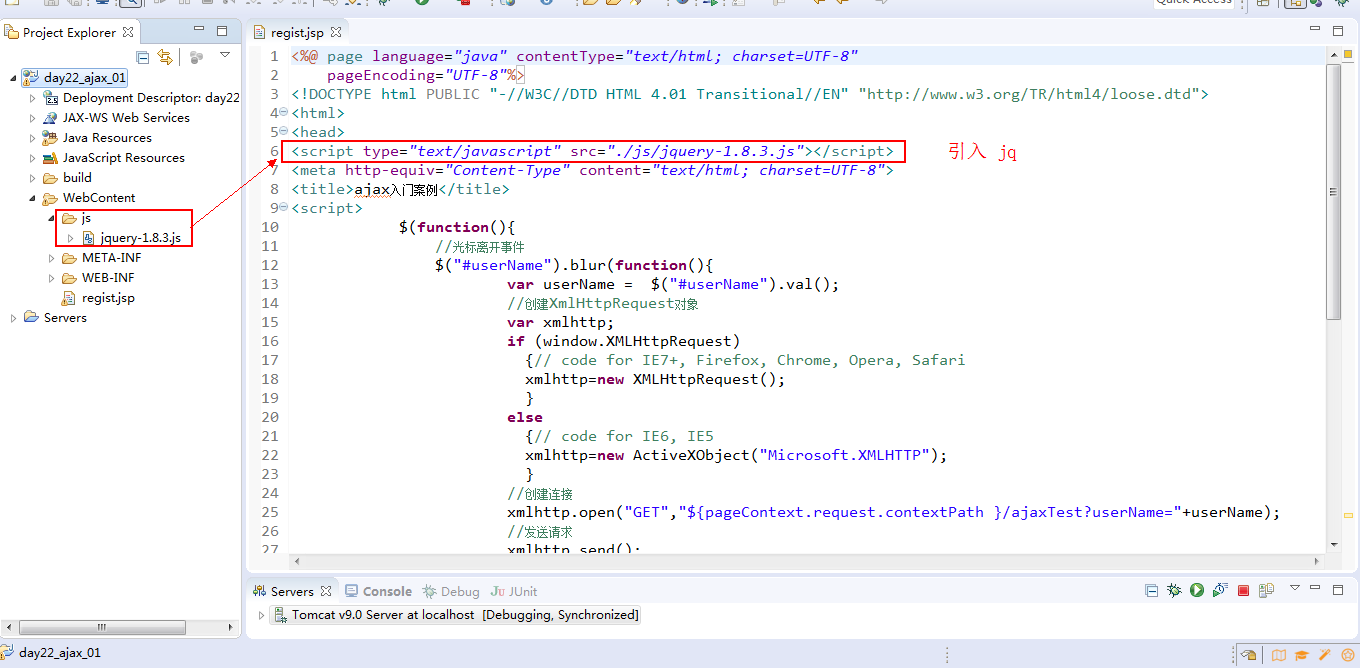
编写一个页面
<%@ page language="java" contentType="text/html; charset=UTF-8"
pageEncoding="UTF-8"%>
<!DOCTYPE html PUBLIC "-//W3C//DTD HTML 4.01 Transitional//EN" "http://www.w3.org/TR/html4/loose.dtd">
<html>
<head>
<script type="text/javascript" src="./js/jquery-1.8.3.js"></script>
<meta http-equiv="Content-Type" content="text/html; charset=UTF-8">
<title>ajax入门案例</title>
<script>
$(function(){
//光标离开事件
$("#userName").blur(function(){
var userName = $("#userName").val();
//创建XmlHttpRequest对象
var xmlhttp;
if (window.XMLHttpRequest)
{// code for IE7+, Firefox, Chrome, Opera, Safari
xmlhttp=new XMLHttpRequest();
}
else
{// code for IE6, IE5
xmlhttp=new ActiveXObject("Microsoft.XMLHTTP");
}
//创建连接
xmlhttp.open("GET","${pageContext.request.contextPath }/ajaxTest?userName="+userName);
//发送请求
xmlhttp.send();
//使用事件得到响应数据,并处理结果
xmlhttp.onreadystatechange=function(){
//xmlhttp.readyState==4 表示客户端请求一切正常
//xmlhttp.status==200 表示服务器端响应一切正常
//alert(xmlhttp.readyState);
//alert(xmlhttp.status);
if (xmlhttp.readyState==4 && xmlhttp.status==200){
//document.getElementById("Prompt").innerHTML=xmlhttp.responseText;//获得服务器响应正文
$("#Prompt").html(xmlhttp.responseText);//获得服务器响应正文
}
}
})
});
</script>
</head>
<body>
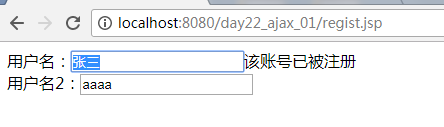
<!--http://localhost:8080/day22_ajax_01/regist.jsp -->
用户名:<input type="text" name="userName" id="userName"><span id="Prompt"></span><br />
用户名2:<input type="text" name="password" id="password" placeholder="比较框"><br />
</body>
</html>
2.2.2 后台
package cn.ma.ajax;
import java.io.IOException;
import java.io.PrintWriter;
import javax.servlet.ServletException;
import javax.servlet.http.HttpServlet;
import javax.servlet.http.HttpServletRequest;
import javax.servlet.http.HttpServletResponse;
/**
* 光标离开 发出Ajax请求
* http://localhost:8080/day22_ajax_01/regist.jsp
*/
public class AjaxTest extends HttpServlet {
private static final long serialVersionUID = 1L;
protected void doGet(HttpServletRequest request, HttpServletResponse response) throws ServletException, IOException {
response.setCharacterEncoding("UTF-8");
String userName = request.getParameter("userName");
PrintWriter out = response.getWriter();
if("张三".equals(userName)){
out.write("该账号已被注册");
}else{
out.write("该账号可用");
}
}
protected void doPost(HttpServletRequest request, HttpServletResponse response) throws ServletException, IOException {
doGet(request, response);
}
}
3. 效果


 被折叠的 条评论
为什么被折叠?
被折叠的 条评论
为什么被折叠?
 到【灌水乐园】发言


