


 本文介绍使用Python和Pygame库实现一个简单的鼠标跟随效果,屏幕上的鱼形图标会实时跟随鼠标移动,并通过边界检测确保图标不会移出屏幕范围。代码中详细展示了如何加载背景和图标图片,设置窗口大小,以及如何在事件循环中获取鼠标位置并更新图标位置。
Learning From Here
import pygame
import sys

pygame.init()

screen_width = 640
screen_high = 480

screen = pygame.display.set_mode((screen_width, screen_high))
screen_rect = screen.get_rect()

pygame.display.set_caption("Moving Fish")

background_image_filename = 'sushiplate.png'
mouse_image_fliename = 'fugu.png'

background_image = pygame.image.load(background_image_filename).convert()
mouse_image = pygame.image.load(mouse_image_fliename).convert_alpha()

mouse_image_rect = mouse_image.get_rect()

clock = pygame.time.Clock()

while True:

    #限制每秒循环100次,防止大量占用cpu
    clock.tick(100)

    for event in pygame.event.get():

        if event.type == pygame.QUIT:
            pygame.quit()
            sys.exit()

        if event.type == pygame.KEYDOWN:
            if event.key == pygame.K_ESCAPE:
                pygame.quit()
                sys.exit()

    screen.blit(background_image, (0, 0))

    #获取鼠标位置
    x, y = pygame.mouse.get_pos()

    mouse_image_rect.center = (x, y)

    #设置图片移动边界
    if mouse_image_rect.left < 0:
        mouse_image_rect.left = 0
    if mouse_image_rect.right > screen_rect.right:
        mouse_image_rect.right = screen_rect.right
    if mouse_image_rect.top < 0:
        mouse_image_rect.top = 0
    if mouse_image_rect.bottom > screen_rect.bottom:
        mouse_image_rect.bottom = screen_rect.bottom

    screen.blit(mouse_image, mouse_image_rect)

    pygame.display.update()
运行截图:

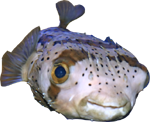
本次使用的两张图片资源:
光标:fugu.png


 3257
3257

 被折叠的 条评论
为什么被折叠?
被折叠的 条评论
为什么被折叠?
 到【灌水乐园】发言


